Leaderboard

Popular Content
Showing content with the highest reputation on 01/03/09 in all areas
-
Thanks Gents!!! I'm off to the bar! Time to get pissed and howl at the moon!2 points
-
Всмысле "для LO" ? DCS и есть ЧА.2 points
-
The Black Shark Auto Flight Control System (AFCS) description in the manual is I believe confusing and lacks sufficient detail to get a good understanding of its operation. This is my attempt to describe its operation in practical terms based on my experience flying the Sim. There may be errors and or omissions. I will update this document as required and would welcome feedback to make it better and or more correct. ------------------------------------------------------------------- The BS Auto Flight System is designed to do the following: 1. Fly the Helo along a desired or planned flight path (ROUTE) 2. Provide Stability Augmentation damping and Attitude holding. 3. Generate Steering commands for the FD system to allow the pilot to manually fly a desired or planned flight path. 4. Provide a rapid Auto turn in the yaw axis on to a designated target. 5. Provide flight control inputs to the Auto Hover and Altitude hold system. AFCS Controls. The KA50 has a number of controls that directly interface with the AFCS system. ROUTE MODE SWITCH This switch is located on the collective leaver and should be regarded as an Auto pilot On/Off switch. It has 3 positions. In the centre position the Route mode switch is Off.In the forward position the AFCS AP is engaged and will actively fly the helicopter. In the rear position the switch is used in conjunction with the Auto Hover mode to provide a controlled descent. The Route Mode switch also works in conjunction with the Desired Heading (DH) - Desired Track (DT) switch. DESIRED HEADING_ DESIRED TRACK ANGLE SWITCH The DH DT switch located on the RH sill panel provides either a Course Reference or Heading reference for the Auto pilot to maintain. In the Desired Track (DT) position the AFCS assumes that the pilot wants to fly the planned track to the active PVI800 Waypoint, that is it selects Course Line steering. A course deviation scale is displayed in the lower portion of the HUD. In the Desired Heading (DH) position the AFCS assumes the pilot wants to fly directly to the Active PVI800 waypoint. In the deselected position (centre) the AFCS assumes the pilot wants to maintain the last set reference heading. ALTITUDE SOURCE SELECT SWITCH This is located on the right Sill panel. The switch selects either Barometric Altitude (BR) or Radar altitude (RD) as the altitude source to be used by AFCS. (it does not affect the altitude display in the HUD) STABILITY AUGMENTATION & FLIGHT DIRECTOR There are two methods used in the BS to provide stability augmentation Attitude Hold modes and full time damping. These are controlled by the 4 Auto pilot push buttons and are also affected by the Trimmer switch and FD switch. There are 4 Autopilot pushbutton switches on the right panel. These switches labelled Pitch hold, Bank Hold, Alt hold and HDG hold are dual function switches. These switches control basic damping and attitude hold modes. With the switches OFF both damping and attitude hold are off. The helo is difficult to fly with no damping or attitude hold function. i.e. its raw control input with no AFCS modification. The ON function of the switches is also affected by the Flight Director (FD) switch selection. FD Switch OFF With the FD Switch off and all 4 Push buttons on then Damping is active and attitude Hold modes are active. The Damping mode is running in the background to take out unwanted oscillations in the respective axis. The Attitude hold mode is a pilot assistance mode that hold the last commanded attitude. The desired Pitch,Roll or HDG attitude is set by the pilot using the trimmer switch. As the pilot releases the trimmer switch the AFCS takes a snapshot of the present Pitch,Bank attitude and heading. These snapshots are then used by the AFCS to within its authority hold these selected attitudes. The pilot can override these attitudes but will find a certain "resistance" to his input as the AFCS attempts to maintain the last datums. If the pilot was to release the controls the AFCS would return the Helo to these last set datums. Though not a recommended technique Pressing and holding the trim switch whilst manoeuvring temporarily disables the attitude hold function (damping is still active), consequently no resistance to control input is felt. As soon as the trimmer switch is released the Attitude hold function again becomes active. In addition the pilot can select specific axes ON or OFF. In many cases whilst manoeuvring it is advantageous to Turn HDG Hold off as this provides smother dynamic heading changes.... recall that damping is still present. FD Switch ON The FD switch does 2 things. It overrides the attitude hold functions regardless of Autopilot push button selection (Damping is still active provided switches are on). It provides HUD steering cues to the pilot to achieve the last commanded performance. The desired performance is set on release of the trimmer switch. again the AFCS takes a snapshot of the Heading (DT/DH switch in the centre) Pitch and roll attitude. These then become the Datum references used by the FD. You can see this most easily by the FD pitch reference markers appearing at the present pitch when the Trimmer switch is released. If the DT/DH switch is in either DT or DH position the heading reference used by the FD comes from the PVI i.e. a heading to go direct to the waypoint (DH) or to intercept/maintain the required inbound track to the waypoint (DT). This can lead to confusion as to what the rudder is doing. (Hint remove the confusion by placing the DT/DH switch in the centre position. In this manner the HUD diamond will always reflect the datum heading the FD and AFCS are using. A quick blip of the trimmer switch will Synch the diamond and AFCS/FD heading reference to present heading) The Collective brake also affects the FD output. If the collective brake is used an altitude snapshot is taken by the AFCS and is used as a datum altitude. The FD then provides altitude cueing in the HUD to return to the datum attitude. This Altitude cueing will only be displayed if the ALT HOLD push button is selected on. Note FD steering cues are only displayed in NAV HUD mode. HDG HOLD & ALT HOLD ADDITIONAL INFO These switches labelled HDG HOLD and ALT HOLD provide a means for the pilot to send a reference heading and or Altitude to the AFCS to be maintained or used as a steering reference. These switches are used in conjunction with the Trimmer and Collective brake. The HDG HOLD switch when selected and provided a reference heading has been set will result in the AFCS applying rudder to yaw the aircraft towards the reference heading. Once on the reference heading rudder commands will be used to maintain this heading. This rudder action can at times conflict with immediate pilot commands and or result in unbalanced flight. If this occurs the HDG HOLD mode should be deselected. ALT HOLD The ALT HOLD switch should be thought off as a Mode arming switch. When selected the AFCS is armed and ready to automatically Hold a specific altitude using small adjustments to rotor pitch angle. to get ALT HOLD to work three things must be done. First ALT HOLD must be on, secondly the pilot must provide close to the required rotor pitch angle (i.e. enough collective) to more or less keep the Vs at 0, finally the pilot must then tell the AFCS to maintain the current altitude. This last step is done by pressing and releasing the collective brake. When the collective brake is released a snapshot of the present altitude (Baro or Radar) is sent to the AFCS to be used as the reference altitude. Whether the AFCS uses Radar or Baro altitude is determined by the position of the Auto pilot Altitude data source select switch on the right sill panel. In the RD position the snapshot altitude reference sent to the AFCS is Radar altitude. In the BR position the snapshot altitude reference sent to the AFCS is Baro altitude. ALT HOLD only has a certain amount of control of the blade pitch angle, i.e is is + - a bit around the collective set pitch. If the collective lever is moved the ALT HOLD function has less blade adjustment to play with. If you move the collective outside of the ALT HOLD range then ALT HOLD does not have enough blade pitch authority to do its job. Ideally the collective brake should effectively lock the collective lever thereby ensuring that that reference blade pitch is fixed and the ALT HOLD function has enough authority to do its job. As long as the collective does not move/drift then ALT HOLD works just fine in BS. Notes: if the ALT HOLD switch is off it will be automatically commanded on when AUTO HOVER is engaged. ALT HOLD is only relevant when used in conjunction with the Collective brake and or Route AP/Auto Hover mode AUTO HOVER SYSTEM The KA50 Auto Hover system is a pilot aid that assists the pilot to maintain a specific Hover point in 3 dimensions. There are numerous equipment interfaces to the Auto Hover system. The Auto Hover system should only be engaged at low speeds (<20Kmh). When engaged the AFCS stores the exact position at which the Hover mode was engaged. This position is used to generate the HUD hover point square and the HSI Hover point reference bar centre point. This Hover reference position can also be updated by the pilot at any time by a momentary blip of the trimmer switch (and collective brake for altitude/height). Provided the Hover point is selected (or updated) at almost 0 speed The Auto Hover system will actively fly the helicopter to the Hover reference point. The Auto Hover system simply attempts to stabilise the Helicopter at a point in space. Minute corrections are used automatically to maintain 0 speed in all axis. The Auto Hover system inputs include: Inertial, Doppler drift and ground speed from a dedicated Auto Hover doppler unit in the lower rear fuselage, Radar altitude, Baro altitude (only above 300metres radar altitude), low speed vanes, and differential static pressure between various static ports. Altitude maintenance in the hover. Provided the pilot has a reasonably accurate Collective position the Auto Hover system uses small adjustments to the blade pitch to maintain the reference Hover Radar altitude (These can be seen by small variations in blade pitch angle, the collective stick will remain in its selected position). Recall that a quick blip of the collective brake resets the Auto Hover reference altitude. If the ALT HOLD switch is off it will automatically be commanded on when AUTO HOVER is engaged. AUTO HOVER has a minimum altitude of 4metres Radar Alt. WARNING : The Auto Hover is only operative to an altitude of 4metres. If an inadvertent descent below 4metres or aborted landing/bounce occurs it is usual for all 4 AFCS pushbutton lights to start flashing. This indicates that an auto deselection has occurred. In this state all damping and attitude hold functions have been deselected. In this situation it is imperative to reselect the switches to regain damping and or attitude hold function. AUTO HOVER DESCENT Whilst in the hover the pilot can also use the AFCS to commence an automatic descent at 2ms. This is done by holding the Route mode switch to its forward position... Route descent. The AFCS will command a small reduction in Blade pitch to initiate the descent (The collective lever will remain stationary). The Helo will descend at 2ms whilst maintaining the Hover point) until the KA50 gets to 4metres Radar Altitude. At this point the Auto Hover system increases blade pitch angle to maintain 4 metres Radar Alt (i.e. exists descent mode). To continue the descent the pilot must manually reduce collective. If the Route descent switch is released the descent will be stopped at the present radar altitude. PILOT OVERRIDE OF AUTO HOVER In the Auto hover the pilot can make small adjustments to override the auto hover system. This is used to drive the helo to the Hover point or to a new Hover point. Small precise cyclic inputs are used to achieve this. The use of HDG HOLD AFCS mode is of great assistance in the hover. When on the desired Hover heading Engage HDG HOLD mode. If a change in heading in the hover is desired deselect HDG HOLD (prevents undesirable rudder commands) yaw to the desired Heading Re-engage HDG Hold. A quick Trimmer blip will synch the current heading and reset the current Hover reference point). An alternative is to simply override HDG Hold, then retrim when on the new heading. AUTO TURN ON TO TARGET This mode can be used in forward flight or the Hover and is considered a tactical mode that operates in the lateral axis only). The Auto Turn on to target mode is simply a method to align Target Line of sight with the Helos for and aft axis. When a target is designated the AFCS systems takes the angular deviation of the SHKVAL head from the aircrafts centreline and simply yaws the KA50 to drive this angular deviation to ZERO. Pilot technique is to designate the target then press the Auto Turn to target switch. As long as this mode is active the AFCS will attempt to keep the SHKVAL Line of sight to zero in the yawing plane. (For the Auto turn on target function to be operative the HDG HOLD mode select switch must be on). (Thanks to all who commented I think I have incorporated most of your input in the rewrite)1 point
-
Models by Sunrise: ЧМЭ3 http://forums.eagle.ru/showpost.php?p=608070&postcount=171 point
-
hi guys, Just finished this latest mission which is intended as a single player mission. This is intended to be a scramble - jumping into a cold/dark cockpit with the clock working against you to stop a terrorist threat. Time is limited and the opposing forces you face changes randomly. I'll paste the briefing below. While this mission is intended to be a Cold/Dark start, I have also included a Hot start up and running version. You can download one or both at this link: http://public.me.com/ronht enjoy ron Over the last several months insurgent groups have been threatening to contaminate the reservoir north of Dzhvari. These threats, if successful, would have a devastating effect throughout the entire valley as all the surrounding cities rely on the resources contained within the reservoir. Today, it appears that threat has become a reality. A skirmish has taken place with authorities within the last hour on the northern skirts of Dzhvari and again with security forces at the dam. The conflict north of the city resulted in several dead and we are currently unable to contact security forces stationed at the dam. We have two security forces heading for the damn now but they will not arrive in time to turn back the terrorist threat. Witnesses have reported a bus escorted by a heavily armed group heading up the dam highway. It is believed the bus and truck are filled with toxic chemicals and the insurgents are going to carry out their threat. They MUST be stopped before reaching the dam! SCRAMBLE - SCRAMBLE - SCRAMBLE!!! You are to launch immediately, there is no time to re-fuel your Ka50 or re-arm your wingman. You must make every attempt to stop the insurgents before they reach the dam. A spotter team will call updates on the position of the bus. Primary targets are a white and blue civilian bus and other vehicles that are traveling together up the dam highway. The dam highway is heavily traveled, however, because this is a dire situation you are cleared HOT on all traffic on the dam highway. While we want to sustain as little collateral damage as possible, civilian losses have been accepted as a possible result of this operation. Be advised the insurgents have been reported to have mobile SAM's and are using civilian automobiles to transport personnel equipped with manpads. Your wingman is armed only with gunpods and your fuel load is minimal, however, there is no time to waste! Use your wingman in "Over watch" formation or in any capacity you deem necessary and stop those vehicles! Get Going and Good Luck!1 point
-
http://fr.youtube.com/watch?v=Uz3vV36pEhA :music_whistling::joystick:1 point
-
NRG-Vampire, which you have laid out these models are in free distribution and at use in commercial objectives the coordination with the author is necessary. The author of these models of the consent will not give that in the licence is specified "only for free distribution". Quality of models at first sight seems excellent, but actually these models have been made in 2006 and them have simply recoloured. I make this models from white paper. Ordered by ED1 point
-
Hi, You are a thought-reader. :-) Ther's my future plan. :pilotfly:1 point
-
Hi, I have the same CPU and im leaving mine at 3.80GHz. what rating is your Ram rated at? if your FSB is not in relation to your ram speed the pc will fail to load.1 point
-
Как он может быть не русскоговорящим, если работает в ЕД, в Москве. Я думаю они уже делаются с нуля. Если кто знаком с МАХом, то поймет что смысла в модернизации старых НЕТ! Я думаю там парни дружат только с "репой".1 point
-
That would suggest to me that something other than your memory is causing instabilty. PM Sent.:smilewink:1 point
-
Hi guys, I've put together a few After Action Reports (AARs) over at SimHQ. They're basically the story of some of the missions I've flown in the Deployment campaign along with a load of screenshots. Take a look and see what you think. From my own perspective, I think they get better with time (meaning that the ones at the bottom of the list are better than the first ones). Convoy Cover http://simhq.com/forum/ubbthreads.php/topics/2640294/Black_Shark_Convoy_Cover.html#Post2640294 Supply and Demand http://simhq.com/forum/ubbthreads.php/topics/2642282/Black_Shark_Supply_Demand.html#Post2642282 Patience and Luck http://simhq.com/forum/ubbthreads.php/topics/2644809/Black_Shark_Patience_and_Luck.html#Post2644809 War (Part 1) http://simhq.com/forum/ubbthreads.php/topics/2645582/Black_Shark_War_Part_1.html#Post2645582 War (Part 2) http://simhq.com/forum/ubbthreads.php/topics/2645599/Black_Shark_War_Part_2.html#Post2645599 Enjoy. :)1 point
-
My understanding from a previous thread is that the map and the real world coordinates don't match up at this time and that it is being addressed in a future patch. ron1 point
-
That's when you use the pedals to keep in "balance". But by the very nature of a helicopter you will not always need to apply pedal when initiating a turn. It's not at all like with fixed wing where you always apply pedal while applying aileron. It took me a long time to stop automatically putting pedal in when initiating turns, and until that time my turn-in was sloppy and unbalanced. Once I started leaving the pedal alone until it was required for balance, turn-ins became crisp. As my instructor always said when referring to pedal movement during any training excerise "I cannot tell you how much pedal, or even which direction" "You just put in whatever is necessary, as it's always different". Regarding the KA50, it's interesting that it's very similar to fixed wing. Also I wonder how much that enormous mast and centrifugal forces effects things.1 point
-
Classic! :D Not a bug, 100% realistic feature. What happens is you lose the AC generators (AC main bus). They are turned off/on automatically at rotor RPM ~78-80% (gearbox driven). The doppler navigation system is supplied by AC main bus so when your rotor RPM drops and generators go off the system goes off and there goes the GS indication, autohover, Shkval screen and some other more.1 point
-
Okay obviously this has confused a lot people, so I have written up a simple (but long) explanation about turning in a conventional heli. Now for those wondering about the KA50, I have never flown a co-axial nor do I know the theory, that's why I stated my interest at the beginning of the thread. Lets get back to why we think we need to use pedals to turn in. In a plane using the ailerons to initiate a bank creates a yawing moment, this is because the drag created from the aileron trying to lift a wing is greater than the one trying to lower the wing. In this scenario the nose of the plane will yaw left. To compensate for this yawing motion, right rudder pedal is applied. Now this is where people get things wrong. The rudder pedal is not used to "tip" the plane into a turn, but simply provide an equal and opposite yawing moment to the ailerons. More aileron = more rudder input needed, it's directly proportional. In theory the nose should stay where it is and balanced flight occurs. Now lets look at the conventional helicopter side of thing (important, governor imployed to keep things from getting confusing). When initiating a bank you apply cyclic, this does not create a yawing moment (very minimal and effectively nothing). Easy, we don't need to go compensating for it with anything! Hence no torque pedal is required for turn in. BUT now we now have a problem! Lets look at the vector diagram from a link already posted by JHepburn As the disk is tilted it is creating less "vertical" lift, to maintain height we need to increase the component of lift. To do this we raise the collective. PROBLEM, we have now creating a yawing moment, thus we NOW need to use the pedals, specifically the antitorque pedal. This is the left pedal for a conventional heli. Now lets turn left. We put a left input into the cyclic, start raising the collective to compensate for the loss of "Vertical" lift and input left pedal to correct the yawing moment created from increasing engine torque. Seems simple enough and almost just like a plane. So lets turn right then. Input right cyclic, raise the collective and input left pedal. YES I meant left pedal, this is where fixed wing pilots struggle at first. If you input right pedal here you invoke an out of balance turn and things go pear shaped. Right, I hope everyone understood that. Let's move onto why you do not pull back on the cyclic in a turn if you want to exit it at the same height and speed. Getting back to the Vector diagram above you can see that to maintain height you need to raise total lift somehow. Starting already in a turn, lets pull back on the cyclic then. Up goes the nose and so does our lift, great problem solved! But wait, our speeds going down. And if you look at our tracking our turn is not O shaped but infact has a radius that is ever decreasing. We are in effect flaring, just at a banked angle. Lets try that again, but lets raise the collective instead. Up goes our lift, and providing we maintain the same attitude, our speed remains the same. Our track remains a perfect circle and we can maintain this height, angle of bank and speed as long as we want. For those wondering why If you maintain balance then the nose will lead into the turn. If you don't you will be skidding (like a car skidding straight ahead in a turn). This is what confuse people again, as obviously you need to input into turn pedal right? Wrong see above about the right turn, that's why when talking about pedals in a conventional helicopter (conventional in the sense of a single disk, not main rotor turn direction), they are used simply to keep balance, you make whatever input is needed to maintain it. Now obviously I have simplified things, but I hope it helps some people understand what I am talking about.1 point
-
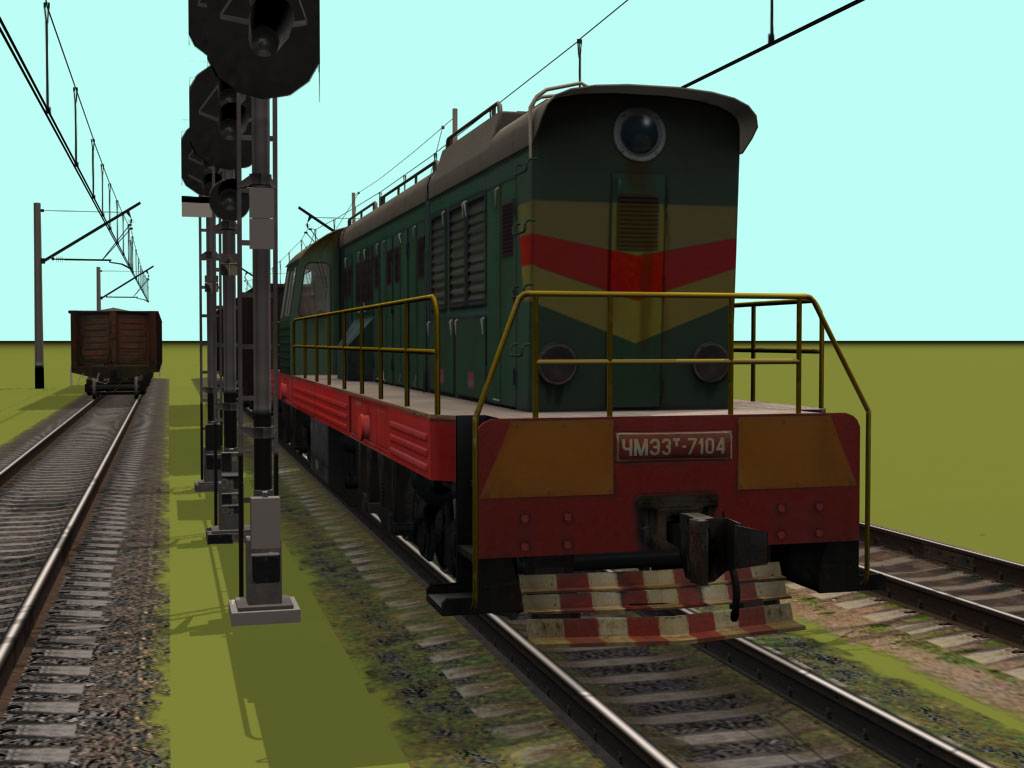
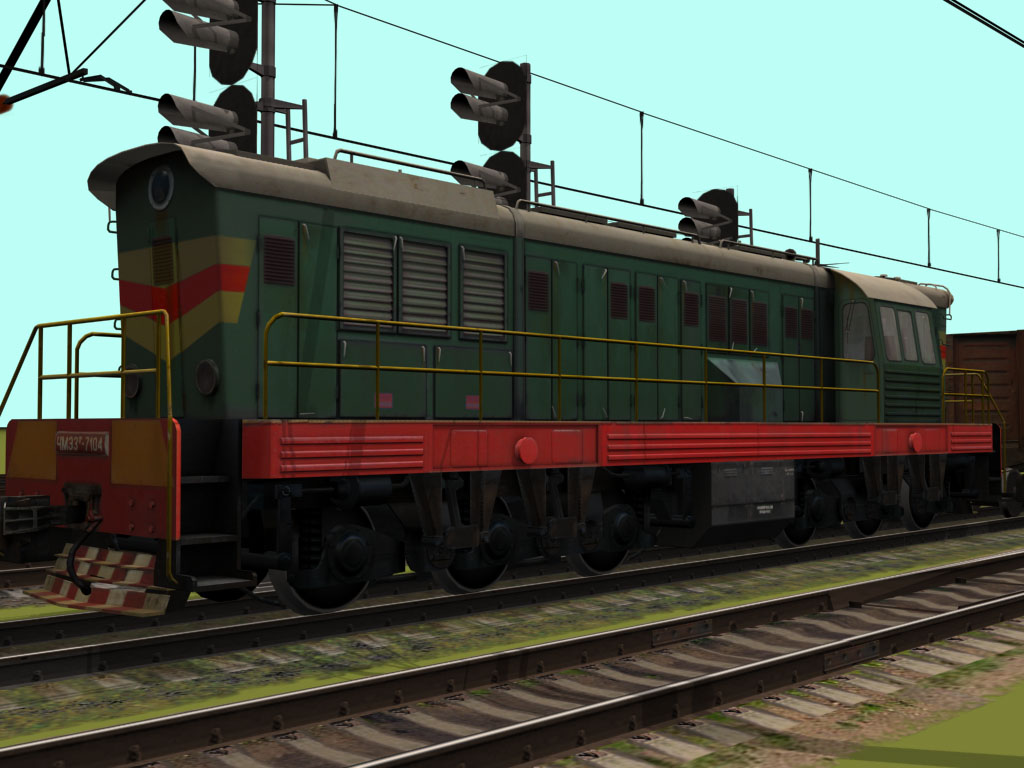
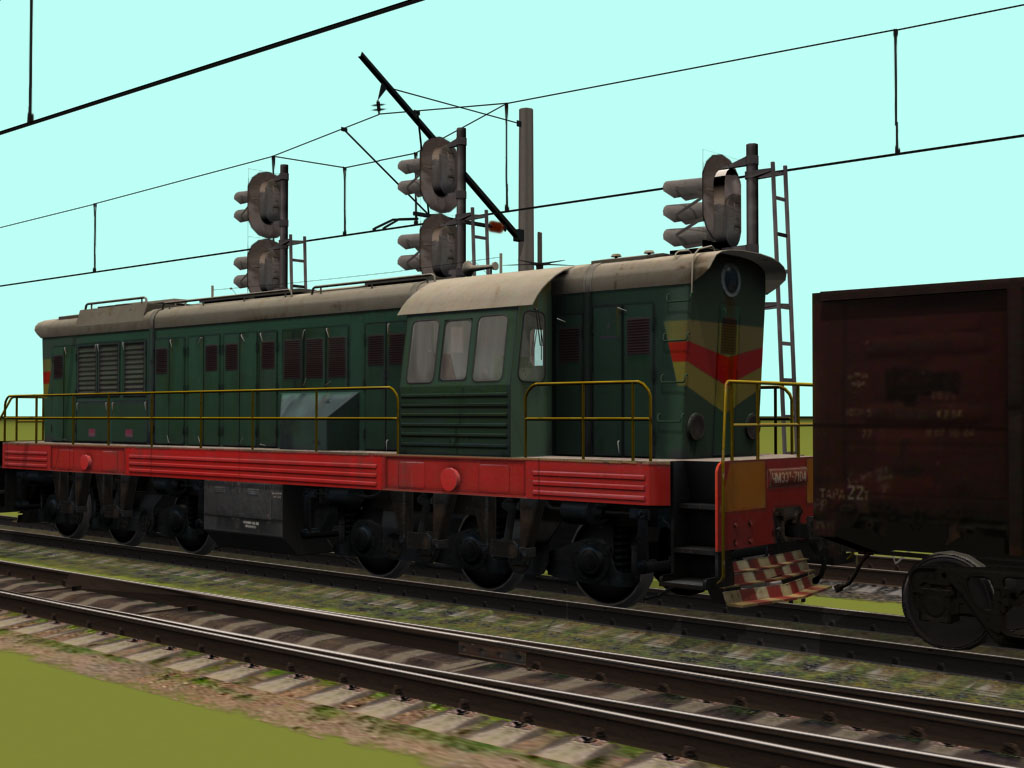
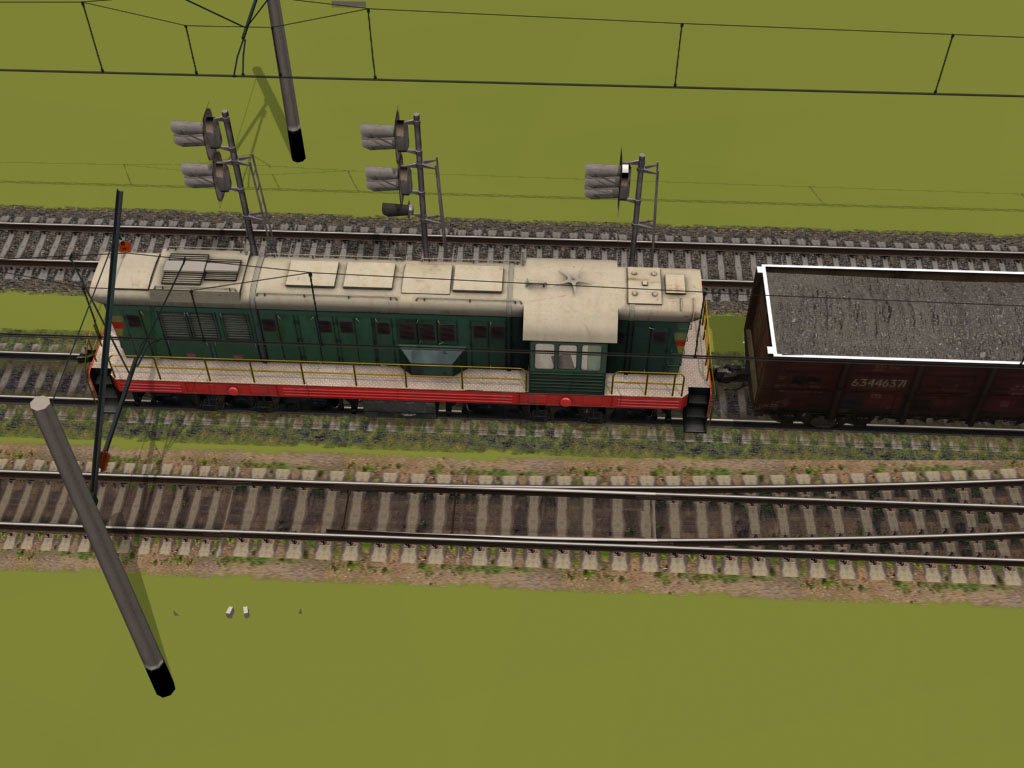
Тепловоз маневровый ЧМЭ3 от Sunrise Ну вот, и добрались до паровозов. Вот, человек не занимался выкладыванием скриншотов WIP и лишней болтовней, а взял и сделал полный, готовый к выгрузке пакет для мира DCS. Пакет включает в себя: основную модель, ЛОДы, текстуру летнюю, текстуру зимнюю, и ДМ. Плюс анимация, даже стеклоочистители работают. Смотрим и балдеем!:)
 1 point
 -
Хм, накидал примерную схему, и прошивку для платы управления светодиодами, всего до 128 шт на один контроллер в симуляторе вроде - бы работает, сам контроллер, при прошивке определяется виндой (использовал плату от Mjoy16), но в железе это все в кучу пока не собиралось. Идея следующая - на стороне компьютера работает некий софт (todo), который получает из сима данные о состоянии индикаторов (можно ли для этого использовать LUA ??) и передает команды контроллеру по протоколу USB. Чтоб зажечь, или потушить нужный светодиод, нужно передать контроллеру соответствующую команду, и номер светодода (0..126). Основано это все на библиотеке AvrUSB , на базе примера hid-custom-rq В архиве - исходники для прошивки (использованы компилятор GCC WinAVR + среда AVRStudio 4), и схема (pdf и исходник схемы в DipTrace) UPD. на запросы тестовой программы плата тоже отвечает, команды вроде бы отрабатываются, осталось проверить работоспособность со светодиодами З.Ы. в электронике и программировании я новичок, поэтому сильно не пинать :) LedDriver.rar1 point
-
Happy Birthday!1 point
-
HB m8!! :)1 point
-
Happy birthday mate!!! Hope you've had a good one!! :drink:.........:beer:......:drunk:.......1 point
-
Happy B day :D1 point
-
Happy Birthday M8! One of the Genuine Good Guys :) A Birthday Treat - Enjoy....... :D1 point
-
HBD Fudd, long live LOCERF!!!1 point
-
Happy Birthday!1 point
-
DCS already makeing the Ah-64A an also A-10C so be happy whats coming.. dont think DSC going make Longbow since its to far in the future who knows maybe they will make in not so decent future. but for i i would rather fly legdary Mi-24 Hind gunship that started it all in afgainstain in 1969 to 1989 flying at 2000m moutain top throwing rocks an bombs an deploying troops etc.. Mi-24 was built for this perpose an is far most scarest chopper in battlefeld screaming at you shooting few secends later its gone.. like the pilot said when makeing docmantry durinig afgainistain war.. (Here come the nightmare)1 point
-
hi, i don't know if there's a thread on this here. i searched for "g25" and nothing showed up, so... for those who do not have rudder pedals, here's a way to simulate them using the clutch and throttle pedals of a Logitech G25 wheel (maybe this can work with other USB racing wheels too). i found this solution in another forum (don't remember where it was now). first, download these 2 apps: ppjoy (http://www.simtel.net/product.download.php?id=75176) glovepie (http://carl.kenner.googlepages.com/glovepie_download) the whole trick is to create a fake joystick with ppjoy and then map the two axes (clutch and throttle) of the G25 controller to an axis of this fake joystick using glovepie. here's how to do it: 1. install ppjoy. 2. go to "Control Panel" and click on "Parallel Port Joysticks". 3. click "Add" to add a new controller. 4. leave all parameters to their default values and add the controller. a new virtual joystick will appear. 5. install glovepie. 6. go to "Control Panel" and click on "Game Controllers". 7. take note of the sequence of controllers you have. take a look at my sequence, for example: [indent]Thrustmaster HOTAS cougar Logitech G25 Racing Wheel USB PPJoy Virtual joystick 1 [/indent] in this case, the G25 wheel is controller number 2. 8. open glovepie and paste this script into it's window: PPJoy1.Analog0 = 0.5*Joystick2.z - 0.5*Joystick2.slider9. change the number of the controller in the script according to the sequence number of your G25 wheel (Joystick1, Joystick2, Joystick3, etc.) 10. click "Run". 11. go to "Control Panel" and click on "Game Controllers". 12. open the properties for the fake joystick you just created (PPJoy Virtual joystick 1). 13. depress the clutch and throttle pedals and the X axis will respond accordingly. 14. launch DCS and go to "Options" and then "Controls". 15. in the "Category" combo box, select "Axis Commands". 16. configure the "Flight Control Rudder" axis using the PPjoy Virtual Joystick 1 column. as you can see, the expression assigned to the X axis of the fake joystick combines the input from the throttle (z) and clutch (slider). when you apply the same travel to both peddals, the fake axis remains centered. when you favor one of them, the axis moves to it's side. i hope someone will benefit from this as i did. :thumbup:1 point
-
Ага, нашел: Файловая система RAW – тип файловой системы логического диска определяемый операционной системой (и другими программами) при частичных разрушениях в структуре файловой системы, например, таких как FAT или NTFS. Как правило, это происходит в процессе каких-либо сбоев операционной системы, работы различного рода программ, некорректного завершения работы Windows или работы с флешкой, а также последствия атаки вируса. При таких казалось бы не значительных разрушения операционная система уже не может корректно определить тип файловой системы и как следствие пропадает доступ к данным. Я не предлагаю использовать Easy Recovery. Предлагаю все-таки попробовать - GetDataBack (для NTFS и FAT соответственно).1 point
-
Ищешь вот такую прогу - Power Data RecoveryPRO, если не сможешь найти сам, пиши в личку. Устанавливаешь, в ней указываешь на диск, с которым у тебя проблемы, некоторое время прога будет сканировать сектора. Потом, если всё получится, откроется дерево каталогов, и копируй всё, что необходимо спасти. Когда сольёшь нужные файлы, можно попробовать восстановить разделы и вернуть диск в первозданный вид.1 point
-
помоему - лучшее из всего перечня в топике. восстанавливал ею харды, убитые разными нортонами и прочими мэджиками.1 point
-
Есть админы которые никогда не делают бекапы, а есть которые уже делают. (с) не мое. По теме - USSR_Nic скорее всего прав. Но acronis_recovery_expert может и поможет. Если сильно припечет можно в спец. контору обратиться, они чудеса творят за 400-600 у.е.1 point
-
Если партишн уже пробовал, то скорее всего уже ничто не поможет. Если там был фат32, то точно можешь забыть про данные. Файлы конечно никуда не делись, но структура имен и расположение уже утеряны. Сочувствую...:(1 point
-
Была как то похожая история - по запарке удалил файлы (фотки) и тут же очистил корзину. Вспомнилось на следующий день, начал лихорадочно искать проги для восстановления, вобщем попробовал всё, но восстановить удалось лишь 3 файла из 30, причем один из них оказался как бы стерт наполовину - реально пол-фотки есть, половинка - черная. К чему я это вспомнил - к тому, что, ребята - делайте бэкапы, ИМХО, в условиях, когда мы начинаем достаточно сильно зависеть от данных на компе - это должно быть так же естественно и необходимо, как зубы почистить. У меня все важные данные с системного еженедельно акронисом бэкапятся на другой винт, т.е. даже в случае гибели одного диска - на другом останется копия...1 point
-
Я пользовался Easy Recovery и Easy Recovery Professional (тут точно не помню название)У меня был слет винды от вируса с последующим форматированием и новой установкой, на чистый диск. Естественно потерялось много ценных данных, однако даже после форматирования я смог вернуть где то 90% информации, если нужно восстановить мультимедиа, вордовские и прочие общераспространенные файлы то лучше использовать Easy Recovery, там есть поиск по типам файлов. Правда я восстанавливал все после форматирования, насчет слета файловой системы не знаю..1 point
-
В одних случаях разные программы могут быть бесполезны и напротив в других случаях эффективны. Я пробовал много программ - такая же проблема была. С помощью некоторых удалось восстановить до 70% данных. В другом случае нгичего не помогло - потерял данные. Stellar Phoenix Fat & Ntfs Harddisk Recovery Suite R-Studio Easy_Recovery acronis_recovery_expert_deluxe Вот что хоть как то работало из перепробованного. Поищите по ним информации достаточно. Но имейте в виду, многое потеряется. Или файлы с русскими названиями не видны, или с длинными, или определенных форматов.. Короче чуть ли не по файлово приходится "вытаскивать" инфо.. Уточните точно ли дело в файловой системой? Может в чем то другом. Если информация действительно стоящая - лучше обратитесь к специалистам. Хотя они не гарантируют результат тоже. Но у них есть опыт и оборудование. Есть вероятность, что в случае, когда для спеца никаких проблем восстановить информацию, самостоятельно Вы ее благополучно потеряете.1 point
-
Ну можешь сам попробовать,я точно не помню,но он вроде может форматить без потери данных. Хотя это что касается неповреждённых разделов,с повреждёнными хз как.1 point
-
Unzip this: Ironhand.zip and drop it in your TIR Profiles folder. Open TIR, select it, and try it on for size. Rich1 point


-
Recently Browsing 0 members
- No registered users viewing this page.