Ranma13
-
Posts
564 -
Joined
-
Last visited
Content Type
Profiles
Forums
Events
Everything posted by Ranma13
-
I'm in the market for a new set of rudder pedals. I currently have the VKB T-Rudder Mk. IV and the MFG Crosswind. I like both for different reasons, but I wanted to get something that either has or allows for a dampener to be installed. Does anybody know how the Slaw Device pedals compare to the Baur pedals? For the Slaw Device, what's the difference between the Bf109 and the Viper pedals? For Baur, what's the difference between the F1, F2, and F3? I'd also be interested in any other combat-style pedals on the market. Most of what I've found is tailored towards commercial aircraft, so if you guys know of any other high-end sim pedals that emulate combat aircraft, I'd like to know about it. Thanks!
-
I asked them about the throttle. There appears to be no mounting holes, and it's intended to just sit on something and not move. It weighs 3.5 kg (7.7 pounds). For the TDC, you can choose either a joystick pot or the same force transducer as used in the real F18. No word on what the price difference is. For the remaining switches, 80% of them are the same switch used in the F18. There is also an idle detent that you have to use the finger lifts to get past. They sell to the consumer market, and it will take 2.5 months to manufacture and requires a 50% down payment.
-
The GoFlight panels are not potentiometers, they are rotary encoders.
-
Yep, that's all correct. You don't have to keep the collective brake pressed while moving it though, you can move it and then just tap the collective brake button to set the new altitude. You'll be fighting against the 20% AP authority doing it this way, but sometimes this is easier than holding down a button while moving the throttle/collective in real life. What I do is bind the ALT HOLD button instead and tap it once to turn it off, adjust my altitude, then tap it once to turn it on again. I find this significantly easier than holding down a button on my throttle while moving it. Yes, this is correct. It may not be as realistic, but without force feedback rudder pedals, it's significantly easier to control the helicopter when your rudder position is absolute instead of relative. I tested this and I was slightly incorrect. The DH-DT switch determines how route mode performs, so if route mode is off, it doesn't matter which position the switch is in. When route mode is on, it will use the 20% control authority it has to steer the helicopter towards the flight plan route. For example, if you trim to a steady hover and enable route mode, the helicopter will turn itself towards the next steerpoint and pitch forward to give you about a 20km/h airspeed. When you set the DH-DT switch to the center position, it will act as if your steerpoint is your last-trimmed heading, extending infinitely into the distance. In other words, if you trim to a steady hover and enable route mode with the DH-DT switch in the center position, your helicopter will simply pitch forward to give you about a 20km/h airspeed, but won't turn towards any steerpoint. Yes, this is correct. If you don't want to keep holding down the trim button, turn on FD. As a side note, never turn off your pitch, bank, heading channels. The autopilot channels does two things: one is to hold the helicopter at the last-trimmed position, and the other is what the West would call a stability augmentation system (it dampens the pilot's inputs to prevent against pilot-induced oscillations). The trim button and the FD only disable the position hold portion; the SAS is always on as long as the channel is enabled and the light is not flashing.
-
It does not. The altitude hold channel is the only channel that the Flight Director does not disable. You can verify this by checking the AOA indicator. Normally, with the altitude hold channel off, the AOA changes only when you move the collective. When you enable the altitude hold channel, the AOA will move even without any collective changes. This is the altitude hold AP at work. You'll notice that this happens when the altitude hold channel is on, regardless if FD is on or not. Normally, when you trim the aircraft, only the cyclic's position is 'saved'. If you check the rudder trim option, the rudder trim position will be saved as well, and the center position of the rudder will move to that trimmed position. You can check this by pressing RCtrl+Enter and looking at the input visualizer. The rudder input is part of the heading hold channel. This is because the rudder input actually controls two things: the rotation of the blades, and the rudder that moves on the tail. Yaw is primarily controlled by adjusting the speed of one of the coaxial rotors, and the tail rudder is only there to help it out. This is why you still have a significant amount of yaw control even with your tail shot off. When the heading hold channel is on and FD is off, the autopilot will adjust the rotation of the blades to hold the heading, but it will not move the tail rudder. In this sense, it 'affects' your rudder input, but it's more accurate to think of it as holding your heading. If you have the rudder trim option checked, you should release pressure on the rudder pedals after trimming. This is because you trimmed the aircraft assuming a certain amount of rudder input. Because in this mode the rudder acts as a relative input, any additional input you provide after trimming will get added to the trimmed position, causing you to deviate from the trimmed position. With the rudder trim option unchecked, you must keep the pedals in the same position they were in when you trimmed the aircraft. If you applied any rudder input while trimming, you must keep the rudder in that position if you want to stay in the trimmed position. In practice, I would leave the rudder trim option unchecked and trim the aircraft with the rudder centered. It's very unintuitive to have your rudder behave as a relative input; imagine trimming the rudder to a 45% right position, where moving the rudder 50% to the left returns it to the center position in the aircraft. When the trim button is pressed, it 'redefines' the center point for the force trim (a.k.a. force feedback). If you crank the cyclic hard to one side and press trim, all the force you're applying to keep it in that position is instantly removed, which will make you jerk the cyclic. This is why real pilots have to press the trim button every so often, in order to avoid this jerking. Also, they don't hold down the trim button because it disables the force trim, and thus making it impossible to tell how much you're deflecting from the center point. Holding down the trim button will disable the autopilot hold channels, but it will remove the force trim effect. Enabling the Flight Director will also disable the autopilot hold channels, but it will keep the force trim effect. If you have a non-FFB joystick, feel free to use either, as it doesn't make a difference. For non-FFB joysticks, it's probably easier to just hold down the trim button, adjust, and release. For FFB joysticks, if I'm just trying to fly in a straight line, I leave FD off and tap trim constantly until I get the aircraft flying in the position I want. If I'm trying to maneuver a lot, I'll turn FD on, tapping trim occasionally to re-define my center position. As mentioned previously, FD does not affect the altitude hold channel. It does, however, change your HUD to indicate your deviation from your held altitude if the altitude channel is on with the FD on. When you press the collective brake in this mode, the HUD will update to indicate your new altitude hold position. As you've correctly surmised, if the altitude channel is off, the collective brake doesn't do anything in the sim. It is considered a 'manual' position that allows you to set a manual heading with route mode. If you have it on DH and enable route mode, the helicopter will fly the shortest route to the next waypoint (in a straight line). If you have it on DT and enable route mode, the helicopter will fly to the next waypoint following the track as displayed on the ABRIS. When it's in the center position, neither will be used and the helicopter will use your heading hold position instead. In practice, this is rather pointless since it effectively disables route mode, so you should always have it in DH or DT mode. It uses the last altitude mode that you set with the altitude hold channel on, but in practice, it doesn't really do anything. There are two ways to 'capture' your desired altitude hold position; either by turning your altitude hold channel on (which sets the altitude when you turned it on as your desired position), or by releasing the collective brake. If you turn on the altitude hold channel when in BARO mode, then flip the switch to RALT mode, the helicopter will still use BARO mode at your last-set altitude until you do a new capture. If you do a capture in BARO mode, flip the switch to RALT then back to the center position and perform a capture again, it will use BARO mode because that was the last mode used to do a capture. In practice, this is really confusing, so you'll never want to use this position and just keep it in one of the two modes.
-
I got my Debolestis detent mod just yesterday, and aside from being slightly too thin (which I fixed by sticking some paper next to it to thicken it), I don't have to lift the throttle to push it past the detent, and it's quite easy to push it past. Which version did you get, the metal or the plastic one? Perhaps you'll want to double-check that it's seated properly, and compare it to the stock detent. The bottom part of the detent side should line up with the stock one, but the thickness of it should be halved.
-
Helicopters require constant trimming because a change in airspeed, altitude, or collective will change the lift vector, and thus requires that the cyclic position be changed as well.
-
New Wheel Stand Pro for Thrustmaster Warthog attachment
Ranma13 replied to ronht's topic in PC Hardware and Related Software
I would say it's transportable rather than portable. It might be 38 pounds shipped, but after you add your pedals and HOTAS, it's gonna be heavier. Also, the triple arms make it unwieldy to move when it's assembled; most likely you'll have to at least remove the two side arms when moving it around, then re-attach them once you get it in position. If you're looking for something that you take out and put back every day, you'll probably not be too happy. -
New Wheel Stand Pro for Thrustmaster Warthog attachment
Ranma13 replied to ronht's topic in PC Hardware and Related Software
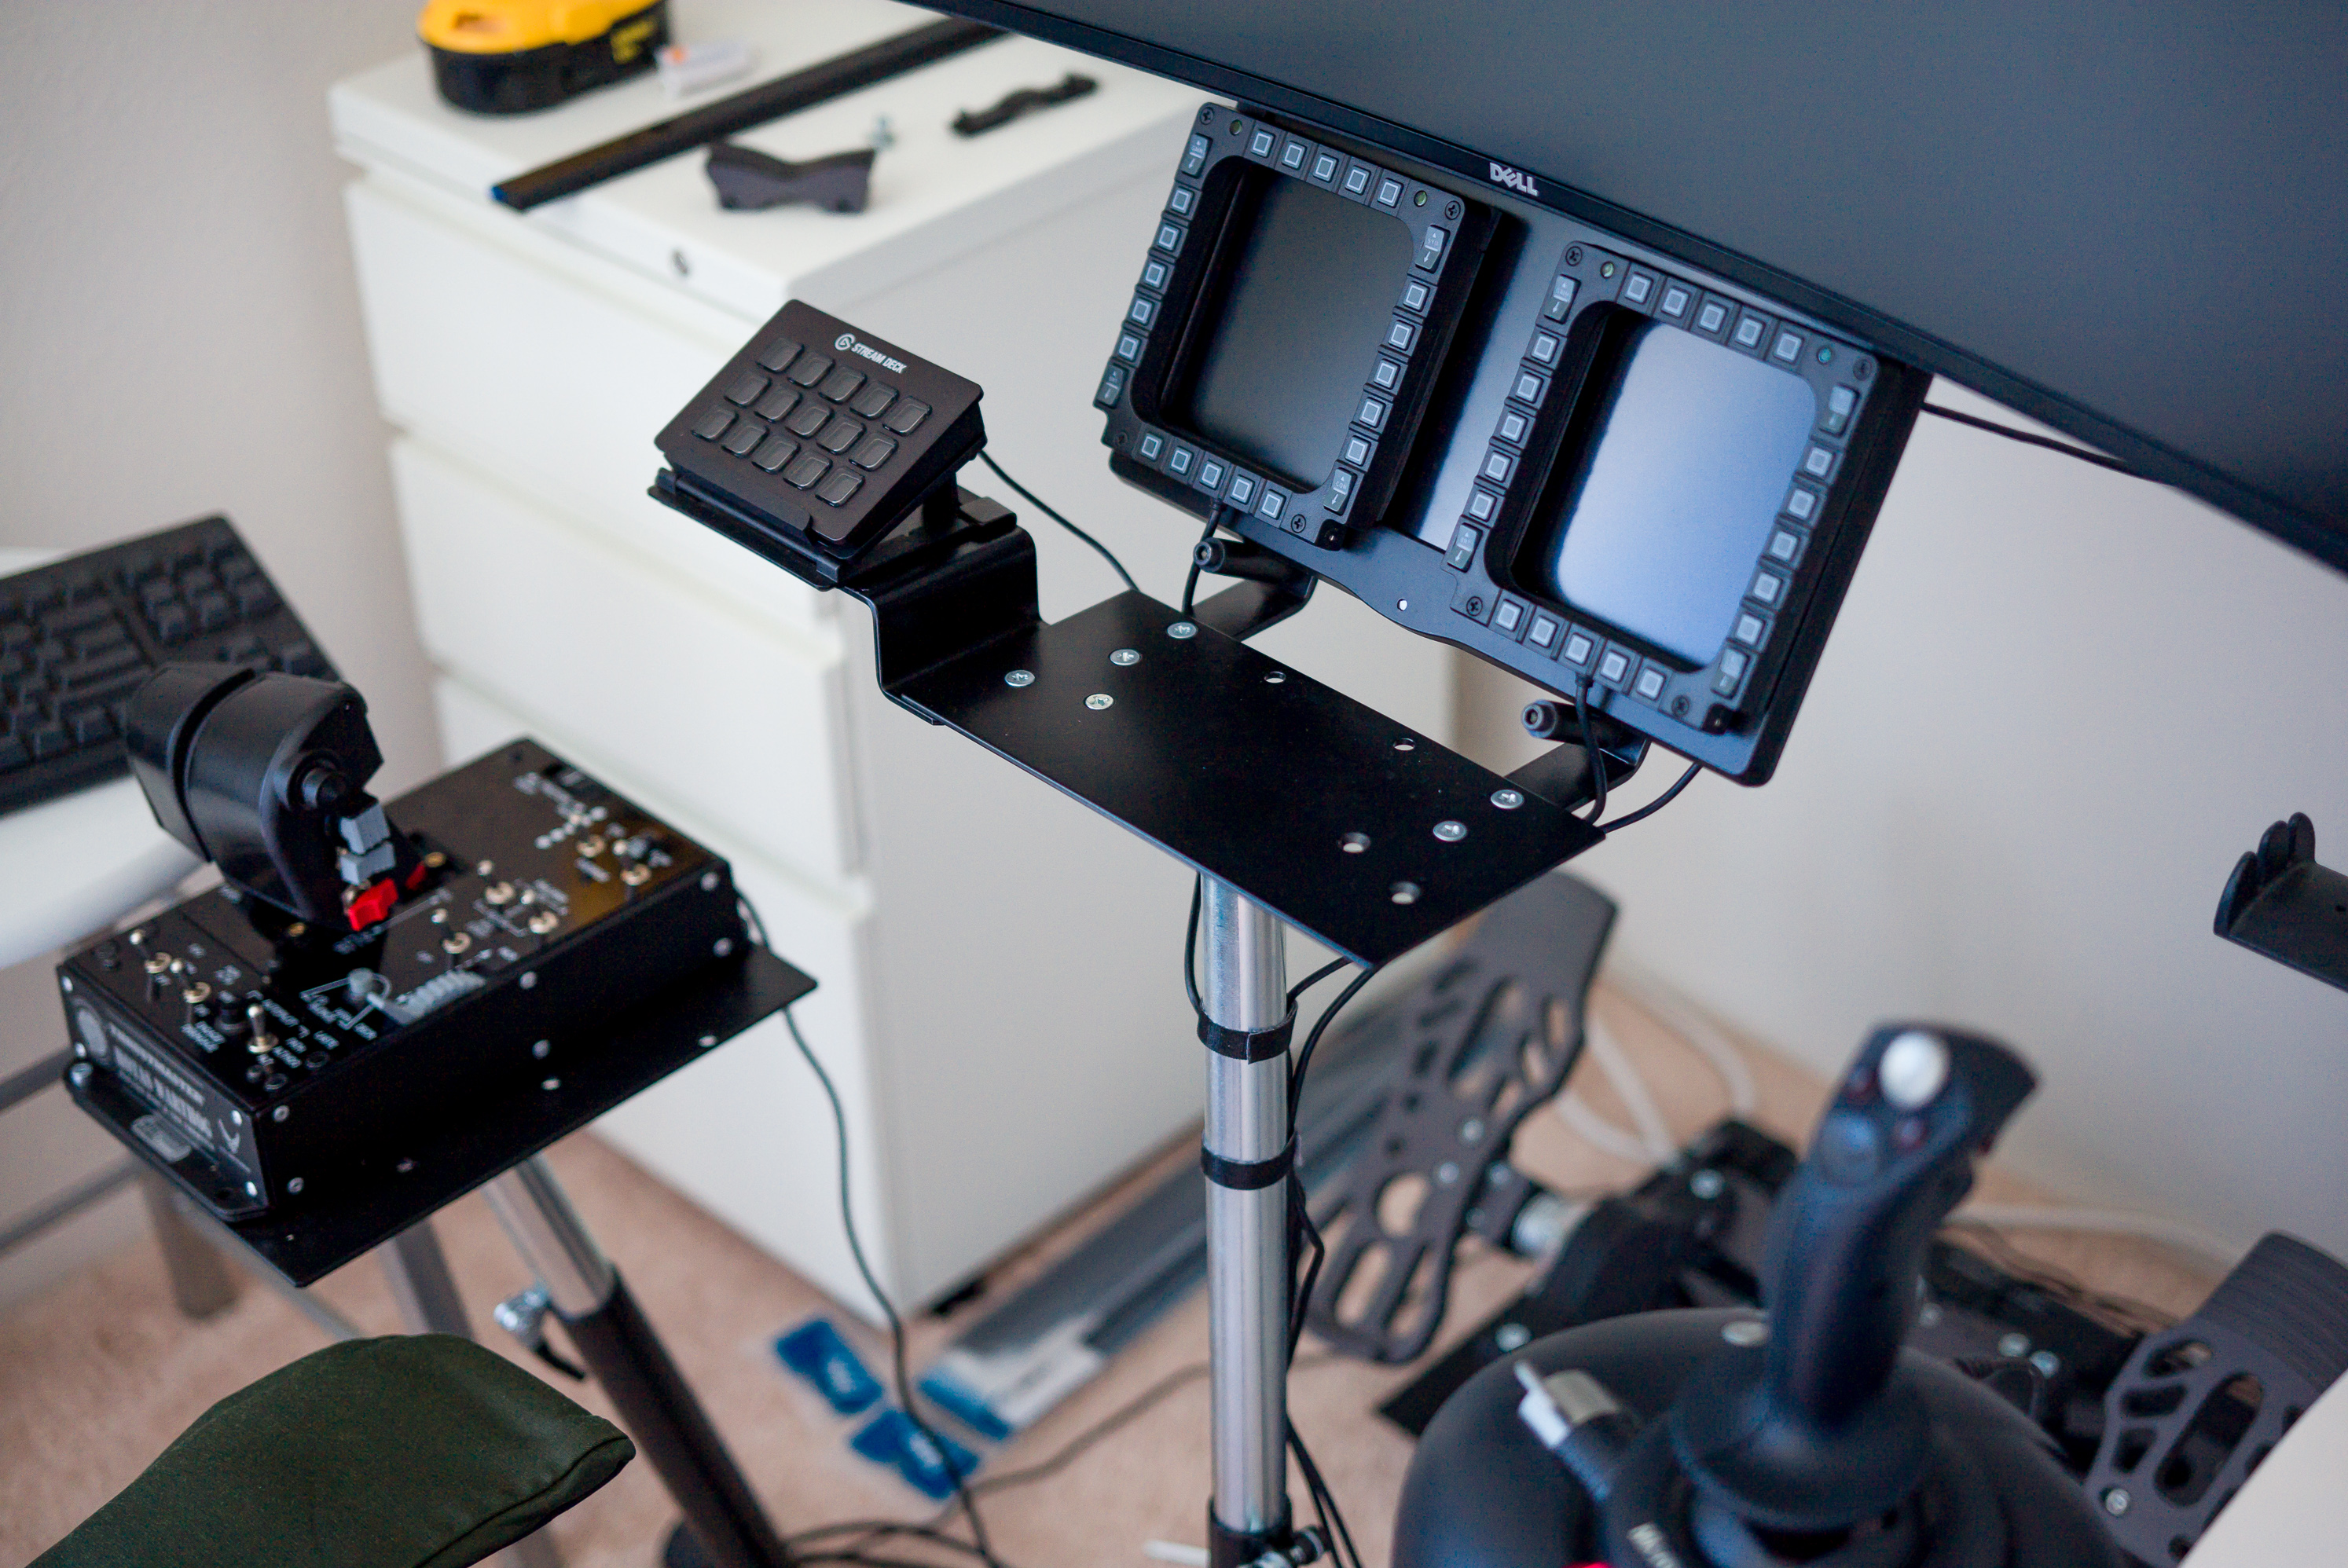
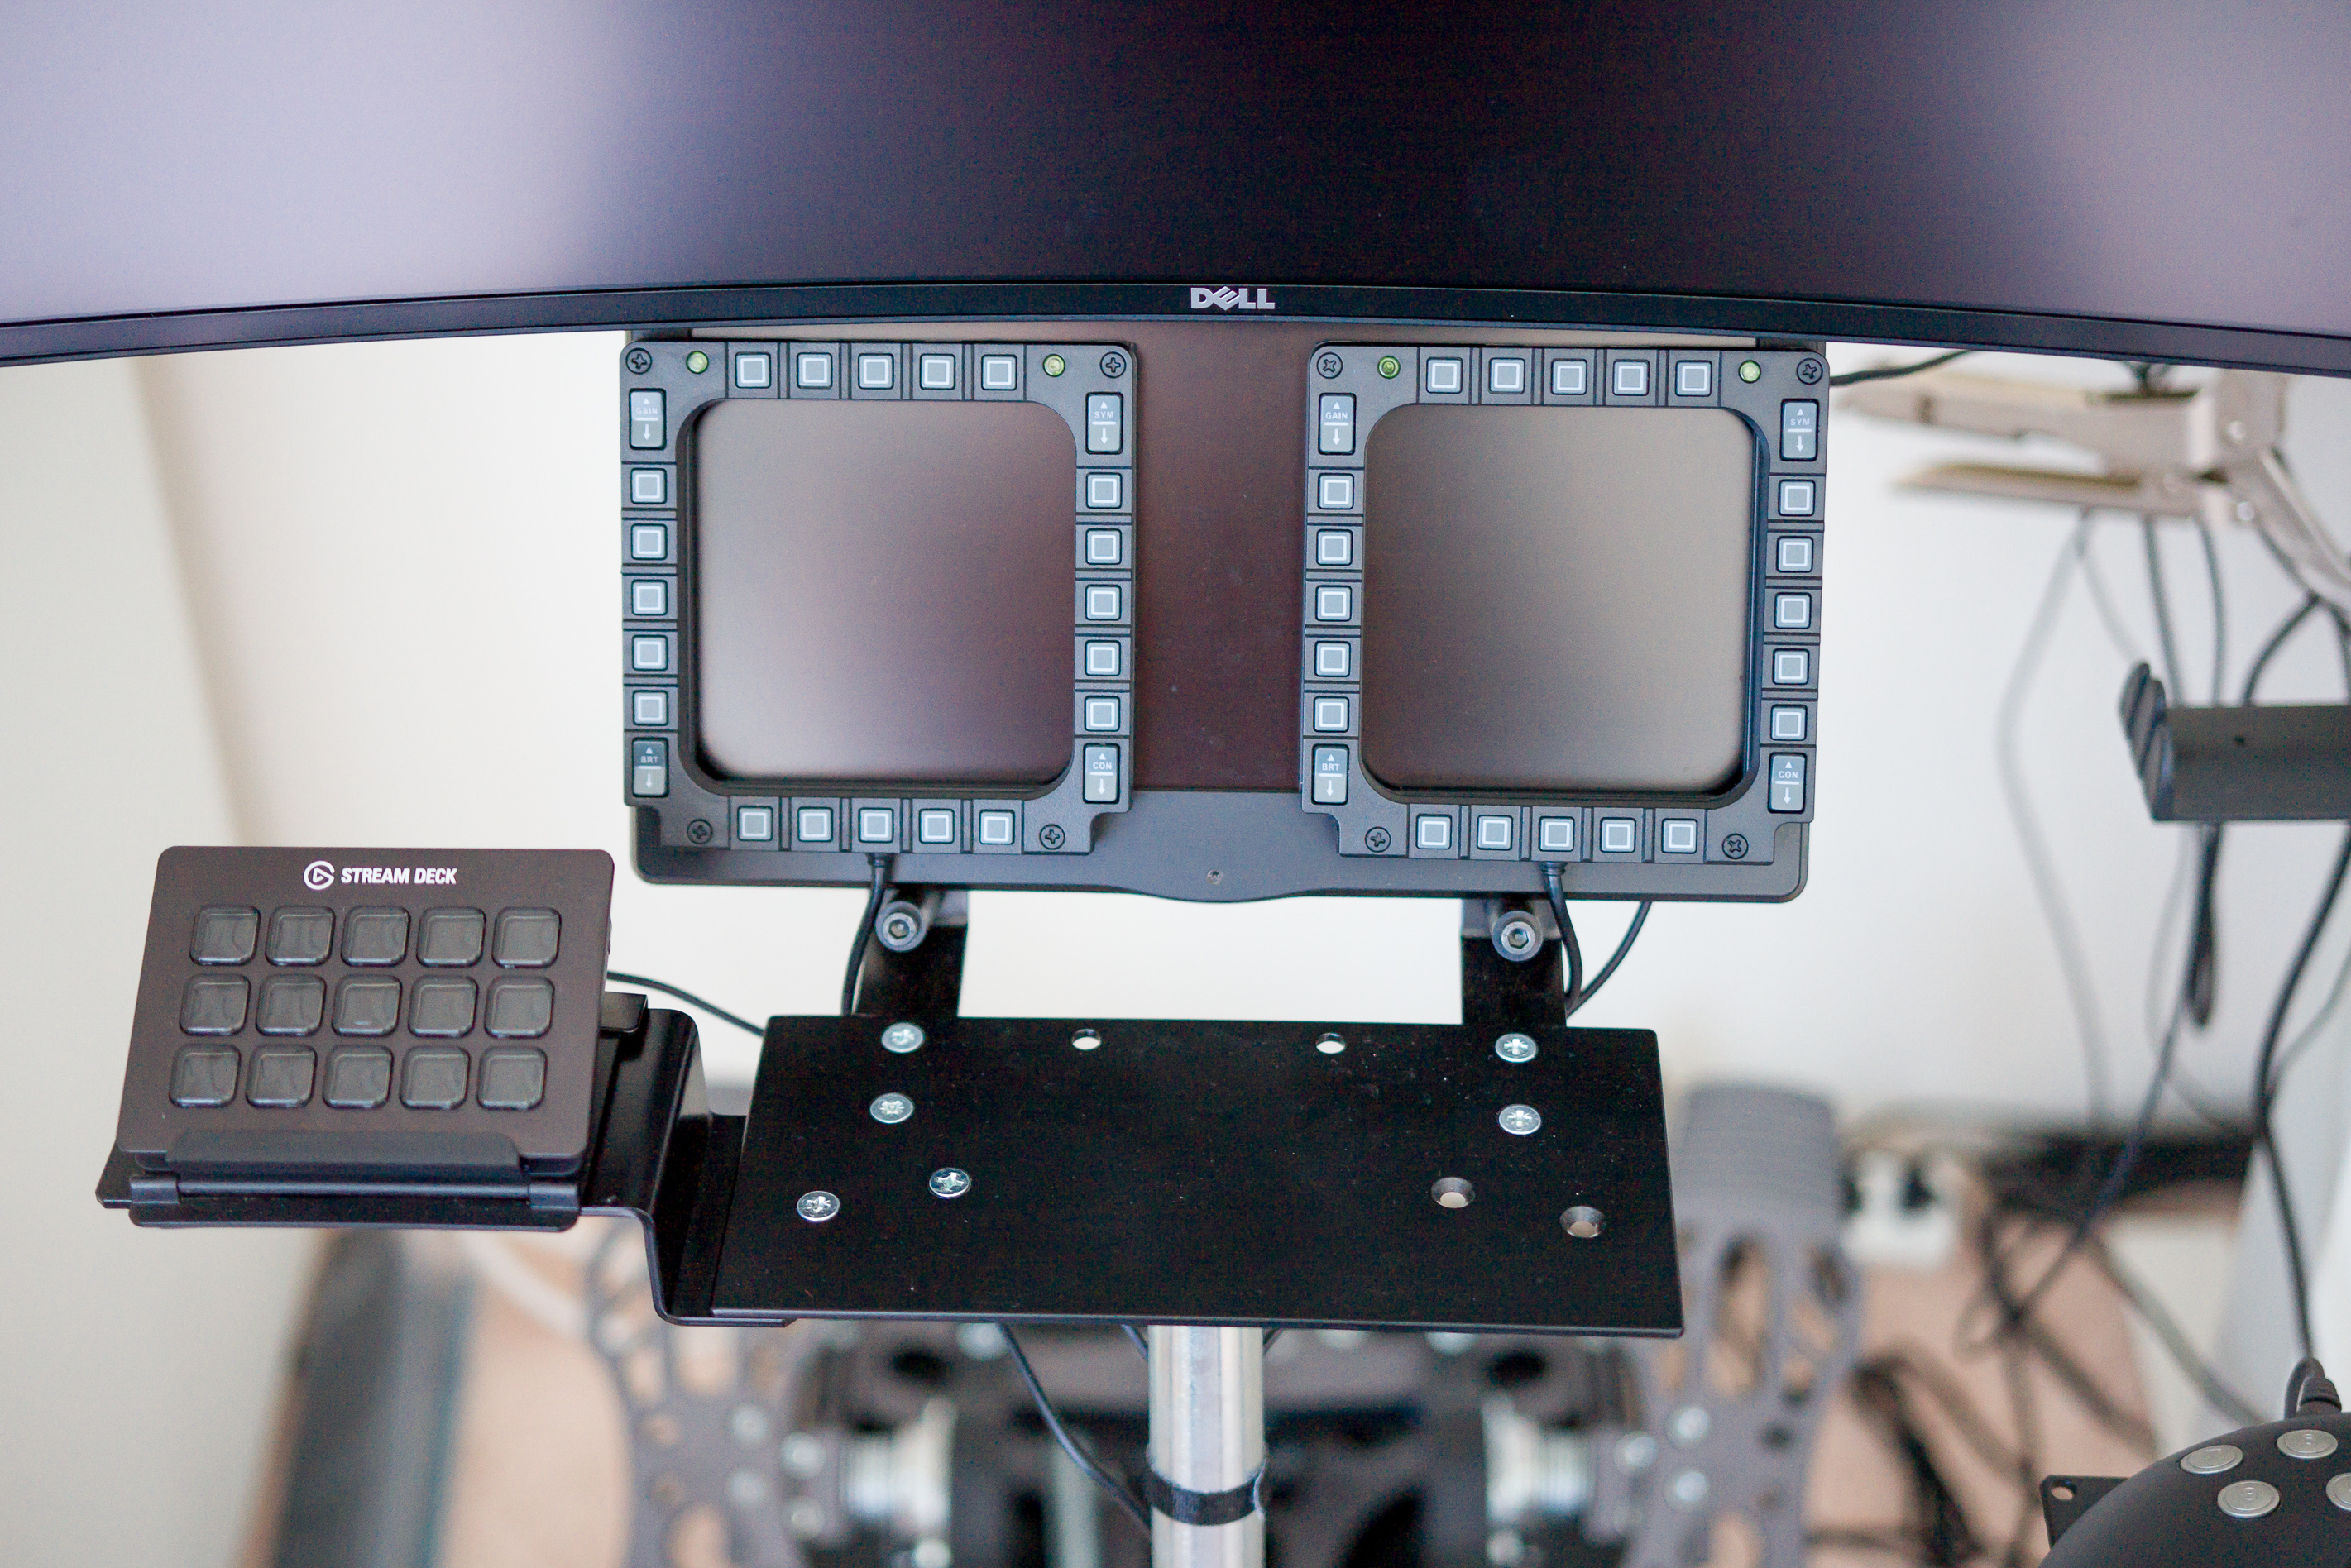
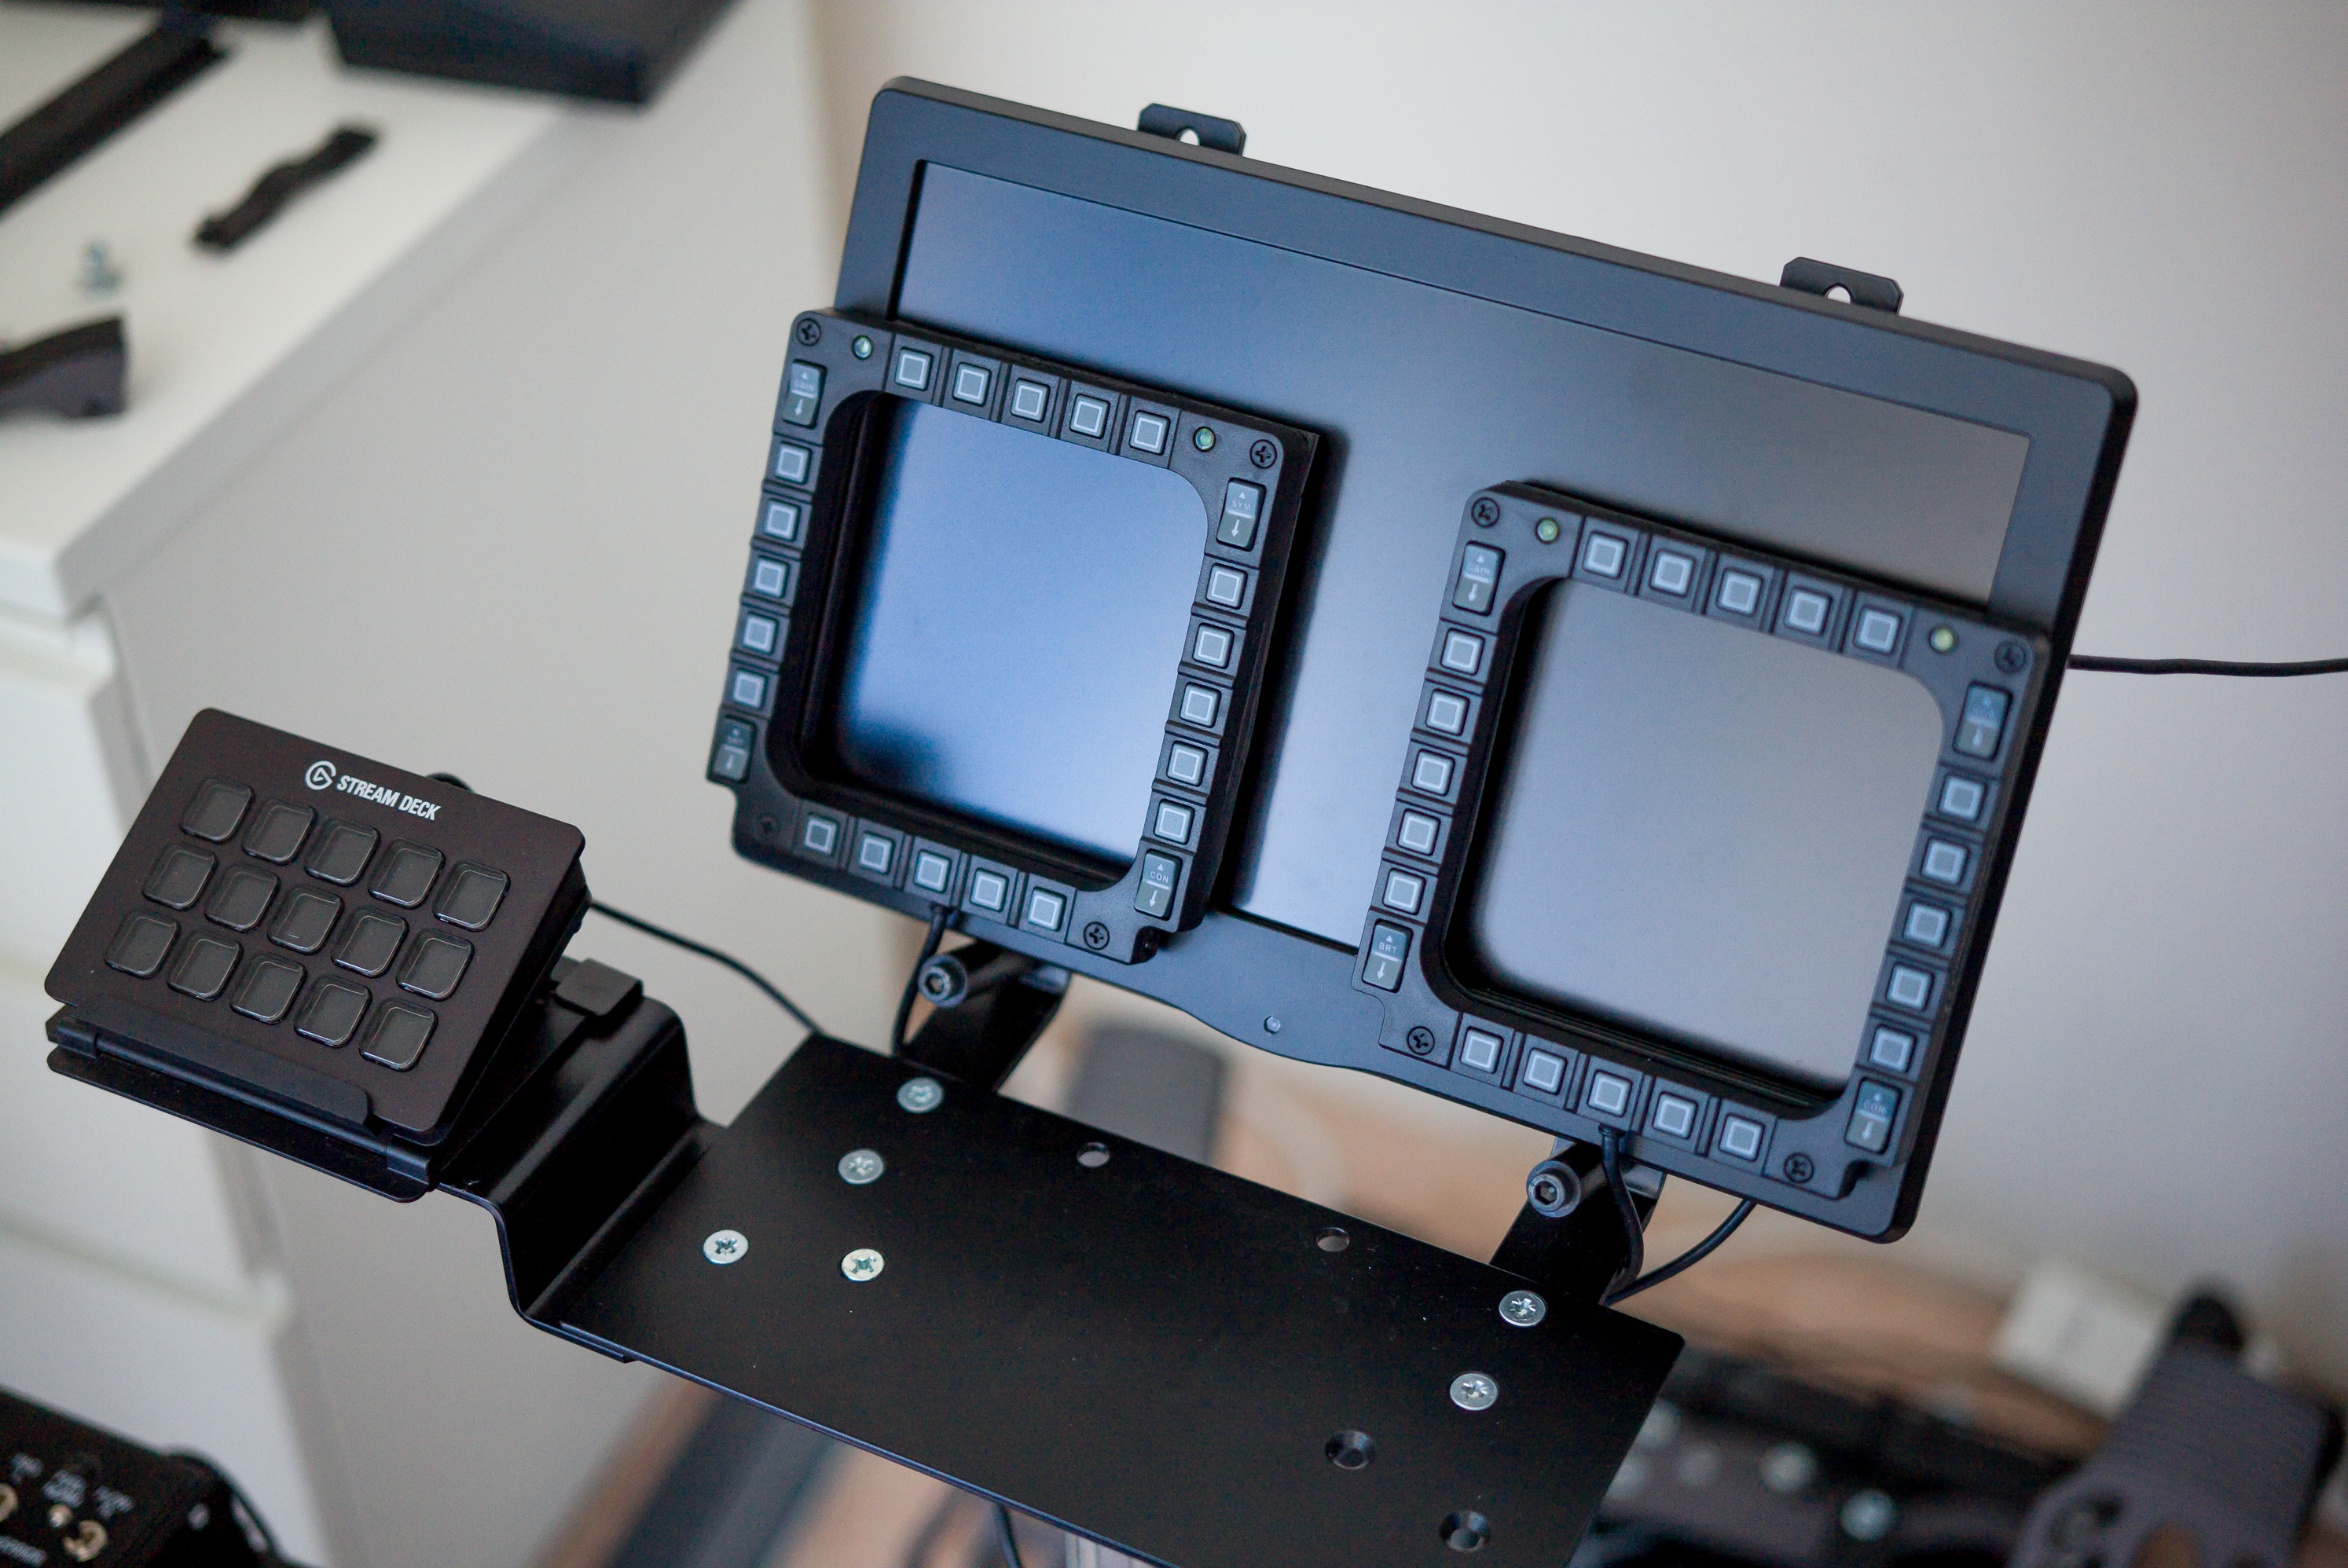
Here's some pictures of my setup, showing how the keyboard arm can be used to hold a monitor. I can probably also center mount a joystick using a table mount, but for now I prefer having it off to my right. The monitor is not mounted, it's just resting on the rubber arms. If you want to mount it, keep in mind that the arms are about 175mm apart, so you will need to fashion some kind of 175mm to VESA adapter plate.
-
Are you using an Arduino? If so, can you look at the serial output using the Arduino software to see if it's outputting the proper messages?
-
Thanks! I'm planning to use it with the FFSB R3 force sensing mod. Will the plastic version be strong enough for this, or do I need the steel version?
-
Introducing the VKB-Sim ‘Modern Combat Grip’ (MCG)
Ranma13 replied to rrohde's topic in VKB-SIM Flight Gear
Because we're not complaining, we're sharing our opinion because the NA distributor asked for it. Someone who is voicing a different opinion than you is not called complaining. -
Would it be possible to get a tailpiece that has a 13-degree tilt forward and a 15-degree offset to the right? According to this schematic: http://www.aerotronicsllc.com/f16ssc.htm The F16 sidestick is supposed to have a 12-degree tilt to the right.
-
In real life, the Shkval uses contrast detect to lock targets, similar to the contrast focus system in digital cameras. You can lock onto anything that has enough contrast with its surroundings, such as trees, rocks, etc. In DCS, the Shkval can only lock certain target types, and the maximum range of the lock is not based on contrast, but rather the sun's position in the sky. This is why sometimes you can clearly see a target with good contrast, but still not be able to lock it. You'll get the maximum lock range around noon, and it drops off significantly as it approaches late afternoon to early dusk. I don't have any solid figures, but at noon you should be able to lock to out to 8km, and drops off to 4-6km just before dusk.
-
This is due to gimbal lock. You'll notice that it gets locked in the same position every time it happens. The solution? Treat it exactly like what it says it is: the Standby Attitude Indicator, to be used only when the HSI fails. Despite the auto-start sequence uncaging it, you should keep it caged until you need it.
-
I can verify the first issue with the radio. Either it's implemented incorrectly, or the manual is incorrect and it's supposed to be DC power instead of AC power. I'm leaning towards the latter, as it wouldn't be too useful for a helicopter to not be able to communicate if the inverter goes out. As for the APU, I can't reproduce it. Are you starting the APU, and then turning off the boost pump? If so, the suction from the APU will keep fuel flowing into it. If you're turning off the aft fuel pump prior to starting the APU, then the APU sound should play, but the temperature won't increase, and the APU will die after a short while.
-
I wrote a library that parses the DCS BIOS binary format, converts it to JSON, and allows you to subscribe to control updates using the standard JavaScript pub-sub model: https://github.com/danieltian/dcs-bios-api I'm interested in how the data will be exposed in DCS Export Core.
-
Most people put a piece of tape over the sensor so that the FFB is always on. This way it doesn't instantly snap the stick as you move your hand on and off it.
-
Yes, the SimShaker software completely takes over the entire seat, so the physical dial and the JetSeat software won't do anything. As you surmised, you will need to change the individual levels within the SimShaker software to turn them down. Can someone verify that on the Sim Edition seat, although there are 8 motors, there are only 6 separate motor zones? It seems that when you activate zones 1 and 2, both motors in the seat cushion will vibrate. This is opposed to the back, where zones 3, 4, 5, and 6 will only vibrate one motor each.
-
Help with head tracking api
Ranma13 replied to guilhermemtr's topic in PC Hardware and Related Software
You can use FreeTrack: https://en.wikipedia.org/wiki/FreeTrack The history of TrackIR's SDK is important to read at the bottom of that article, under the heading "TrackIR interface". TLDR is that the TrackIR SDK was encrypted in later versions, so you need to work around it by using TrackIRFixer: https://naturalpointofview.blogspot.com/p/trackirfixer.html Alternatively, the head movement is implemented in the controls as 6 axes, so you can create a virtual USB controller with 6 axes that corresponds to each type of movement, then bind each axis in-game accordingly. -
This is because the Saitek support page requires Javascript from madcatz.com, but those JS files were removed. There's a mirror here: http://drivers.softpedia.com/get/JOYSTICK-GAMEPAD-WHEELS-and-TABLETS/Mad-Catz/Mad-Catz-Saitek-X-55-Rhino-HOTAS-Joystick-Driver-705513-for-Windows-10-64-bit.shtml but I don't know if it's the most recent version or not. Better than nothing at all. Edit: Please do not double-post. You created two topics asking the same question within the span of 1 hour. This forum is active, but not -that- active. It will take time for people to give you answers.
-
Exporting one device to two monitors
Ranma13 replied to splash's topic in PC Hardware and Related Software
The internal game logic will only export to one viewport. If you have two listed, it will export to whichever one it finds first. For example, the Shkval will try to export to a viewport named SHKVAL, and if it can't find it, it then searches for LEFT_MFCD. That's not exporting to two viewports. That's exporting to one viewport while still keeping the in-cockpit render. -
Shooting Range single mission (1.5 branch) crash
Ranma13 replied to kontiuka's topic in Bugs and Problems
The game will just randomly crash from time to time. It has nothing to do with which mission you're on, or even if you're playing single player or multiplayer. -
You need to do this for any aircraft you fly in DCS.
-
Flaming Cliffs Toggle Switches F15C
Ranma13 replied to aileron's topic in PC Hardware and Related Software
In industry terms, that category of switches is called toggle switches, and within that category you have either latching toggle switches or momentary toggle switches. Likewise, for push buttons, the category is push buttons, and they can either be latching or momentary. Most people just call them toggle switches though, which causes the confusion, especially when you're trying to buy some.