Viper1970
-
Posts
2290 -
Joined
-
Last visited
Content Type
Profiles
Forums
Events
Everything posted by Viper1970
-

Universal military aircraft homecockpit project
Viper1970 replied to Viper1970's topic in Home Cockpits
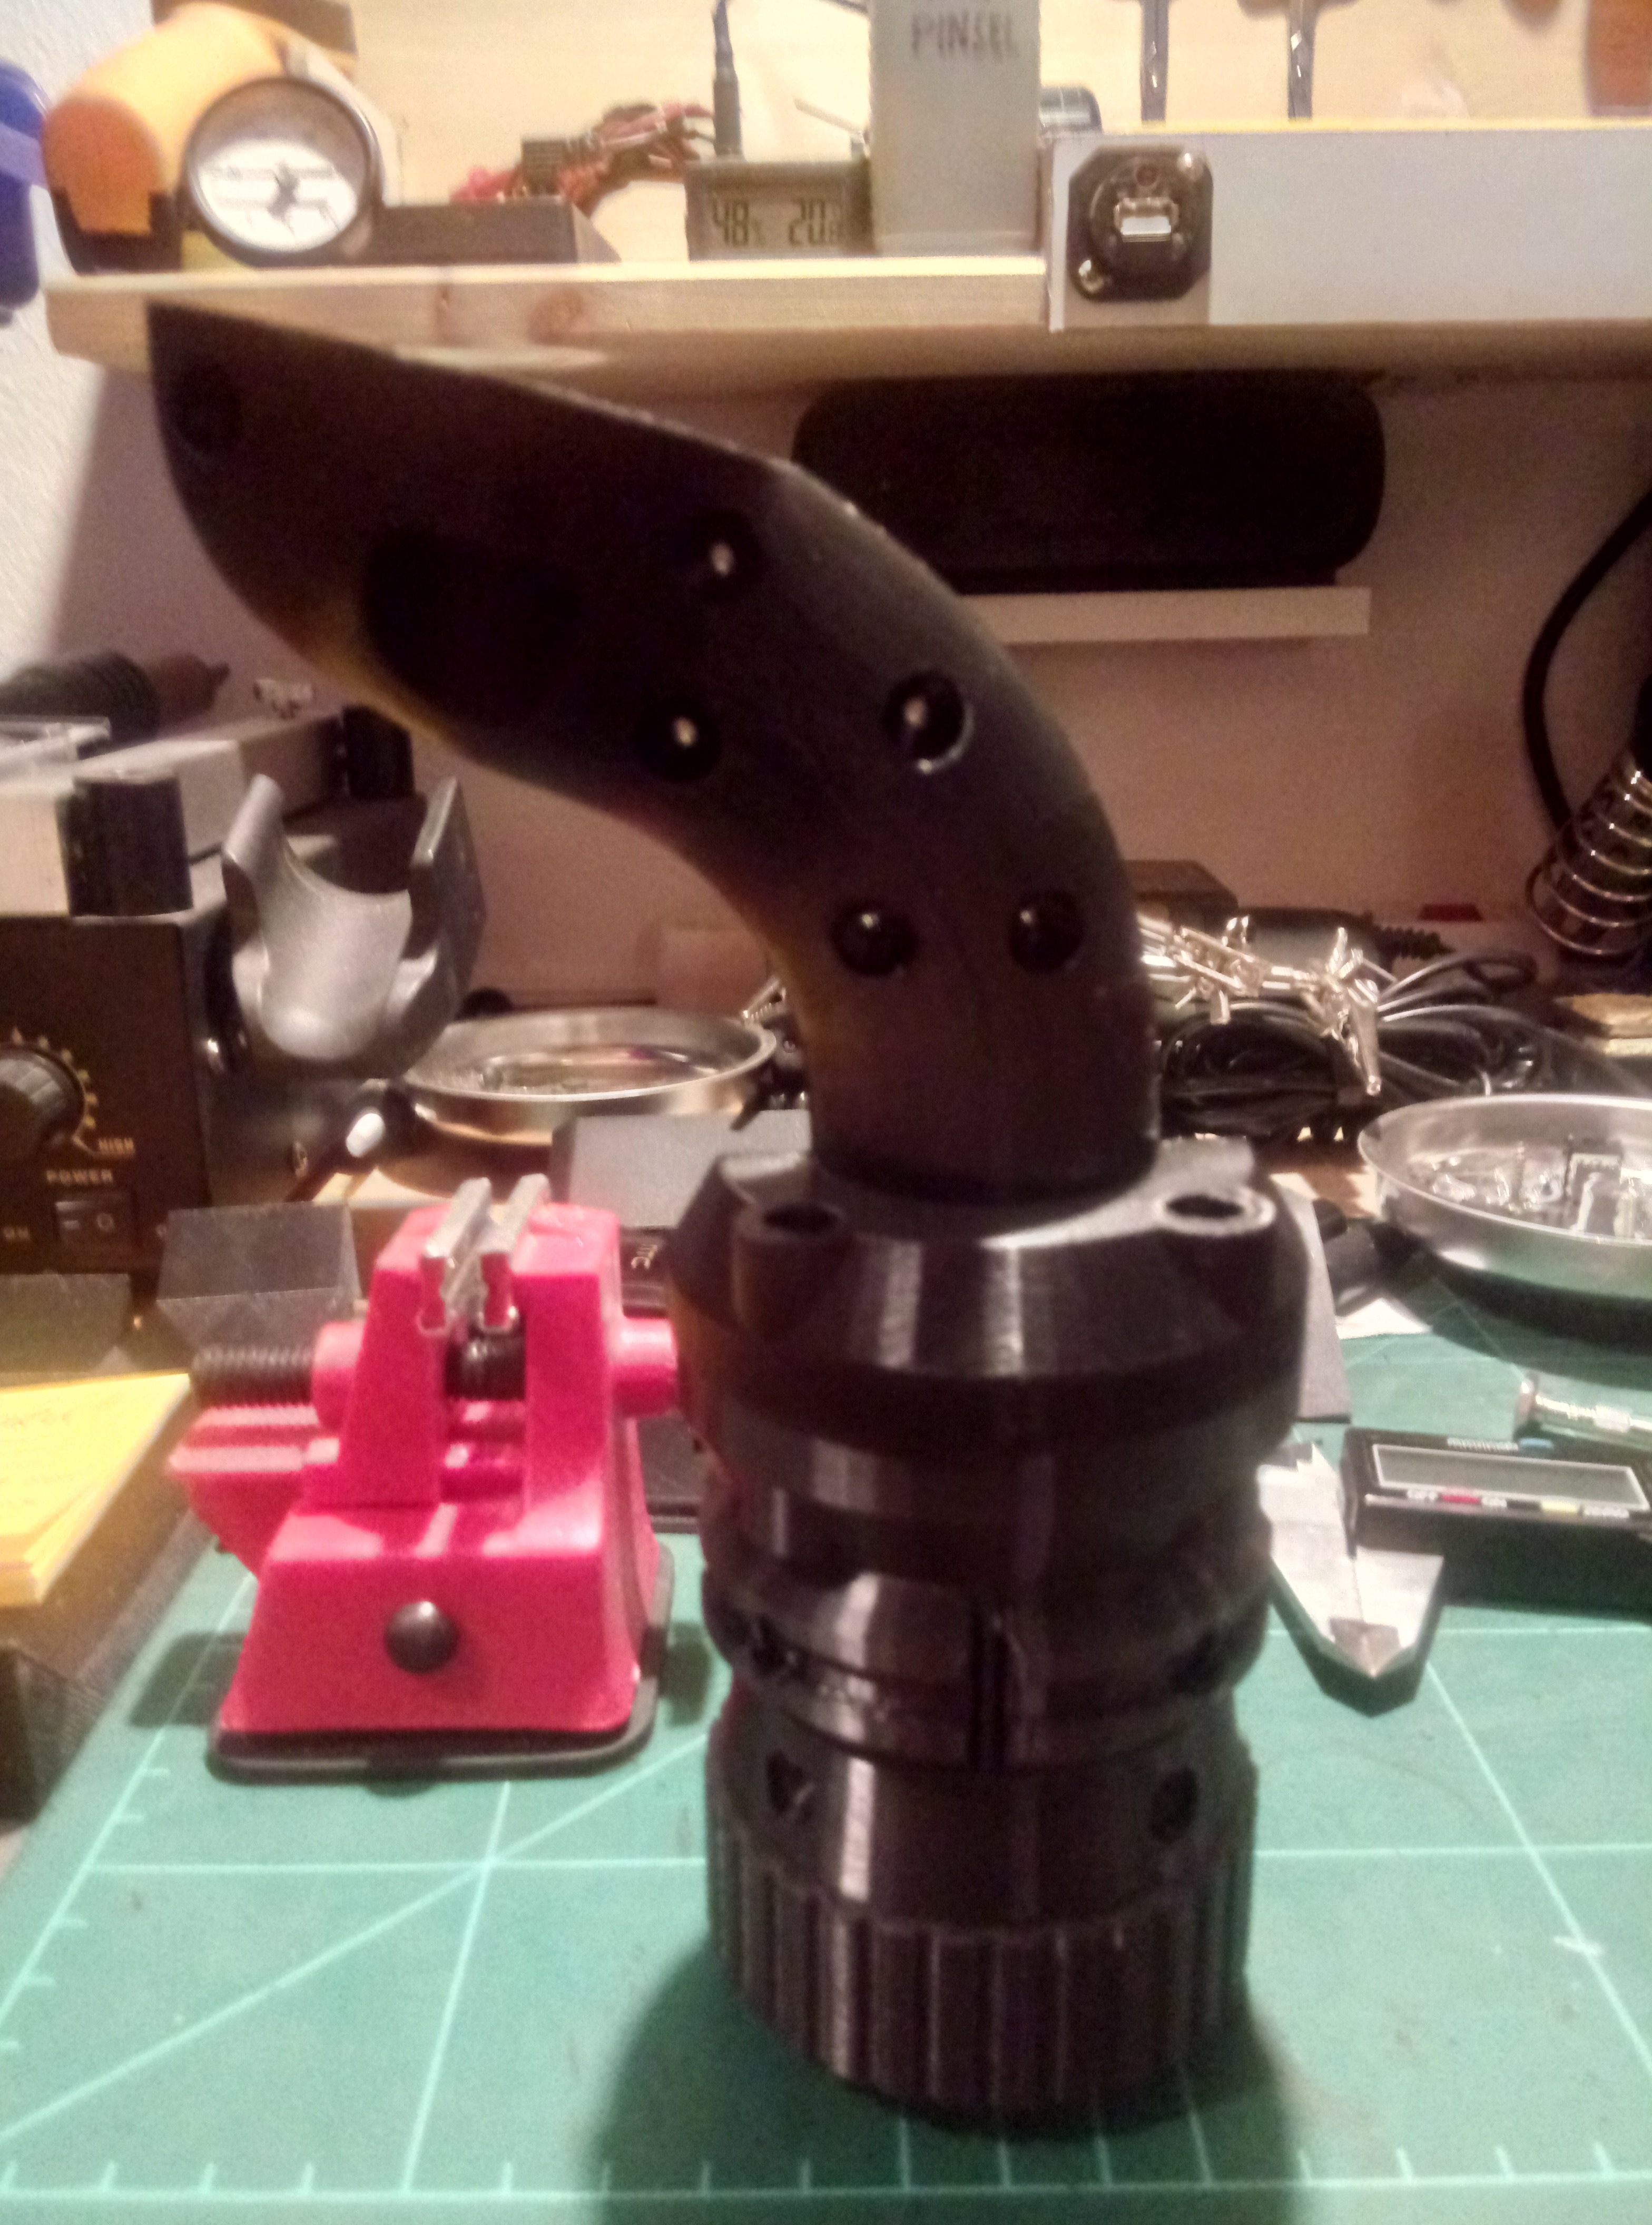
The settings I use in Cura 4.13.0: for the mechanical parts: Nozzle size: 0.5 Layerheight: 0.2mm Printspeed: 50mm/s Support (if needed): 55° Infill: 60% Lines for the grips: Nozzle size: 0.5 Layerheight: 0.1mm Printspeed: 35mm/s Support (if needed): 55° Infill: 60% Lines -
Announcing the F-4 Phantom for DCS World!
Viper1970 replied to Cobra847's topic in DCS: F-4E Phantom
Yes, another legend!!! First day buy! -
Universal military aircraft homecockpit project
Viper1970 replied to Viper1970's topic in Home Cockpits
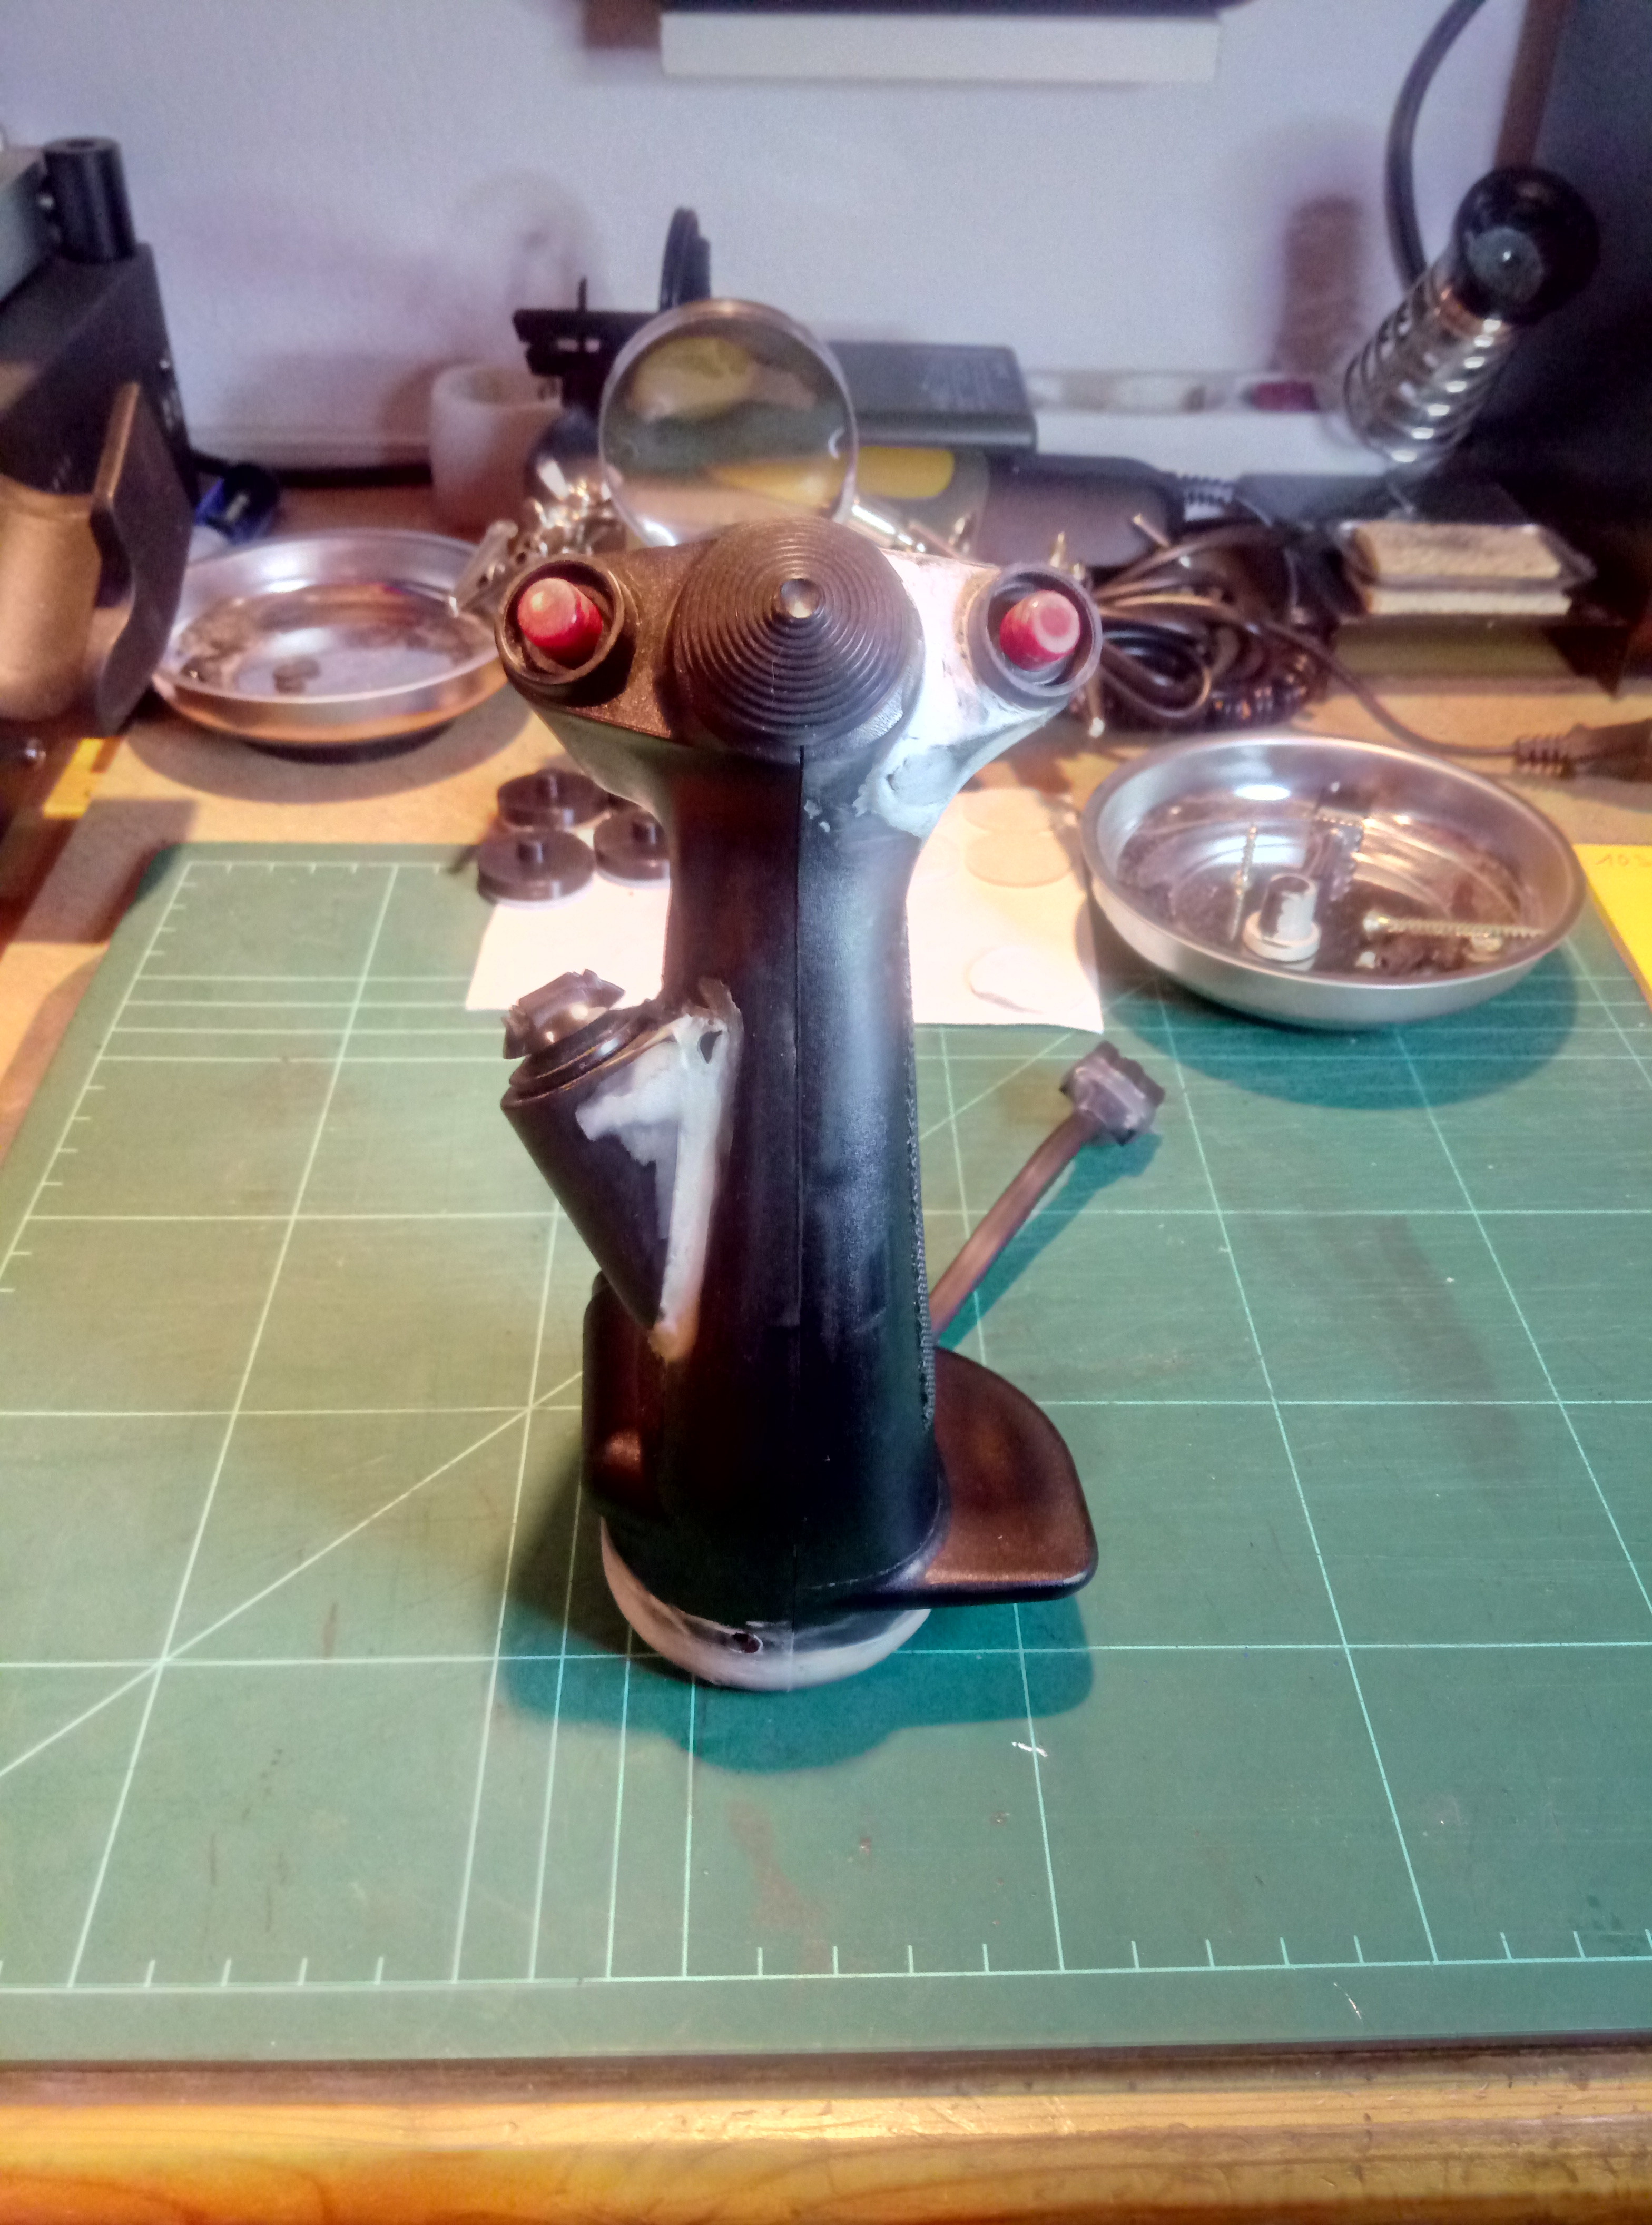
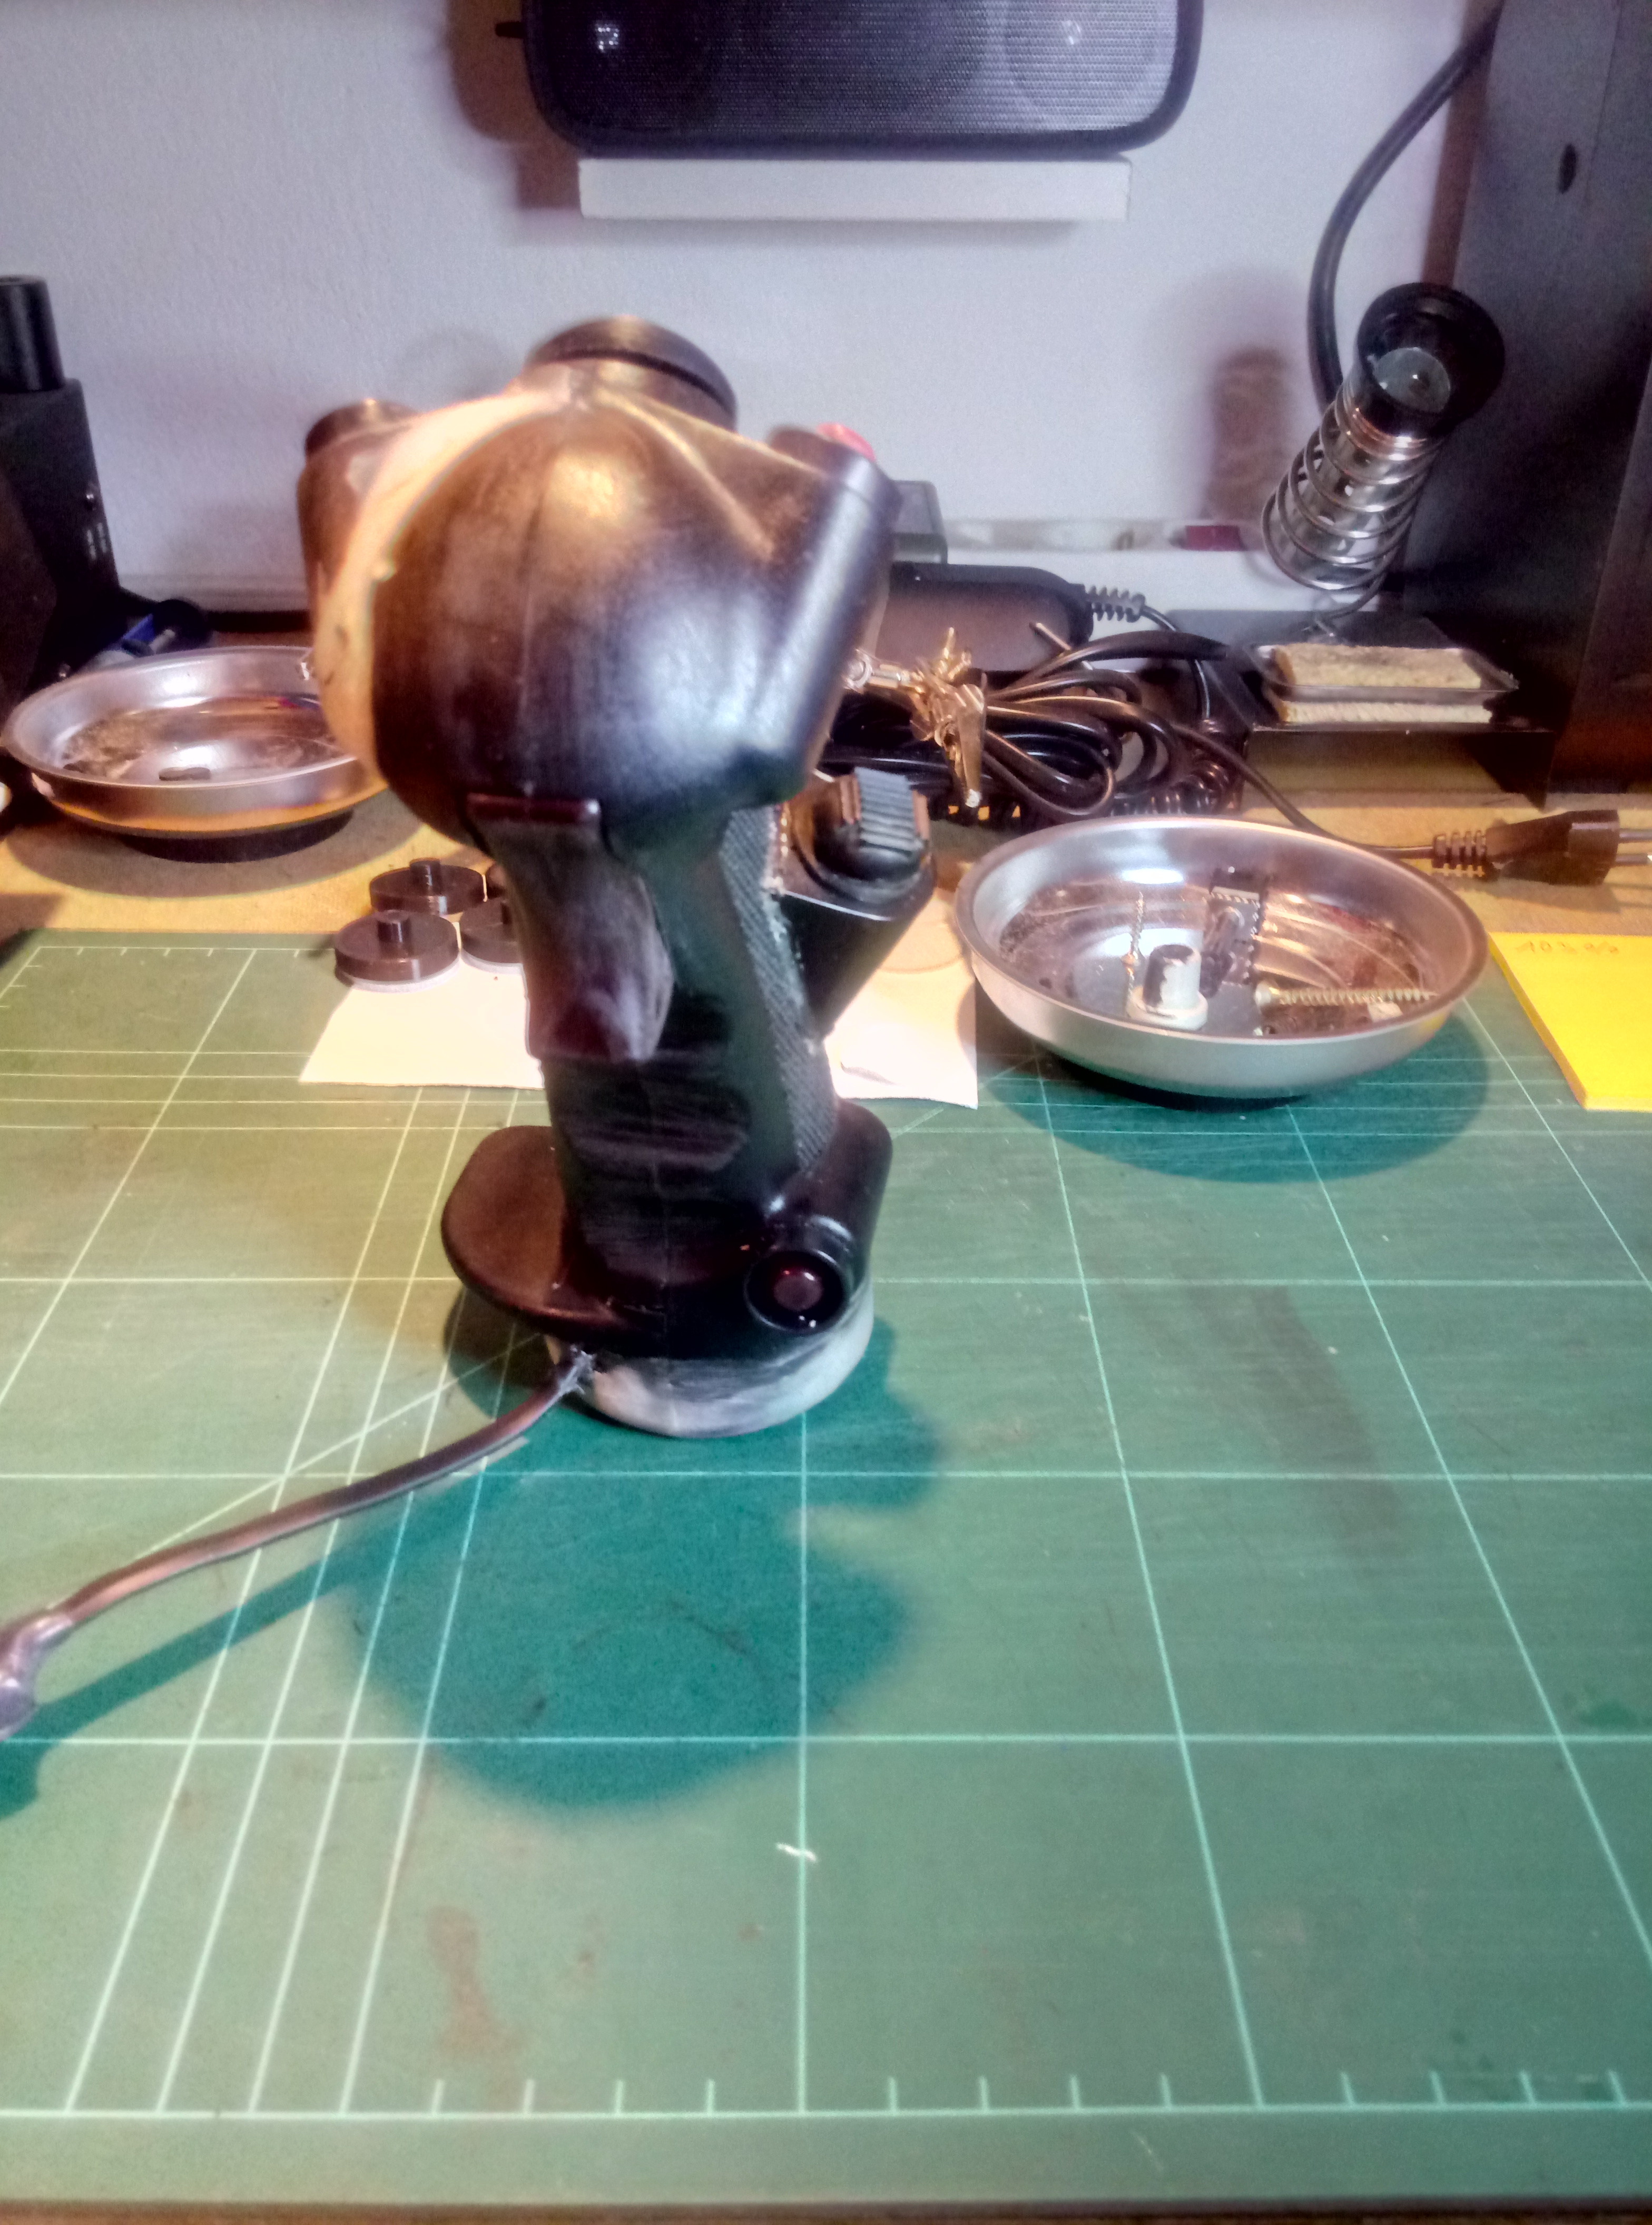
Spring mechanics and first half of the helo extension. Only 0.2mm layer height. Grips will be 0.1mm. Those mechanical parts are not smoothed. All the grip parts were additonally smoothed after 3d building, so they will look far better.
-
Universal military aircraft homecockpit project
Viper1970 replied to Viper1970's topic in Home Cockpits
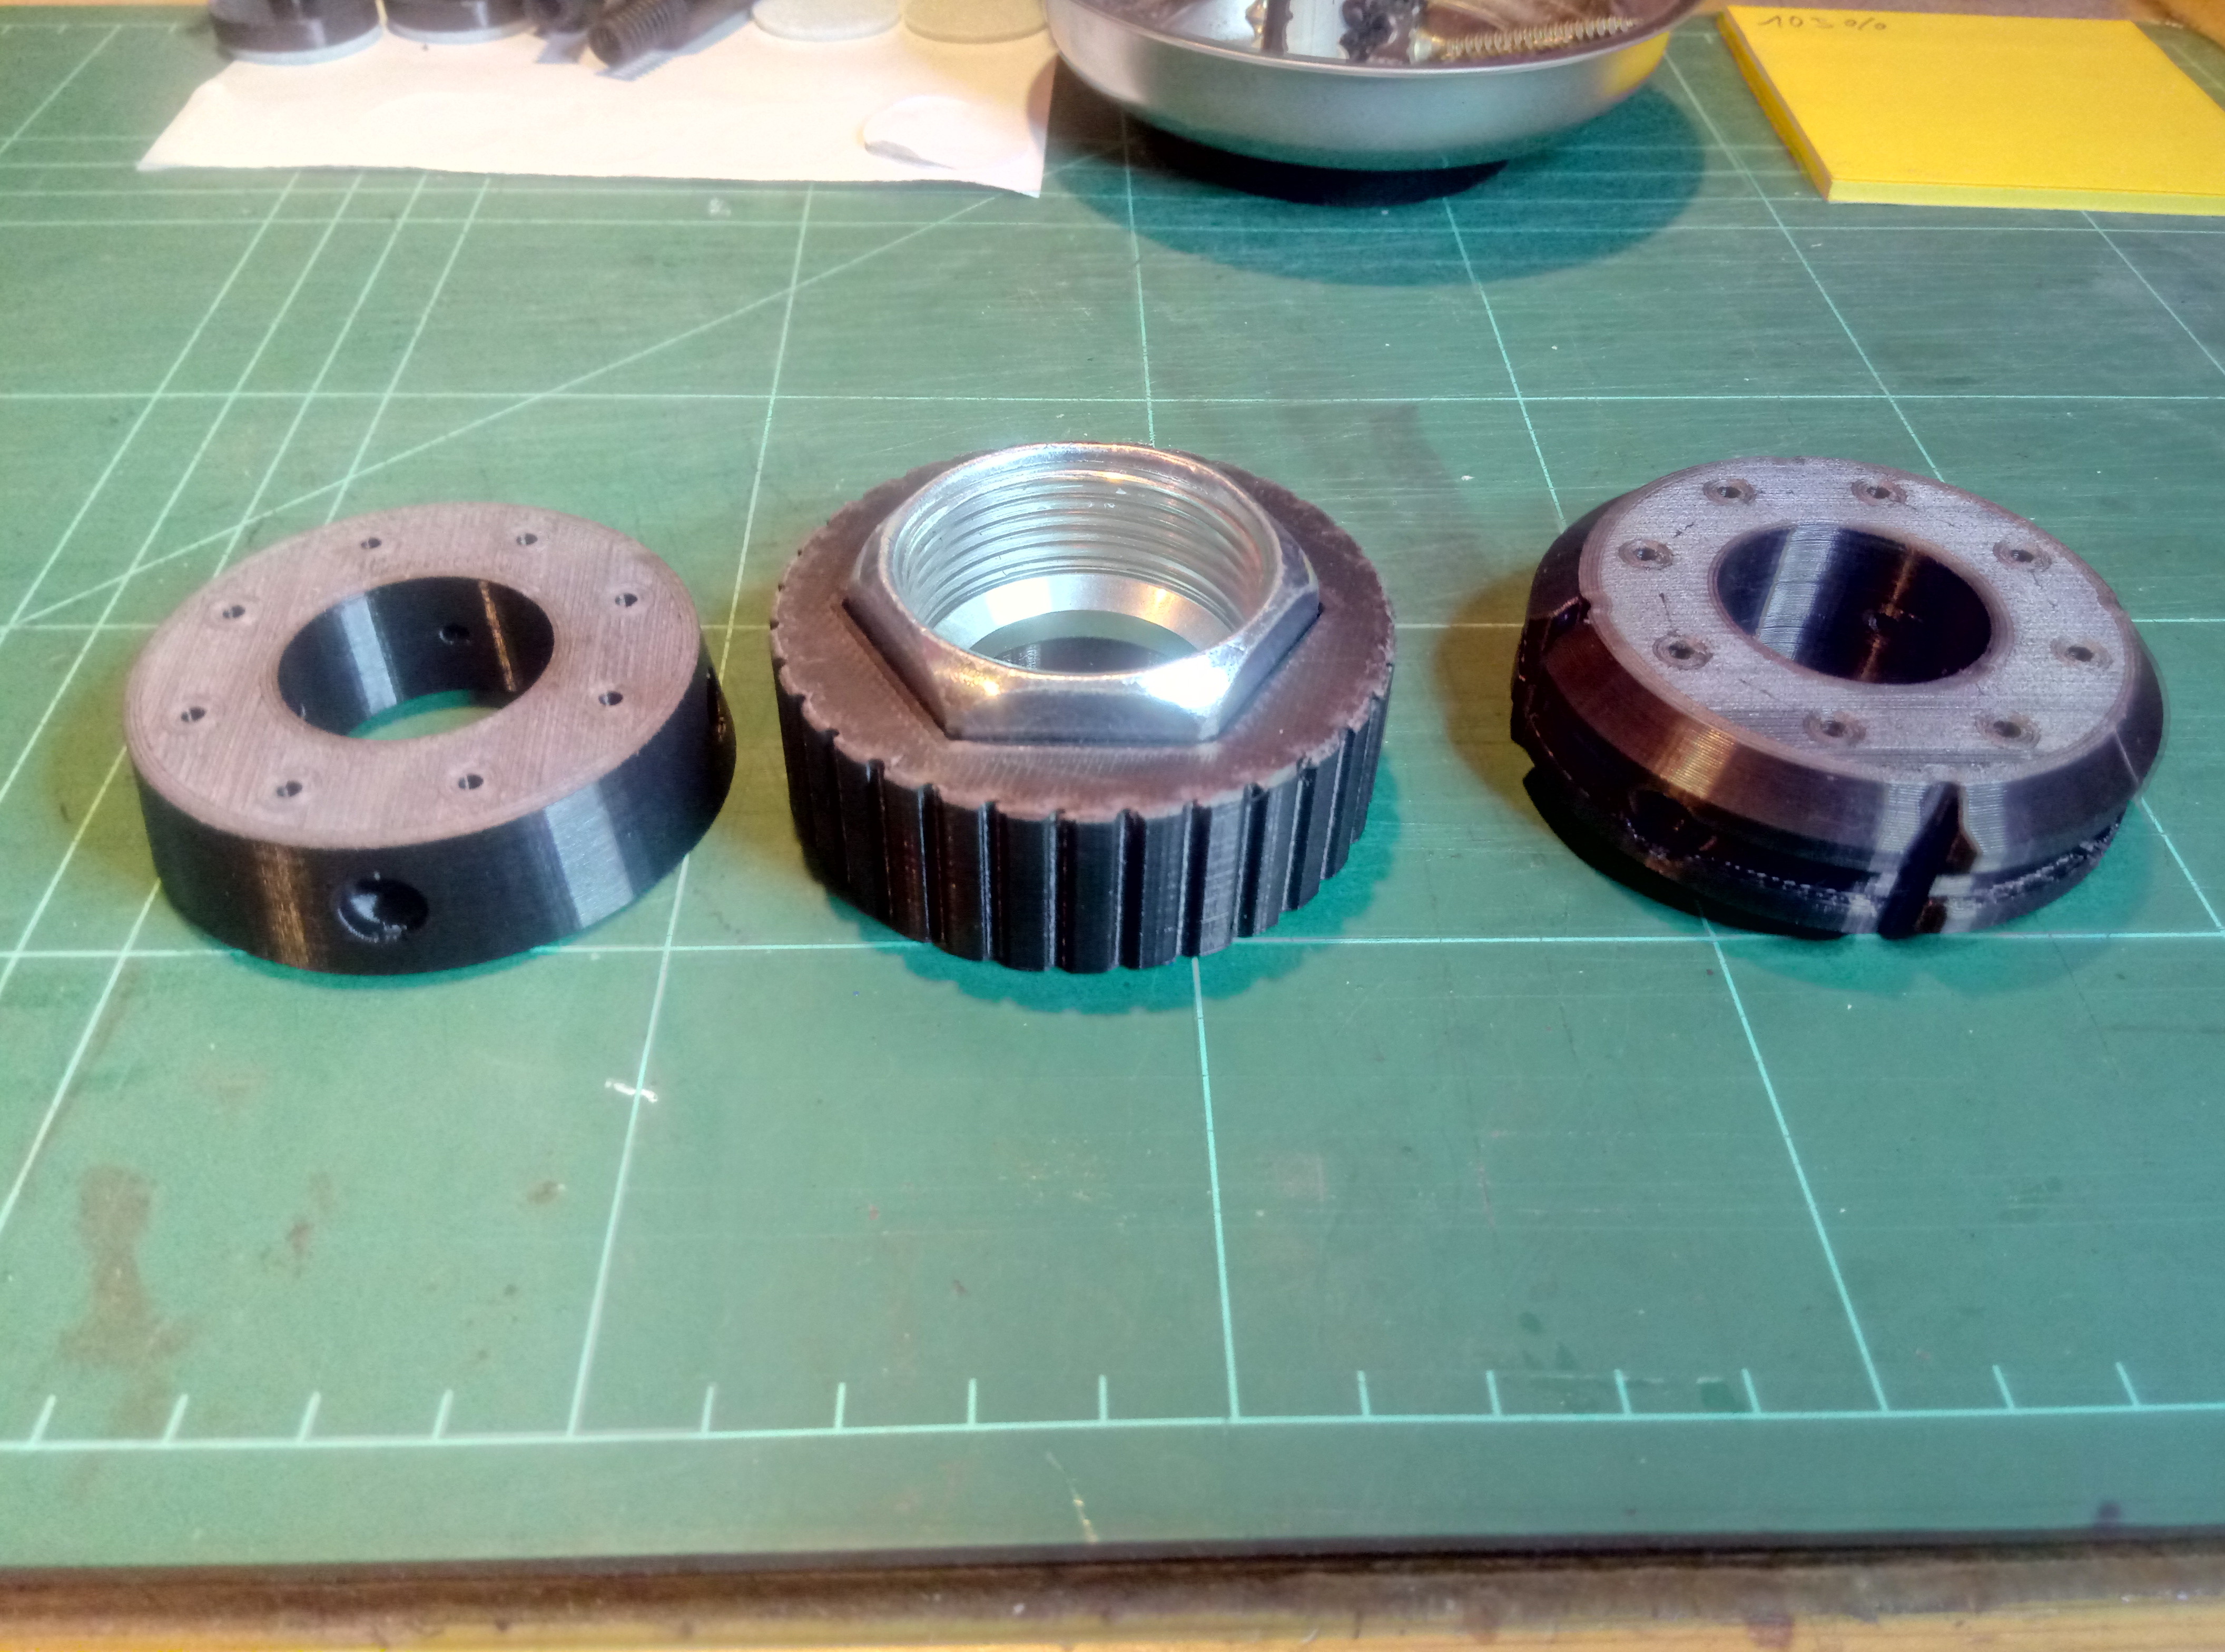
In parallel I have printedall parts for my spring mechanism on top of the modified Cougar, which will be my center base. It also gets a Warthog electronics including the hallsensor. At the moment my helo extension for it is printing . I will do prints now every day to be able to have as much parts as posssible already printed when I start with the work at the universal pit. -
Universal military aircraft homecockpit project
Viper1970 replied to Viper1970's topic in Home Cockpits
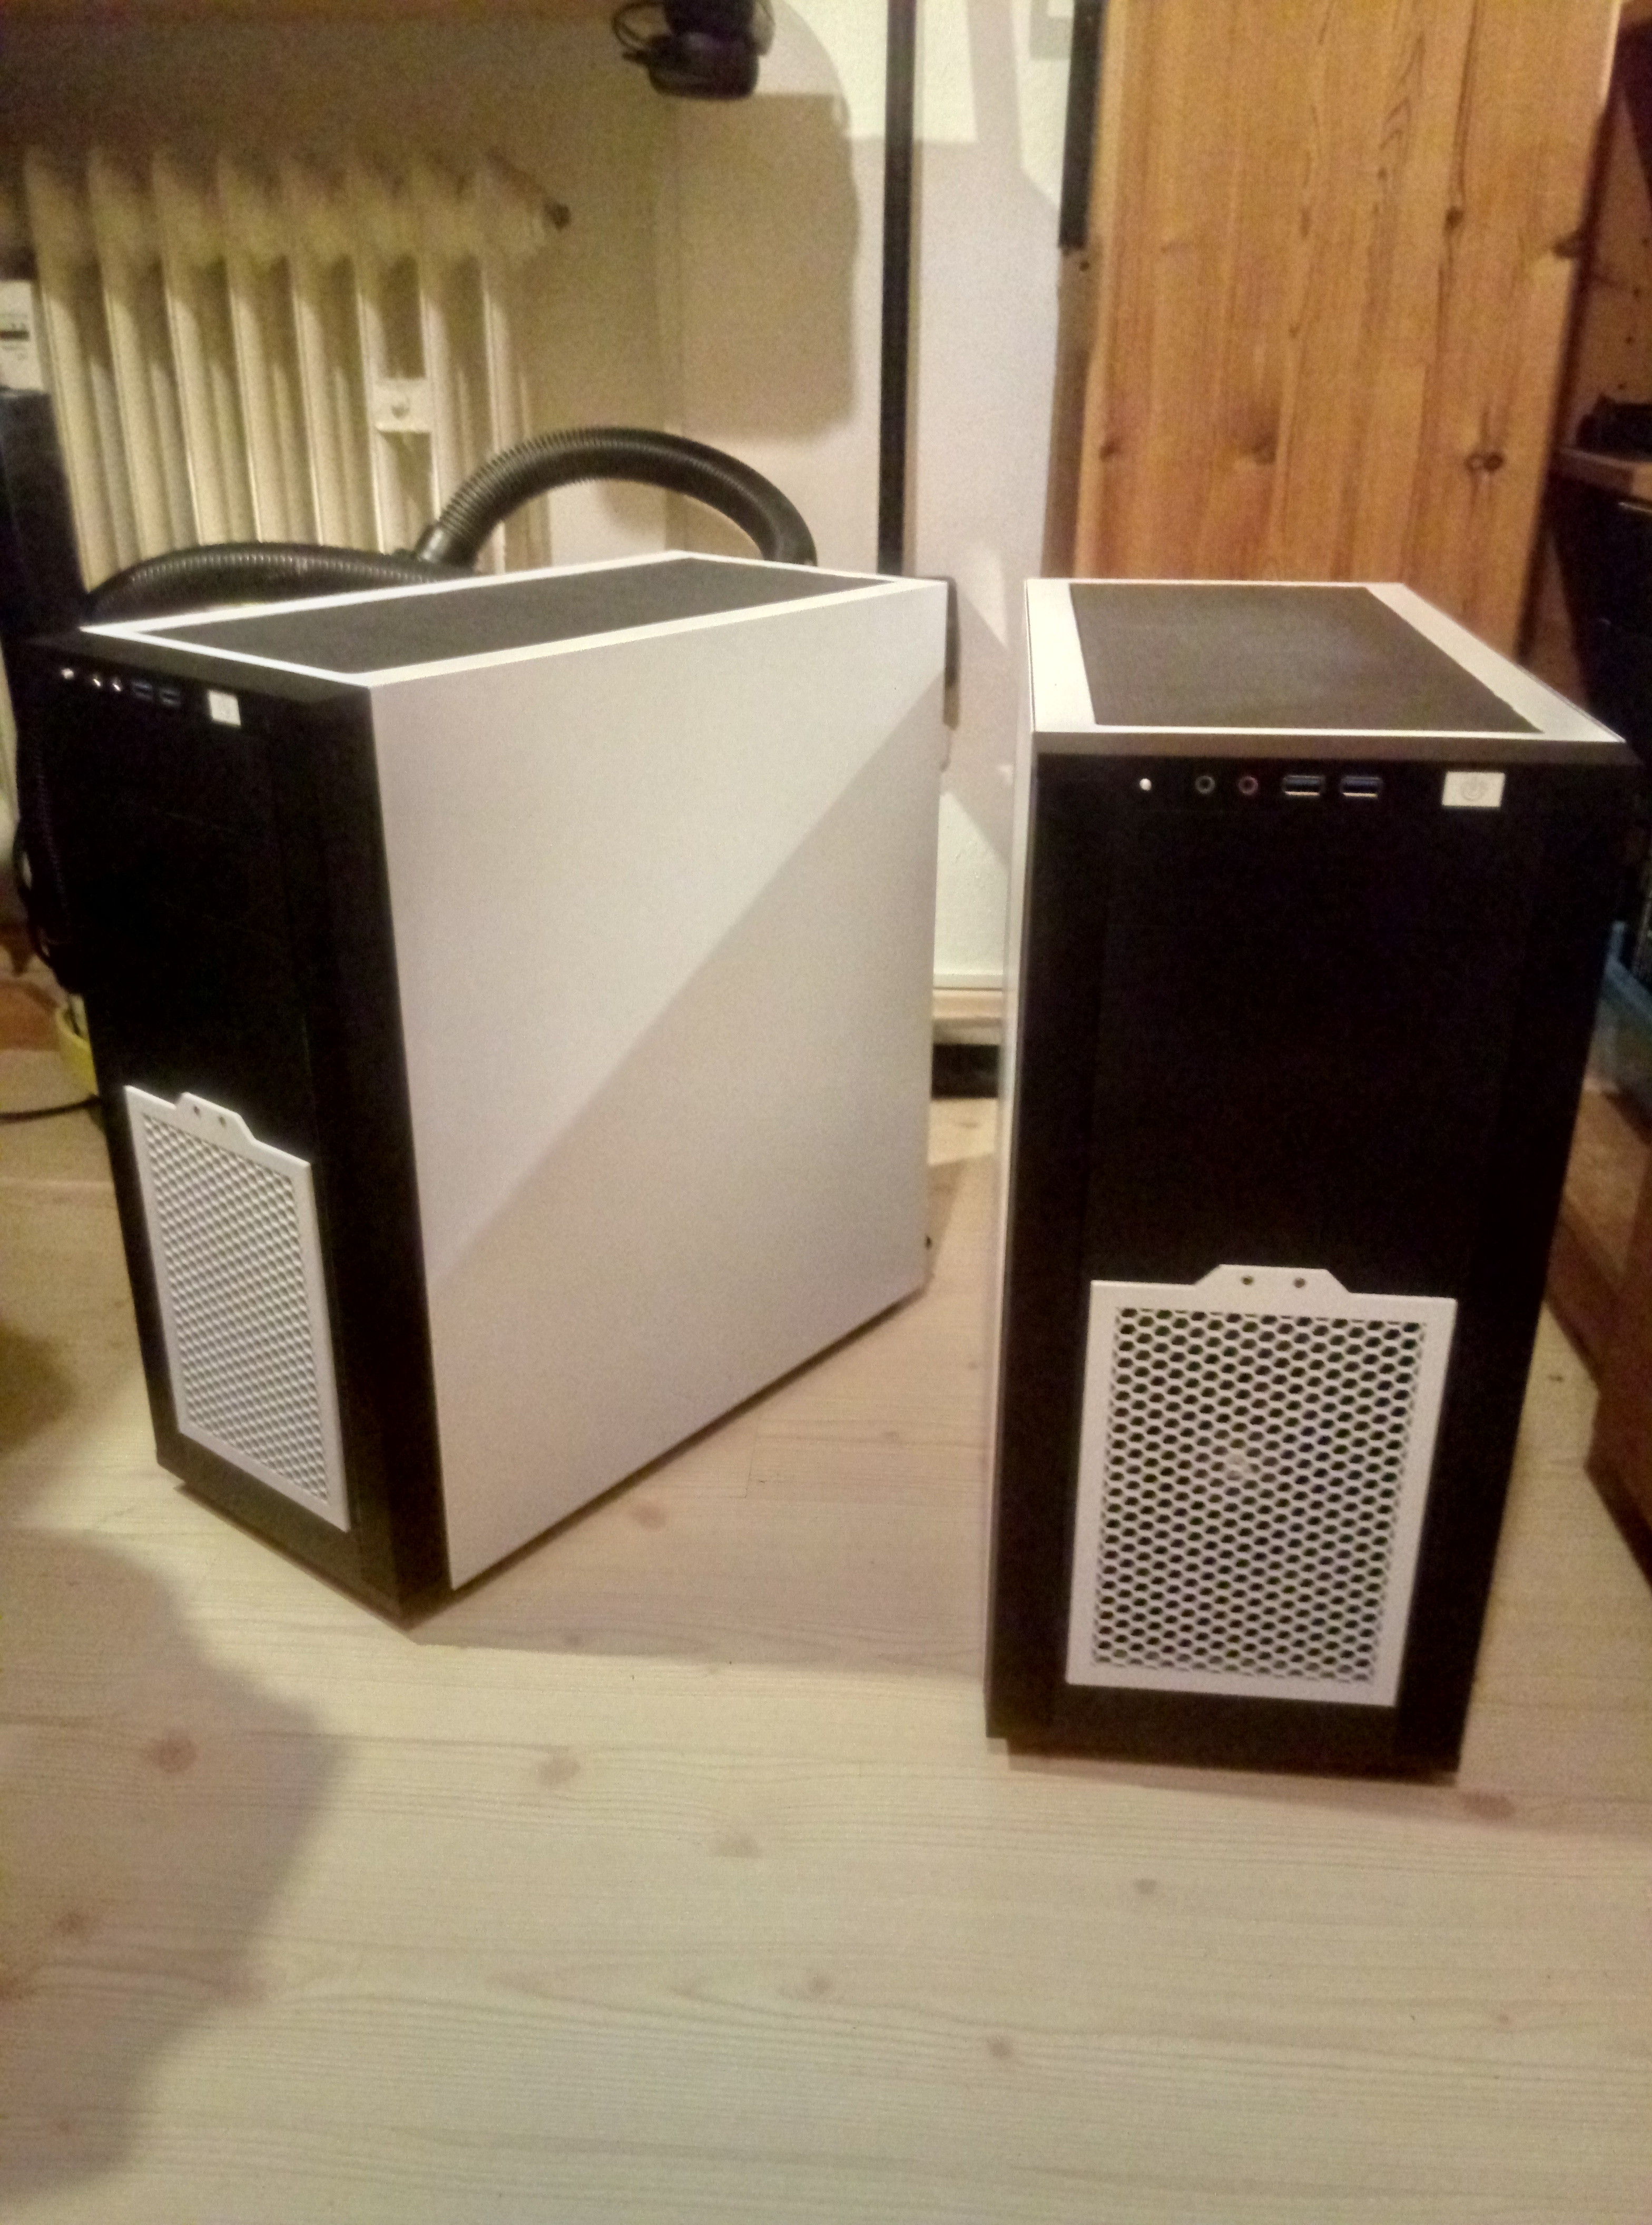
Cases done! Now its time to integrate the hardware. After this I can finally move to my HOTAS and panels at the command unit.
-
Universal military aircraft homecockpit project
Viper1970 replied to Viper1970's topic in Home Cockpits
Hey, thats awesome! I like the idea of being able to move them out, like a drawer. I think I will steal your idea for my HTPC in the living room. At the moment its in an old desktop ITX case fitting exactly inside my selfmade hifi rig. The drawback is that I also must use an ITX power supply and it was already hard to find one with 350w. Now with the Ryzen 2600X and the 1650 Super its really at its limits. I wanted to change this sometime in future and your idea is perfect! -
Universal military aircraft homecockpit project
Viper1970 replied to Viper1970's topic in Home Cockpits
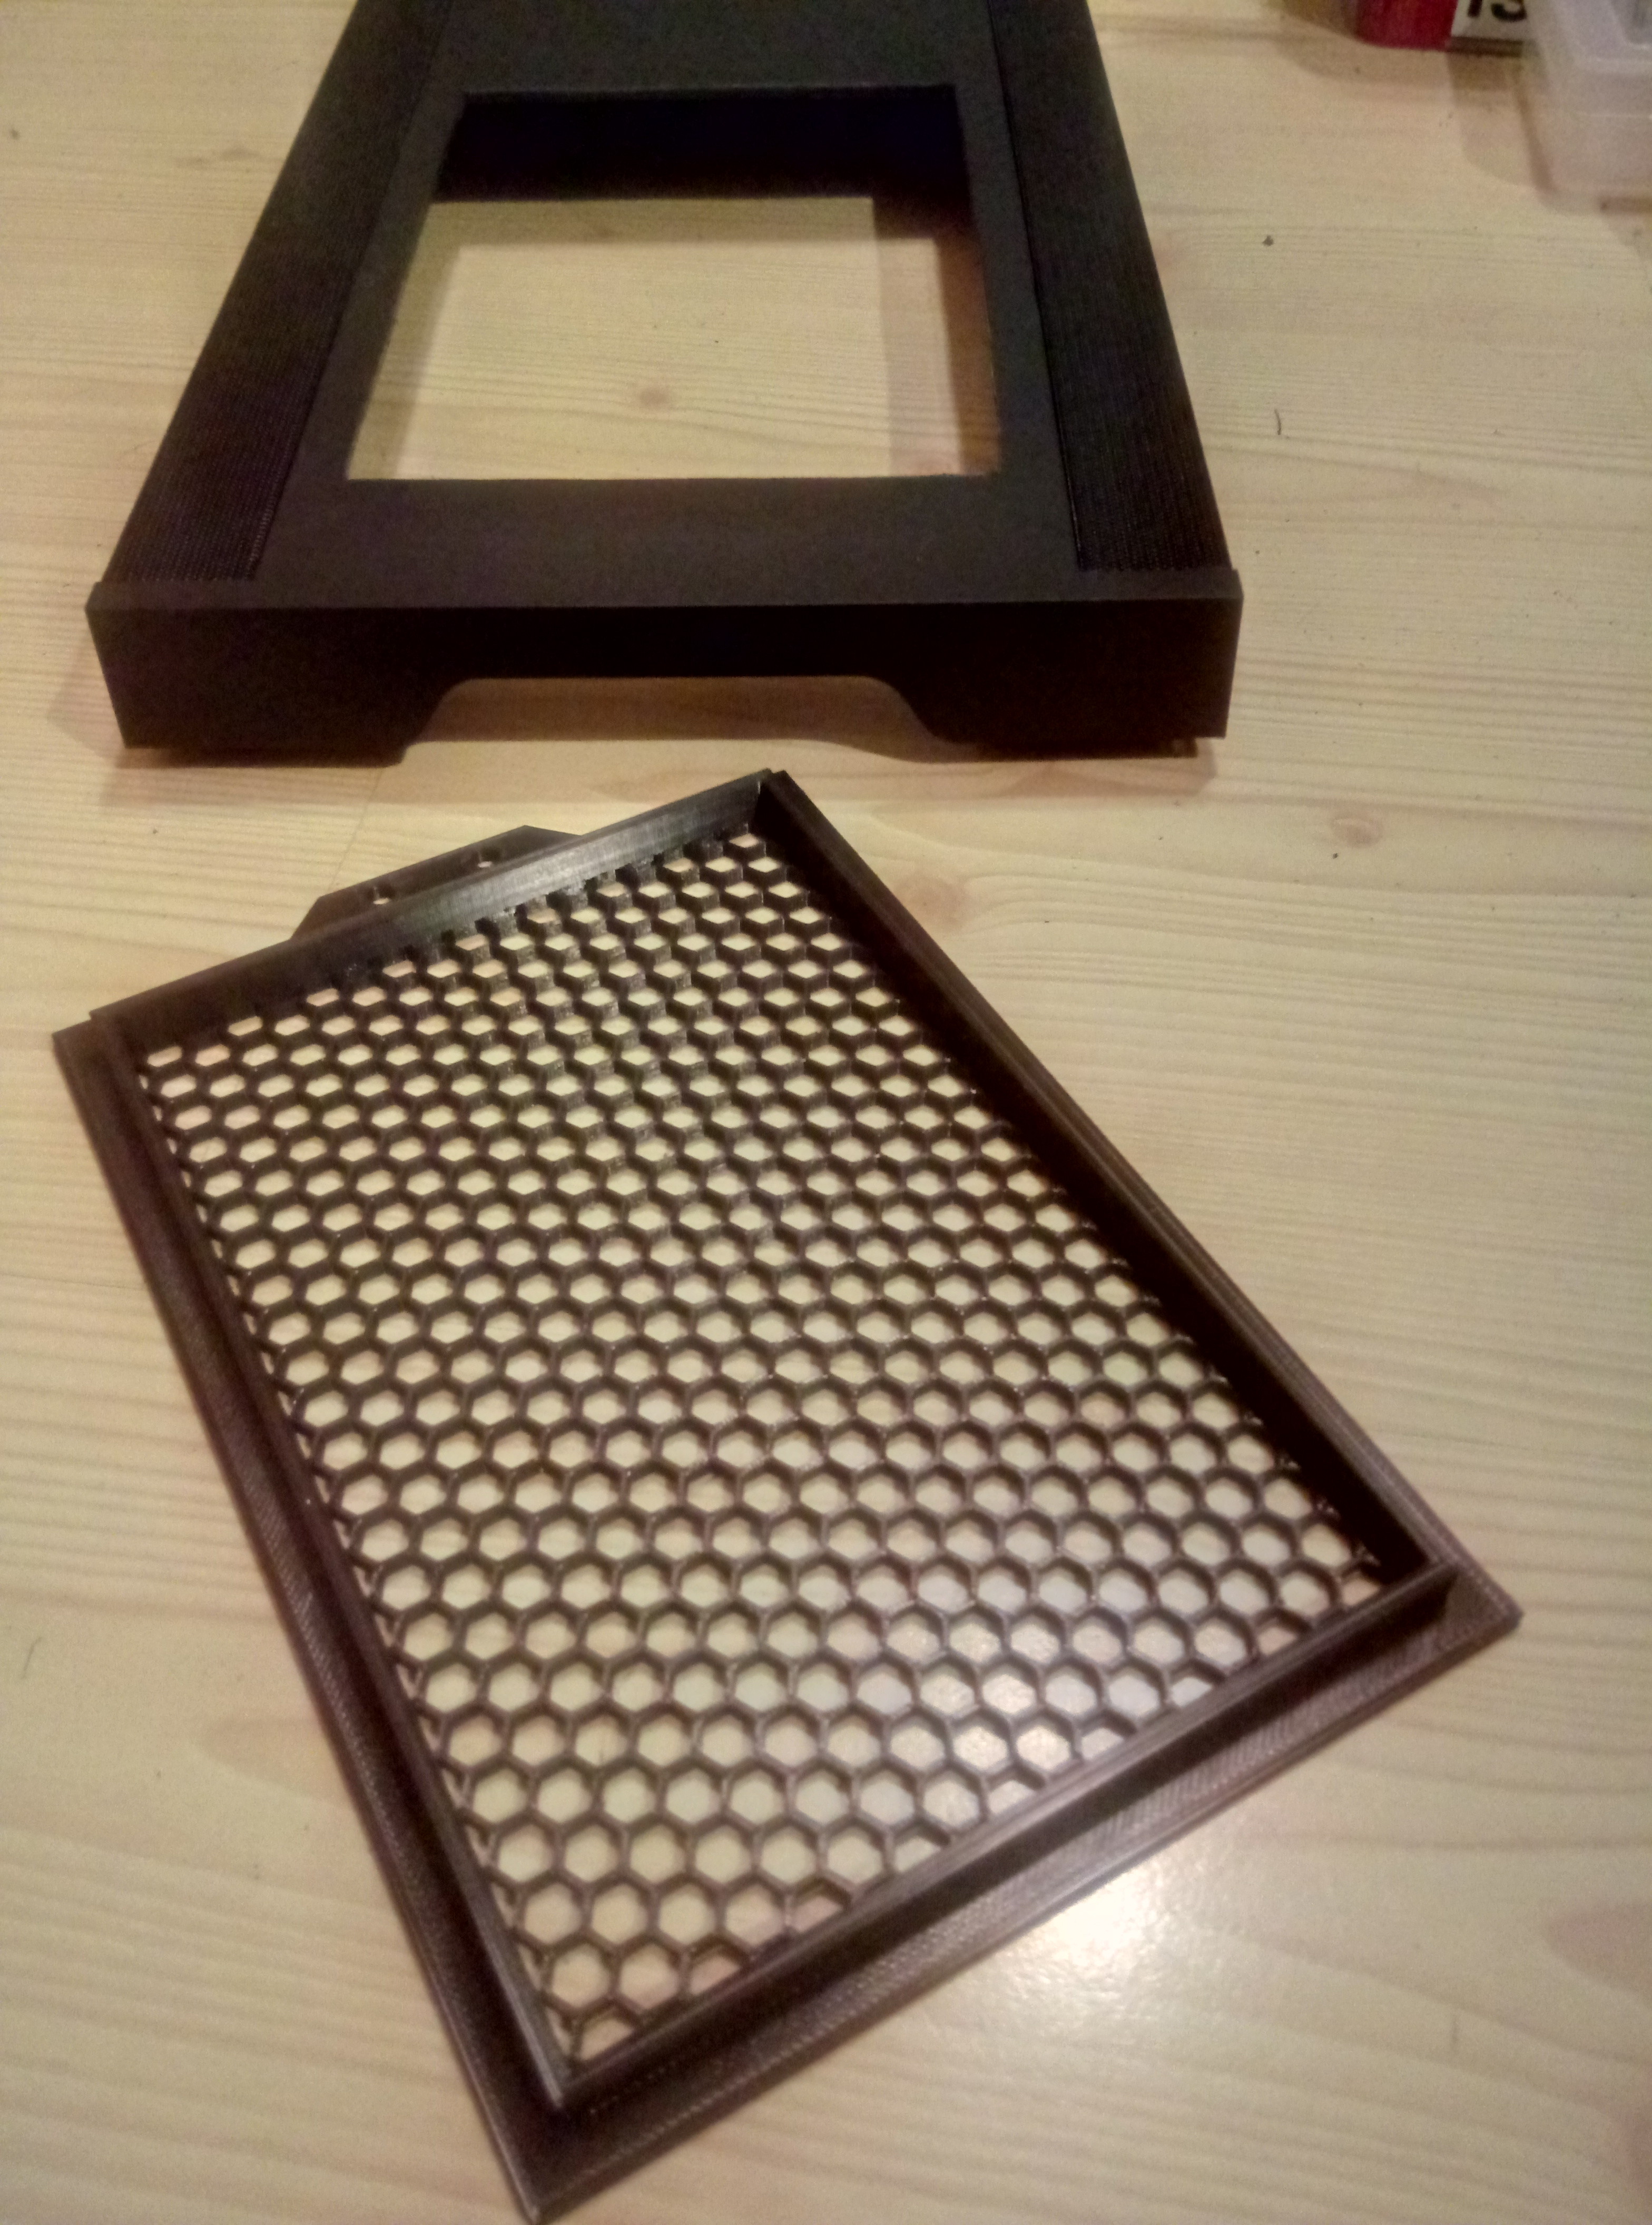
They new fan grill . I hope my HOTAS parts will also print that perfect. Seems like repairing the printer and doing a complete new adjustment was a good thing. It is printing so smooth and error free now. And this is only 2.5mm layer height. For the HOTAS I will use 0.1mm. On top of the grill the hdd and power leds will be integrated. I hate those blue micro leds inside the power button. All my cases have orange for hdd, red for power and green for drives. I m a perfectionist in such things . Tomorrow the grill will also painted grey, so that the big cases fit the look of all my other systems.
-
Universal military aircraft homecockpit project
Viper1970 replied to Viper1970's topic in Home Cockpits
I think I have posted the buttons I use in the thread, but I m not sure. They aren t top notch, but do the job. For the hats I use one from thingiverse, that I will mod a little bit. I print a 2mm hole inside the stamp, drill it out a bit and put a 2mm steel nail without hat (cutted off) in the core. That prevents them from breaking and they feel a bit more "top notch" . I also tried those 5way china smartphone direction switches, but although they are small enough to fit nearly everywhere, they have one big drawback. They tend to let you accidentally activate the push function if you only want to use the direction switch. That is the reason I will print my hat mechanics again and use those china hats only if thete is no chance to fit a bigger part. -
Universal military aircraft homecockpit project
Viper1970 replied to Viper1970's topic in Home Cockpits
Does anybody has an already finished cyclic or collective from the guys who have my STL's? Must be arround 50 people now. Would be nice to share some pics of the results. I'm very curious to see some finished controls, cause I'm still far away to built my own at the moment. -
Universal military aircraft homecockpit project
Viper1970 replied to Viper1970's topic in Home Cockpits
Not easy to get simple, clean looking cases without features for disco light show today, which I really hate And if you get any, they are mostly for office computers, so you have to tune them a bit on your own. -
-
The right sound for working at the pit. And really loud, waking up the neighbours
-
Universal military aircraft homecockpit project
Viper1970 replied to Viper1970's topic in Home Cockpits
The bottom cases, changed the panel to the front and made conections for stacking And the upper computer cases for the command unit. Those are all cheap Aerocool 300 midi towers.
-
Universal military aircraft homecockpit project
Viper1970 replied to Viper1970's topic in Home Cockpits
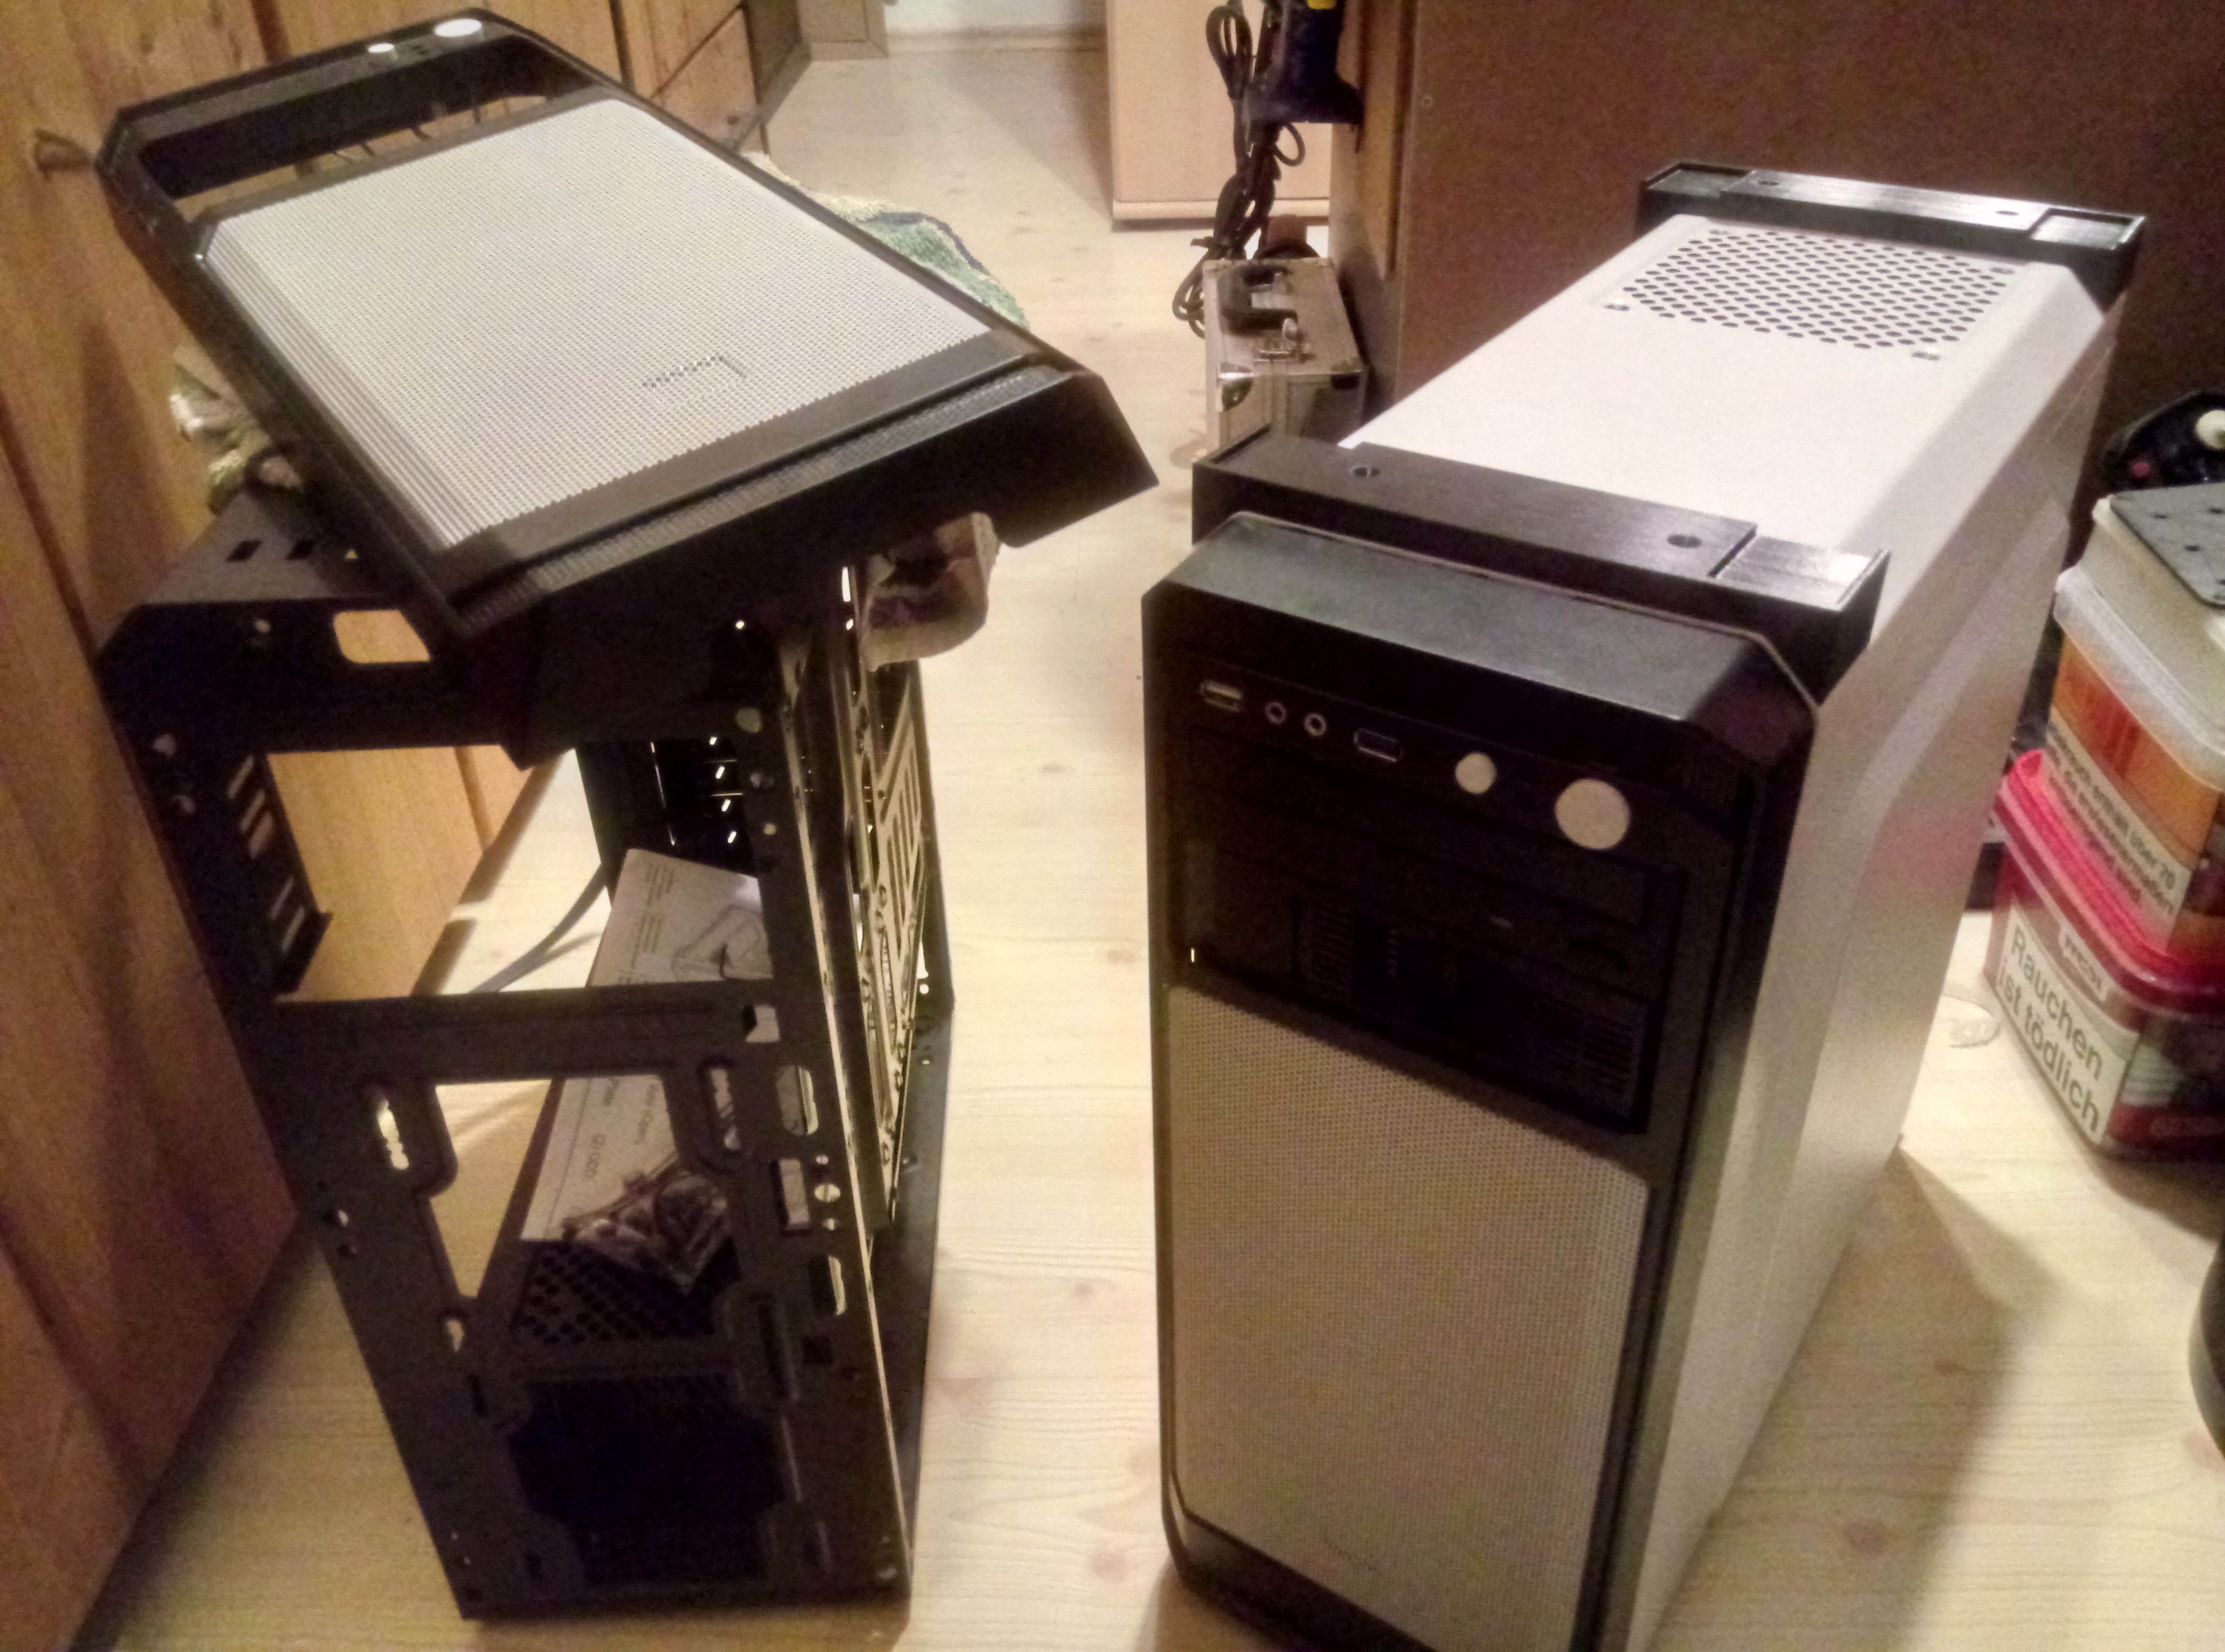
Still working on my computers . At the moment I'm reworking all the cases, so that even the retro hardware fits in some of them. I'm also changing some elements to "NATO" grey, so that they meet the rest of my "flight den's" look and the one of the command unit . Some parts must be spray painted, what isn't a lot of fun at the moment during this cold time. Fast spraying and instantly putting them in the warm flat, trying to do this without sticking on anything or making fingerprints at the parts. -
Zu 2 kommts darauf an wie lange es dauert. Die Hardware hat ja schon irgendwie ein Verfallsdatum . Wird ja schon von der nächsten Grafikkarten und CPU Generation geredet, obwohl diese kaum erhältlich war.
-
Universal military aircraft homecockpit project
Viper1970 replied to Viper1970's topic in Home Cockpits
It's always a problem with the paint work, especially here in Germany, cause our summers aren't very long and I have a lot to paint. If I'm not able to get it done, I have to wait until the next year. That's the reason I will now try it with the brush method. Maybe it's not so good looking but the parts are ready at least. Sometimes you have to make a compromise, even if you aren't happy with it. Spray painting looks a lot better as doing the same with a brush. -
Universal military aircraft homecockpit project
Viper1970 replied to Viper1970's topic in Home Cockpits
And a stick I made the old fashioned way out of an TM XFighter long ago, before I owned a 3D printer. It must also be finished and will be used for the UH-1N (in another sim) and the Blackhawk. Still a lot to change and of course also some sanding and painting to do
-
Universal military aircraft homecockpit project
Viper1970 replied to Viper1970's topic in Home Cockpits
The first mechanical parts of the center stick base, directly after printing
-
Universal military aircraft homecockpit project
Viper1970 replied to Viper1970's topic in Home Cockpits
So, as I could not spray paint my parts during the winter time at the balcony, I have bought some car paint for the jet gun and will now test if it's possible to do the paintwork with brushes and a lot of patience ( one thing I actually really don't have ) also. I will test this at my Hori HOTAS first, cause I don't want to mess the cockpit parts. I hope the results are somewhat feasible, cause at the moment I always had to wait until the first warm days before I can start painting parts. We live in a flat and also my workshop is in the flat. So there is sadly no hobby-basement to do such things and spray painting inside a flat isn't the best idea . Just did a roughly sanding and its still ugly as hell . All has to be disassembled again for further sanding... P.S: This HOTAS is only for the command unit and for "retro flying" my old beloved sims like eg. the Janes series, but it will be fully programmable. I wanted something which isn't a "replica" at my other sim place and I always liked the appearance of the Hori HOTAS, so I decided to mod a used one I was able to get for low at ebay.
-
Universal military aircraft homecockpit project
Viper1970 replied to Viper1970's topic in Home Cockpits
Thanks for this! I will take a look at Onshape. So sad that TC does such a sh... At the other hand it's so intuitiv and simple to use, that even an 3D-amateur like me can make really amazing parts. That's the reason I still used it although I wanted to change to something more professional since a while now. But most of the alternatives are to complex and you have to learn endless hours before even thinking of making such parts as I made with TC now. That was always the reason I stayed with TC. I'm a very impatient guy and want to have quick results . -
Universal military aircraft homecockpit project
Viper1970 replied to Viper1970's topic in Home Cockpits
Just discovered that TinkerCAD is changing dimensions after a while by itself. Many of my created parts have changed slightly in dimensions. It's only about a few hundredth, but that's sometimes enough for fittings not to fit anymore . Eg. shapes like axis I created with 10.0x10.0mm have now 10.03x10.06mm and something like this. What the f.... is wrong in TC? I never opened those projects again or have changed anything! I think now it's really time to look for something alternative to TC. I really liked it's simplicity, but changing dimensions by itself is an absolute nogo! -
Universal military aircraft homecockpit project
Viper1970 replied to Viper1970's topic in Home Cockpits
Still fiddle arround with my computers to be able to stack them. I had to print some connectors to be sure that they will stay in place when stacked. My printer had also a cable break after one year of not using it , so I had to repair it before printing. It looks like all is working how it should again, cause the connectors where printed fine, and so I decided to start printing the first parts for my pit project also. It will be a long run, cause there are many, many parts to print. I will start with the parts for my centerstick base at first. During the print of the cockpit parts I will do the electronics and the painting of the Hori 3 HOTAS which I made for my Command Unit. It has a lot of extra buttons and switches in the throttle base, and a mechanical idle/AB detend. The stick is also modded with some extra functions and a paddle lever. I will use one Pokeys and one Codemercs card for the electronics to be able to control all the functions and the slew in the throttle as a mouse or as a ministick. There is also a UFC and some small panels which I already printed, that will also get one Pokeys card. The end result should be a small "cockpit" with a foldaway panel that is fully compatible from Windows 98 up to Windows XP at which I can fly my retro sims again. The other use of my c"command unit" is tank and naval sims under modern OS from W7 up to W10. Besides this it will be my workstation in future so I don't have to use the HTPC in the living room anymore . -
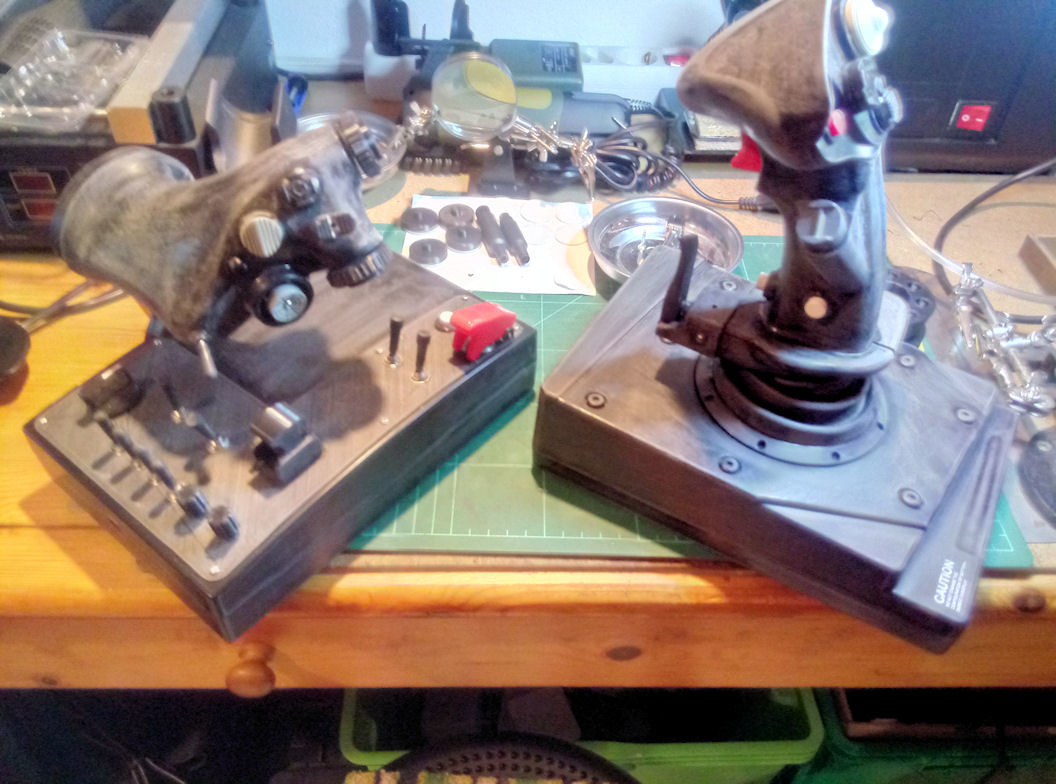
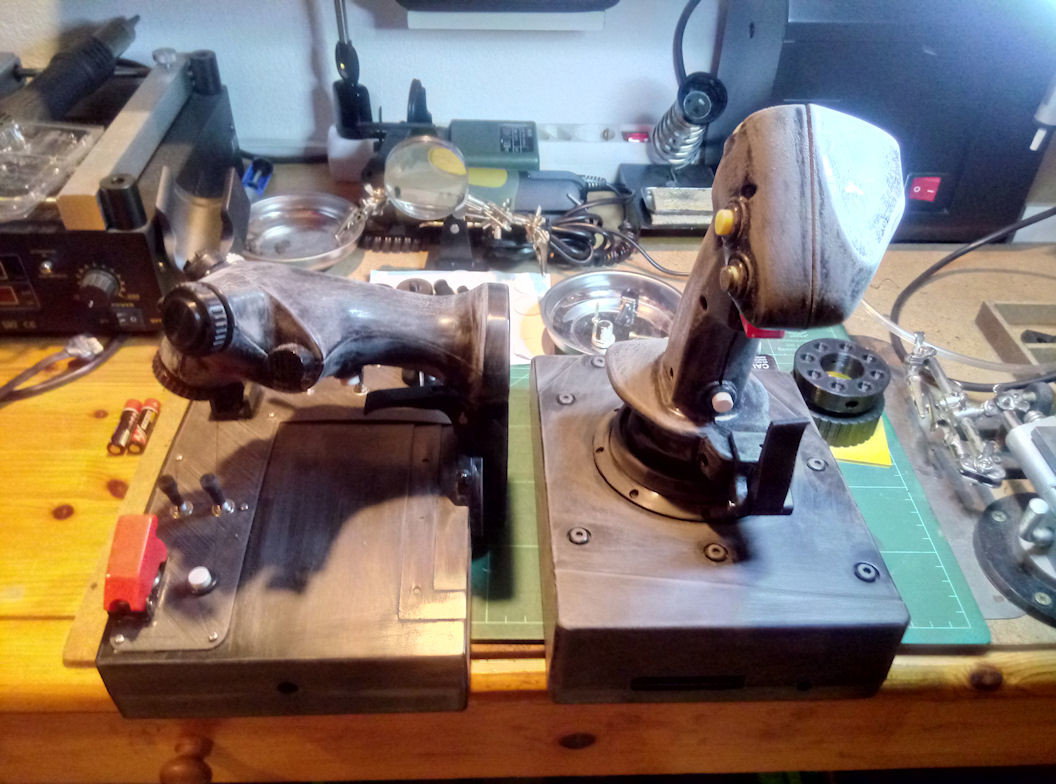
Looks like your grip is nearly perfect
-
If you own the TM hornet grip, this picture of the real stick grip and the throttle grip side by side may help a little bit for the roughly dimensions. I have also searched for some dimensions or blueprints, but wasn't able to find any.
-
Das ist der Grund, warum ich beides umsetzen will. VR, aber auch ein kleines Pit (und ja es ist nicht scale, sondern nur eine große Buttonbox ). VR ist sicher toll und mein Rechner auch einigermaßen ausreichend, aber ich möchte trotzdem auch noch die Möglichkeit haben ganz normal am Bildschirm mit Track IR zu fliegen. Ich finde das manchmal einfach "gemütlicher". Bin wahrscheinlich schon ein zu alter Sack . VR ab und an, aber eben nicht immer, das wird mir einfach zu viel.