Search the Community
Showing results for tags 'thrustmaster'.
-
A few days ago my Warthog throttle died like so many others and I just wanted to post a quick fix that just might get you going again until you can sort it out with an official board replacement/repair. This worked for me and I have not seen anybody else recover their throttle in any posts I have read. I found that by reducing the 5V line on the USB cable to less than 4.5V, the throttle came back to life. I did this by simply putting a Non powered USB hub between the throttle and PC, you could also add some other items onto the hub to load it down a bit more. Most people seem to try connecting direct to system board or another powered USB hub thinking it might be a low voltage issue causing the throttle to fail, which is the logical way to think. Another alternative would be to supply your own external power to the USB line to the throttle only that can be adjusted to less than 4.5V, isolating the power line from the PC/Hub, but only do this if you are confident in what you are doing. If you are faced with a dead throttle or stick give it a try, if you have had a failed firmware update you will have to do the firmware update again and get the last green verification tick before it will work properly. You can read my full ordeal with this issue here: https://forums.eagle.ru/forum/english/dcs-world-topics/input-and-output/thrustmaster-aa/64402-post-motherboard-specs-of-bricked-tm-warthogs-here-please?p=7130525#post7130525 Cheers Tri.
-
I have had my Viper TQS mission pack for about half a year and I am very happy with it. However one minor detail that slightly bothers me is that the throttle has a small amount of play in it's range of travel. This happens when releasing the throttle, the grip tends to get dragged down in the direction of the gravity. It's not that big of a problem but it still changes the input by couple of values. Incrasing the friction using the allen key doesn't help. I want to ask if this a thing with all throttles or is it just me having something loose? Thanks for any tips. 20250914_182722.mp4
-
UPDATE: Version 2.72 is available. The new installer now points to the new webhost. Special thanks go out to the Virtual Armed Forces for hosting CTS on their website. Hosting by the VAF is a significant improvement in uninterrupted service and consistency. Please check out the Virtual Armed Forces for an outstanding PvE multiplayer experience! You can also check out the VAF in the Air Combat Sim podcast #42. If you don't wish to do a fresh install, you can replace the top line of your CTS\DB\version.txt with the following entry: http://cts.virtualarmedforces.com/CTS/DCS/CTSversion.txt You may also download the new installer, or simply download and replace the updated version.txt below (note, this does not work for the CTS Legacy version; you'll need the installer for that). Special thanks to Tercio Sampaio for developing the GUI. If you wish to donate for this program, please send any donations to Fisher House, a charity that supports wounded veterans and their families. Exception: if you want me to program for a module or hardware I don't have, please PM me and we can discuss it. DCS World TARGET Script for Thrustmaster Cougar or Warthog and MFDs is now available. Download it from: Eagle Dynamics User Files Box.com This file is an installer which will install and launch the updater, which will then download the latest version of the script. You can also periodically run the updater to keep your script up to date. This script for the HOTAS Cougar/Warthog and Cougar MFDs includes dedicated profiles for the following aircraft: A-10C Warthog AV-8B N/A Harrier II AH-64D Apache Ka-50 Black Shark P-47D Thunderbolt P-51D Mustang UH-1H Huey Mi-8 Hip Mi-24P Hind F-86 Sabre Fw-190A8/D9 Bf-109K-4 Kurfürst MiG-21bis Fishbed MiG-15bis M-2000C SA-342 Gazelle L-39 Albatross F-5E Tiger II Spitfire LF Mk. IX Mosquito FB Mk. VI AJS-37 Viggen C-101 F-14 Tomcat F-15E Strike Eagle F-16C Viper JF-17 Thunder F/A-18C Hornet MiG-19 Farmer I-16 Ishak A-4E Skyhawk T-45 Goshawk Combined Arms Flaming Cliffs 3 The script is fully implemented with both code and custom keyboard and joystick LUA files. The included "Standard DirectX" profile can me used to create a versatile profile for anything else. This script uses TARGET, so you need to install it (though Cougar users can leave Foxy where it is). I also recommend the latest MFD Drivers, as I have found fewer profile crashes with these enabled. The script offers the following features: Graphical User Interface (GUI) to save your settings and auto-generate script files. Both HOTAS Cougar and Warthog Compatibility with F/A-18 Grip Support for selected modules. All documentation (except for the Setup Guide) is in HTML with context-sensitive help in the GUI. CommState routine allows for the selection of F1 through F12 keys with Hats 2-4 while the MIC switch is pressed Hot-selectable “TriggerZoom” allows you to zoom into your target or HUD when depressing the first trigger stage LED indications for airbrake, landing gear, TriggerZoom, CommState, and Teamspeak3 PTT Compatible with TouchControl (formerly TouchIR), VAICOM Pro, DCS Simpleradio Standalone, and all major VoIP solutions Optimized for TrackIR, but compatible VR or with Hat1 as POV Individual HOTAS profiles are mapped as closely to their real world counterparts as practical Flaming Cliffs 3 (FC3) HOTAS mappings correlate to the A-10C (attack aircraft) or F-16C (fighters) as closely as practical FC3 Context Sensitive Autopilot routine that reverts to last used mode on toggle A-10C Profile includes direct entry for CDU, CMSP, and UFC Ka-50 Profile allows direct entry for ABRIS (RMFD) and Rubicon Datapad Ability to automatically pause TrackIR while at the Door Gunner Station (UH-1) Context sensitive communications menus based on crew station (framework in place for DCS implementation) TARGET based Central Position Trimmer Mode that greatly improves upon the default trimmers when not using force feedback. Analog and digital differential braking routines, including paddle braking and nosewheel steering. Kneeboard mapping for all aircraft. NVGs for all capable aircraft, including "bonus" mapping for the A-10A, Su-25, Su-25T, and F-86 (H/T Zaelu). AWACS Mode for LotATC and SRS users. Simplified hot-selection of aircraft allows for potentially thousands of aircraft and variants in this script, along with audible feedback of aircraft selected. Screenshots are in the following post. I look forward to your feedback; any information that will help me improve this profile is greatly appreciated. To this end, there is now a public bugtracker for CTS. See the HTML documentation for instructions on how to submit a bug report or feature request. version.txt
- 2263 replies
-
- 9
-

-

-
- hotas
- thrustmaster
- (and 3 more)
-
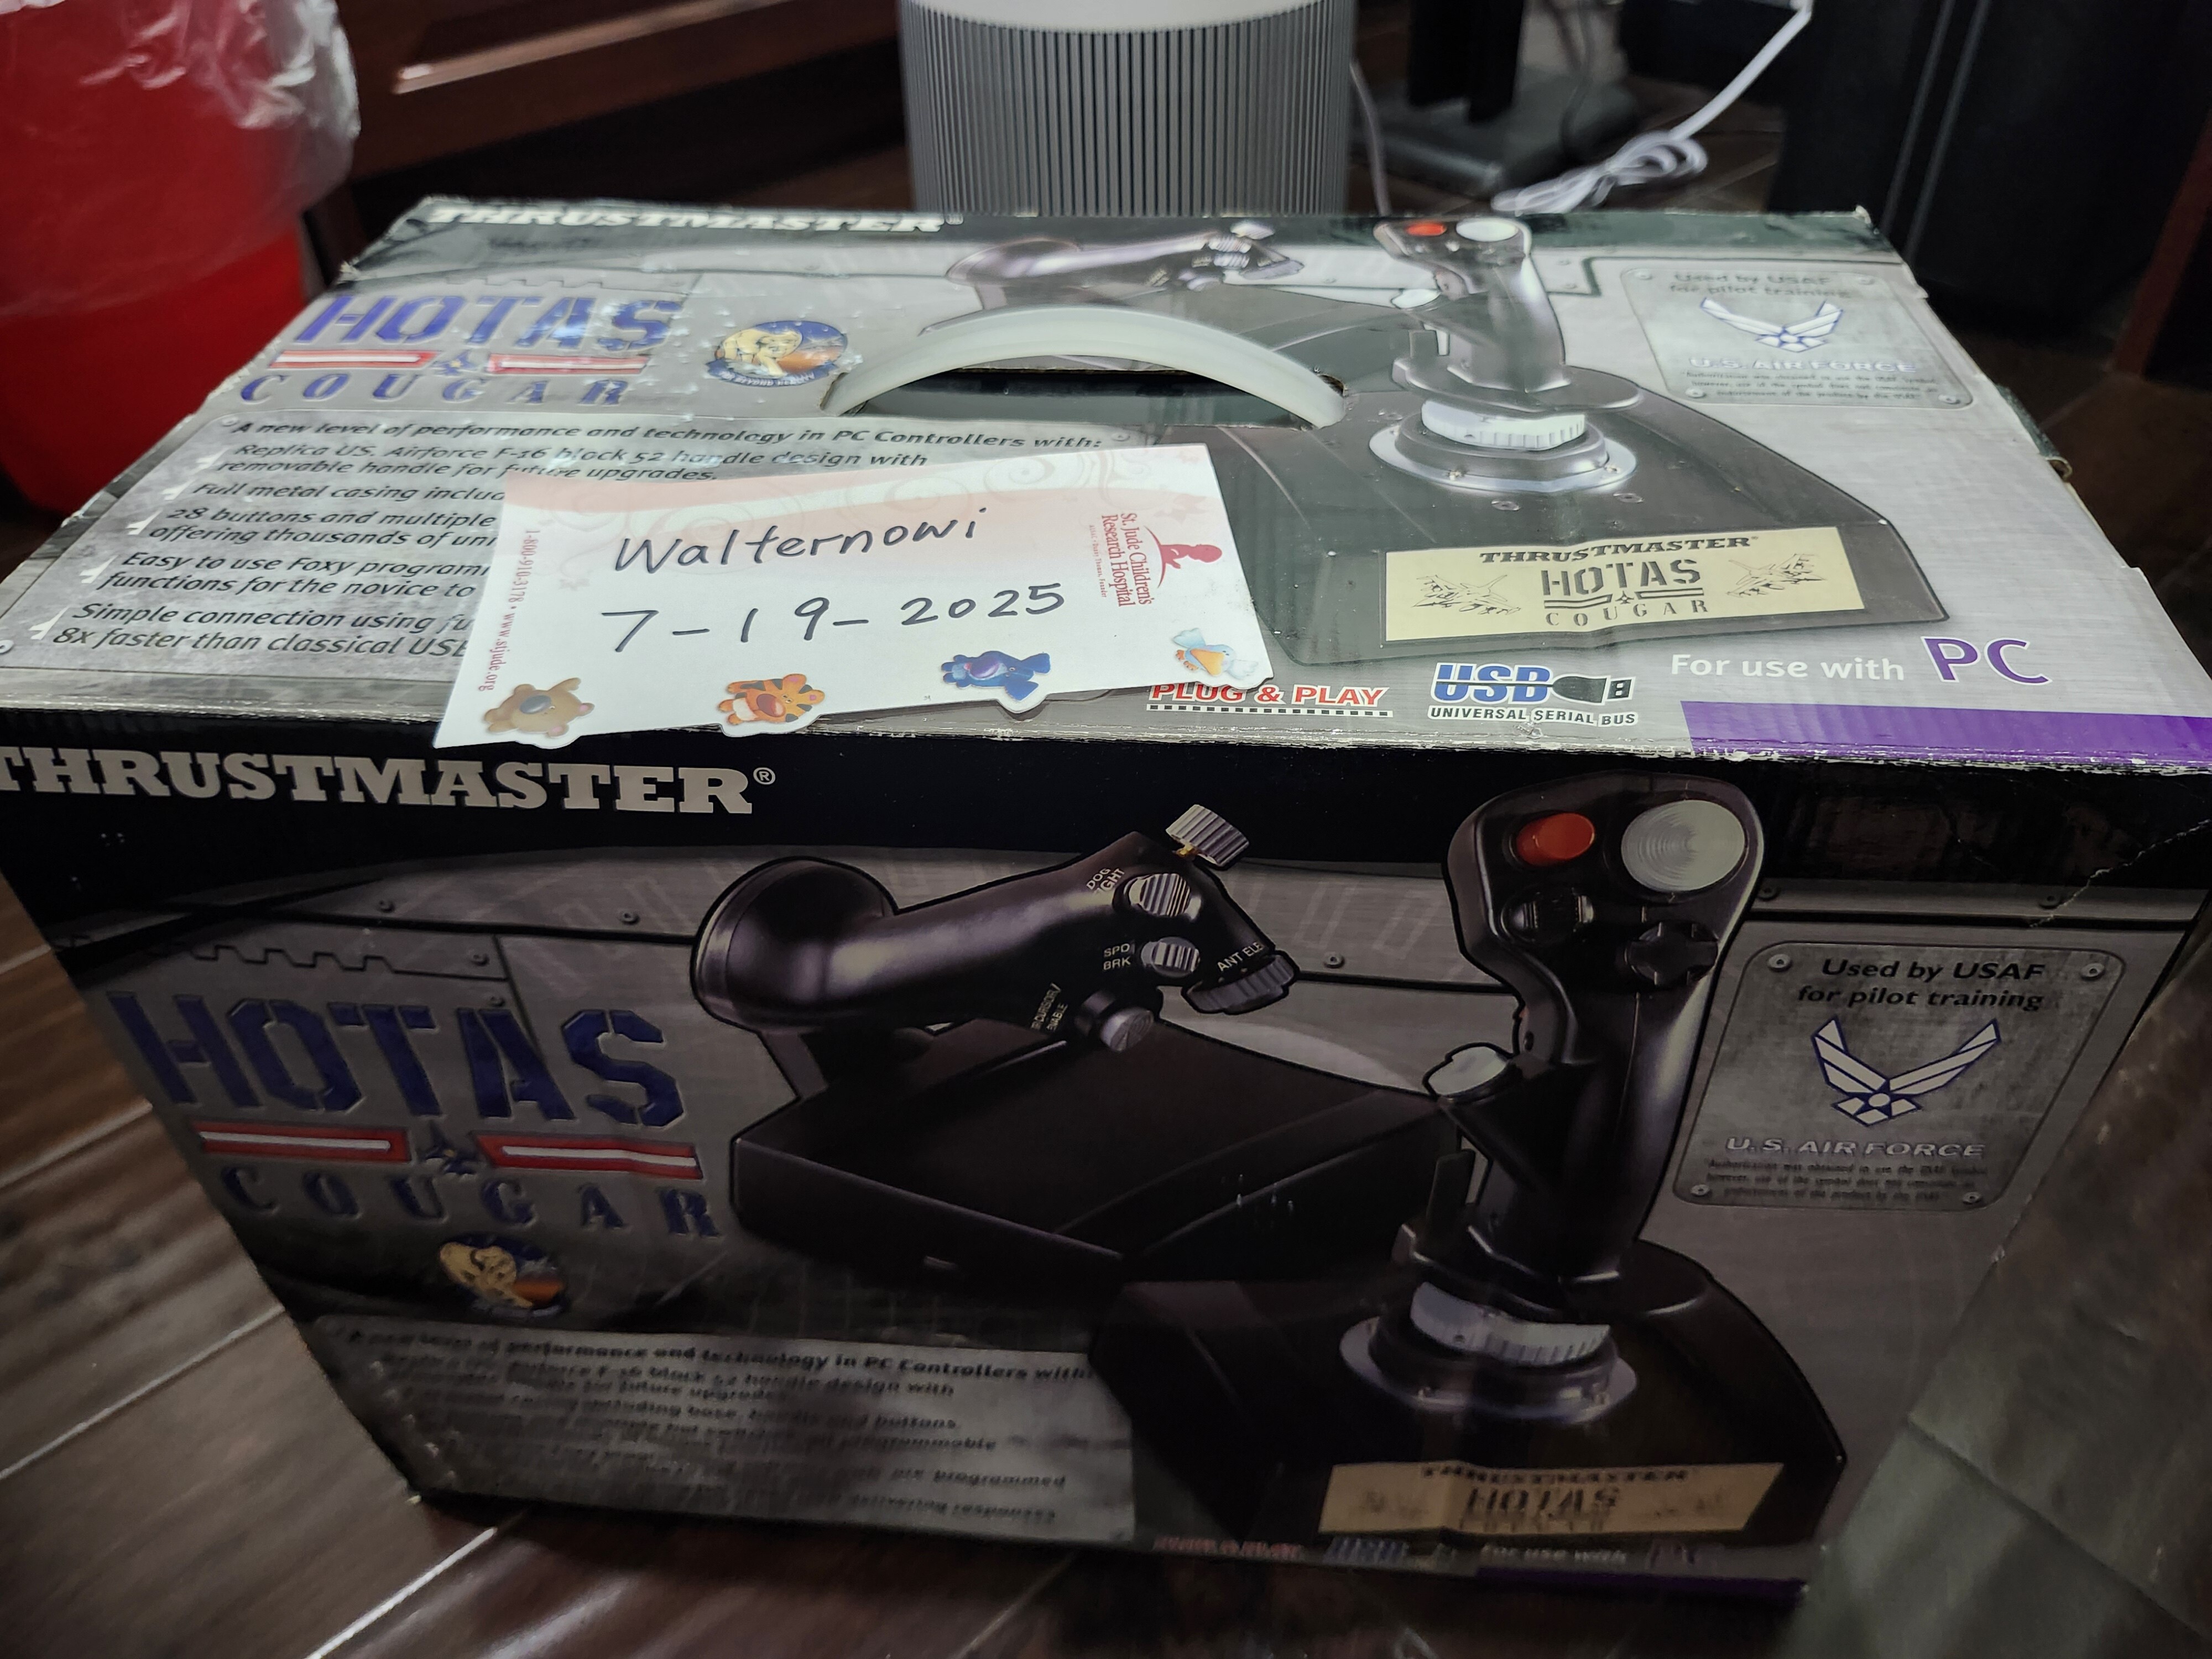
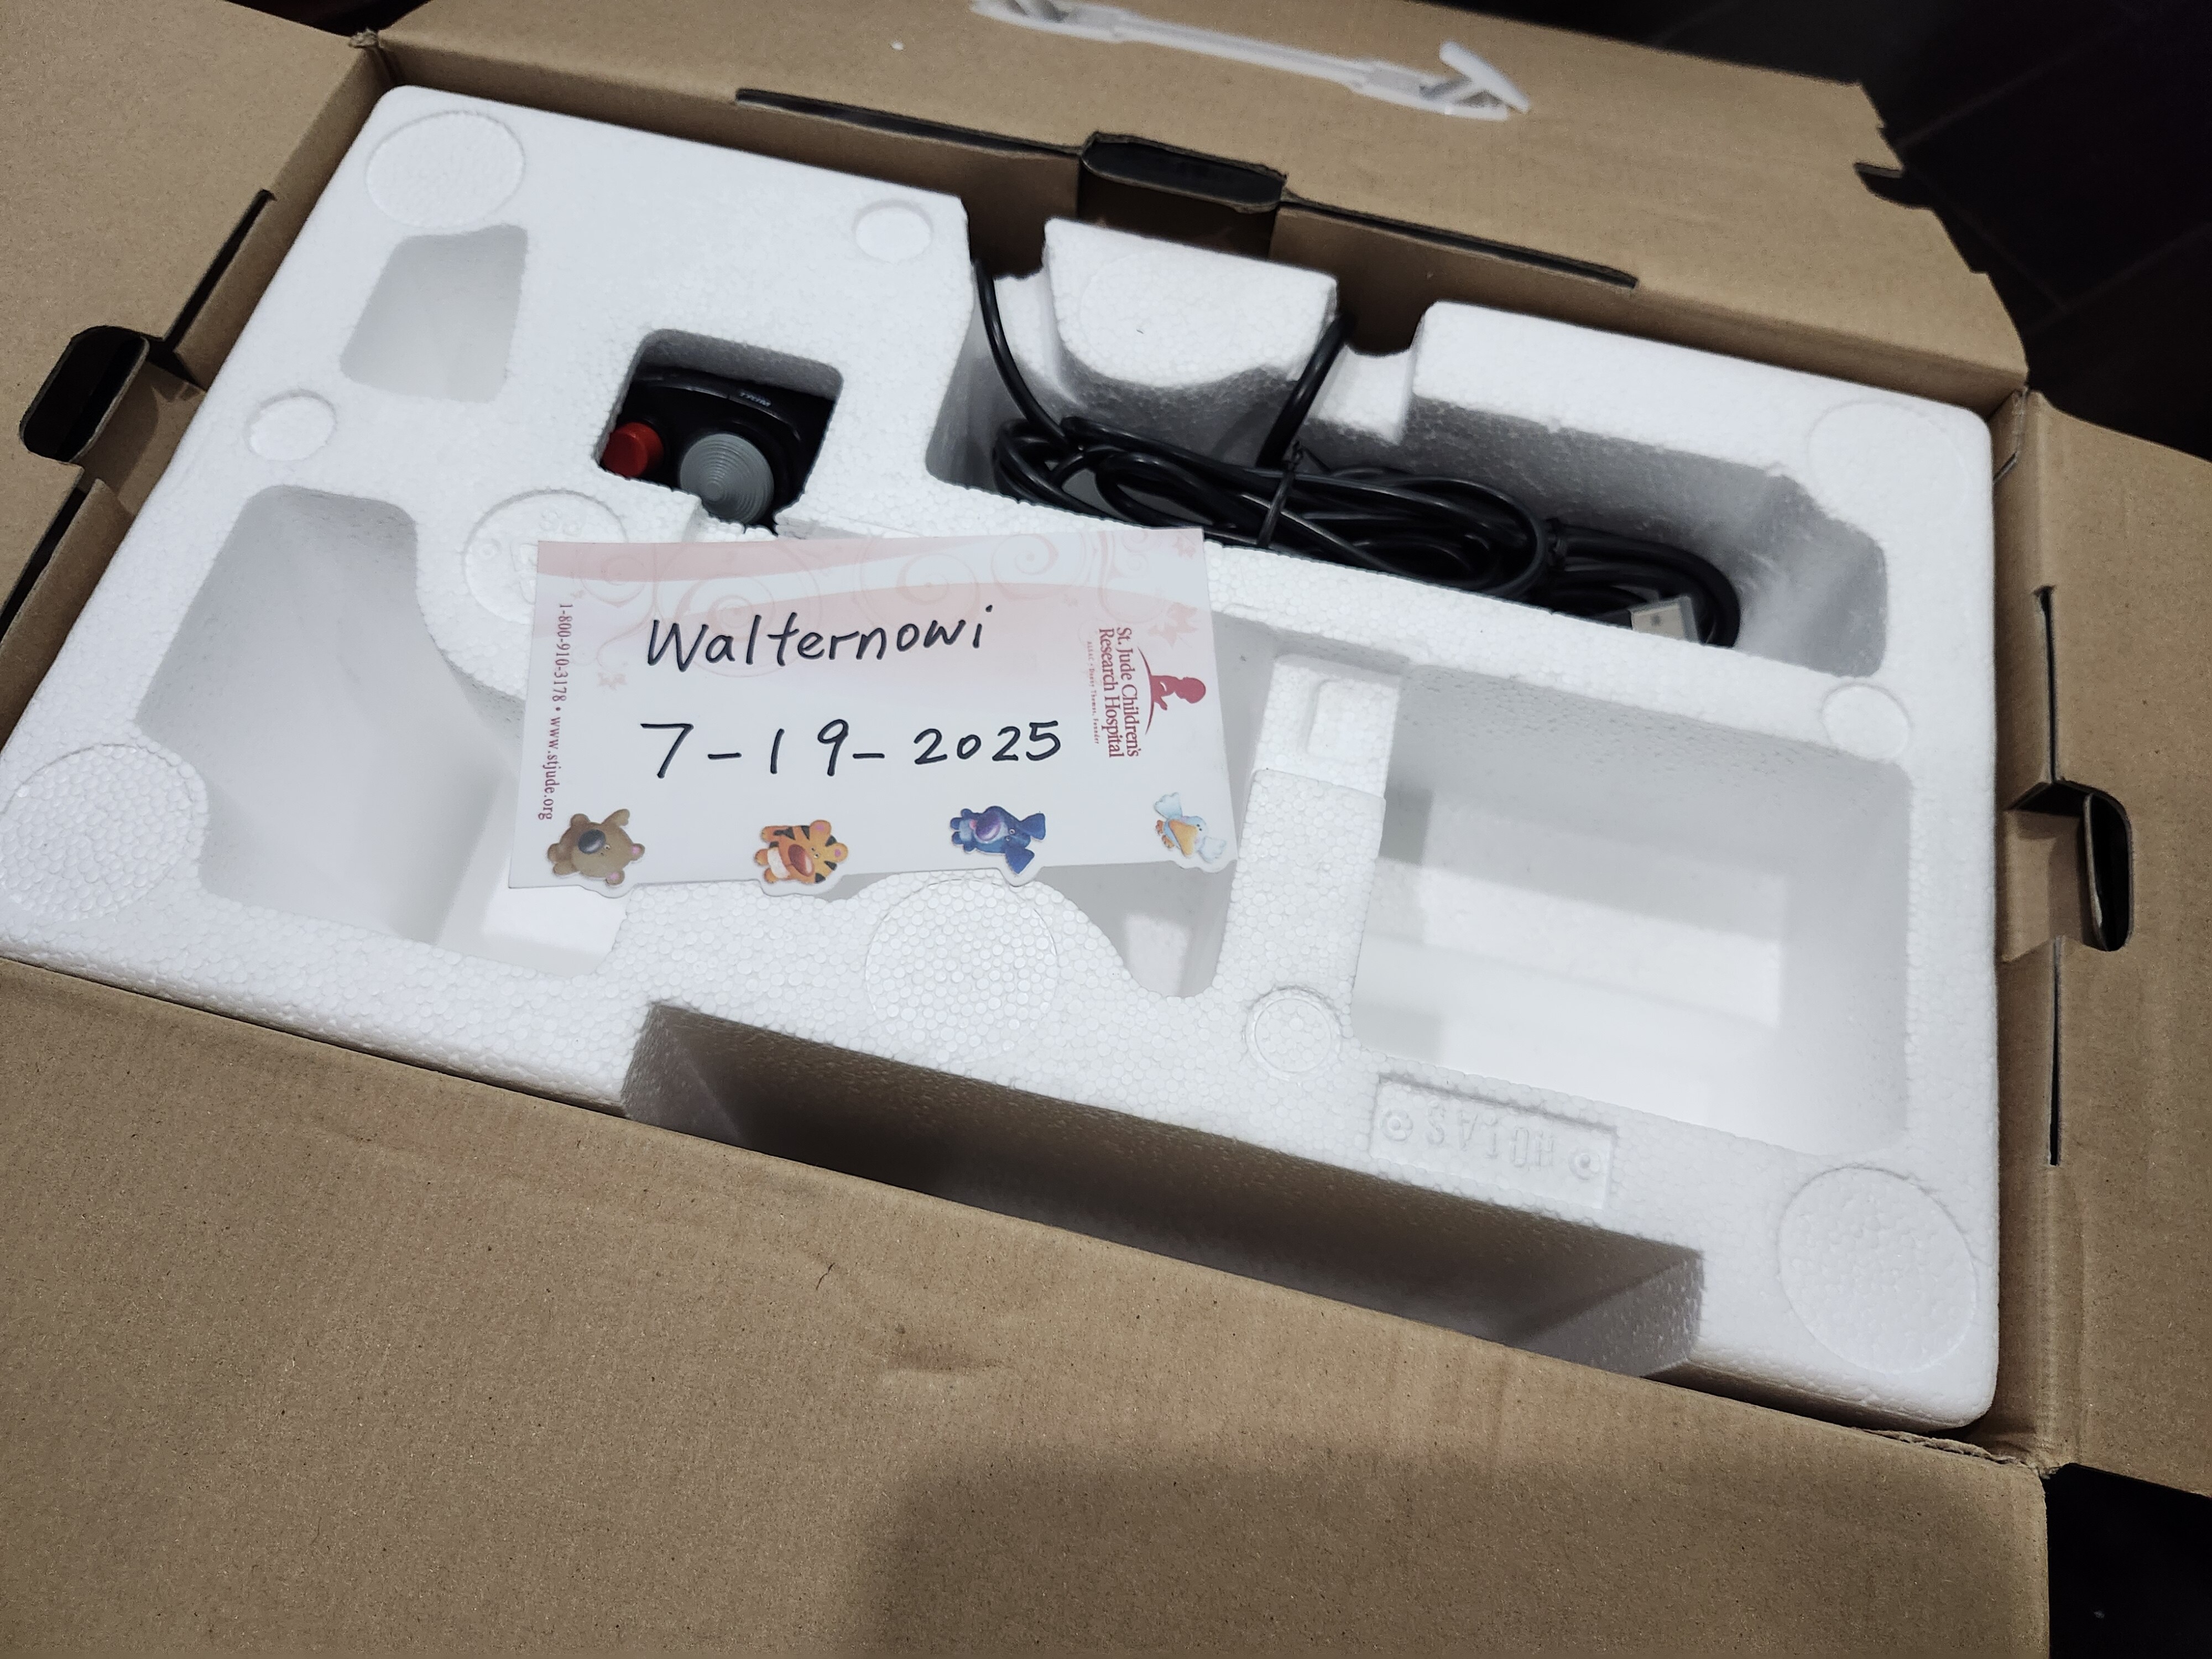
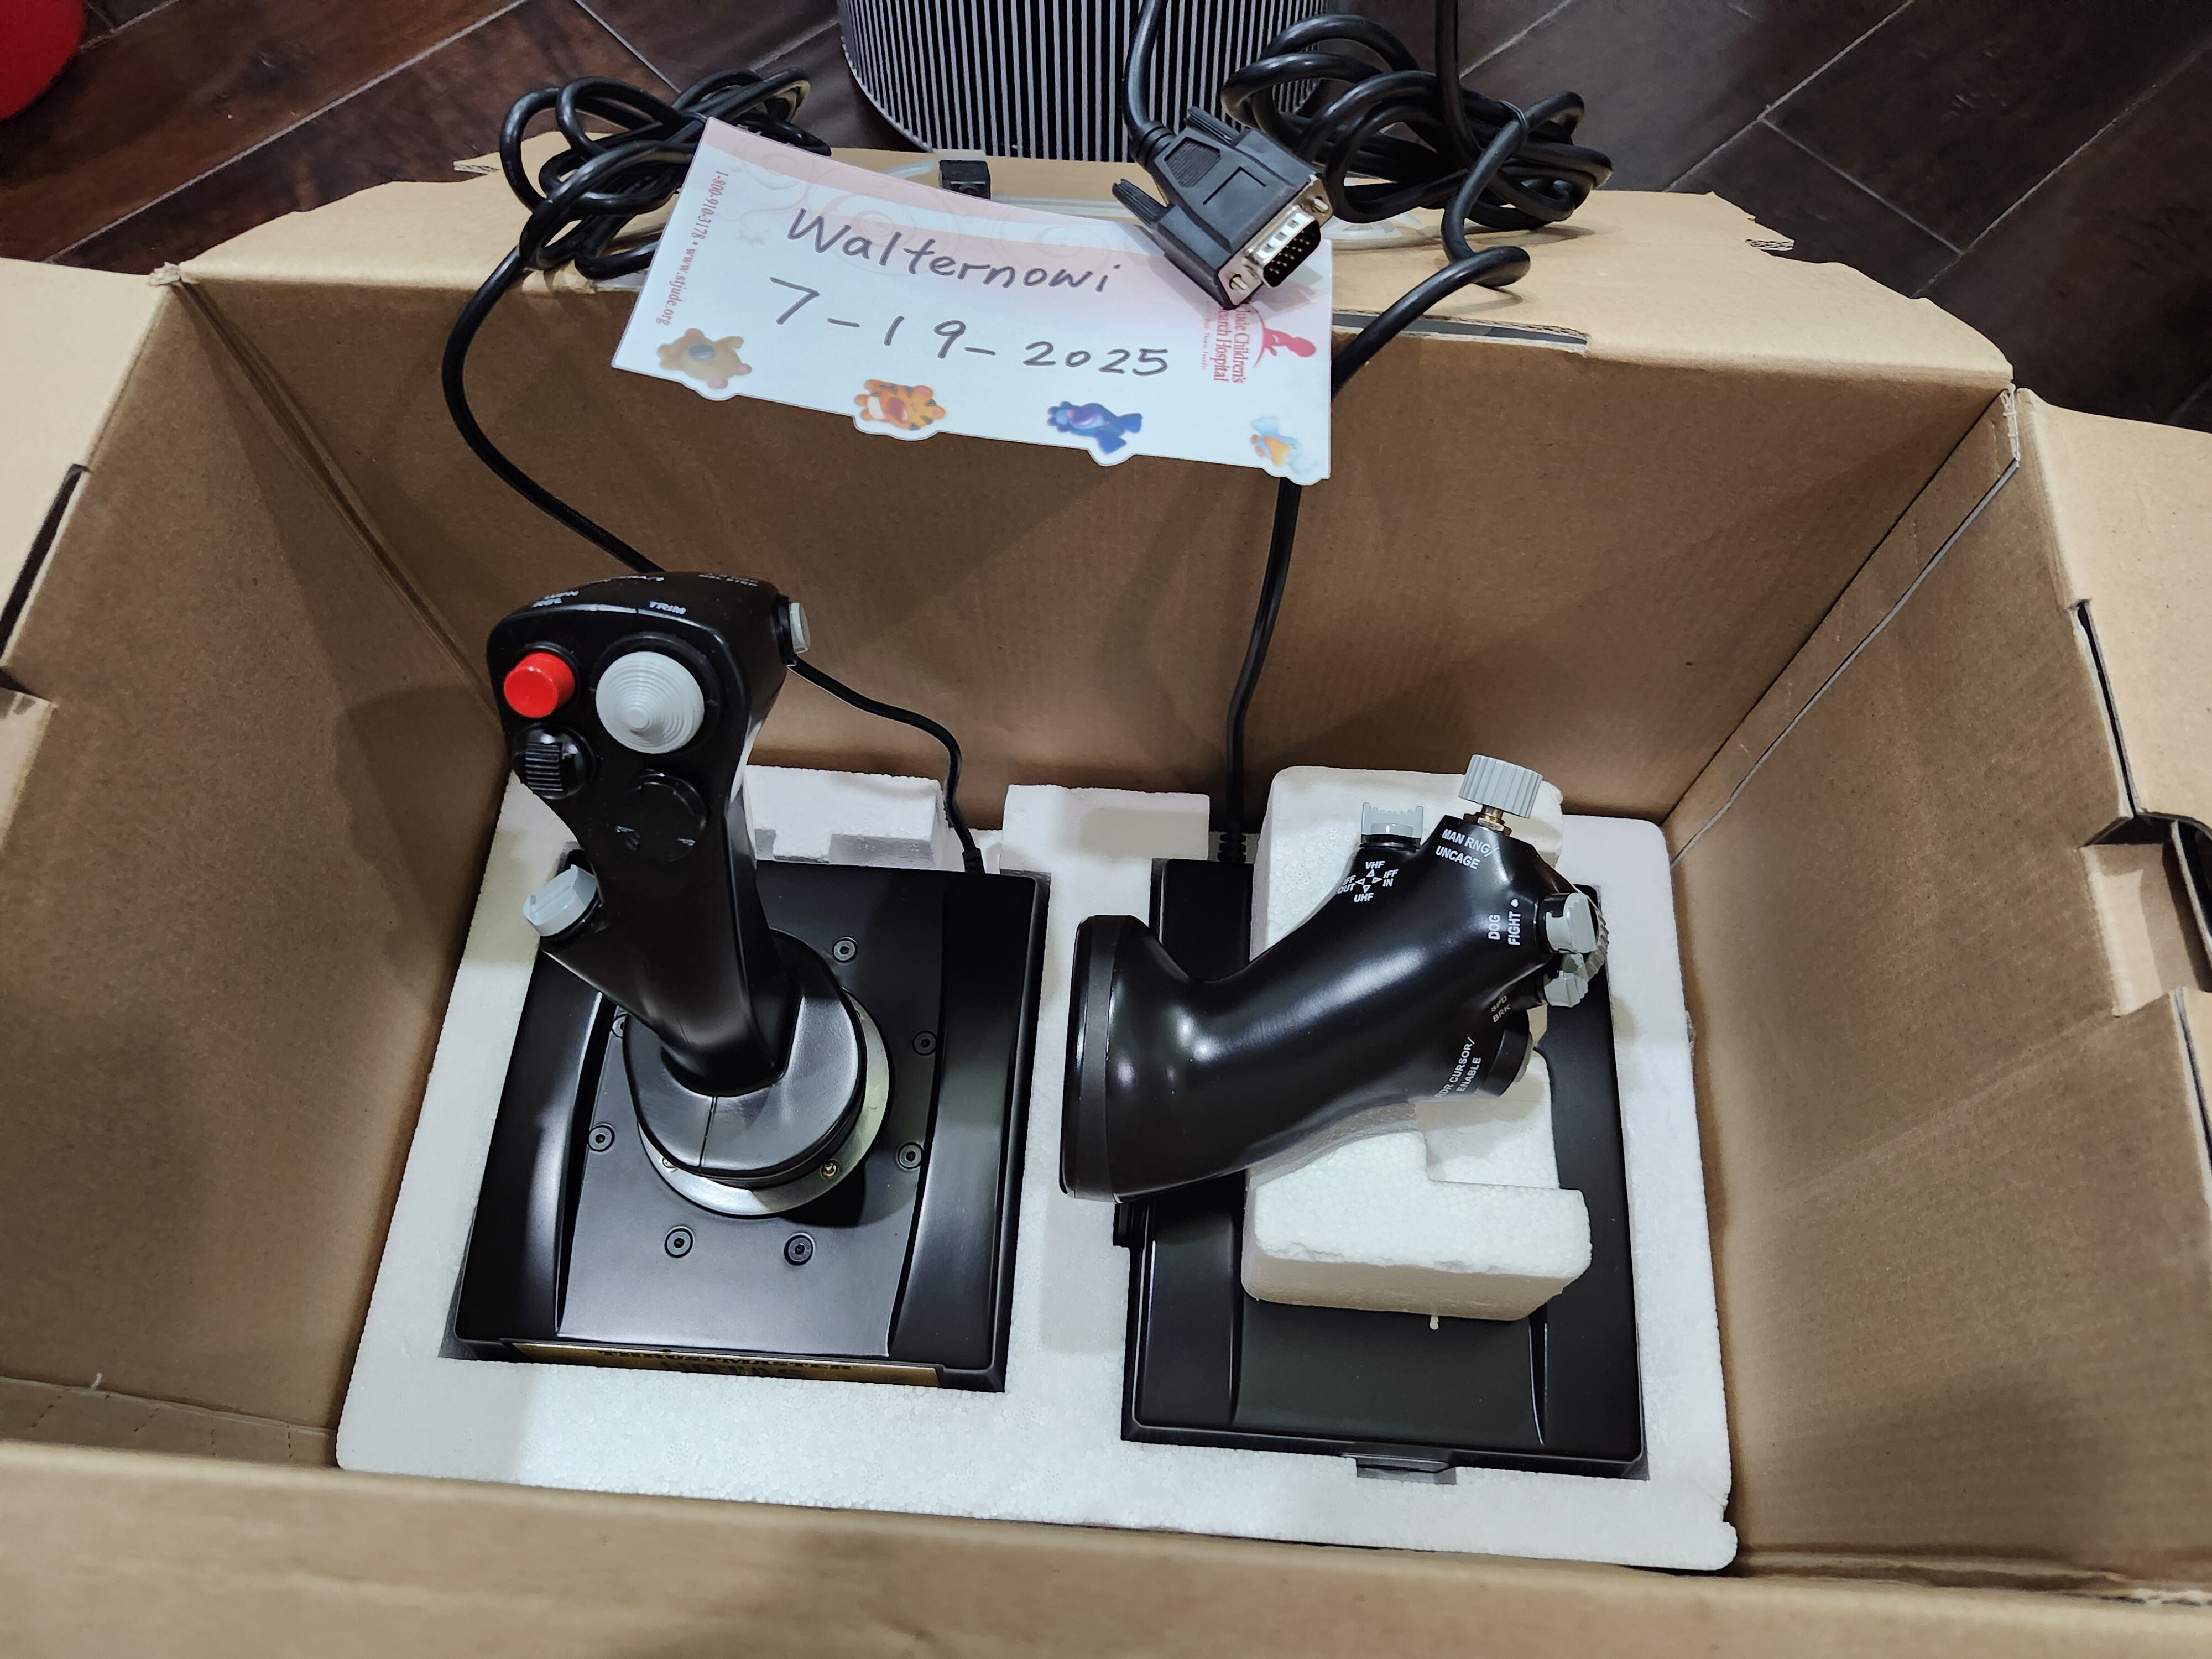
For sale is a brand new Thrustmaster HOTAS Cougar I bought years ago. My original intention was to mod it, but never get the time to do it. Item is in its original package. I am located in California, US Price is $190 + Shipping, o.b.o. My Heatware

-
Hey guys, After some time the analog pots of my very nice Thrustmaster Cougar started putting out erratic values and were spiking all over the place. These pots seem really cheap and even if there were still replacement parts from TM available, in my eyes it would not make much sense to replace them with the same low quality parts. I have been tinkering with my idea of contactless sensors for the Cougar now for around a year and I think I am finally satisfied with what I got. These sensors are plug and play, fully sealed, make use of a ball bearing on the axle and use a N52 neodymium magnet for contactless angular measurement. The PCBs are only 14 x 20 mm (0.55 x 0.78 in) and were quite the hassle to make all the necessary ICs and SMD parts fit in. The housing is a two part SLS 3D print from Shapeways, which is a very tough material. I use it for all sorts of mechanical parts. (Here you can find development pictures: http://simhq.com/forum/ubbthreads.ph...er#Post4419858) These sensors in reality are not hall sensors, but instead use next gen magnetoresistive sensors which are heavily used in the automotive industry and have basically replaced hall sensors there. The main advantages are higher sensitivity and actual angular measurement instead of only measuring the magnetic flux (as hall sensors do). The same type of sensor is used eg in Baur BRD devices in form of MagRez or RAMS. These devices are known for their amazing precision and I wanted to make use of the same sensor in the Cougar. Installation is as easy as stick it in, screw it tight, plug it in and done. You can calibrate them as you normally would via the Hotas Cougar Control Panel and the whole thing stays fully TARGET compatible as well. Now enough talk, here are some pictures. TM Cougar stick sensors Because the question comes up a lot, you can invert every axis of the Cougar in the first tab of the Cougar Control Panel (CCP) software. If you are interested or want to ask questions please contact mtwsims@tutamail.com. No PMs please! Please note that sometimes I am rather slow to respond and it can take me several days to answer your emails. Payment via PayPal or SEPA bank transaction, but for PayPal I would have to add the PayPal fees on top. All sensors are designed, assembled & hand soldered by me. Every single sensor is then checked and calibrated manually. I can proudly say it is 100% Made in Germany. Price: 44€ (set of two sensors) + 7€ tracked international shipping (from experience shipping within Europe is around 2-6 days and to the US 14 days) -------------------------------------------------------------------------- TM Cougar Throttle standalone USB adapter + digital contacless 14 Bit GMR sensor I also have made a USB standalone adapter for the Cougar with a high res 14 Bit GMR TLE5011 digital sensor on the Throttle axis. This one is similar to the TUSBA, but half the price and with an added extension bay that supports extra shift registers, encoders, buttons, analog and digital axis. You can buy the USB standalone adapter without the new digital sensor and simply keep using the original pot. However you can not use the digital sensor without the USB adapter, as it communicates via the digital SPI protocol. I have been selling these on the german Craigslist/ ebay since 2018 and people were really enthusiastic about their performance. Price is 33€ for the adapter and 20€ for the sensor + 7€ tracked international shipping (shipping is only paid once per order) -------------------------------------------------------------------------- TM Cougar Throttle hall sensor kit I can now also offer a simpler Hall effect sensor kit for the Throttle. It consists of an Allegro 1324 hall sensor + cable and a 3D printed casing + N52 magnet. It is plug and play for the Throttle unit without my USB standalone adapter and similiar to older hall sensor kits for the Cougar. The difference is it requires no fancy mounts and is fixed in the correct position in two out of three axis for more precision. The third axis is dependent on magnet strength and can be hardware and or software calibrated. By hardware calibration I mean depth of insertion into the 3D printed case, nothing to it really. The mod is only compatible with the 5V mainboard version as is! The solution to this problem is a little voltage conversion board that is 3€ extra. The 5V and 3.8V versions differ in a resistor on the VCC line. Here you can check which version of the Throttle mainboard you have: https://forums.eagle.ru/topic/135000-new-hall-sensor-kits/?do=findComment&comment=2916178 Awesome installation instructions by JCook: Price is 22€ + 7€ tracked international shipping (shipping is only paid once per order) -------------------------------------------------------------------------- Cougar Ministick/ Slew replacement This mod replaces the original Ministick of the Cougar Throttle. Often times the original Ministick is worn out and as no replacement parts are available from Thrusmaster anymore a solution was in dire need for many HOTAS Cougar fans. The thumbhat is modeled after the earlier block original F-16 slew. The mod is completely plug and play. Price is 22€ + 7€ tracked international shipping (shipping is only paid once per order) -------------------------------------------------------------------------- Cougar ANT sensor replacement This mod replaces the original ANT pot of the Cougar Throttle. Often times the original ANT pot is worn out and as no replacement parts are available from Thrusmaster anymore a solution was in dire need for many HOTAS Cougar fans. The implemented chip allows me to program the min/ max voltage output of the sensor to correspond to the exact min/ max angle actually needed in practice. For the Cougar ANT pot this means 270° of rotation in total. Important installation instruction: Price is 22€ + 7€ tracked international shipping (shipping is only paid once per order) -------------------------------------------------------------------------- CH Pro Throttle, CH Fighterstick, CH Combatstick, CH Pro Pedals etc. magnetoresistive sensors The cool thing about these MR sensors is that they are a drop in replacement for the standard CH pots, but contrary to these they work contactlessly. That means you can simply connect these sensors to your CH mainboard and done. You will never have to worry about deteriorating or dirty pots again. The CH Control Manager recognizes this sensor normally and you can calibrate it within the software. Important installation instruction: Price is 22€ + 7€ tracked international shipping (shipping is only paid once per order) -------------------------------------------------------------------------- 24 Bit shift registers for Cougar USB standalone, Thrustmaster gear, MMJoy2 These are compatible to the Thrustmaster hardware, to MMJoy2 and to my Cougar USB standalone adapter. The dimensions are 20 mm x 50 mm (0.79 in x 1.97 in), so they are very small and fit basically in everywhere. The pins are spaced in standard 2,54 mm (0.1 in) to fit normal header pins (see picture 2). I offer them either with or without header pins. The shift register is 24 Bit, so it has 24 inputs that you can connect buttons to. It can also be daisy chained, so you can put several shift register boards in series. Eg MMJoy2 supports 12 shift registers in series. So if you daisy chain 4 of my 24 Bit shift register boards, you have a total of 96 button inputs with just 2 pins used. If this isnt pretty damn cool I dont know what is. Price is 10€ + 7€ tracked international shipping (shipping is only paid once per order) If you are interested or want to ask questions please contact mtwsims@tutamail.com. No PMs please! Please note that sometimes I am rather slow to respond and it can take me several days to answer your emails. Payment via PayPal or SEPA bank transaction, but for PayPal I would have to add the fees on top. All sensors are designed, assembled & hand soldered by me. Every single sensor is then checked and calibrated manually. I can proudly say all my mods are 100% Made in Germany.
-
 Thrustmaster mods --------------------------------------------- F/A-18C (Hornet) grip upgrades OTTO P1 push buttons | OTTO T4 trim switch | OTTO T5 sensor control switch F-16C (Cougar) grip upgrades OTTO P1 push buttons A-10C (Warthog) grip OTTO P1 push buttons | OTTO T4 trim switch | OTTO T4/T5 hat switches for TMS/DMS/CMS A-10C (Warthog) throttle NEW--> Full mil-spec switch upgrade [OTTO, Cutler-Hammer, Honeywell, Mason] --------------------------------------------- Just a heads up, guys - the friendly engineers at Thrustmaster made it easy to swap their stock TM buttons with OTTO buttons to massively improve the clickity on the new Hornet grip same as what you can do on the Warthog grip. I opted for the 2.5 lbs actuation force for the pinkie and full 4 lbs for the pickle button. OTTO product numbers are P1-11111 and P1-11121 respectively: Here we go mashing buttons on the grip like a fool. No trouble reaching anything. Disassembly of the grip is pretty straightforward but you will run the risk of bricking it and you will probably void your warranty. First remove the paddle lever by unclipping the c clip and pushing the shaft pin out. There’s a spring in there and a small washer on the shaft. Unscrew the three hex bolts in the handle and pop the cover off. One of my bolts wanted to stay in the grip. Unscrew the PCB and push it out of the way. Unscrew the neck part that’s held in by a single bolt that also holds the ground wire and a small lock ring. Disconnect the pinkie button connector from the PCB and pop the button out through the front by pushing in the tabs on either side. You may need to rotate the button in place with pliers to be able to access both tabs. Cut the wires, strip the ends and solder them onto the OTTO button. You’ll want as much wire as possible for the new button as it can get a little tight in there. The OTTO button has a smaller diameter than the TM button so wrap some electrician’s tape around it; press it into the grip and connect it to the PCB. Fasten the neck part and PCB back into the grip and move on to the top part. Unscrew the two outer screws in the top part and pop the plastic top back and rotate it out of the way. The pickle button should be easy to pop out by pressing the two tabs in. Note that you have to cut the wires before removing this button, unless you want to try to disconnect it at the main PCB and re-threading the wire back down the neck of the grip. Replace it with the OTTO button same way as the pinkie button: leave as much wire in place in the grip as possible and use electrician’s tape to make a tight fit. You could file down the contacts or remove some plastic backing in the grip at this point if you want to set the OTTO button as deep as the stock button. I didn’t do it so mine sits at a very slight angle. Be careful not to pinch the flimsy wires and screw the top part and cover back on the grip. The paddle lever goes on last and it can be a bit tricky to get the spring seated correctly. Upgrade complete! Here's a short video showing how to get the paddle lever spring back on: In terms of difficulty I’d say this is easier than modding the Warthog since there’s fewer buttons to mess with. I suppose you could change the spring or the tact switch on the Hornet paddle lever but it’s not going to be as much of an upgrade as what’s possible on the warthog with a P1-11122. Compared to the Cougar though this is a walk in the park. Seriously. Don’t mess with the Cougar like I did. It takes a lot of Dremel grinding to fit the OTTOs in there and the result is not going to be as neat as what’s easily possible on the Warthog. Also, the new pinkie switch gets in the way of the paddle switch since they’re much closer together. Well, good luck if you decide to mess with your grips!
- 123 replies
-
- 2
-
-
-
- thrustmaster
- warthog
- (and 3 more)
-
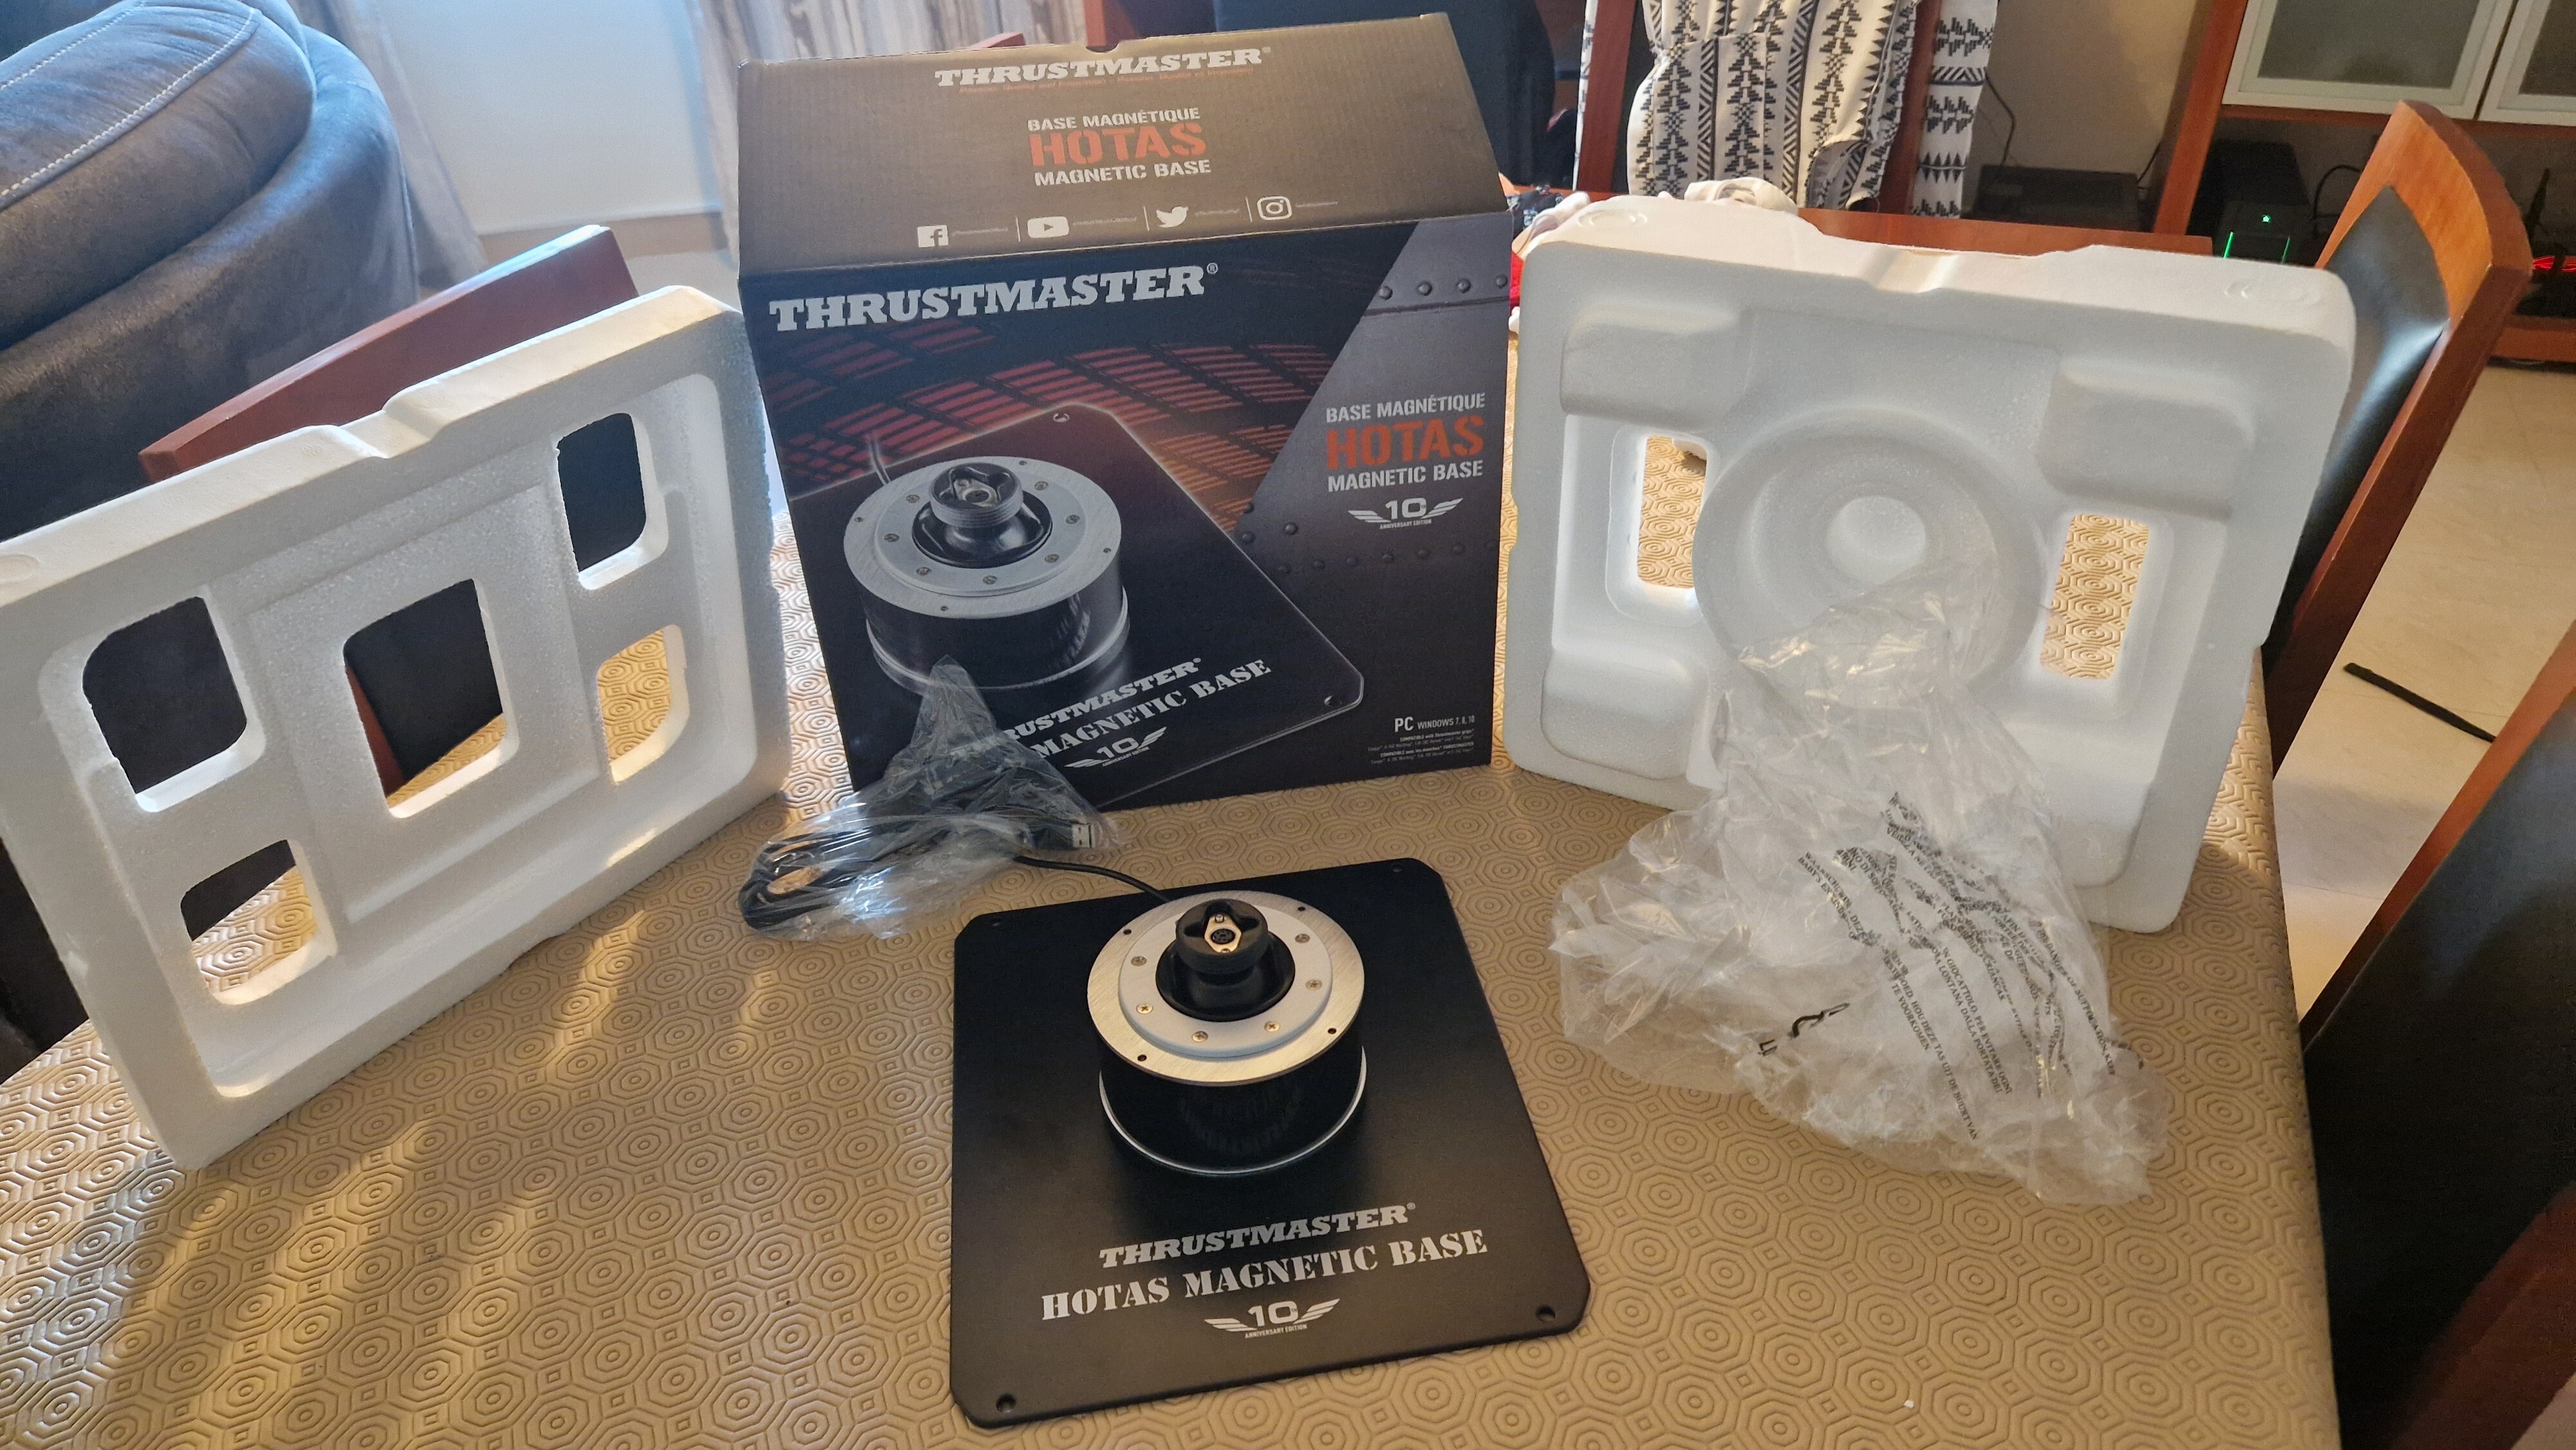
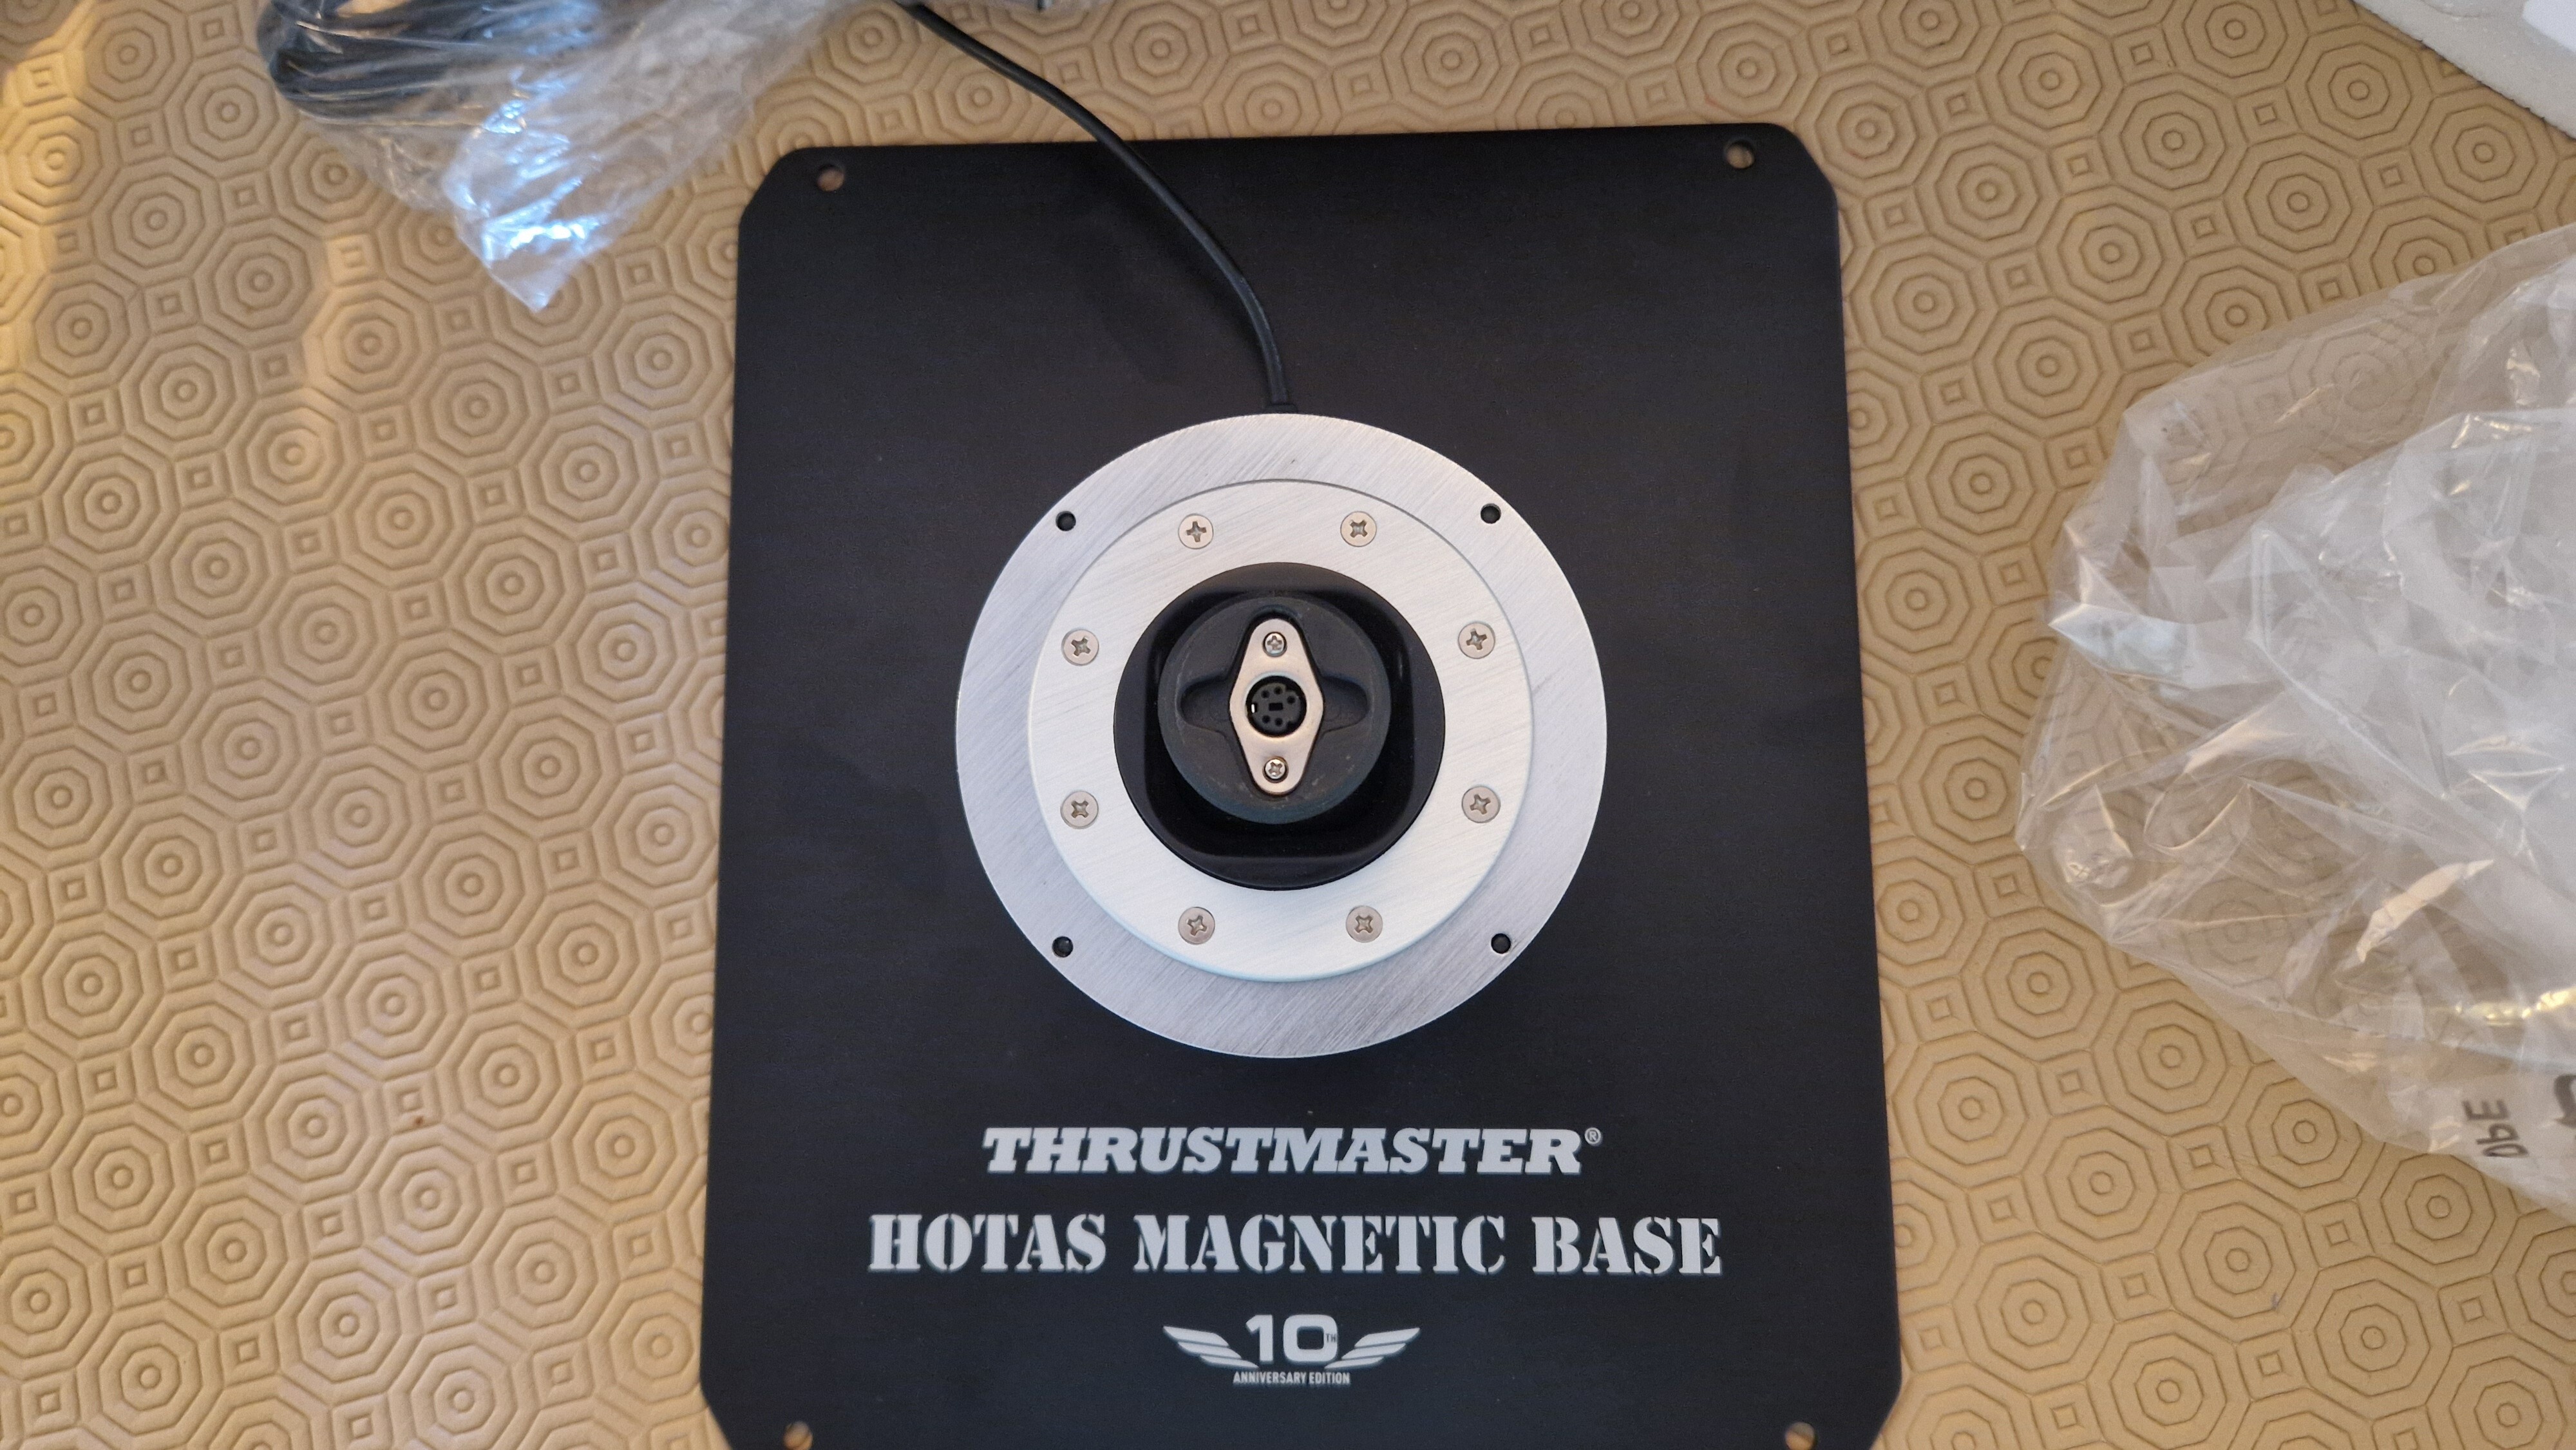
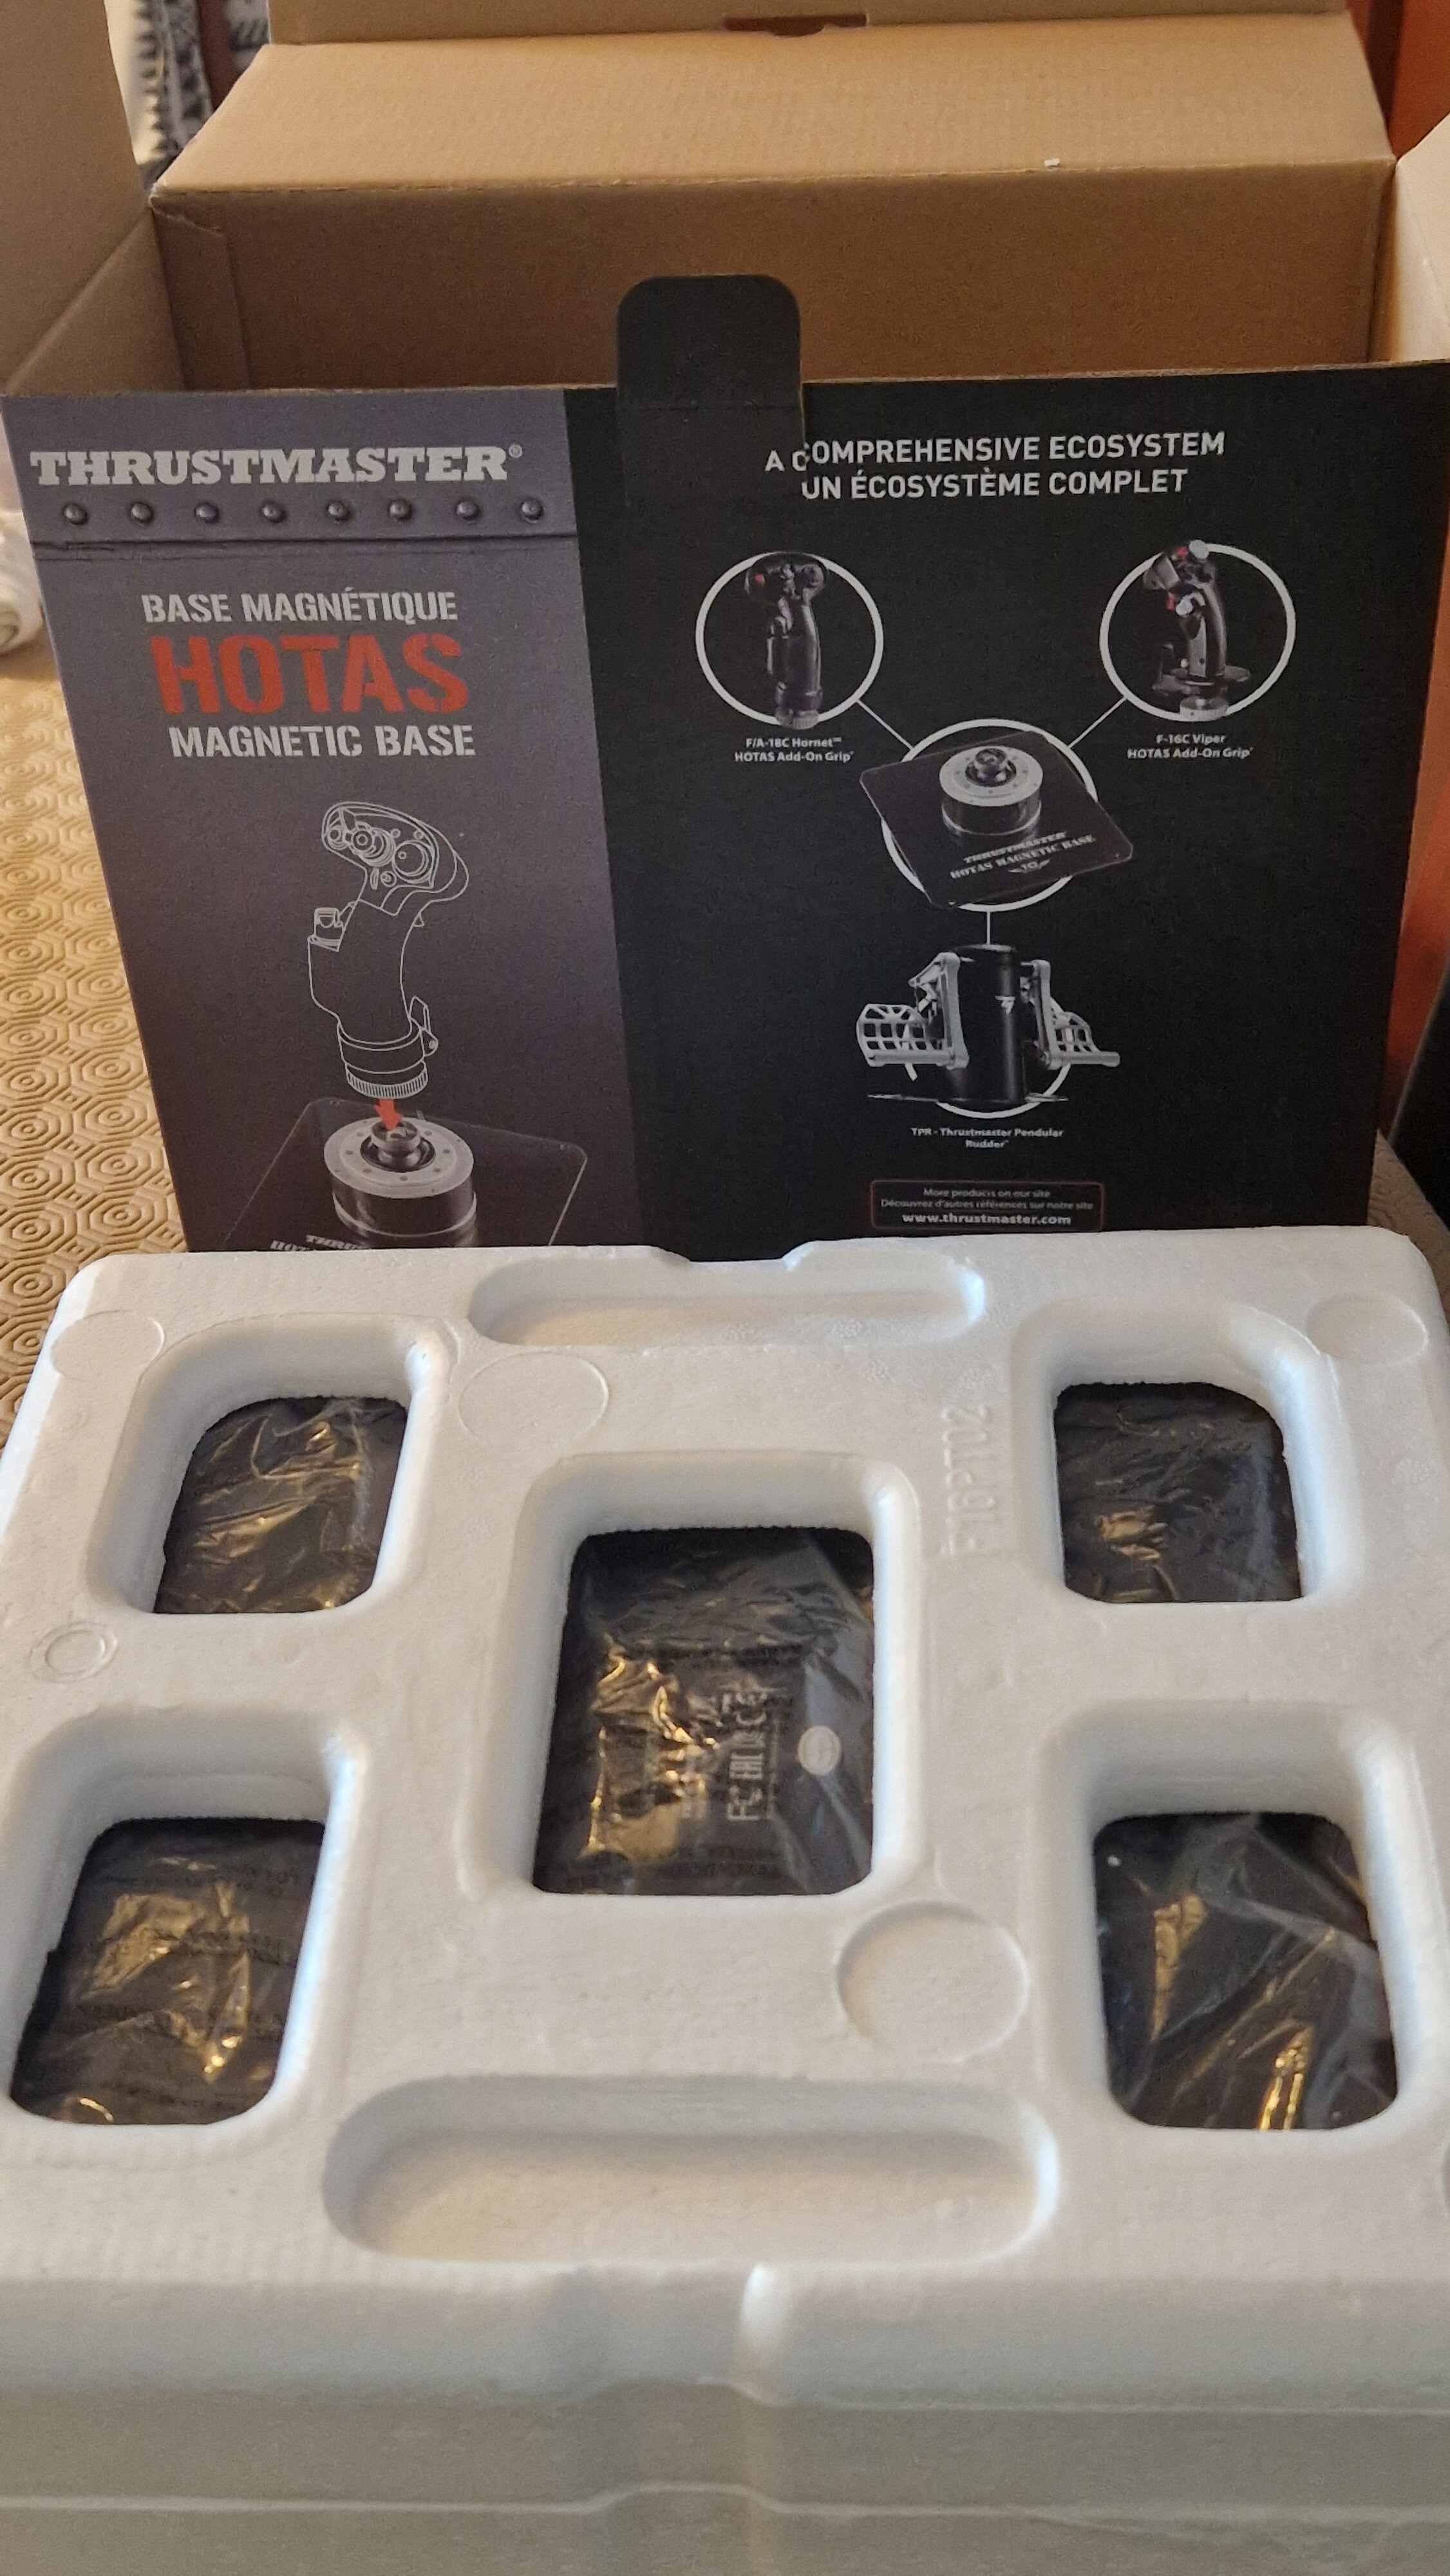
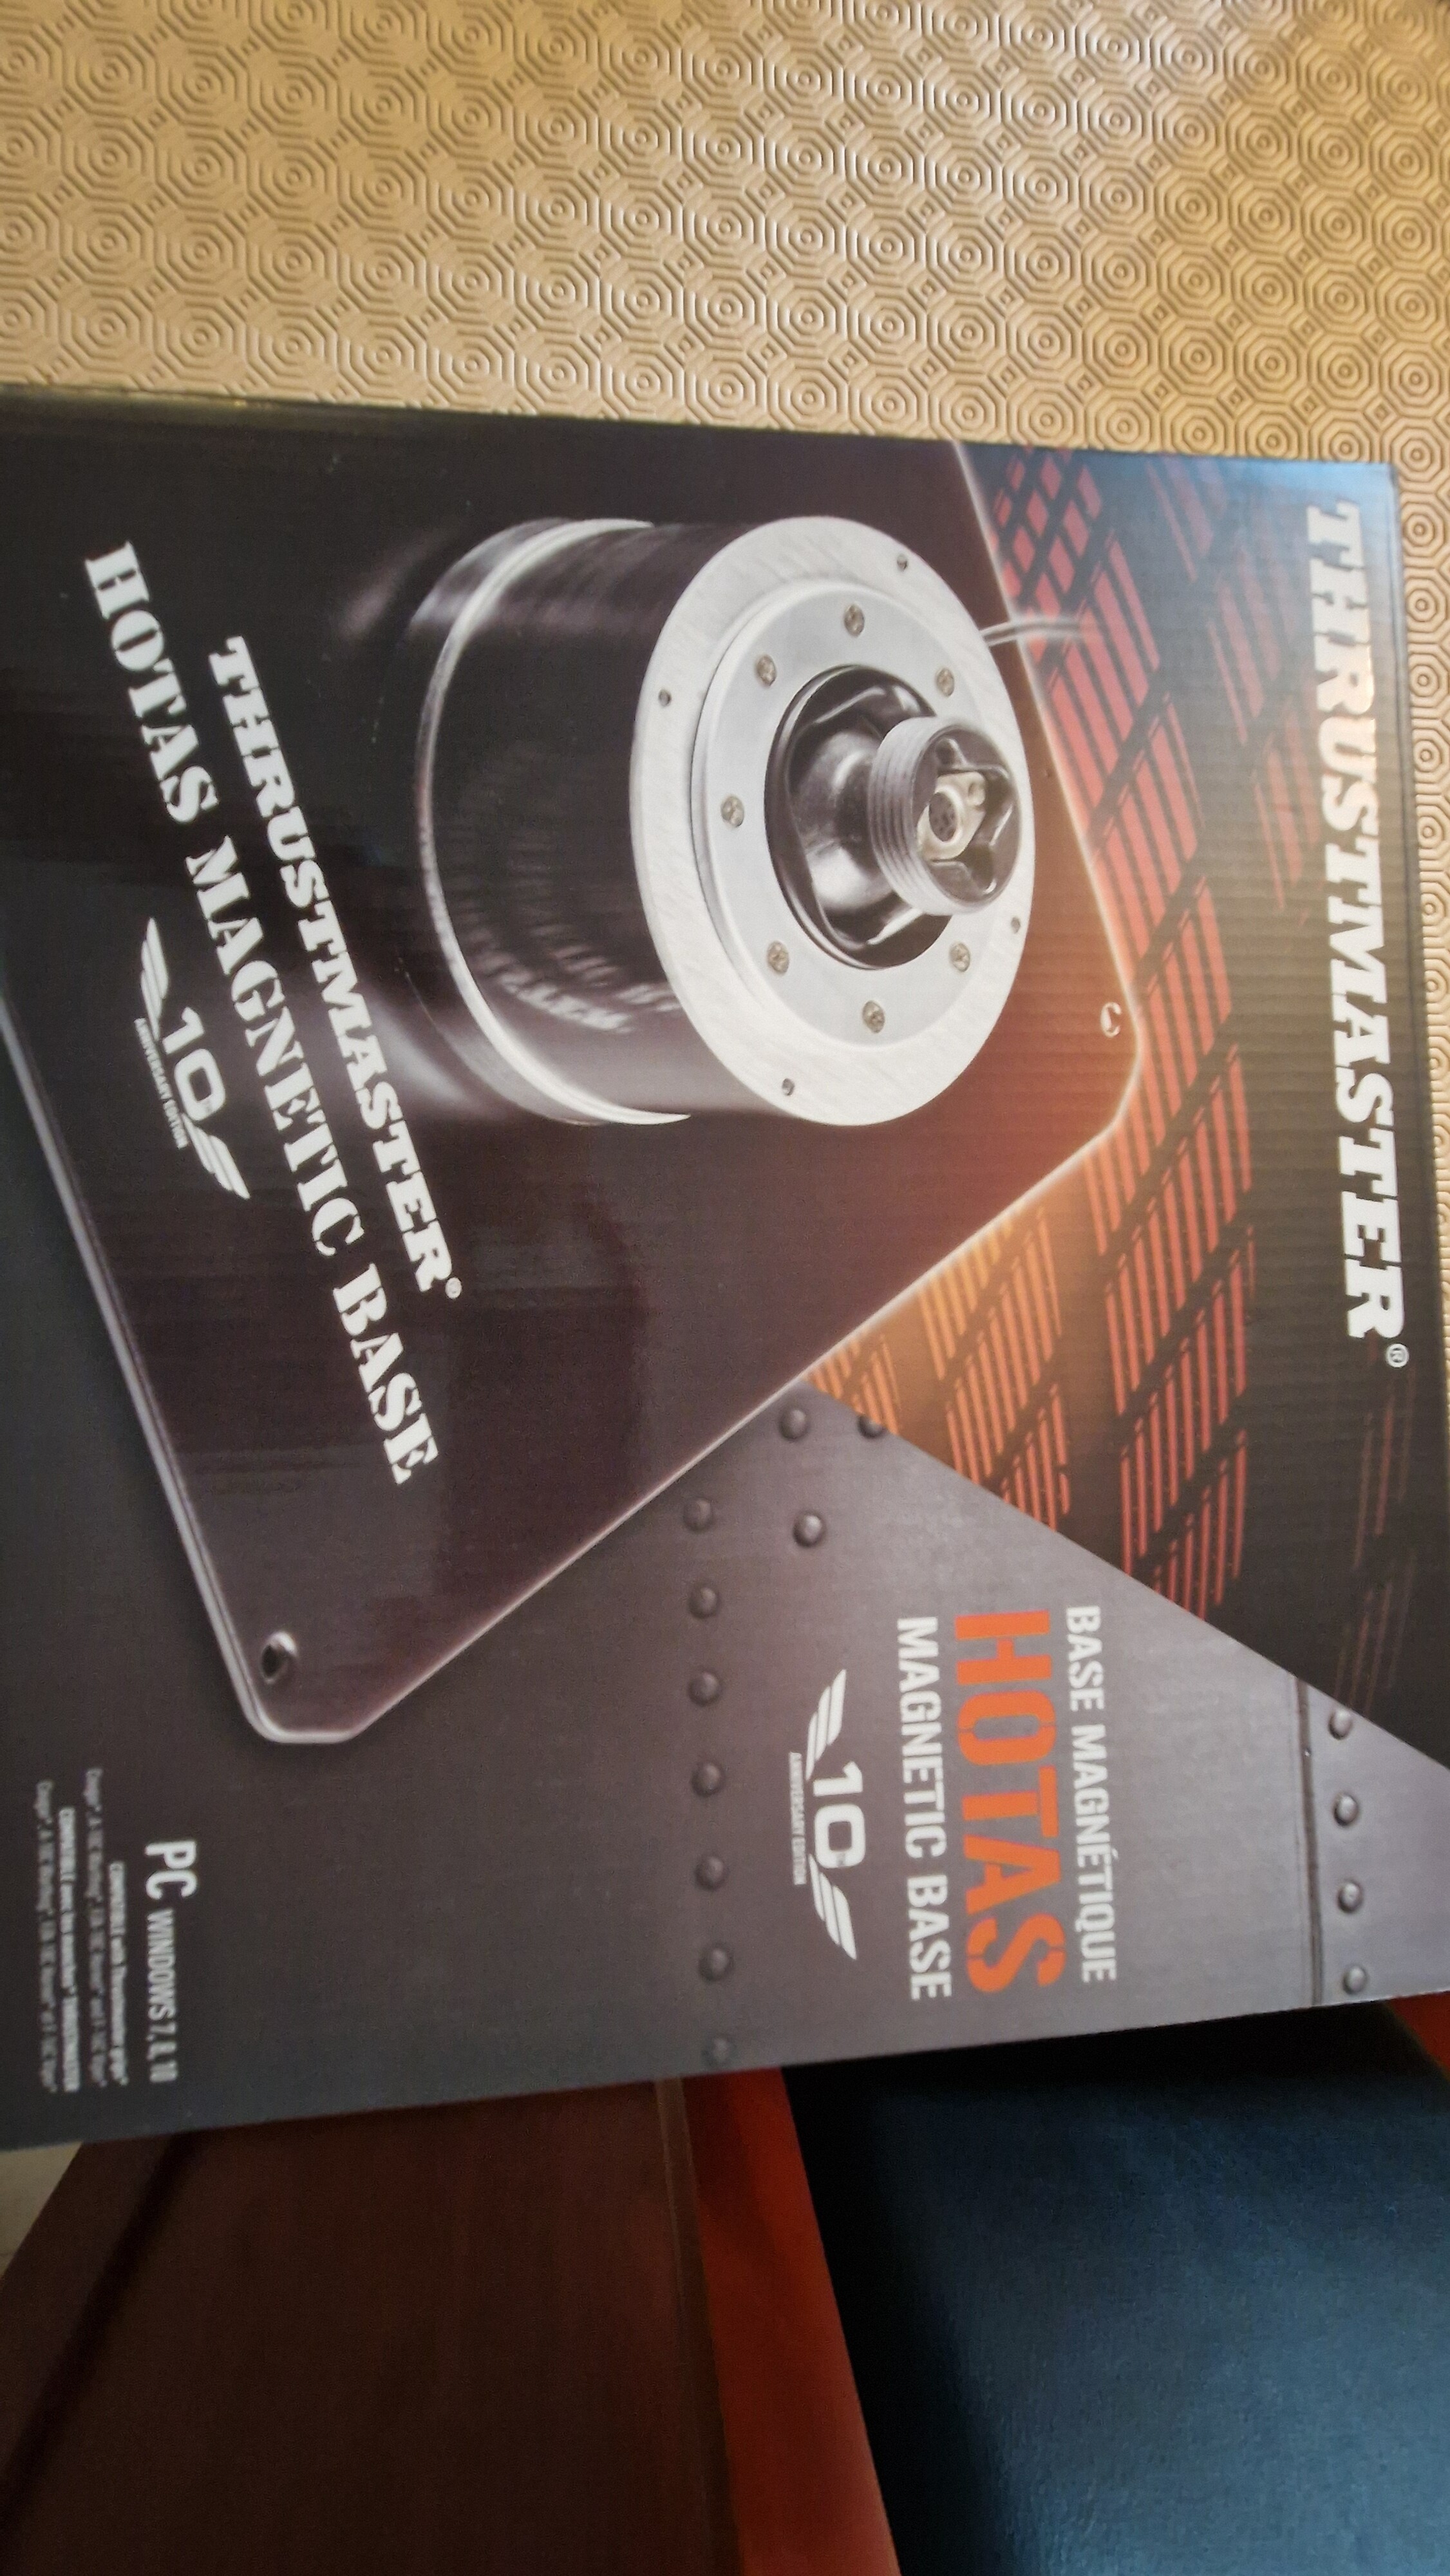
 Thrustmaster Magnetic Base 10th Aniversary Bought last year in April (04/2024) used a few times Reason to sell: Upgraded to an AVA Base last week Original packaging, Almoust as New, (I take very good care of my hardware) 100€ + Shipping from Portugal
-
 Hi Helpers. been away from DCS for a while, but wanted to explore the new Marianas map among things. Just installed the latest 2.9.17.11733 update. I found with my AVA base the axis behavior now quite stuttery, while it worked fine before the update. It also still works fine with IL2 Great Battles BTW. Also with DCS it seems the AVA's axis does not reach the full range (both X and Y) any more. ------ My warthog throttle works fine, nu stutters, full axis rage, but maybe it's a TM AVA or windows issue? Ran a full repair, (no mods etc) and even reinstalled the Thrustmaster's latest 1,14 drivers and firmware. NADA, any one also experienced this? PS is there a way to check windows further on this? ADDED: FIXED: there's a firmware update for the AVA base needed for the latest windows versions, DCS is fine now.
-
Realizzo estensioni su misura per Thrustmaster Hotas complete di cavetteria e connettori. Realizzate in filamento caricato al carbonio, ultra resistenze anche per Force Feedback. Realizzati con un riempimento del 100% e con all'interno il solo canale per il passaggio dei cavi. Chiedo 20 euro + spedizione. Ciao
-
 Hi all, I've had my throttle for about 6 years now and it's been working fantastically. I'd never used the throttle OFF indents before. On testing I have the below issues with the OFF indents registering on both L and R throttles. Thrustmaster support tried to help but couldn't figure it out nor could offer a solution in my country. The video shows more clearly what is happening. Buttons 29 and 30 are the Throttle OFF indent triggers. Note 29 and 30 both register at throttle 0%. 29 flickers on and off at 0% and 30 registers at 0% and in the OFF indent. https://youtu.be/LM5oQjTG_0o I've pulled it apart but the throttle sensors (HALL i think) are well enclosed it seems. Any suggestions on how to fix would be appreciated before I start pulling things apart further EDIT: I have also run through the Thrustmaster warthog throttle calibration tool (V1.07) which is what they asked me to do.
 -
There seems to be a problem with the Thrustmaster Pendular Rudder's default axis in DCS. After launching a custom mission in which the plane starts in the air, it will immediately kick left. Depending on the plane (e.g. most pronounced with F-5E), the plane will then go out of control. It will only regain control once the rudder is moved. Looking into the Axis controls for the rudder, it seems DCS defaults the rudder to the JOY_RZ axis, when the one it should use, and the one I assigned to it should be the JOY_Z axis. This will repeat every time the mission is restarted. I found there is a "default.lua" file which contains axis default values, and there are entries for other market rudders, but none for this TPR. I tried to add this to the Lua file on my own, but was not able to as the exact name of the entry seems to be required from the vendor. Without its own entry in this file, it seems the TPR defaults to the general setting, which has the Rudder assigned to the JOY_RZ Axis, and the Thrust to the JOY_Z Axis, which may be causing the kick left at start, since the throttle may typically be placed in the off or max setting, which may map on the Rudder as "left". This is currently causing a lot of crashes at the start of the mission.
-
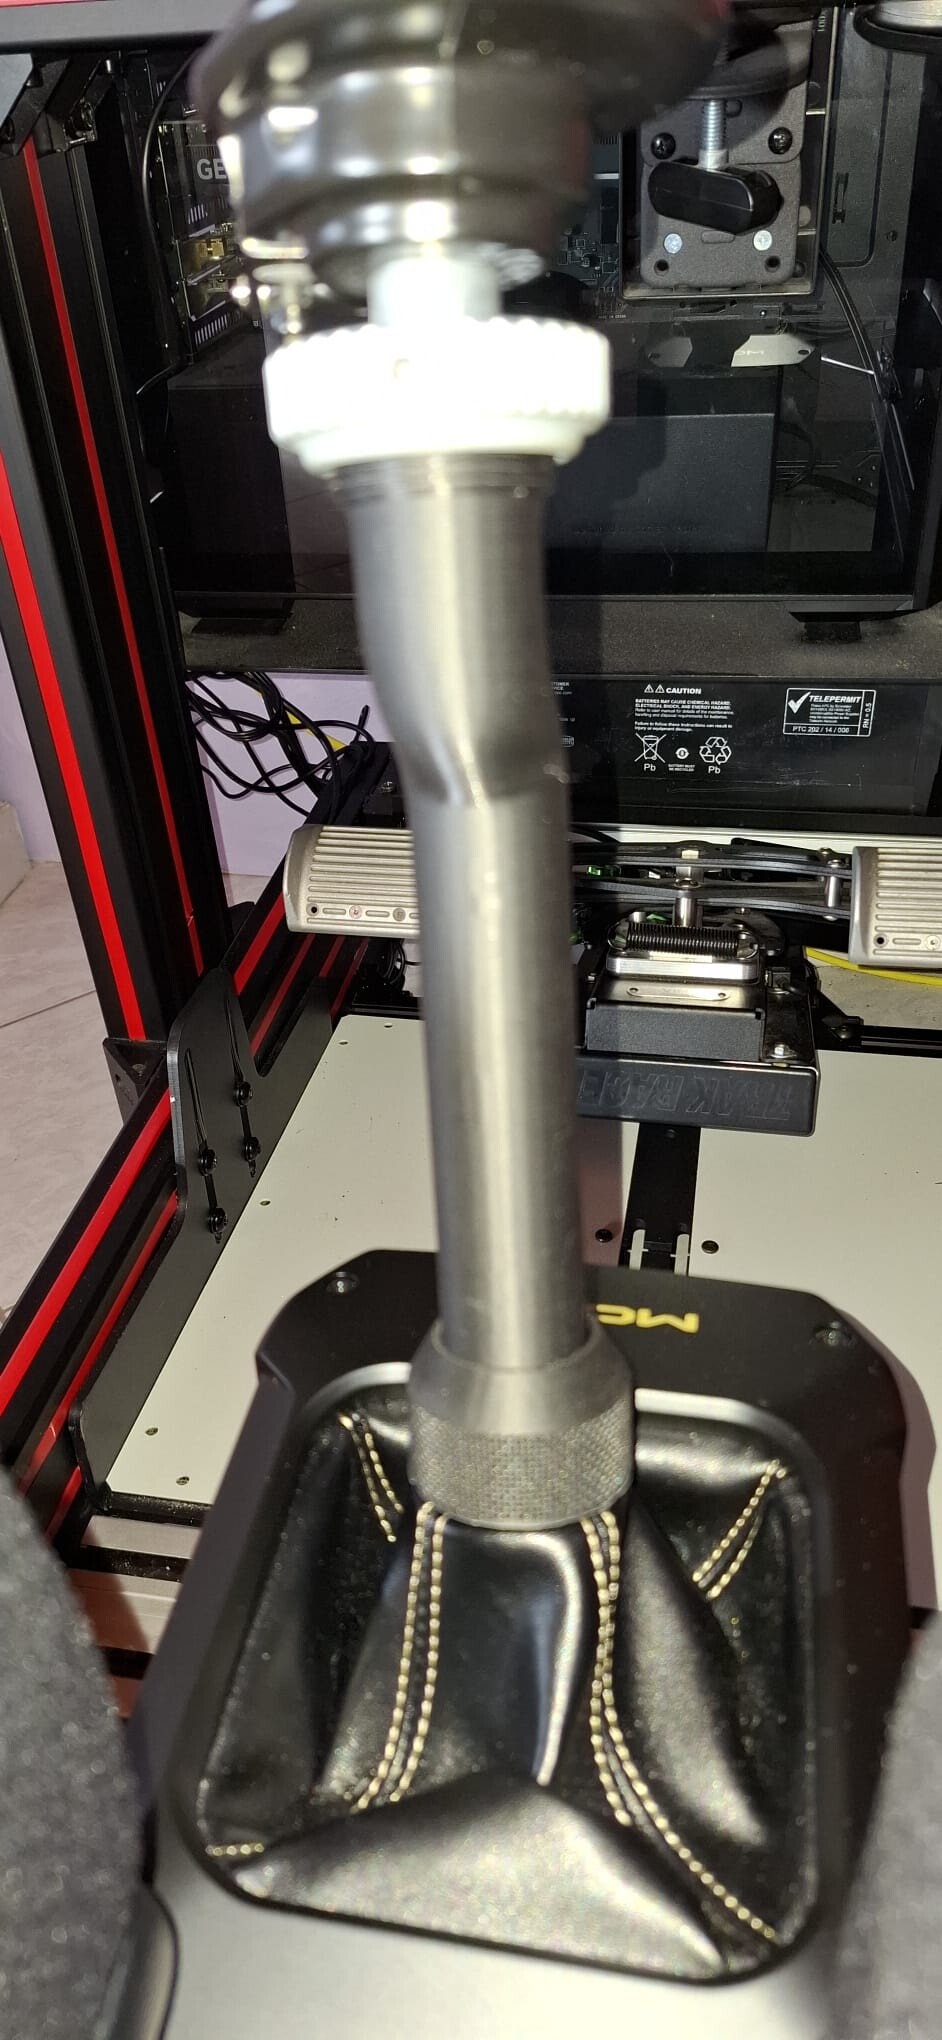
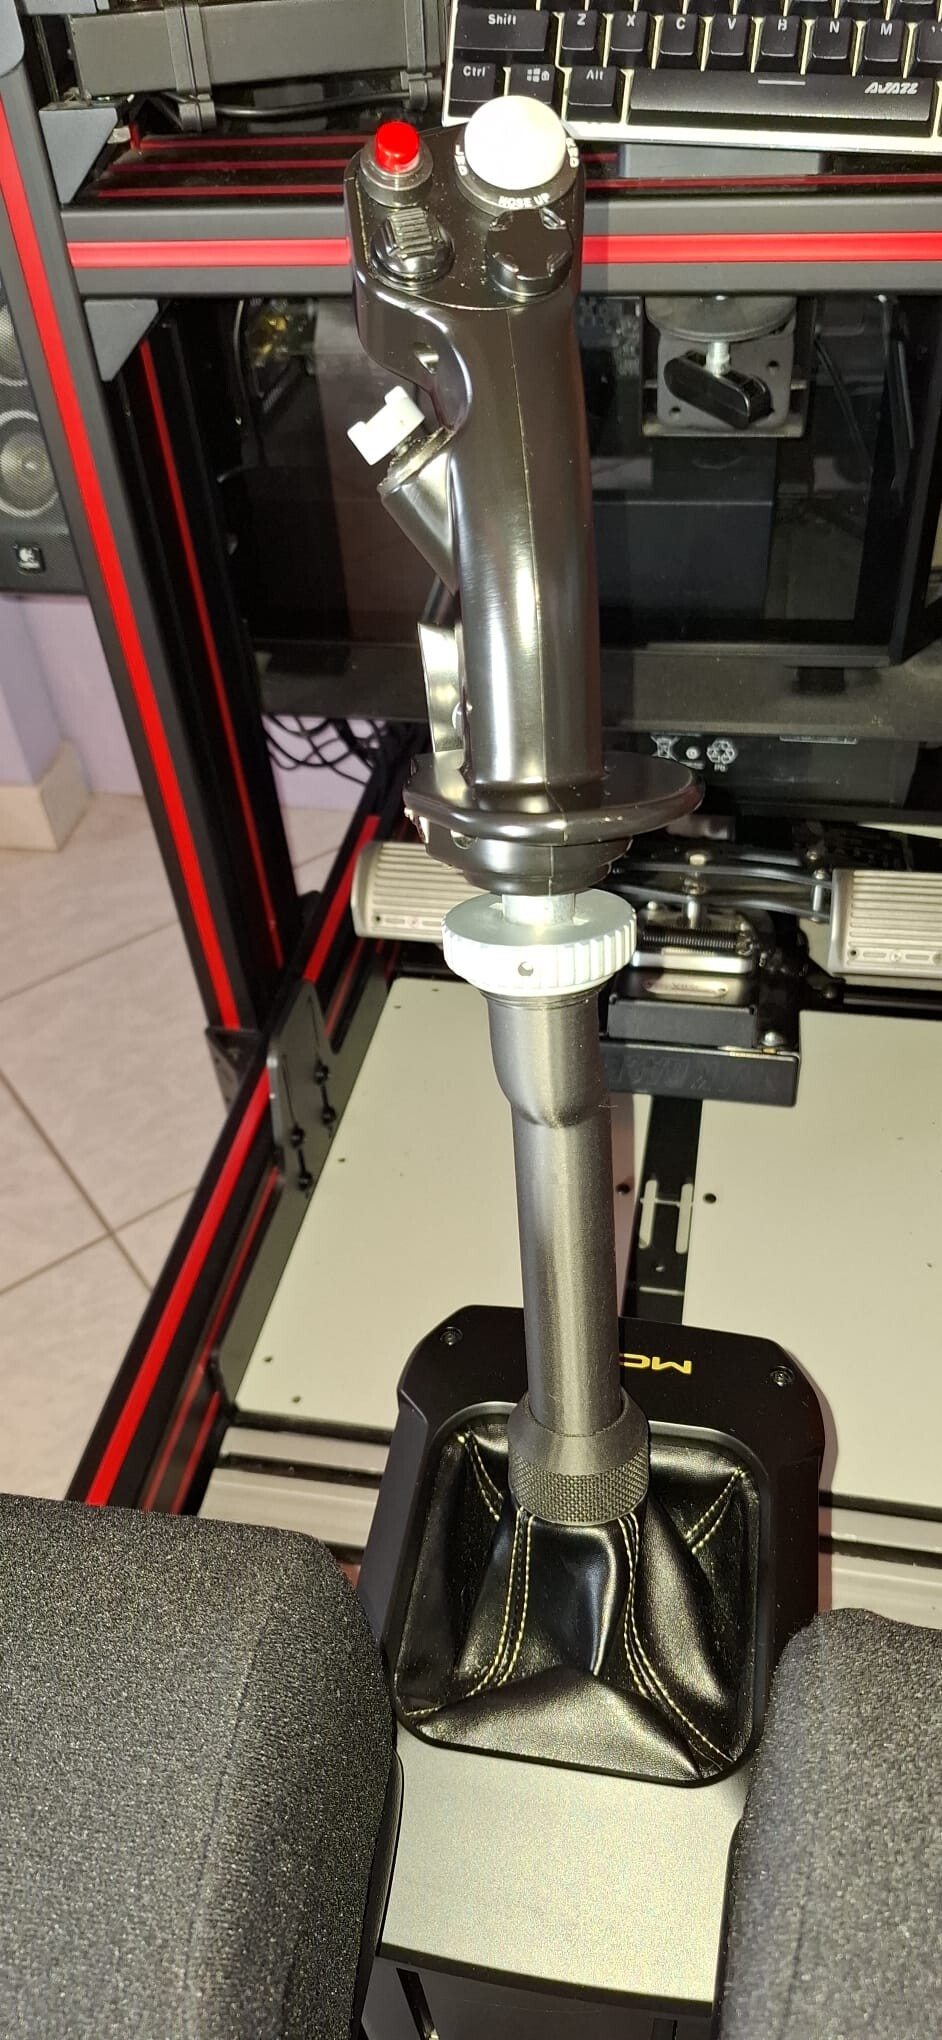
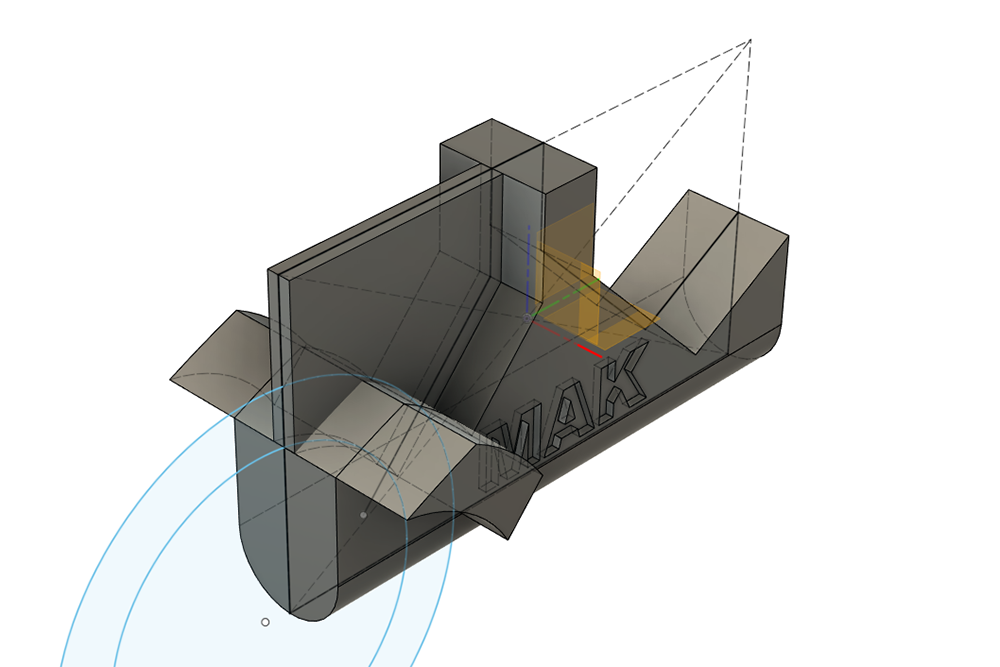
I hope HOTAS Warthog users will find this little project useful. It is 3D printable afterburner custom detent, to replace genuine part which require to rise throttles up to activate afterburners. 3D printed part allows to just push the throttles through, but with still detectable detent and resistance. There are three versions of it available for free download, with different resistance levels. Cheers & enjoy! https://makcorner.net/mak-thrustmaster-hotas-warthog-afterburner-detent/ NOTE: my STL file is free. If you own 3D printer, the only cost to make this thing is few cents for filament .
- 10 replies
-
- 5
-
-
-
- thrustmaster
- hotas
- (and 3 more)
-
--------------------------------------------- Warthog throttle Upgrading the throttle panels NEW-> Upgrading the outboard (left) grip Warthog, Hornet and Cougar stick grips Mil-spec upgrades for Thrustmaster stick grips --------------------------------------------- I've upgraded all switches to mil-spec on the Warthog throttle to improve the switch feel and make it more functionally realistic. This is probably only of interest if you really like the A-10C. This includes mil-spec locking and standard Eaton/Cutler-Hammer switches on the panel, the locking flap switch, OTTO push buttons and a functioning Honeywell mag switch. I had to provide 12VDC and install an Arduino running DCS-BIOS and a MOSFET circuit to control and sync the mag switch with DCS. Due to the size of the mag switch I had to extend the height of the throttle body with a simple 3D printed frame. On the throttle grips I put in all Eaton/Cutler-Hammer and one Honeywell toggle switch, OTTO hat switches and push button, and a Mason force transducer slew control out of a real F15 throttle unit. The force transducer is interfaced directly with the throttle using a small prototype PCB from Deltasim. I couldn't fit the whole mechanism from the F15 so I dropped the push functionality. It does exist in the real A-10C AFAIK but it is unused so not a great loss. While I was at it, I rewired the panel backlight to the Arduino I needed for the mag switch. This allows the LEDS to be directly synchronized with the in-game panel light intensity using DCS-BIOS. We included the actual brightness parameter in the latest DCS BIOS module for the A-10C. We have it for the Hornet as well in the DCSflightpanels branch. Here's a short video showcasing the look and feel of the switches. I've listed the switches I used, what they are in the real jet (based on Deadman's list) and some Honeywell alternatives at the end that are readily available from e.g. mouser.com This mod is neither cheap nor easy to do. It could be argued that it is in fact totally unnecessary and I would for sure have loved to convert a real throttle unit instead and it probably would have been cheaper. Good luck finding one though I intend to post a more in-depth guide to the various mods later - here's the short version for now: Rip out all switches and sub PCBs Poke it a bit with a Dremel tool Install new switches and wire them up You're golden
- 31 replies
-
- 9
-
-
-
- mason
- thrustmaster
- (and 5 more)
-
 Inaugurate a server dedicated to the buying and selling, as the name says, of all the elements related to the world of virtual simulation. Few rules, just don't be too Spam, be respectful and please invite your friends to visit us. There will always be discounts, news and many more things that we will be adding little by little. We create an open community, without hindrances and with the only objective to exchange information and get good deals. There are channels for everything .... We are authorized dealers of Thrustmaster and more than 50 other top brands in the world of Gaming. Our website is virtualpilotstools.com . There you can make your purchases. We are also manufacturers of cockpits that will revolutionize the market and will be available to all budgets and all spaces. Join our server !!!!! ...... our motto is .... "You have the wings, now you just have to fly"".... Discord: Virtual Pilots Tools#9308
 -
Hi all very new here, trying to follow the A10II C training flight for HOTAS, I get put in auto pilot mode and the trainer talks me through the different buttons, hats etc then all a sudden, the auto pilot disengages and i spiral ground words and I crash. My question is this Is there a recommended Warthog combo profile that I can download from somewhere I also have TM MFD and Crosswinds MFG pedals in my setup. Many thanks for any help? Kind regards Humpster
-
My thrustmaster warthog's friction lever worked perfectly for years as my zoom axis, then became jittery after sitting unused for several months. No software fix seemed to work such as turning off LEDs or putting them at max. I decided to try to replace the potentiometer entirely. I had purchased a couple of these: https://br.mouser.com/ProductDetail/CTS-Electronic-Components/251B12T104A2NB/?qs=6E8igxPflKdliaNMymwp6A%3D%3D And they were completely wrong. The size of the plastic shaft that interfaces with the actual lever plastic piece is way too small, by about half. The shaft itself has a keyed flat side, this keyed flat side faces the wrong way. The overall potentiometer size is also much too small. Here's someone else's picture of the potentiometer that I also found in my throttle: https://imgur.com/a/9rbh5zw I found in another post someone recommending this digikey link for a chproducts potentiometer. I can already tell immediately that it would not work. It's round and made of completely different materials. https://www.digikey.com/products/en?keywords=reppot604 So I'm still on the hunt for the correct item at this point in time. If any one of you know or are able to find this specific potentiometer so that I and others can use it for repairs that would be greatly appreciated.
-
I got my TPR pedals today and they generally work great. It took a bit of fiddling to get the brakes to work, but I can't seem to get much, if any, differential braking. What little I see may just be a case of me applying a bit more pressure to the pedal in general. I definitely have each pedal assigned separately in the controller options. It's not a huge deal except when I land at Mach 1.2.
-
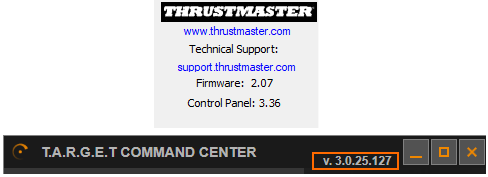
Hello everyone. I hope the most expert people here can help to solve this. The deal is: one night i used the TCA quadrant without any problem At the other day, it doesn't response to any movement. Looking at the control panel the firmware version said: 0. I tried to update the firmware with the thrustmaster updater without sucess. I put the TCA quadrant into Boot mode, i tried to update the firmware with sucess, however at the moment to unplug it and plugin it, the firware reverts to 0 again. Any other suggestion?, Thrustmaster is taking forever to answer for this enquiry.
-
Hi Team, I've found when on Open Beta the past few days the game will hang on the title screen when my thrustmaster t300rs racing pedals are plugged in. The game will continue to load once they are unplugged. I use the pedals for my rudder control. No crash logs as game isn't crashing. Issue only seemed to begin around 30 April - prior to that it was fine on 2.7. We had a similar issue on the update to 2.6 so not sure if this is the same again.
-
I have the Thrustmaster T.6000M, there is a button on the back of the throttle which is like the thumbstick on a xbox controller. I want to use it as a slew for my SOI or Radar, but DCS counts it as a axis, not a button. Since the radar slew is a button, I can't use the thumbstick on the throttle. Is there a way I can change it so it works?
-
This is my idea, but not finished yet. Basic parts: 2x Thrustmaster MFD Cougar 2x ZGYNK 8' 2x DP to HDMI conversion cable 1,5m 1x USB hub D-LINK H7 1x Lenovo TAB 3 8' + DCS UFC apk 1x Xinmotek XM-08 (button bar) 10x Button TS-12 (green light) Button bar 3D print https://www.thingiverse.com/thing:4755643 1x Lenovo TAB 3 8' + DCS UFC apk 4x USB extension cable 30cm (wireless headset, wireless mouse, PS2cam for TrackIR, free) 1x USB to Micro USB extension cable 20cm (Xinmotek XM-08) DDI panel - Plán.pdf DDI panel - Díly 7_2MM - TAB 8.pdf FA-18 BTN BAR PCB.pdf
- 2 replies
-
- 1
-
-
- thrustmaster
- mfd
- (and 7 more)
-
Hi, I installed DCS again after some months off and wanted to fly the newly purchased A-10C II. Sadly the coolie hat isn´t working. I thought maybe it is broken, but when testing and recalibrating the throttle outside of DCS everything is OK, at least in the Windows 10 testing window. Did everyone know this error or could point me to an approach how I could find out the problem? I also loaded up Arma 3, mapped the coolie hat to the vision and could without any problems move my vision in any direction using the coolie hat, so it must be a problem with DCS... I hope somebody could help me. Greetings
-
 So this was driving me insane... one of my MFD 's would consistently disappear... but, I couldn't find the conditions under which it would disappear, I thought I had a cabling problem ... nope... I thought it was that the script I was using to create 128 buttons in TARGET... nope etc... A little about my controller set up: Thrustmaster Warthog HOTAS which I configure using TARGET, to get a full 128 buttons MFG Crosswinds v2 3 x Thrustmaster Cougar MFD 1 x Razer Tartus (configured as a joystick button box, because I prefer discrete DX button presses, as it creates less confusion keyboard collisions etc) 1 x Stream deck (configured as a joystick button box, using vjoy, because I prefer discrete DX button presses, as it creates less confusion keyboard collisions etc) I obviously turned of vjoy first and thought that fixed it but then in game, nope it would not work, re scanned device etc... nope still nothing ... I start looking into the Game Controller UI in desperation. Clue 1 I noticed that my MFD2 wouldn't configure correctly via the Game controller UI (even though it would still work in game) it would just show as a joystick, but, labelled as the Tartus so I pulled each of the controllers in turn, until i got it up as MFD... turned out it was the Tartus Resolution 1 I changed the MFD from MFD 2 to MFD 4 (luck more than logic) in the Game Controller UI, with the Tartus unplugged, each MFD number has a different VID in windows, so i guessed it was colliding. Each MFD now showed up correctly as an MFD the the Game controller UI. I ran Target and low there were still three MFD's hurrah ... or so i thought... I get into game and the MFD3 has gone AGAIN... some muttering (well swearing) what the hell is going on. Clue 2 why the hell do i have VIVE controller listed in DCS. 2nd order diagnostics (when does the MFD vanish) ... after many stages of testing it MFD3 only vanishes once Steam VR starts only when i have one or more hand controllers active (assumption what if to do the game controller mapping in SteamVR they are mapping the controllers to a VID that just happens to have collided with the MFD, as the newer device they would overwrite the existing device and the MFD vanishes, only if you run TARGET Resolution 2 Change MFD 3 to MFD 8 to see if that works it does hurrah Are we nearly there yet... no we bloody aren't Turn back on vjoy that works, turn back on the tartus and OFFS the configuration of the MFD4 via the Game Controller UI has c*cked up again... note the device works in game but FFS I won't less this beat me... Resolution 3 Turn the Tartus off Move the MFD to 7 because that is next to 8 that will be safe right ... wrong ... well 5 is next to 4 ... wrong ... 6 hurrah! Finally Left MFD1 is fine, my Right MFD is set to MFD6 in the UI, and the Center to MFD 8... conclusion getting multiple MFD's to work with multiple joystick devices is a complete pain in the bottom, and it would be really nice if the manufacturers would use a mechanism of ensuring their virtual joysticks dont collide with each other...
 -
 It have always annoyed me that I could not map the "off-positions" of the 2- and 3-way buttons on my Thrustmaster throttle. A two-way button will generate a "button-press" when toggled to one position, however when you toggle it to another position that "button-press" will simply go off, and it will not generate another button-press (hence nothing to map/bind). Likewise a 3-way button will only generate a "button press" in the up-position and another "button press" in its down-position, however it will not generate any "button-press" when put in its middle-position (e.g. the pinky-switch forward/aft will generate button-press 13/14, however nothing in its middle-position). I know you can handle this via Thrustmasters Target-software, however as your Target-profile boils down to a single virtual device (hence a finite/limited number of axis and buttons), I've always found it to be "too simple" for my taste (in this aspect the software for CH-products is much better). Also you can do it via various other 3rd party software, such as VoiceAttack or JoyToKey. However these are more complicated to setup, as you often have to create/use a specific profile for a specific aircraft, since they need to "send" specific key-combinations. So back in 2019 I decided to write a small program that lets me do so via vJoy (that is a driver for up to 16 virtual joysticks, each with multiple axis and up to 128 buttons). Joy2vJoy is hard-coded to ONLY work with the Thrustmaster throttle and the vJoy driver is a requirement (vJoy is not bundled, but download links are listed below). I initially had plans to expand this program with support for additional devices and add scripting. At one point I had a development versions with LUA-scripting support, however it was not running reliable, so I scraped it. In its current form I have used this program with DCS since 2019 myself, and have never had any issues. The program is written to be light on CPU-usage, so your frame-rate in DCS is not affected, but I suggest you only enable "Update checkboxes" when testing how the software is working. If you haven't done so already you need to install vJoy (links below) and create a single virtual Joystick with at least 21 buttons (I simply made one with 128 buttons). In the enclosed manual (PDF-file) I show how this device is created, and how you can test it is working, using the programs installed with the vJoy driver (you only have to do this once). From that point you simply need to run Joy2vJoy prior to starting DCS (or whichever sim/game you want to use it with). The way it works you map your physical buttons to actions in DCS using the physical Thrustmaster throttle (as per usual). However to map-up the "off-positions" of the various 2/3-way buttons you in stead need to map up "button-presses" on the jVoy device to the action you want to perform when a physical button goes off. E.g. for the DCS AH64 I use the 3-way pinky switch on the throttle to control NVS-OFF (aft), NVS-NORM (middle/off) and NVS-FIXED (forward). The Pinky-switch forward/aft generates button press 13 and 14 on the phycial throttle, so I use theese buttons on the physical device to map-up NVS-FIXED/OFF. However I then use button 13 on my virtual vJoy device to map to NVS-NORM. It is a coincidence that it is also button 13 on the virtual device, so either use the table in the PDF-manual too see which virtual button-presses are linked to which physical-buttons, or simply check "Update checkboxes" in Joy2vJoy and see what happens when you press the physical buttons on your Thrustmaster throttle (which check-boxes are checked/un-checked). In the screen-shot above (both "Activated" and with "Update checkboxes" are enabled), the check-boxes in the left side of the screen represent the physical buttons on your Thrustmaster throttle, and the check-boxes in the right side represent the virtual buttons of the 1st vJoy device. Download link for Joy2vJoy: https://www.digitalcombatsimulator.com/en/files/3321311/ Links for the vJoy driver, both for usage with Joy2vJoy and/or the Streamdeck-vJoy plug-in: https://github.com/njz3/vJoy/releases (as of now version 2.2.1.1) https://github.com/jshafer817/vJoy/releases/tag/v2.1.9.1 (older version) Version 1.03 (April 10th 2022) Added virtual (Off) button 22, when Throttle Hat is centered. Added short-cuts (e.g. "ALT+C" to toggle "Update checkboxes). Added ToolTips to Physical/vJoy checkboxes (shown when hovering mouse ower these). Added management of "Initial Status" profiles. Enabled mirroring of Off-buttons Enabled mirroring of Physical TM-Throttle buttons (and POV Hat) Enabled mirroring of Physical TM-Joystick buttons (and POV Hat) Version 1.02 (April 3rd 2022) Its no longer necessary to press the "Activate" button after startup. Added program arguments, so you can use "-Minimize" (without quotes) in your program short-cut, to start the program minimized. Updated the manual with new download links, and describing the command-line arguments added in this version. Only one instance running is allowed. Version 1.01 (March 2022) No need to toggle all buttons (on/off) of the physical Thrustmaster throttle at start-up. Released here at DCS as a zipped-archive (to be copied where you want it). Version 1.00 (2019) Released as an installer (via a Thrustmaster FB-group). Recorded video for the release of version 1.03 both explaining how to use the program in general, and what was added to version 1.03: Beside using vJoy for the Joy2vJoy software I also have begun using vJoy with my Stream Deck (SD). I started to use Joy2vJoy when I got the DCS F18, and for the F18 I made an SD-profile for the F18 simply sending key-combinations from SD to DCS. However it was a drag finding out which keyboad-combinations that were in use in DCS, which I needed to define/use both in DCS and SD (given many keyboard combinations that DCS will acccept, cannot be generated by SD). So for my AH64 SD-profile I instead decided to use a plug-in for SD that lets my SD button-presses generate vJoy button presses. So as of now I have no less that 5 vJoy-devices (virtual Joysticks) defined. The first vJoy device is only used with Joy2vJoy (can't be shared with the SD plug-in). However the other 4 vJoy-devices (each with 128 buttons) are only used with the SD plug-in. Hence via this plug-in I have no less than 512 virtual buttons in total, that I can map between SD and DCS. Even though you define devices with 128 buttons, there might be programs/games that are only able to see/use the first 32 buttons (however DCS can see/use all 128 buttons on each device). Another bennefit of using this vJoy plug-in for SD over generating key-presses is that you can use multiple buttons at the same time. E.g. pressing two SD-buttons (or more) at the same time, I can both increase the lights for SIGNAL and PRIMARY in the AH64 at the same time. Had I used traditional key-combinations, I would first have to increase one, and then the other. Here below is a link for that plug-in for SD, and a link for a package I made with nearly 300 (button) graphic-files to use if you want to build an AH64 SD profile. In the zip-file for the latter you also get a full list of which actions you could choose to map to actions for the virtual devices 2-5 (4 devices each with 128 buttons): https://github.com/ashupp/Streamdeck-vJoy https://www.digitalcombatsimulator.com/en/files/3321046/
-
 I have just today received my new "Ace Collection Rudder Pedals" from Virpil Controls. These pedals are a replacement for Thrustmaster T16000 pedals I've been using for a few years. Above: The 2 pedals in question. I've spoken some about my disability in a post in the Virpil Controls section. I wouldn't rehash it all again, but in short, I have a disability called Drop Foot on my left leg. (See images) This is a result of a gunshot wound while in the Army and serving in Iraq. The GSW caused compartment syndrome, which crushed the muscle, nerve, and connective tissue in my leg with pressure as the blood flowed into the leg but could not pump out because of a severed vein. (Femoral Vein) I can't lift my toes, and my ankle is sort of fused, and only moves if I move it with my hand or press it against something. I also lack proper touch sensitivity. It's either hypersensitive, or can't feel anything, depending on the time of day, Barometric pressure, how much I've used the leg today, and a whole bunch of other things. Okay, so that's the problem. (Don't bother to comment saying I could fly with a twist stick, that's just trolling. I can't. Doesn't work for me. I fly with pedals. and I own a manual transmission 1985 Jeep and as well as my other car. Yeah, I can drive a stick.) While I can fly with rudder pedals, some pedals are easier than others. For example in the pictures you can see the comparison in width of pedals between the Virpil pedals and the Thrustmaster T16000 model. So apart from overall build quality, which the Virpl pedals win hands down without question by a mile... The wider pedals are much more comfortable. The virpil pedals are about 2-3 inches taller in overall height, and about 4 inches wider throw, maybe less, but it feels like double. Each footrest on the virpil is much more comfortable as the pedal angel at which it sits in the resting position is higher on the ThrustMaster. When I rested my left foot on the TM pedals, it sort of pinched something in my ankle or leg. I don't know because My leg lies to me all the time, but it didn't feel good. I found myself removing my foot from the pedals during flights, which involved lifting my leg with my arm and setting it on the floor. I have not yet done any long flights with the Virpil pedals, however there is no pinching sensation when i put my feet on them. They are comfortable. My Wife sat in a chair and put her feet on both, she commented that the Virpil pedals are like a nice footrest, the TM pedals were uncomfortable to her. (She has properly working legs, so I wanted her take on them.) The comfort level is HUGE. Furthermore, the throw distance and design is important. I can hook my right foot and pull back, effectively adding left rudder, without using too much of my left leg, something that was technically possible, but actually near impossible with the TM pedals. The brake axis on the Ace pedals is a night and day difference. I plan on updating this post, as my wife sometimes feels bad for her cripple of a husband and also ordered me the MFG crosswind ME109 pedals with their adjustable footrest. I have not concerns about the quality of the Ace collection rudder pedals, and I haven't heard many complaints about the build quality of the MFG crosswind pedals. It's just going to come down to which pedals are more comfortable for me to use with my disability. Whichever pedals are a little less comfortable on my leg (Virpil or Crosswind) I'm going to sell off to someone in my Squadron (AIN). I'm going to do full reviews on both the Ace collection, with both foot rests, and the MFG Crosswind ME109 pedals. While this might be interesting to some of you, I must assume that there is someone else out there who is struggling with painful rudder pedals as well, and is too stubborn to use a twist grip. It is for those people, and the manufactures of these controllers that I am writing this for. If you're intresting in talking about this with me, or just someone to fly with and help you learn your aircraft in DCS, feel free to drop by the AIN discord server. We've got a great group of sim pilots, and we're always willing to help people learn and fly with new people. https://discord.gg/JuBydbsfDn Stay tuned, and if you've got any questions on the subject of rudder pedals and disability, please post it here so that we can try and work out solutions together. here's my Youtube, and Ill be doing video reviews of pedals in the near future when I've had a chance to play with them longer. But I did just review a pretty cool head tracker, so check that out in the mean time.
- 1 reply
-
- 1
-
-
- rudder pedals
- disability
- (and 3 more)


.jpg.67bd9b4c55de987efdf0817ec645db2e.jpg)
.jpg.2b8db791dfd456fe14b7cb358c674771.jpg)
.jpg.882cf00aca17107ed33938988310f236.jpg)
.jpg.c465f8e3129940a0fc270d6668e4eee9.jpg)
.jpg.3a0da865cec47932c37b668079233e3a.jpg)
.jpg.35ecce581bef76e9f2c18157db2d755f.jpg)
.jpg.3445ce3033d33142b12a941449103318.jpg)
.jpg.23910353a376f76bb7d5586f265d728b.jpg)
.jpg.9ee9ba220b89ab15d70f9487cfa0b5b8.jpg)
.jpg.5d15eed9305ea776efa7e71c6933e5a0.jpg)
.jpg.72d85fd22339441bec04f8f820071166.jpg)