mariner3302
-
Posts
382 -
Joined
-
Last visited
Content Type
Profiles
Forums
Events
Everything posted by mariner3302
-
The more they see, the more they listen....
-
Just about EVERYONE binds some controls... some more than others. How in the HELL do you NOT give us the ability to bind all the controls and then call this a simulator??? I sure as hell wont be buying anything from Heatblur again if this is normal.... yeah, great airplane, really cool, really pretty - but a SIMULATOR? No. An overpriced and overhyped video game? Yes.
-
How difficult is it going to be to get the binding issues fixed? No binding for the parking brake??? SERIOUSLY??? This has given me a really bad taste in my mouth for anything further from Heatblur,
-
 WELL SAID!!! I havent flown the Cat because I have been building a replica pit for it. I feel pretty let down after seeing the lack of bindings. If they dont do all the bindings then it has all been a waste of time. They hyped it as the best thing since the first flight simulator. Its just another pretty video game at this point, NOT a SIMULATOR.
 -
Running request - Bindable Button / Axis options
mariner3302 replied to maverickturner's topic in Bugs and Problems
Seems like they spent all this time making it pretty to the most minute detail but totally forgot it is supposed to be a simulator, not a video game. -
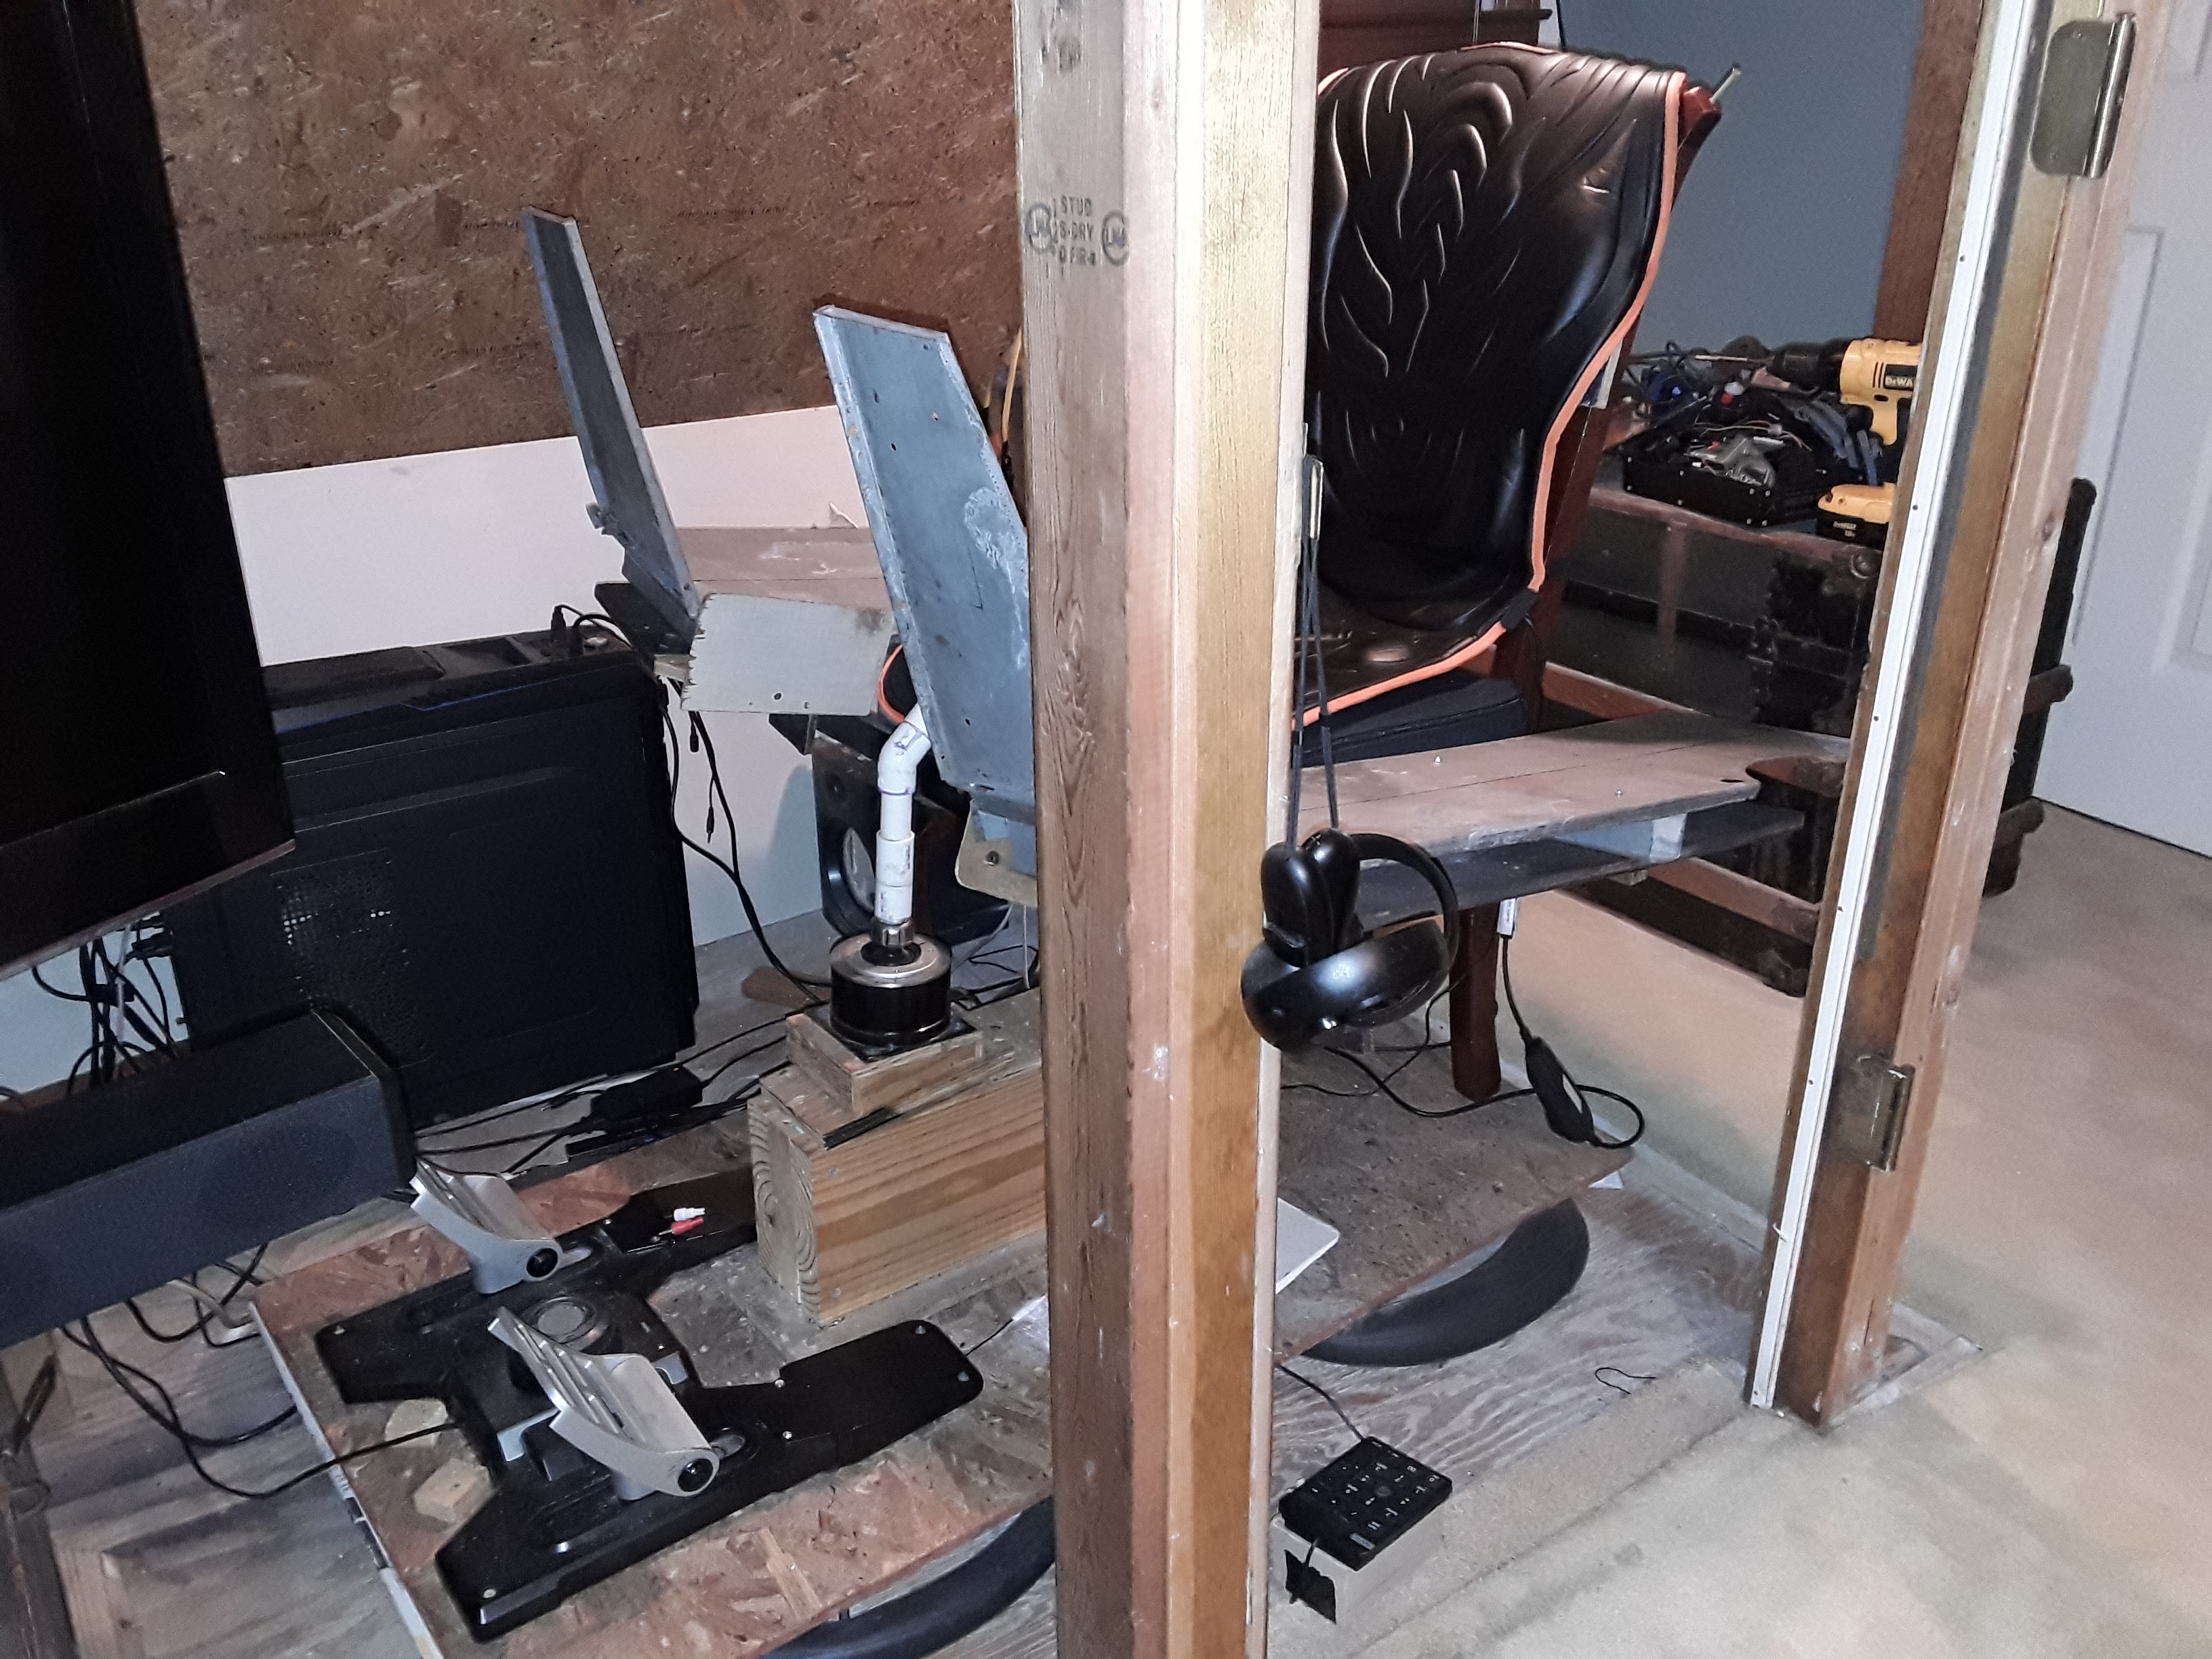
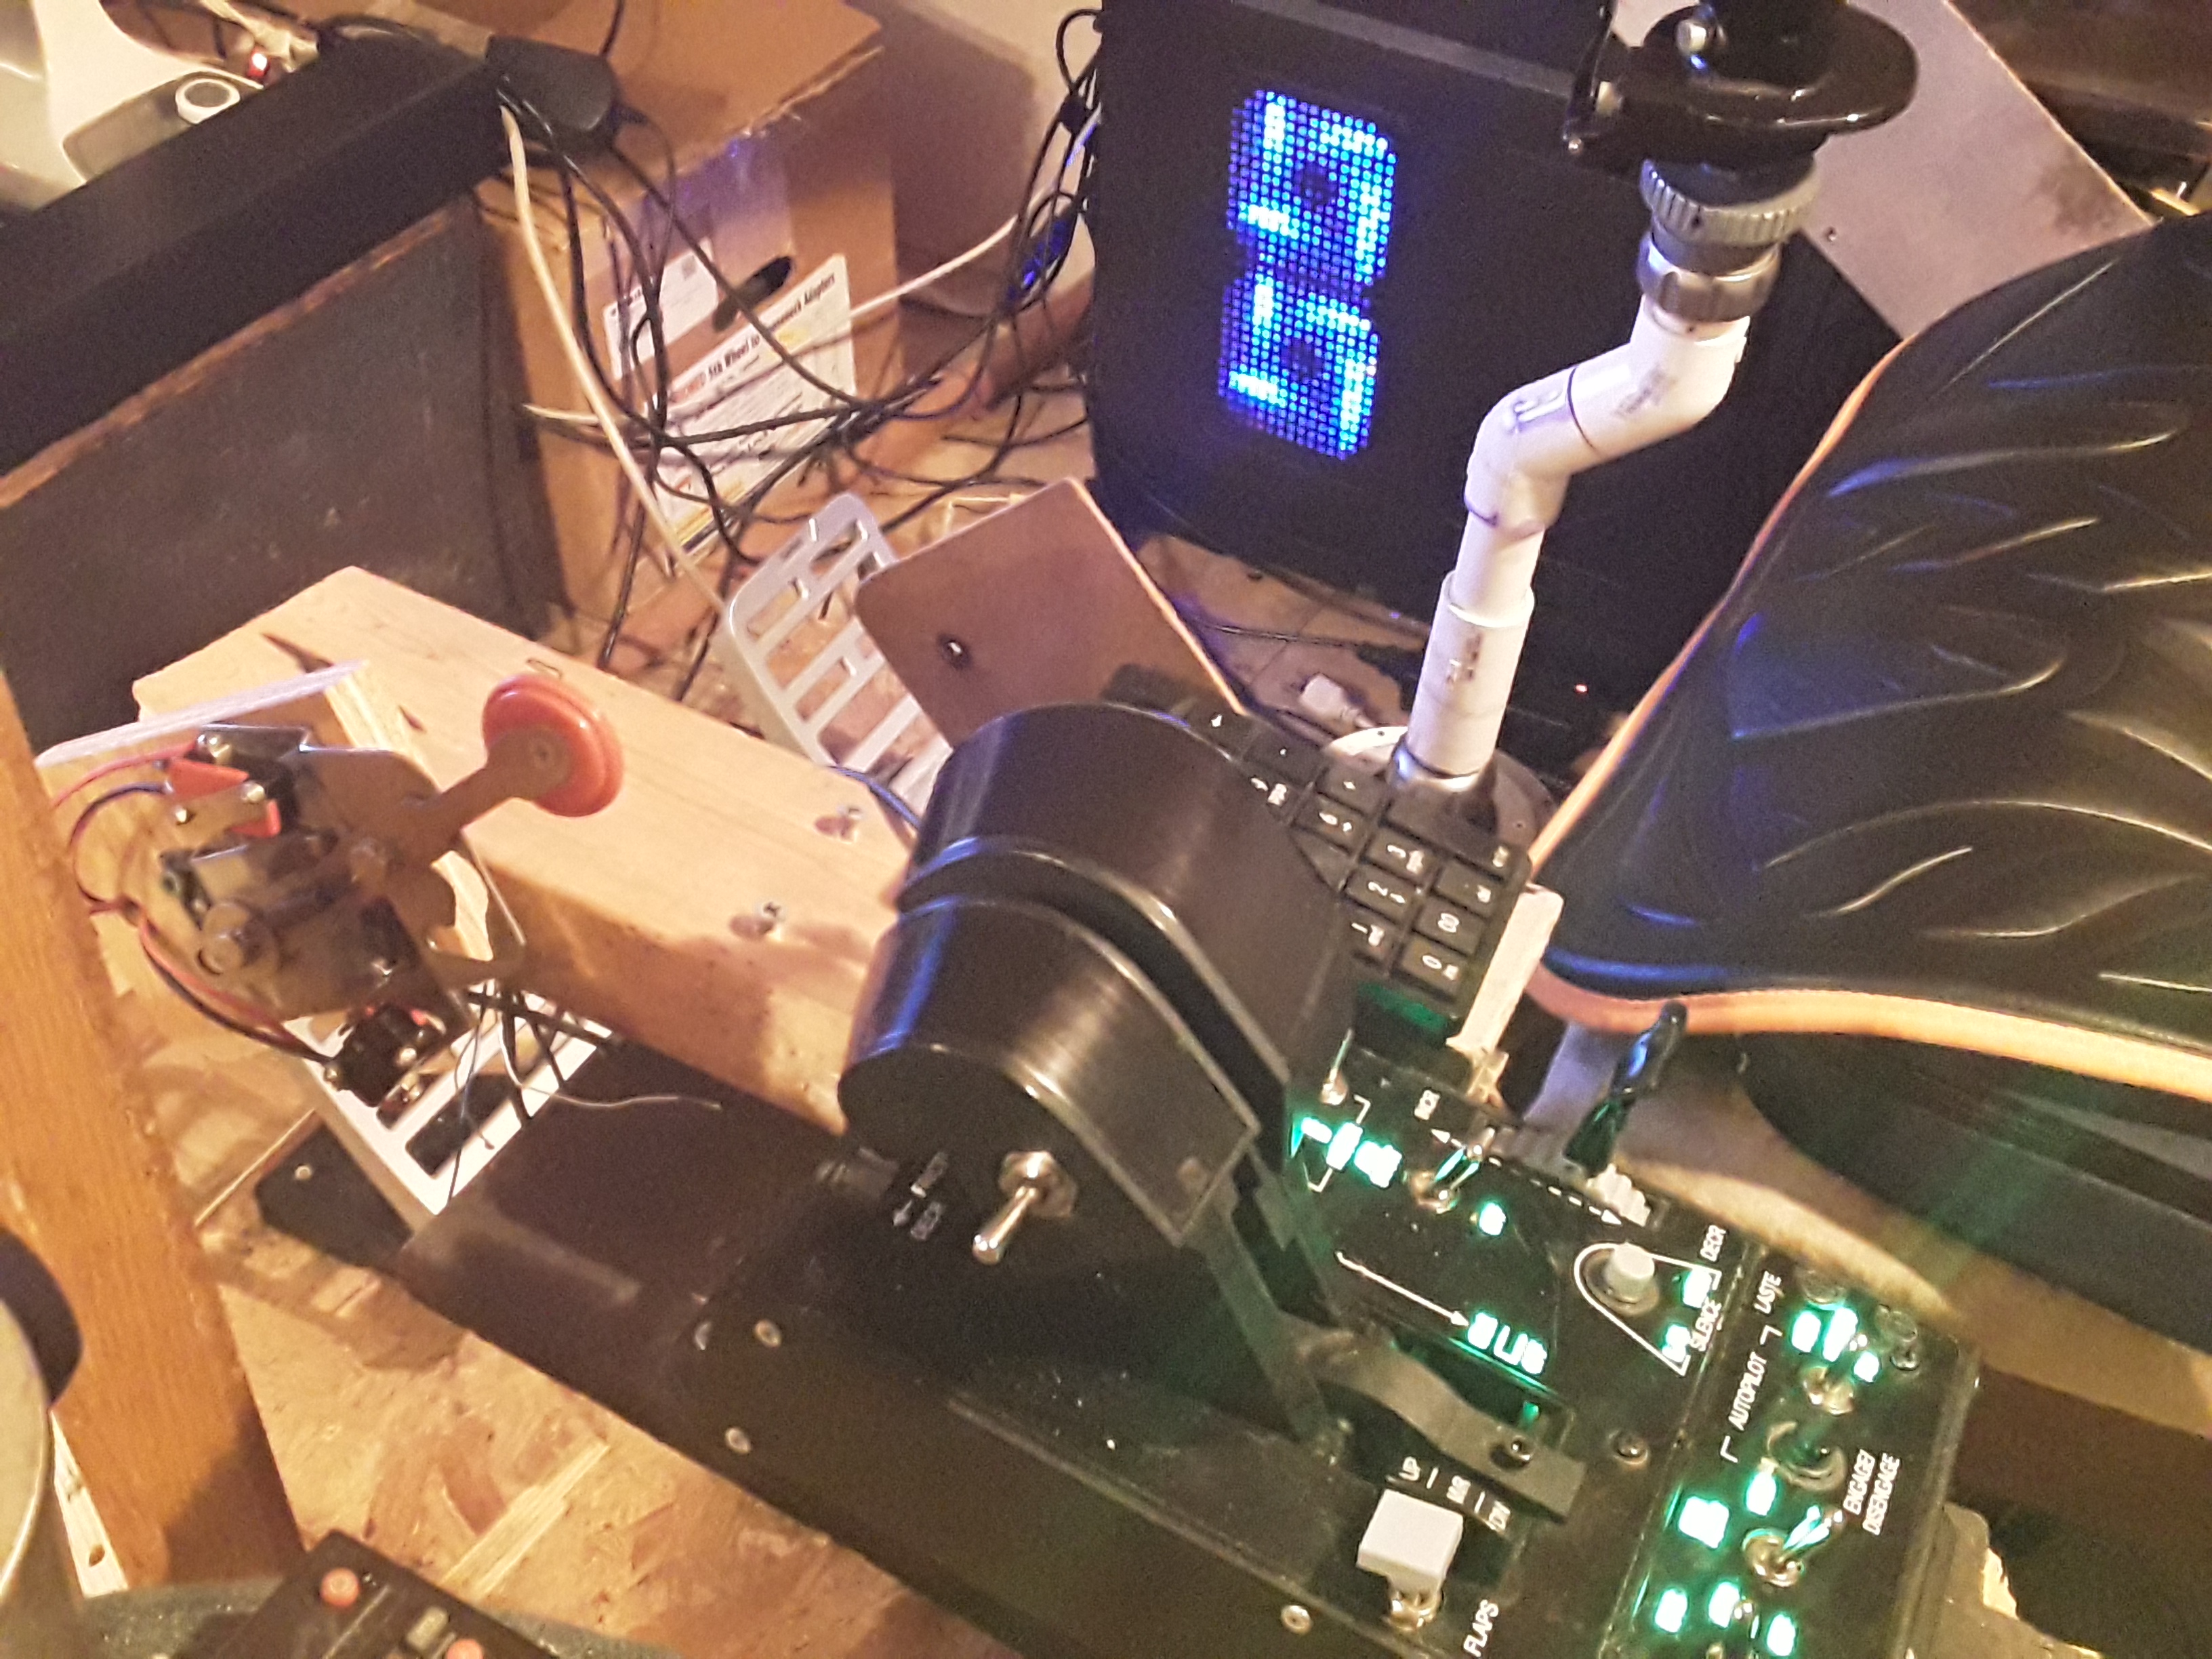
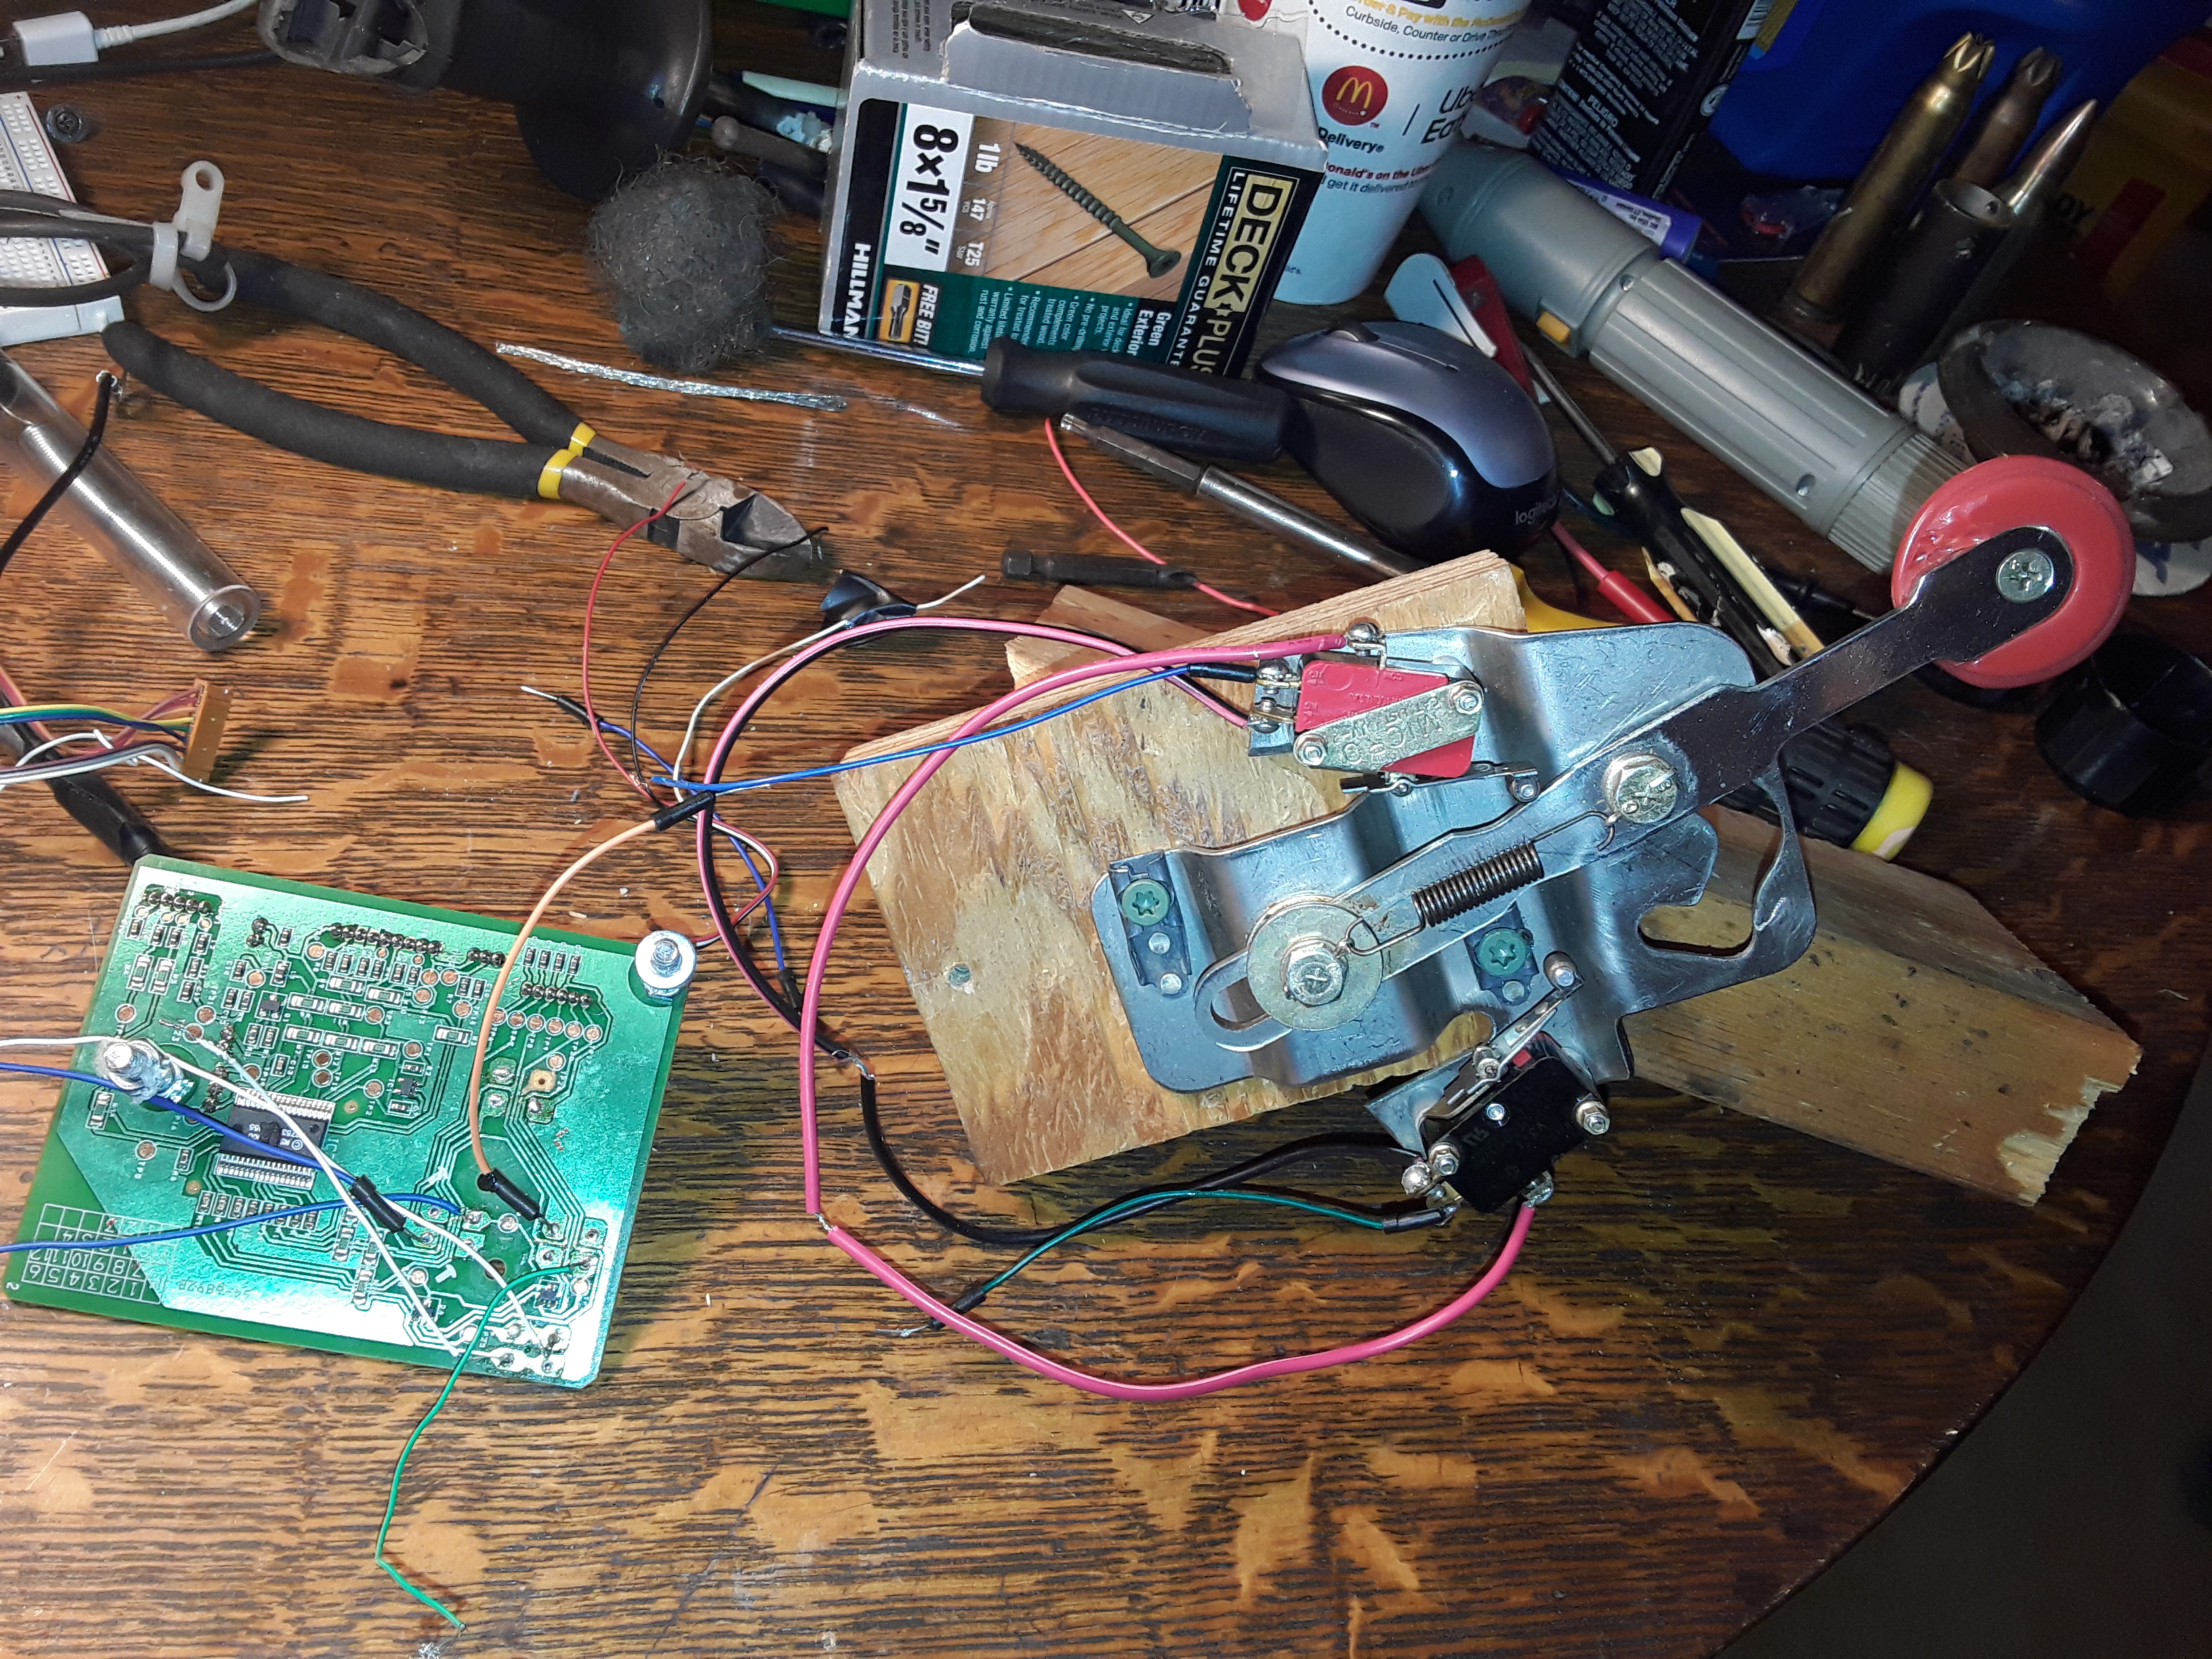
I'm building a cockpit based on this airplane. I built my parking brake from scratch. I am really disappointed in the lack of bindable controls. The axis binds aren't anywhere near what the other developers have given us. I hope we hear this is only because its very new. After all the waiting, the hype, the excitement about this being the greatest development in flight sim tech and we get basic controls you get from a video game....
-
VR Shaders mod for better VR experience
mariner3302 replied to Kegetys's topic in Utility/Program Mods for DCS World
Is the Pimax 5k worth the upgrade from the Rift? -
PointCTRL - Finger Mounted VR Controller
mariner3302 replied to MilesD's topic in PC Hardware and Related Software
Editing this out to avoid conflict escalation.. -
PointCTRL - Finger Mounted VR Controller
mariner3302 replied to MilesD's topic in PC Hardware and Related Software
This is the 'list', as you put it... https://forums.eagle.ru/showpost.php?p=3712497&postcount=202 -
This will be a great tool https://forums.eagle.ru/showthread.php?t=218861
-
Anyone hear what the parameters are for Jester to punch us both out?
-
Glad I could help! I really hope to see your throttle construction, please post pics and helpful hints, etc!
-
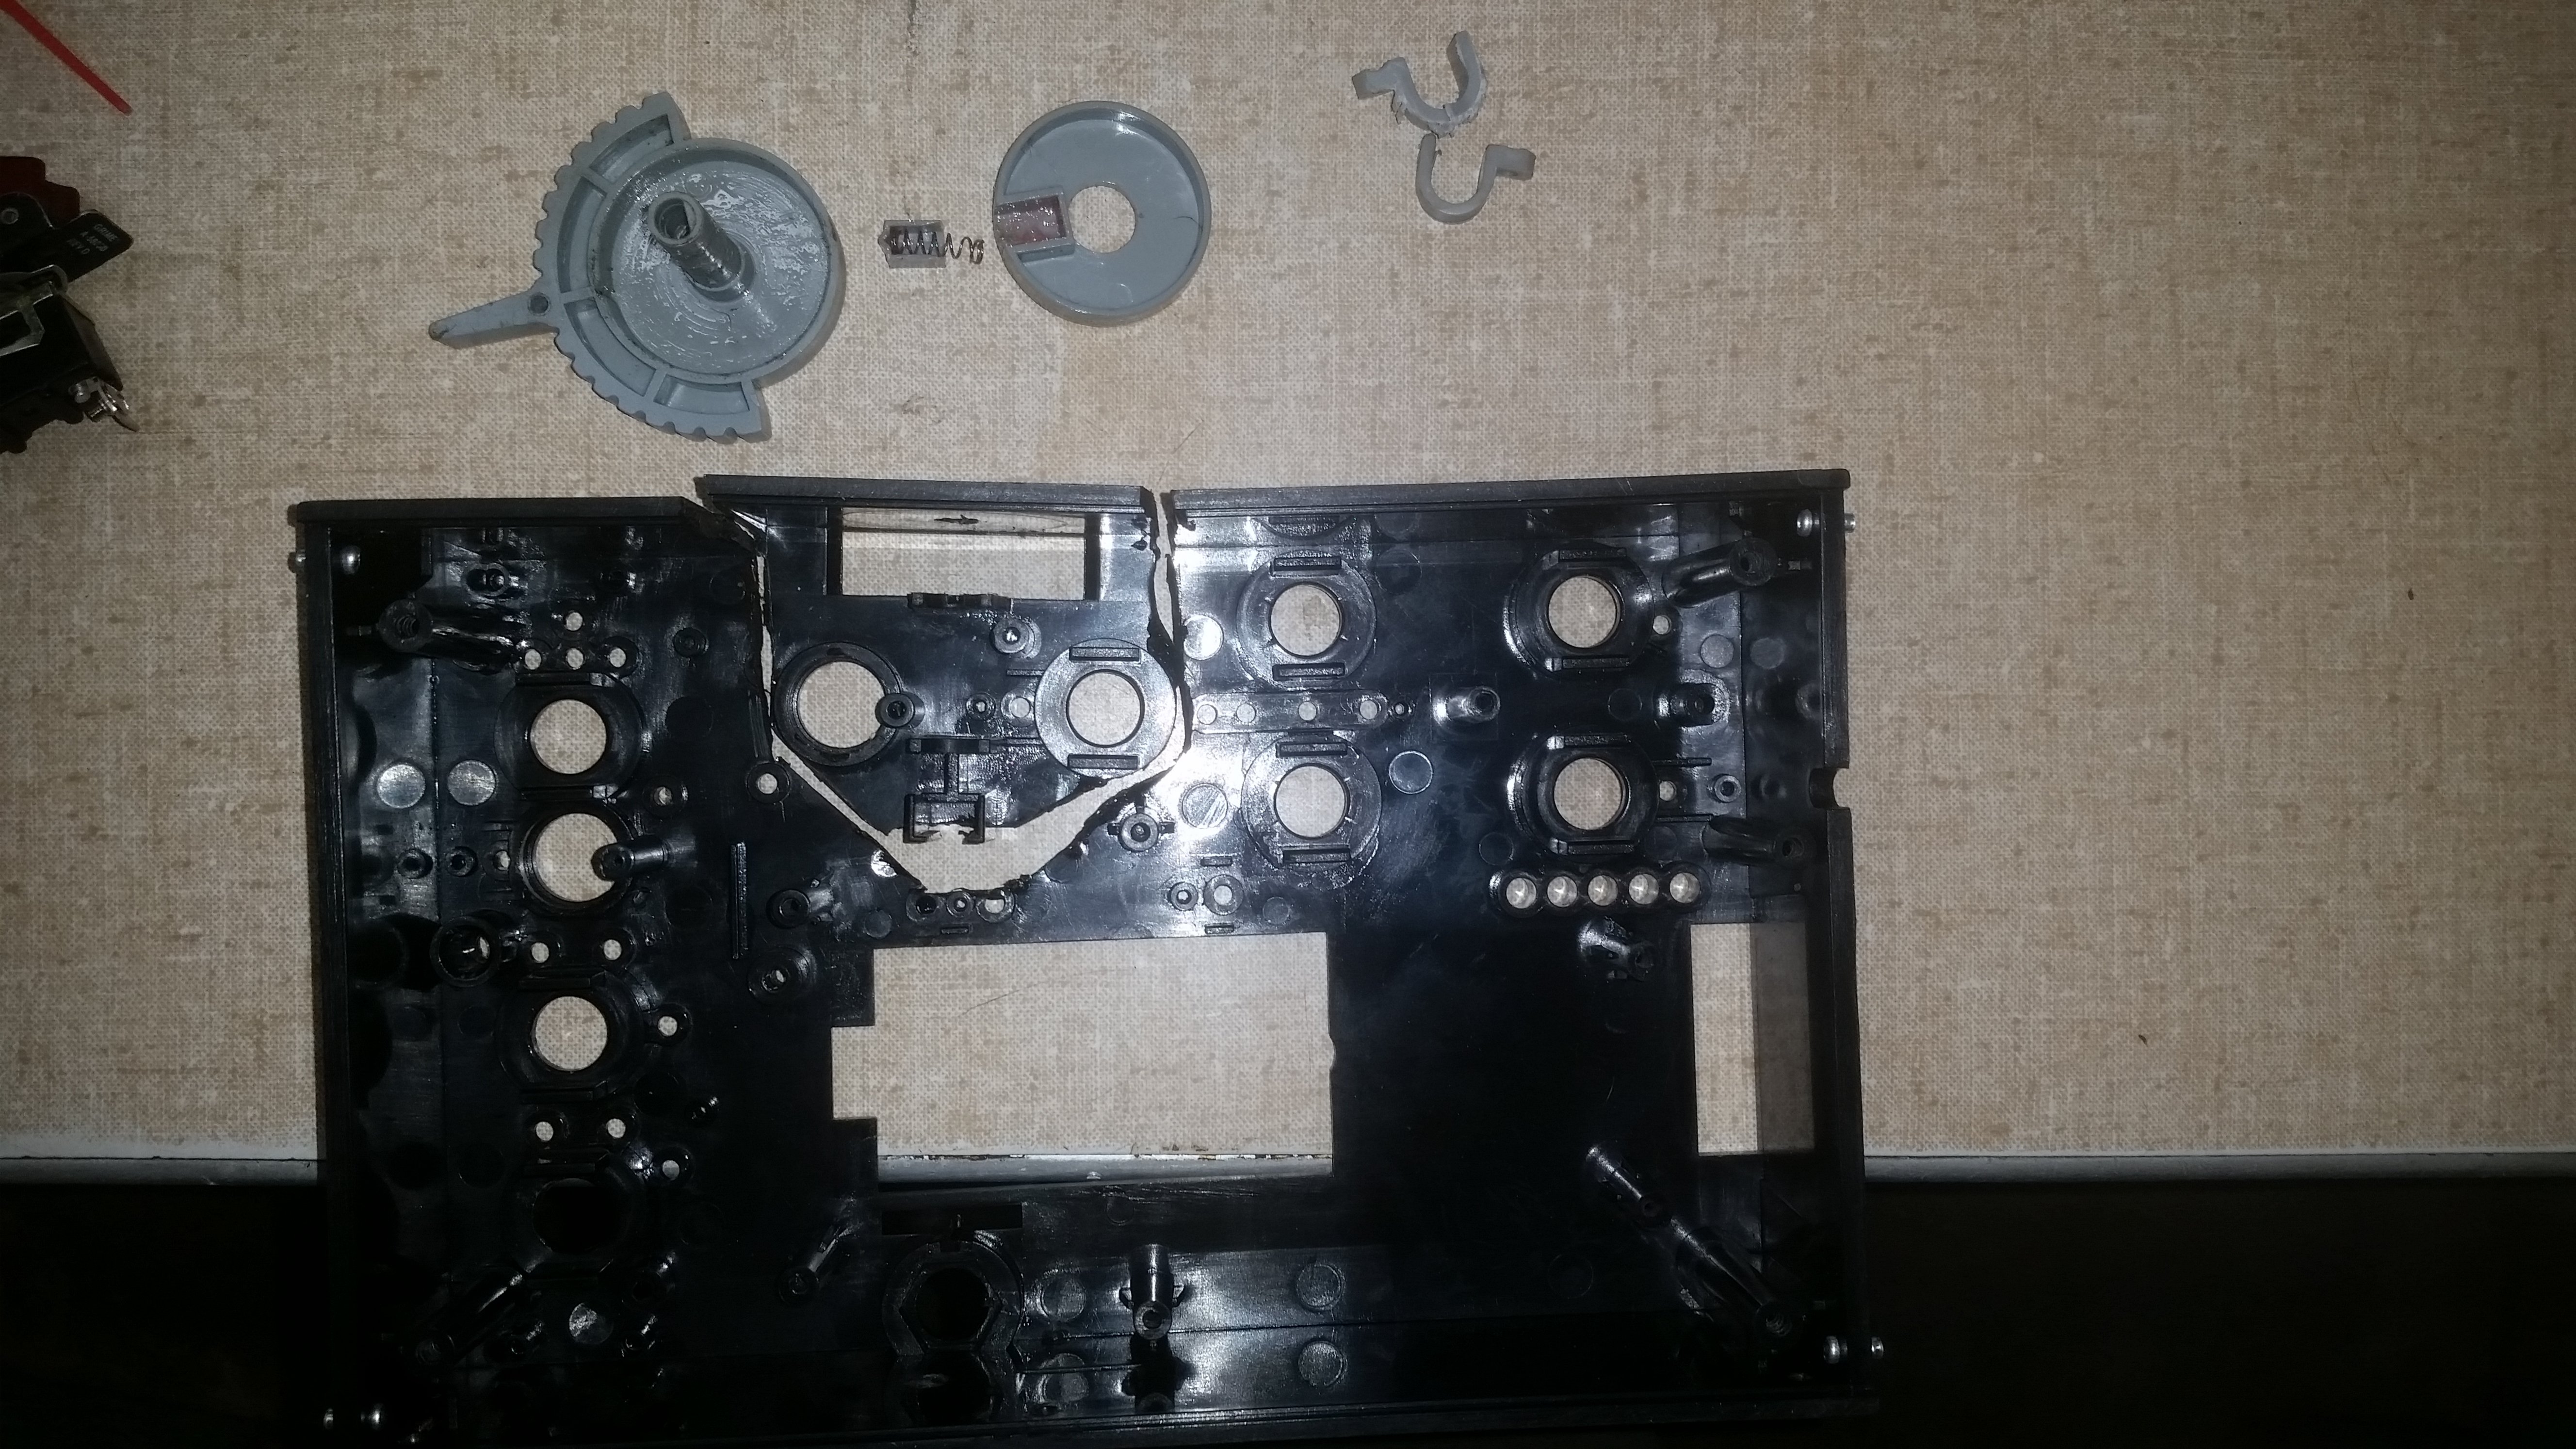
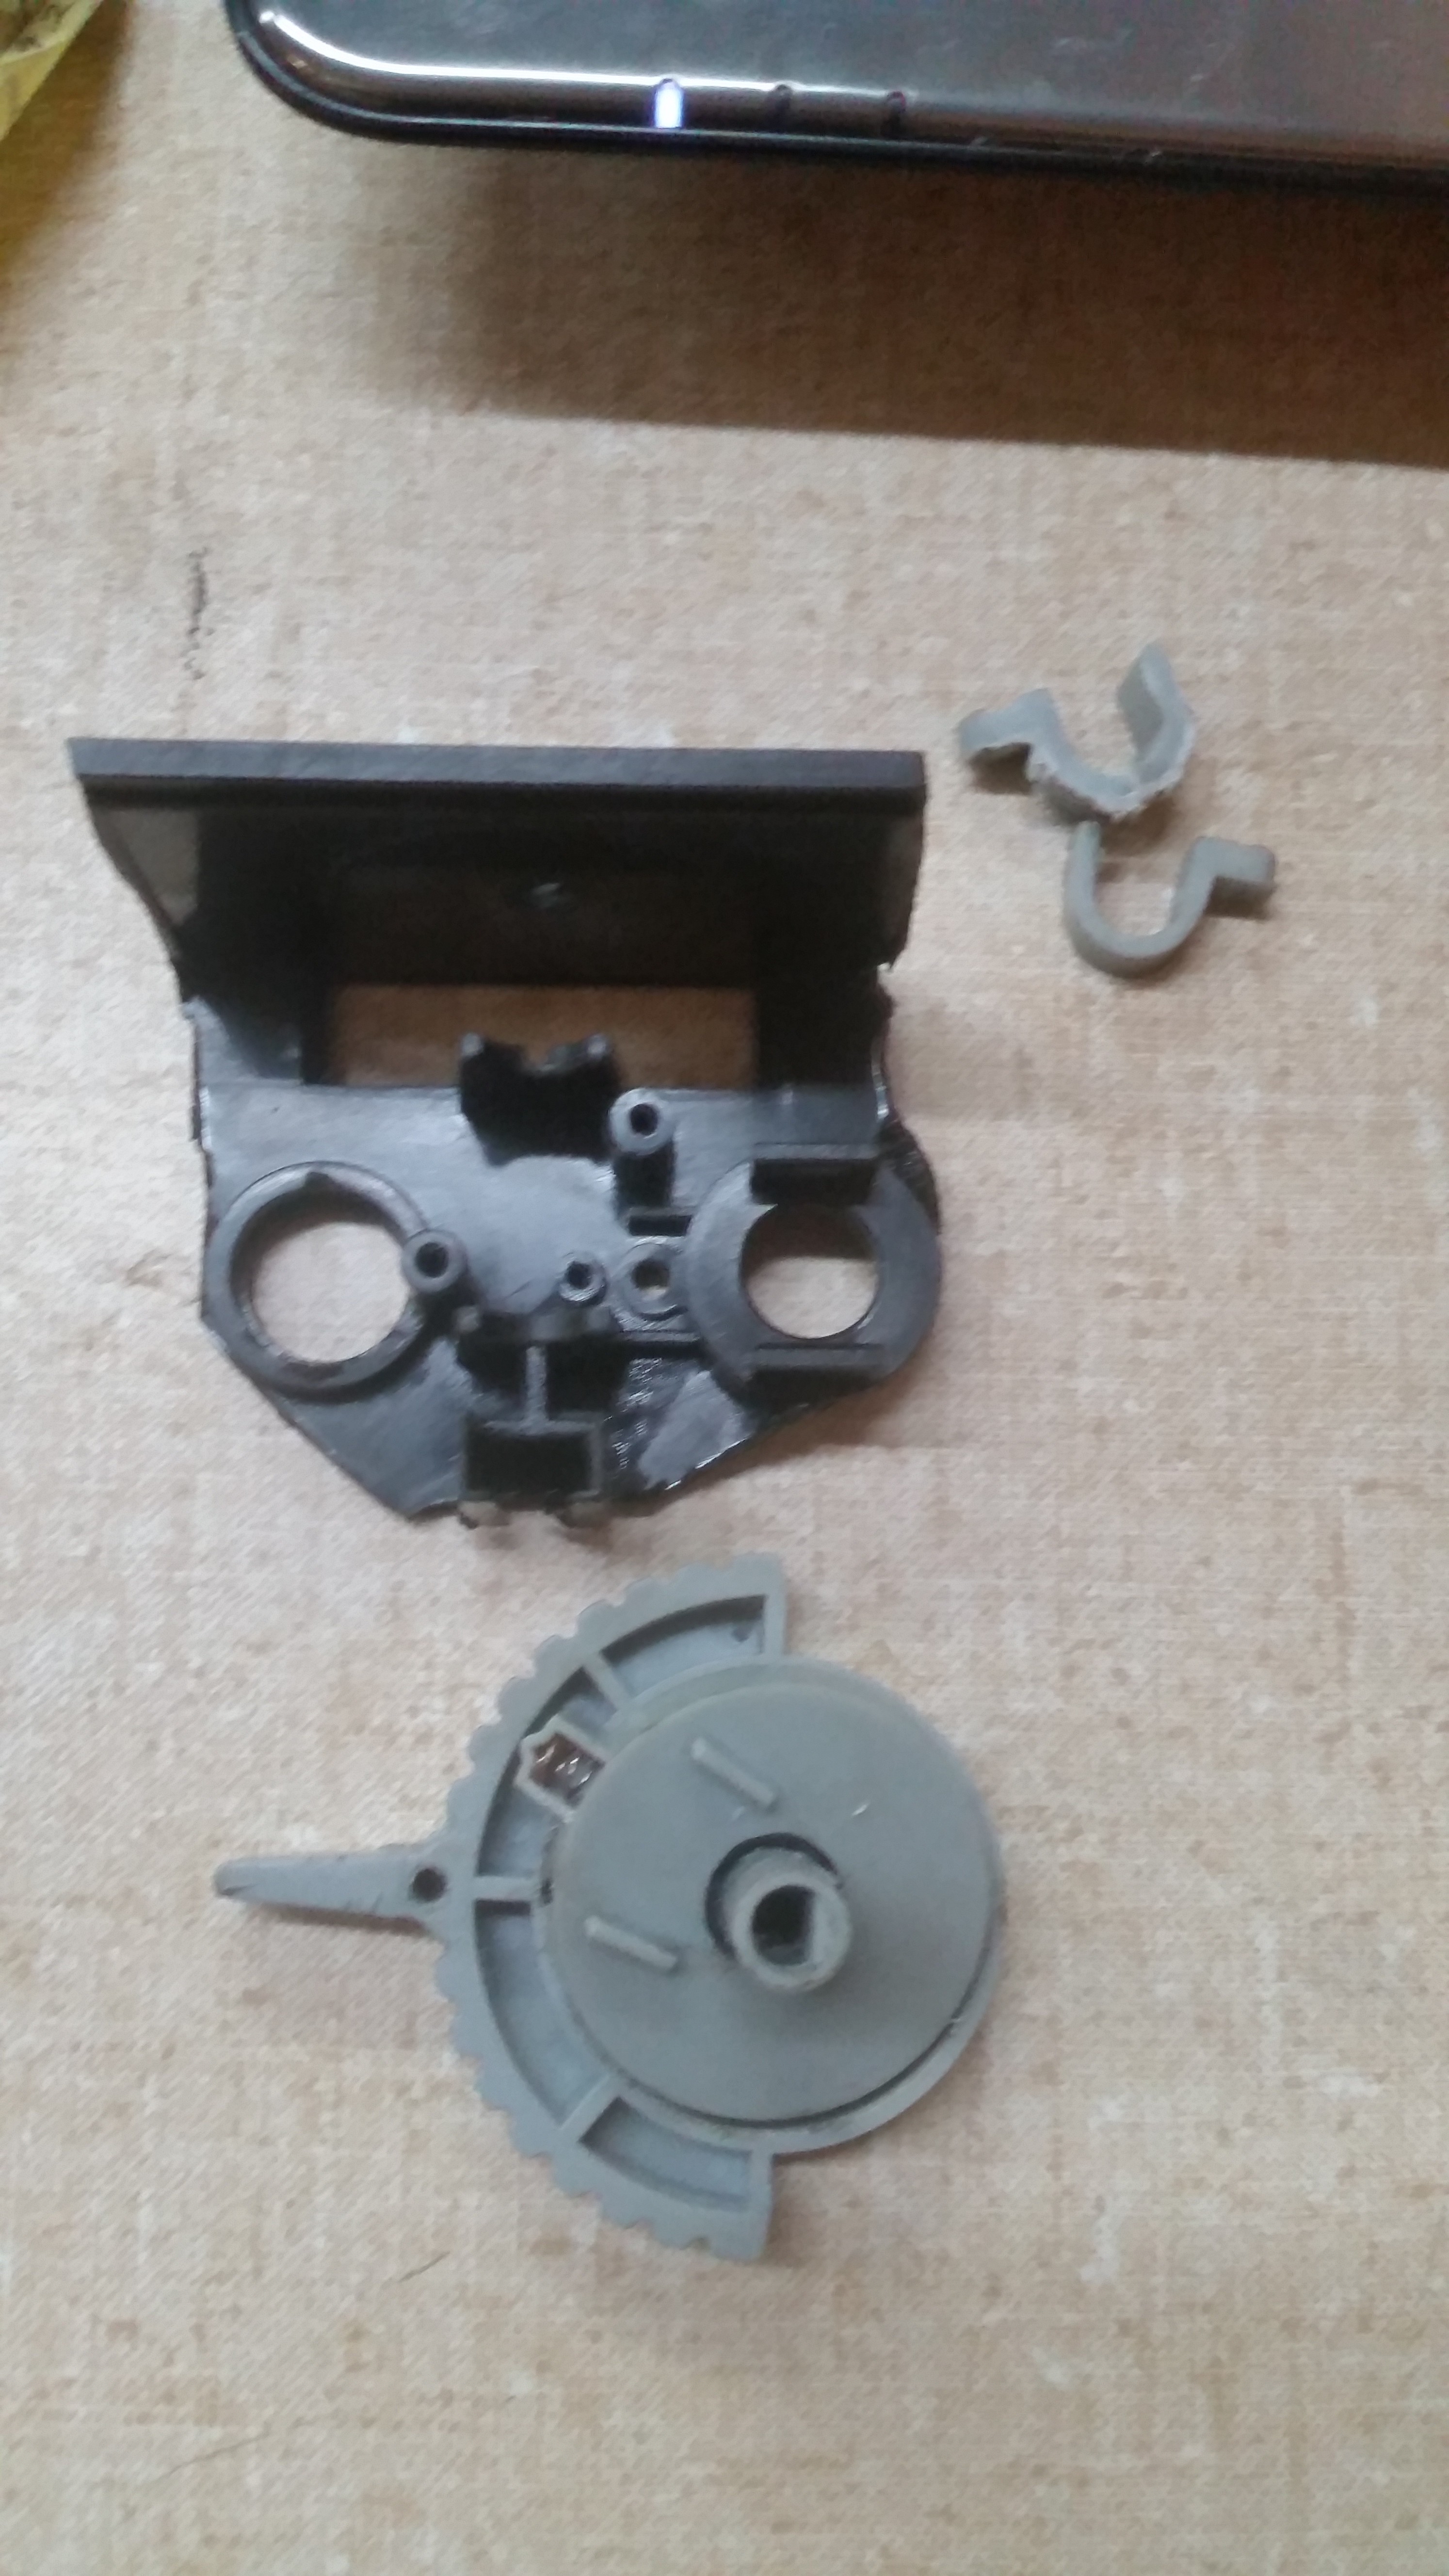
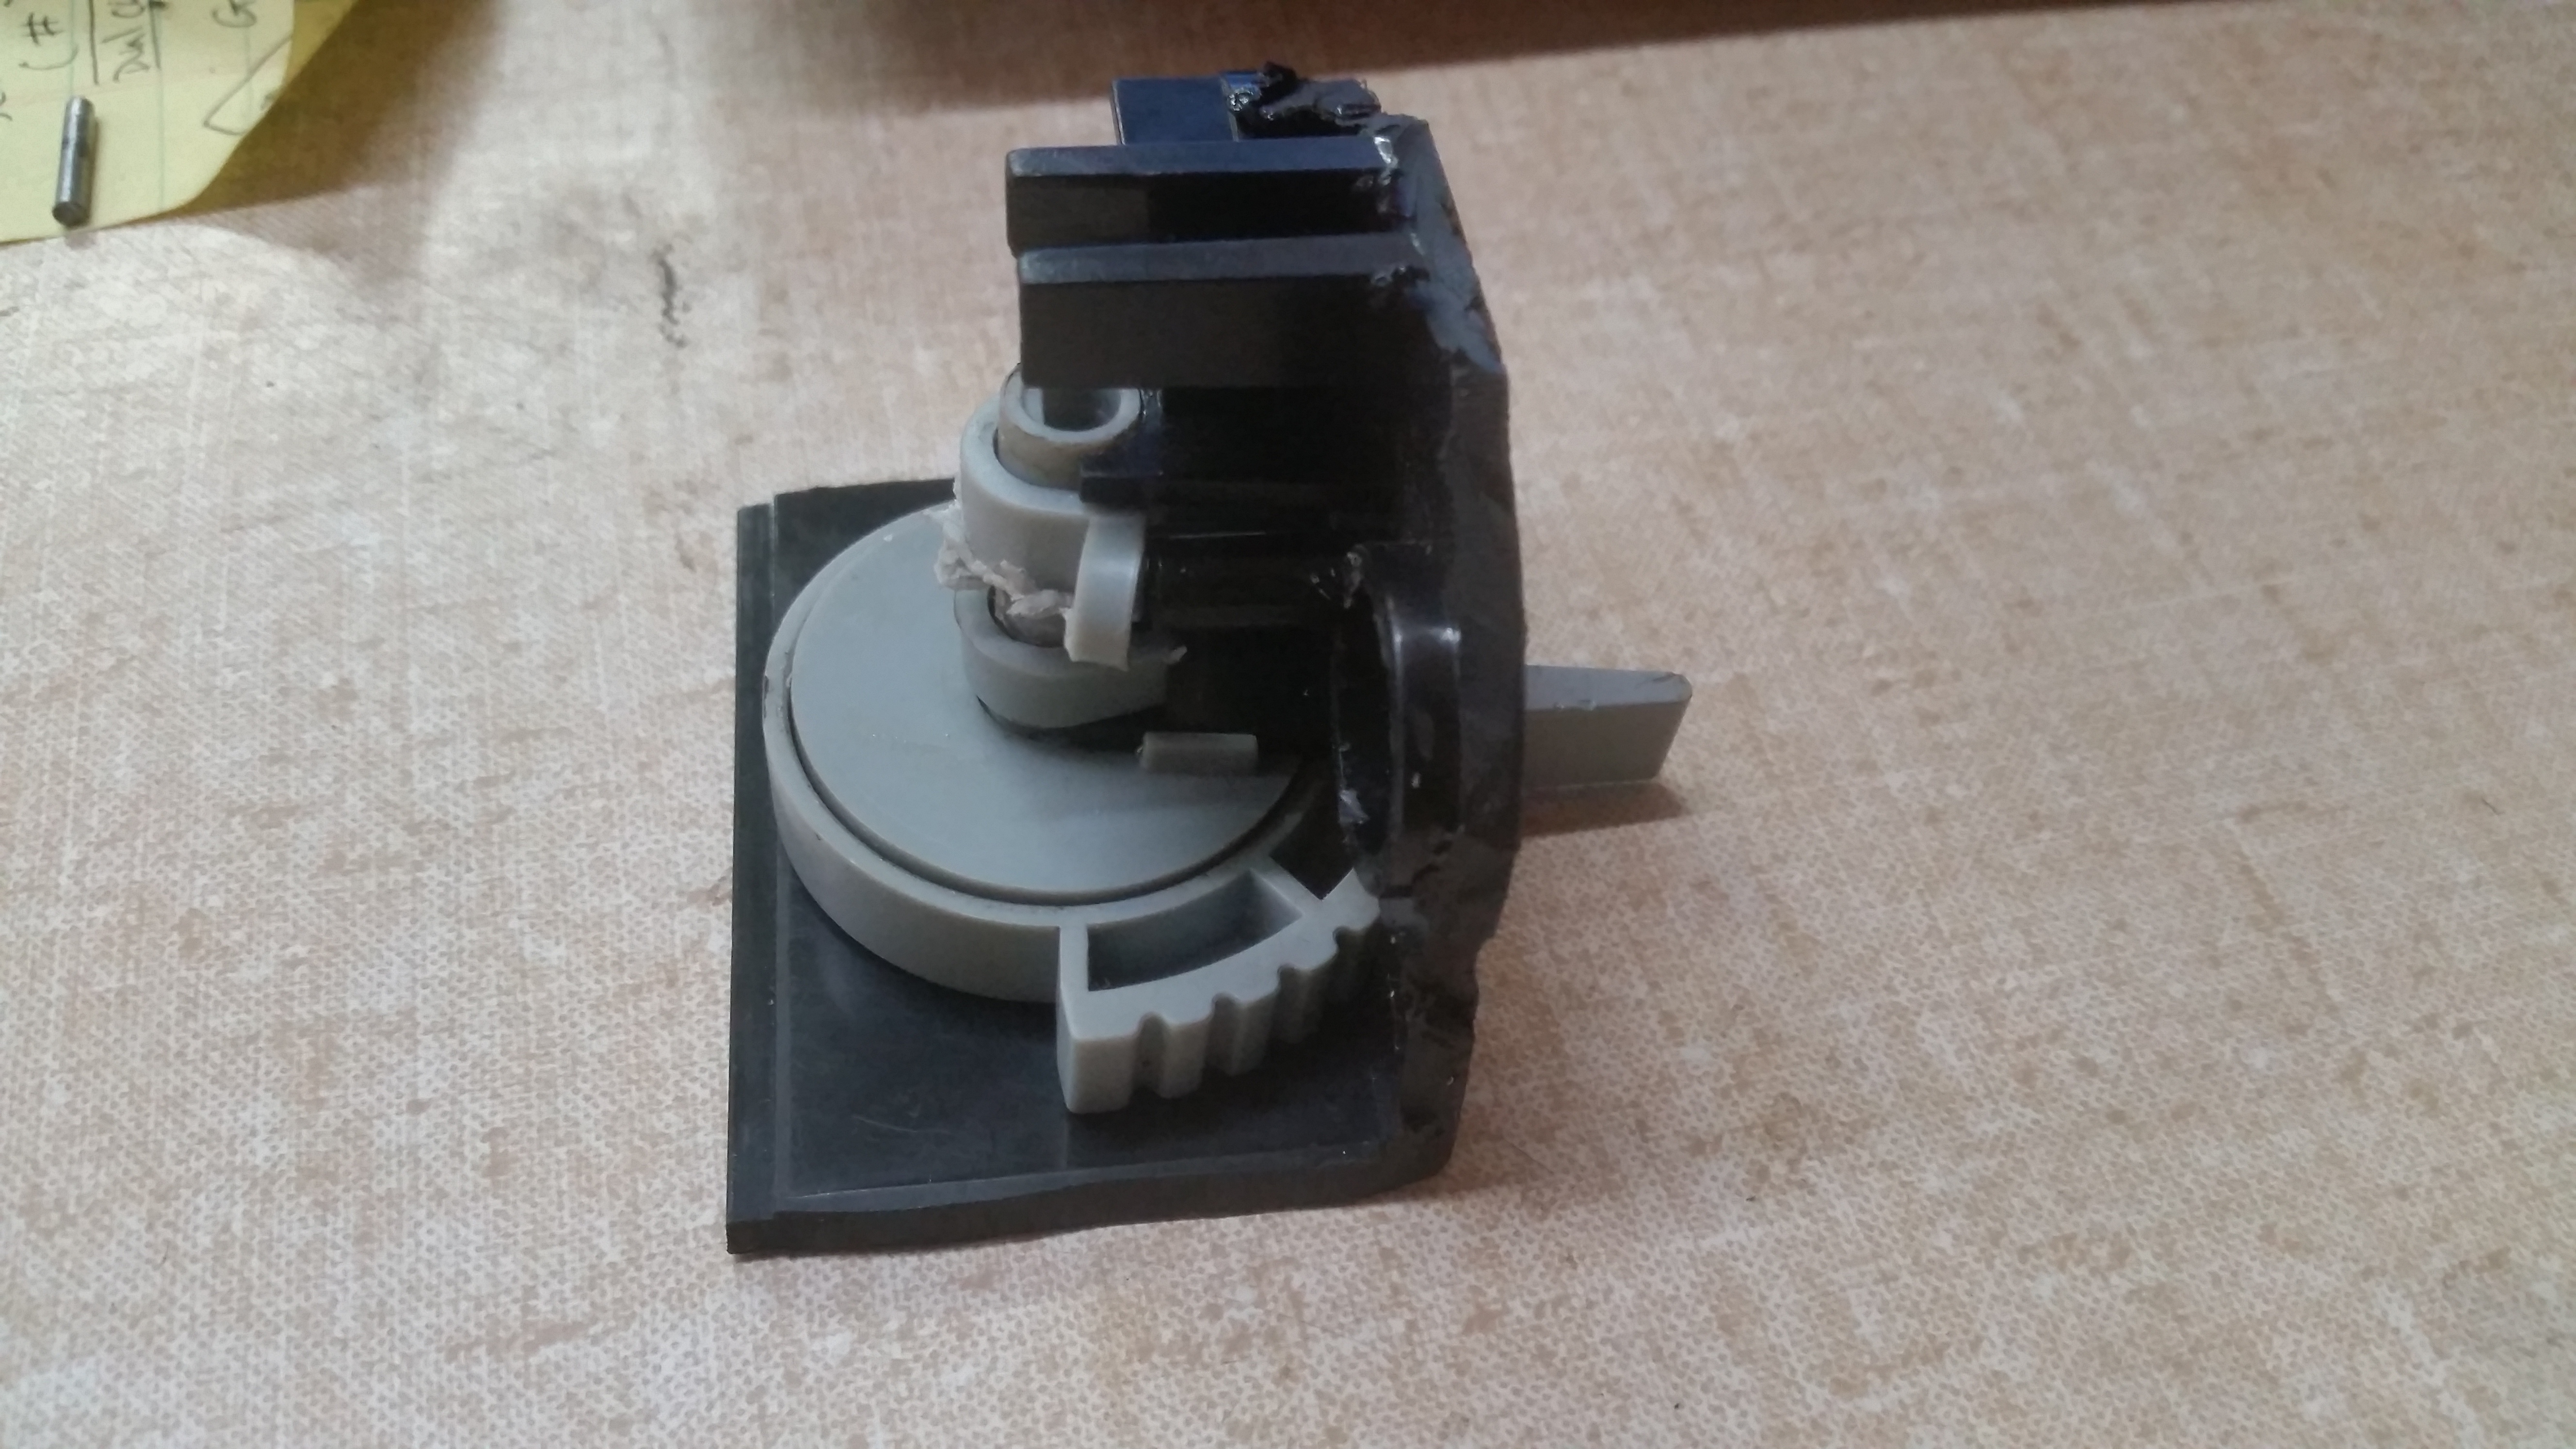
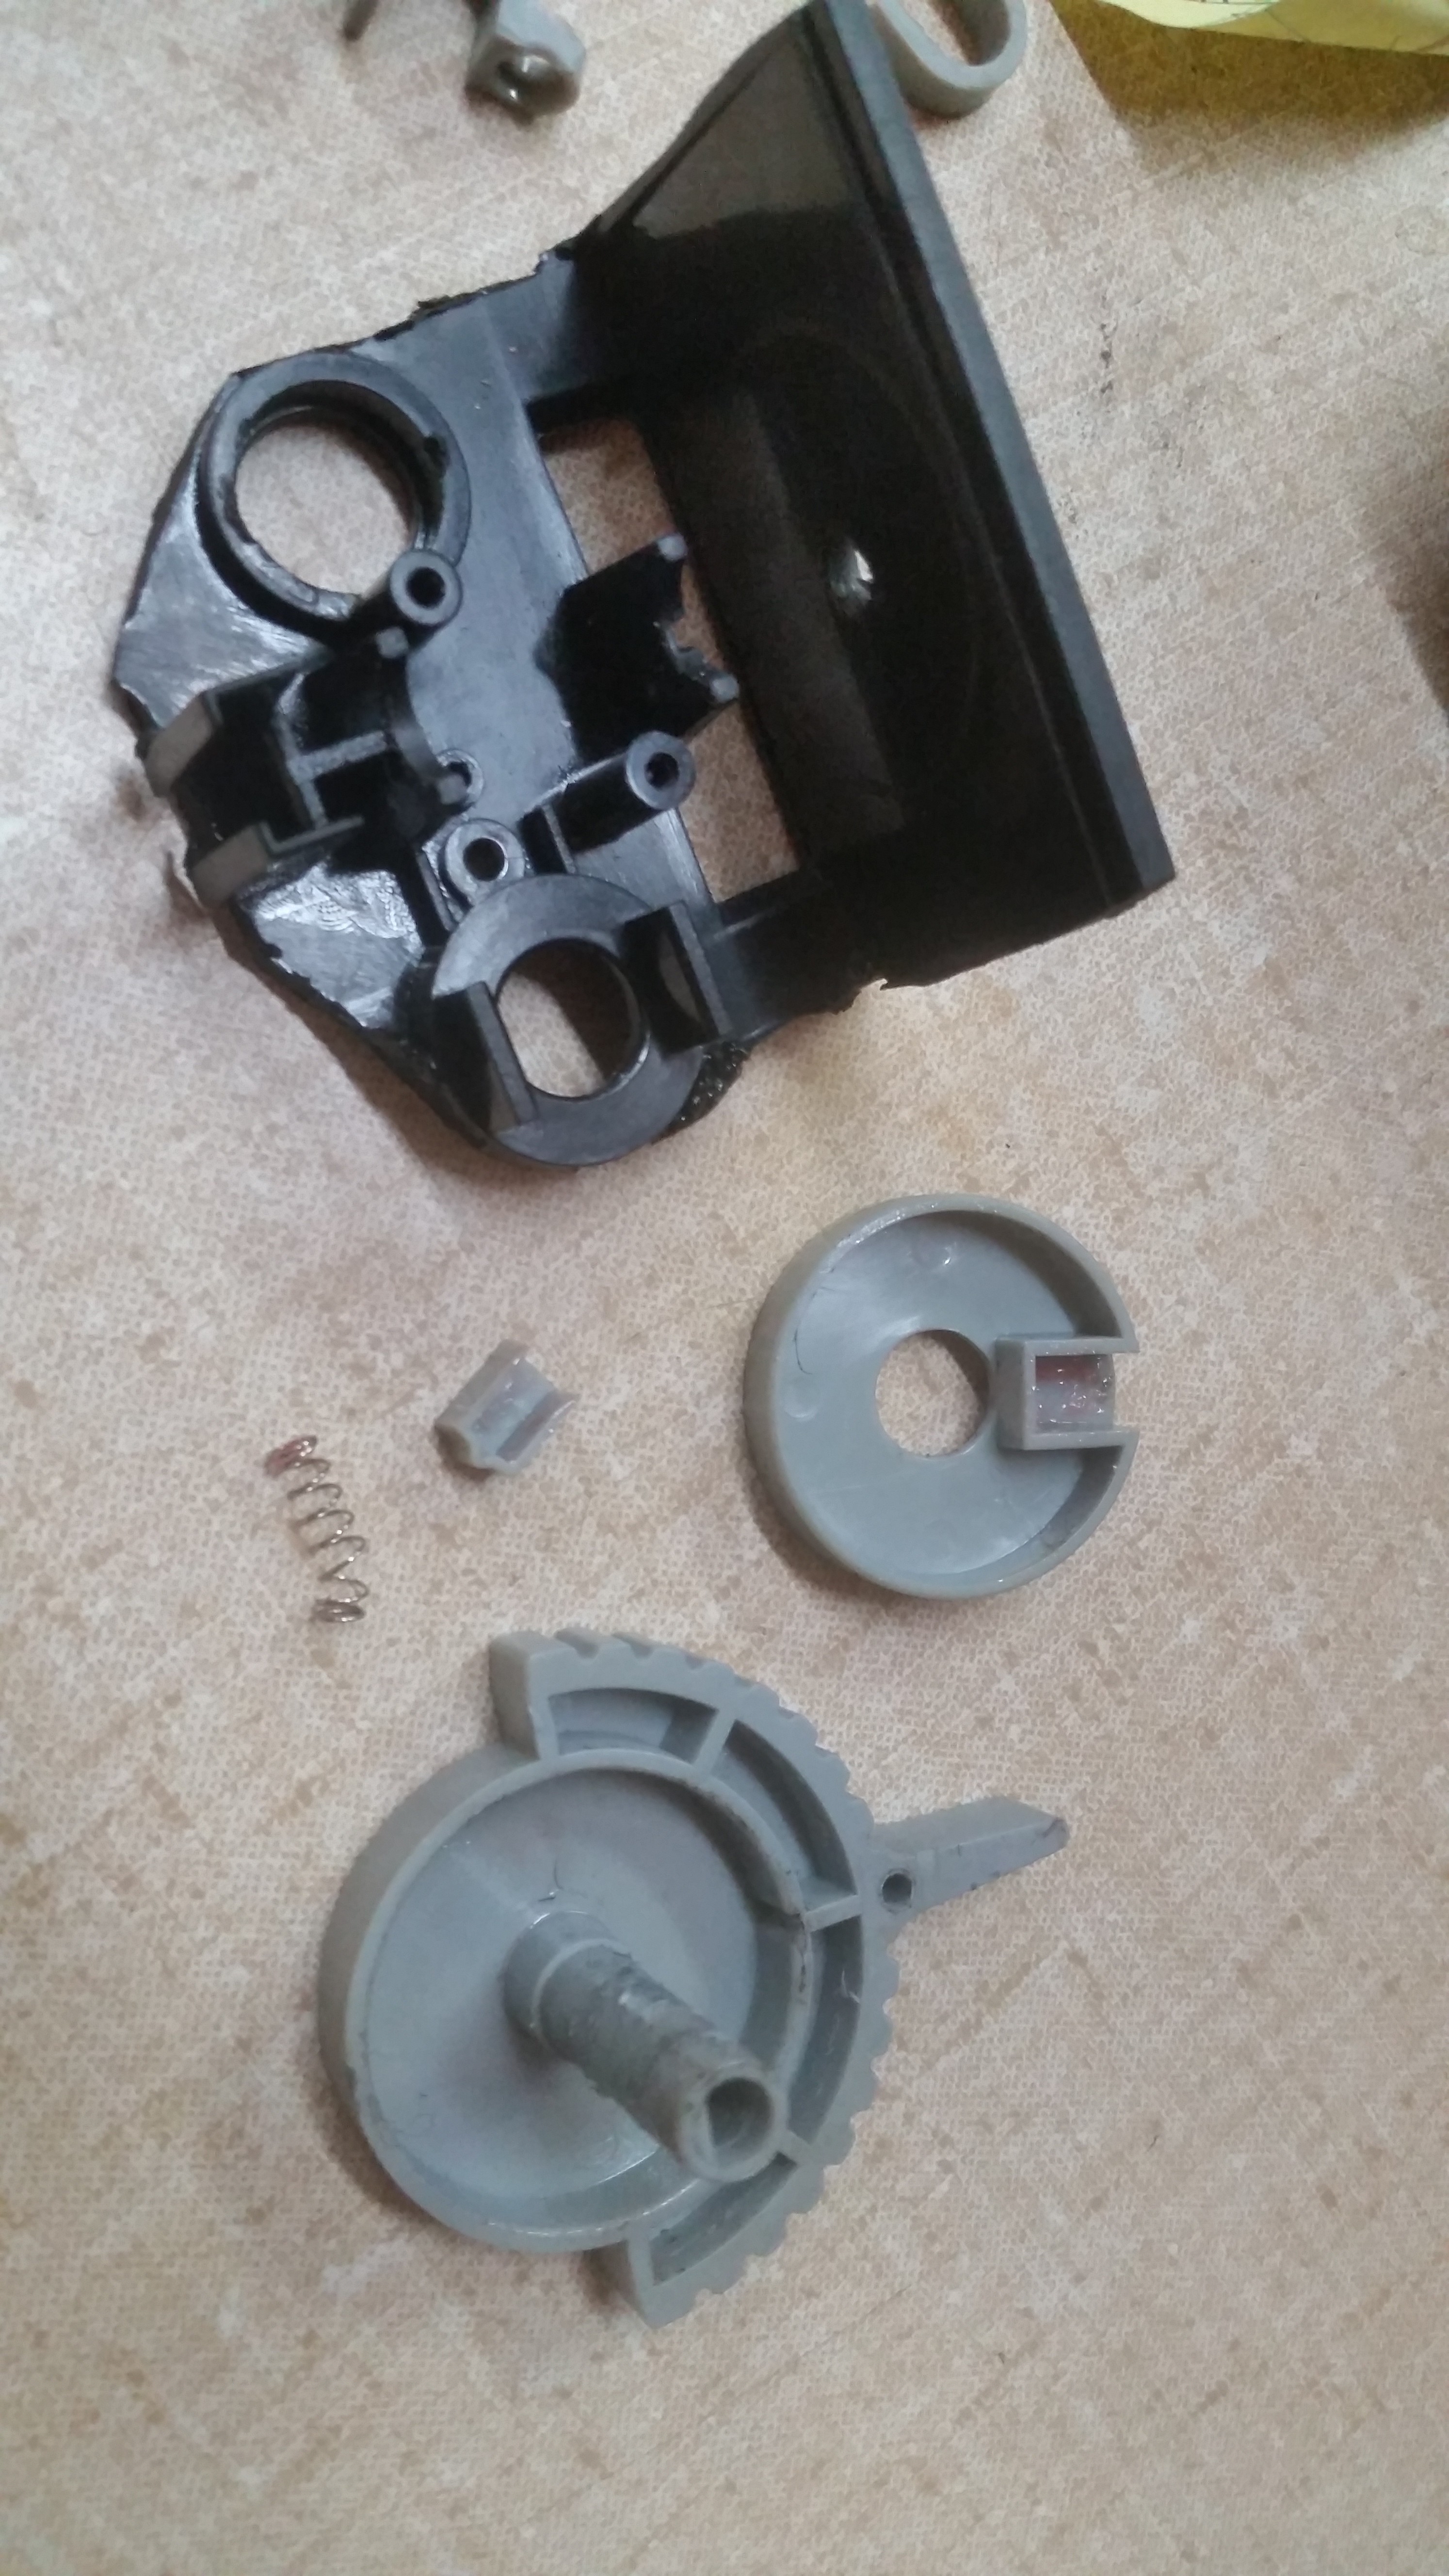
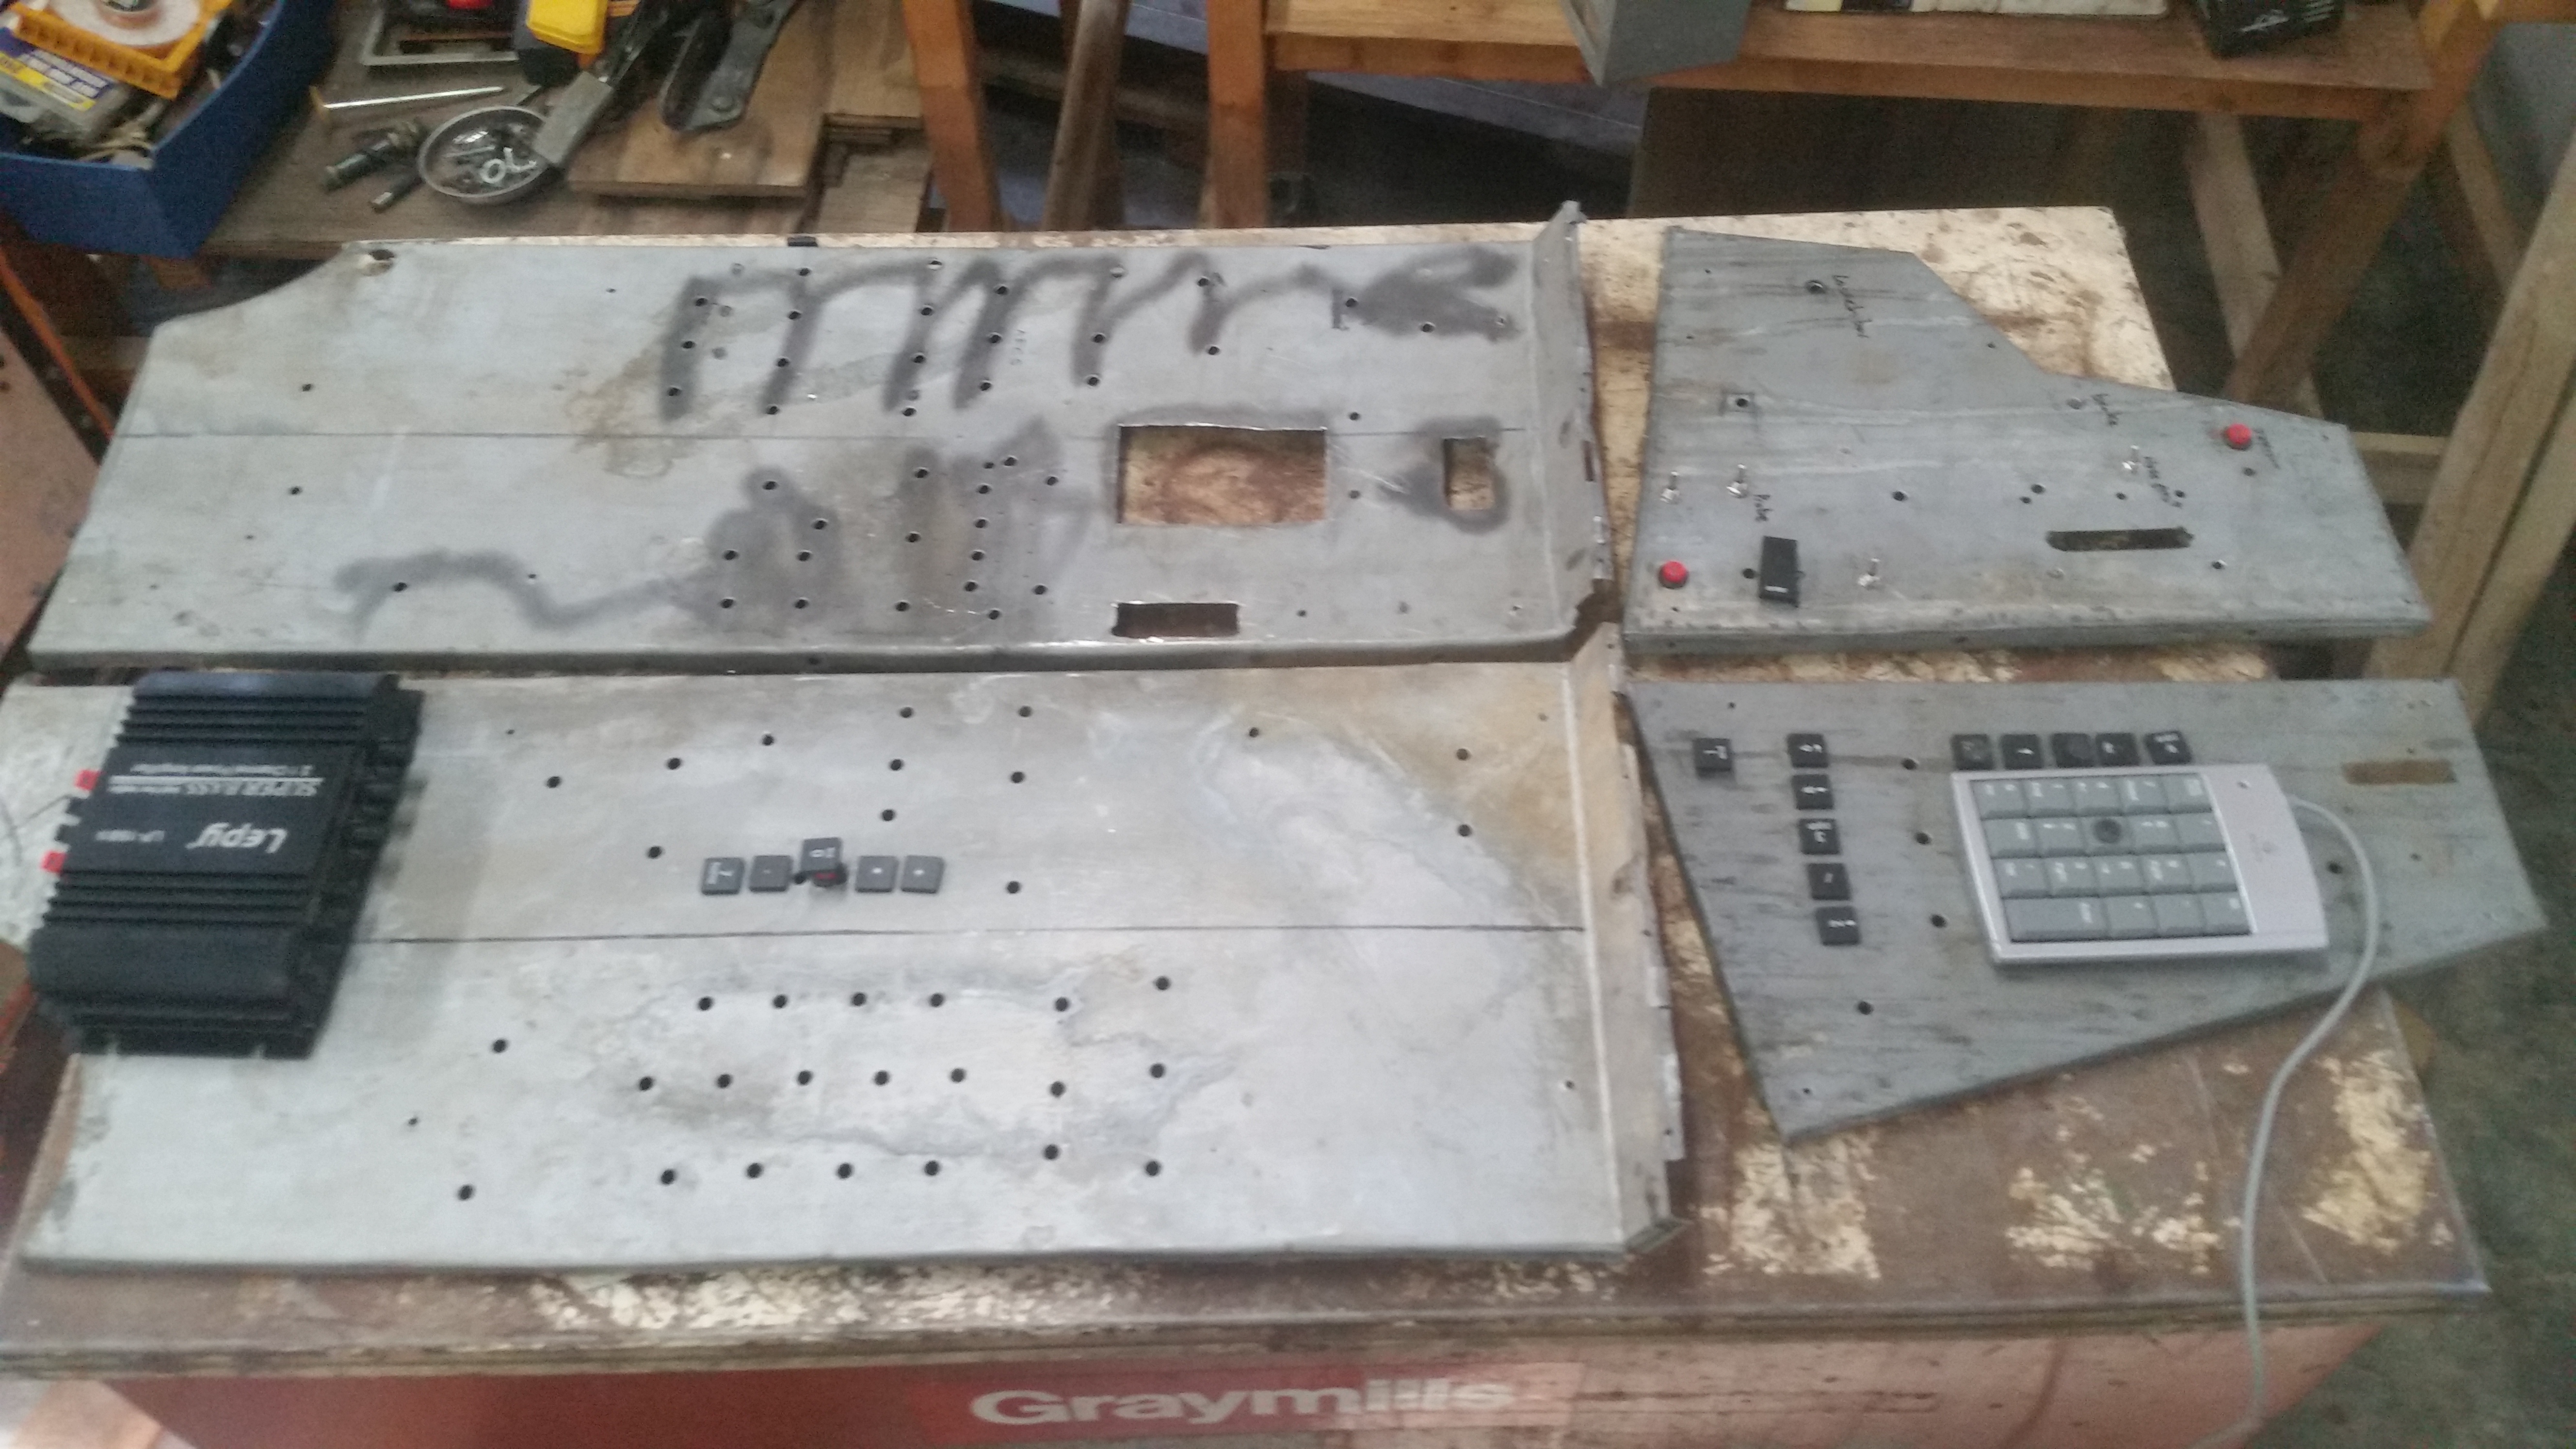
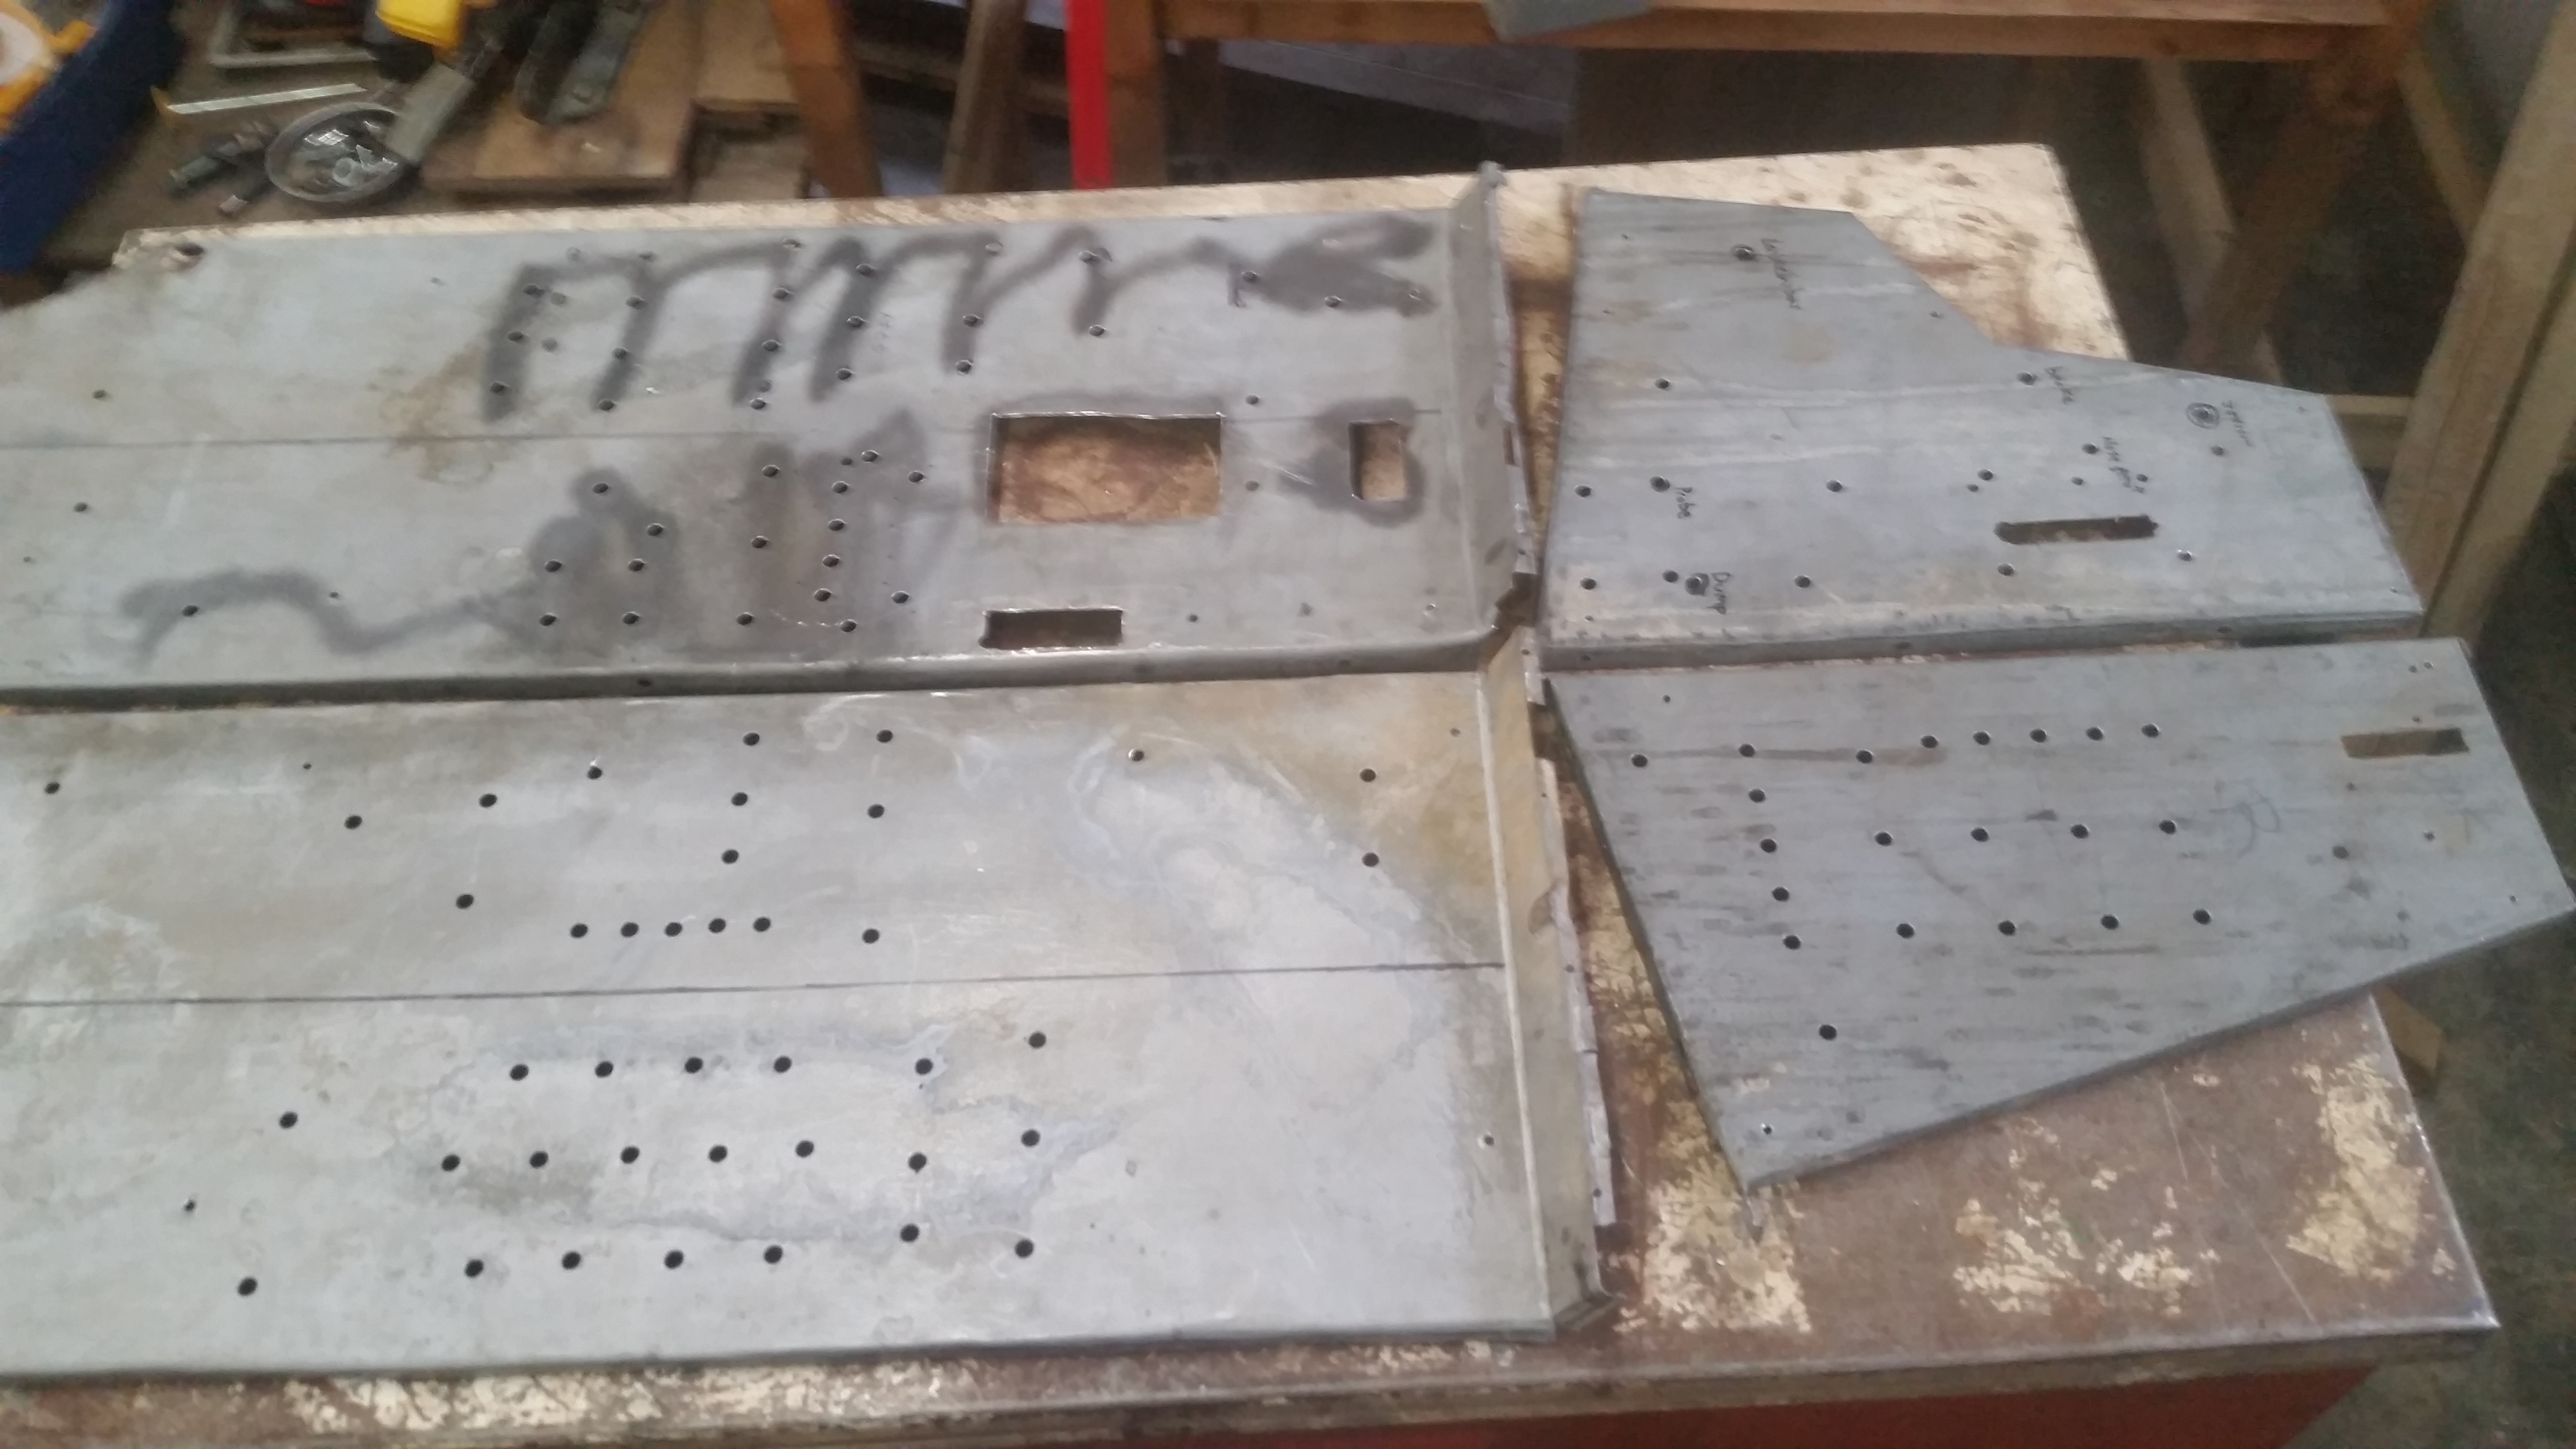
It is quite easy to do all of that. The detent is a small spring loaded button in the outside inner ring of the slider wheel. Simply pull it out and you are in business. I am making mine into the flap lever for the Tomcat. I cut the slider section from the throttle box and turn the slider over so side that holds the pot is now upside down. That enables me to attach that whole piece to the panels. Once you see it, it will make sense.

-
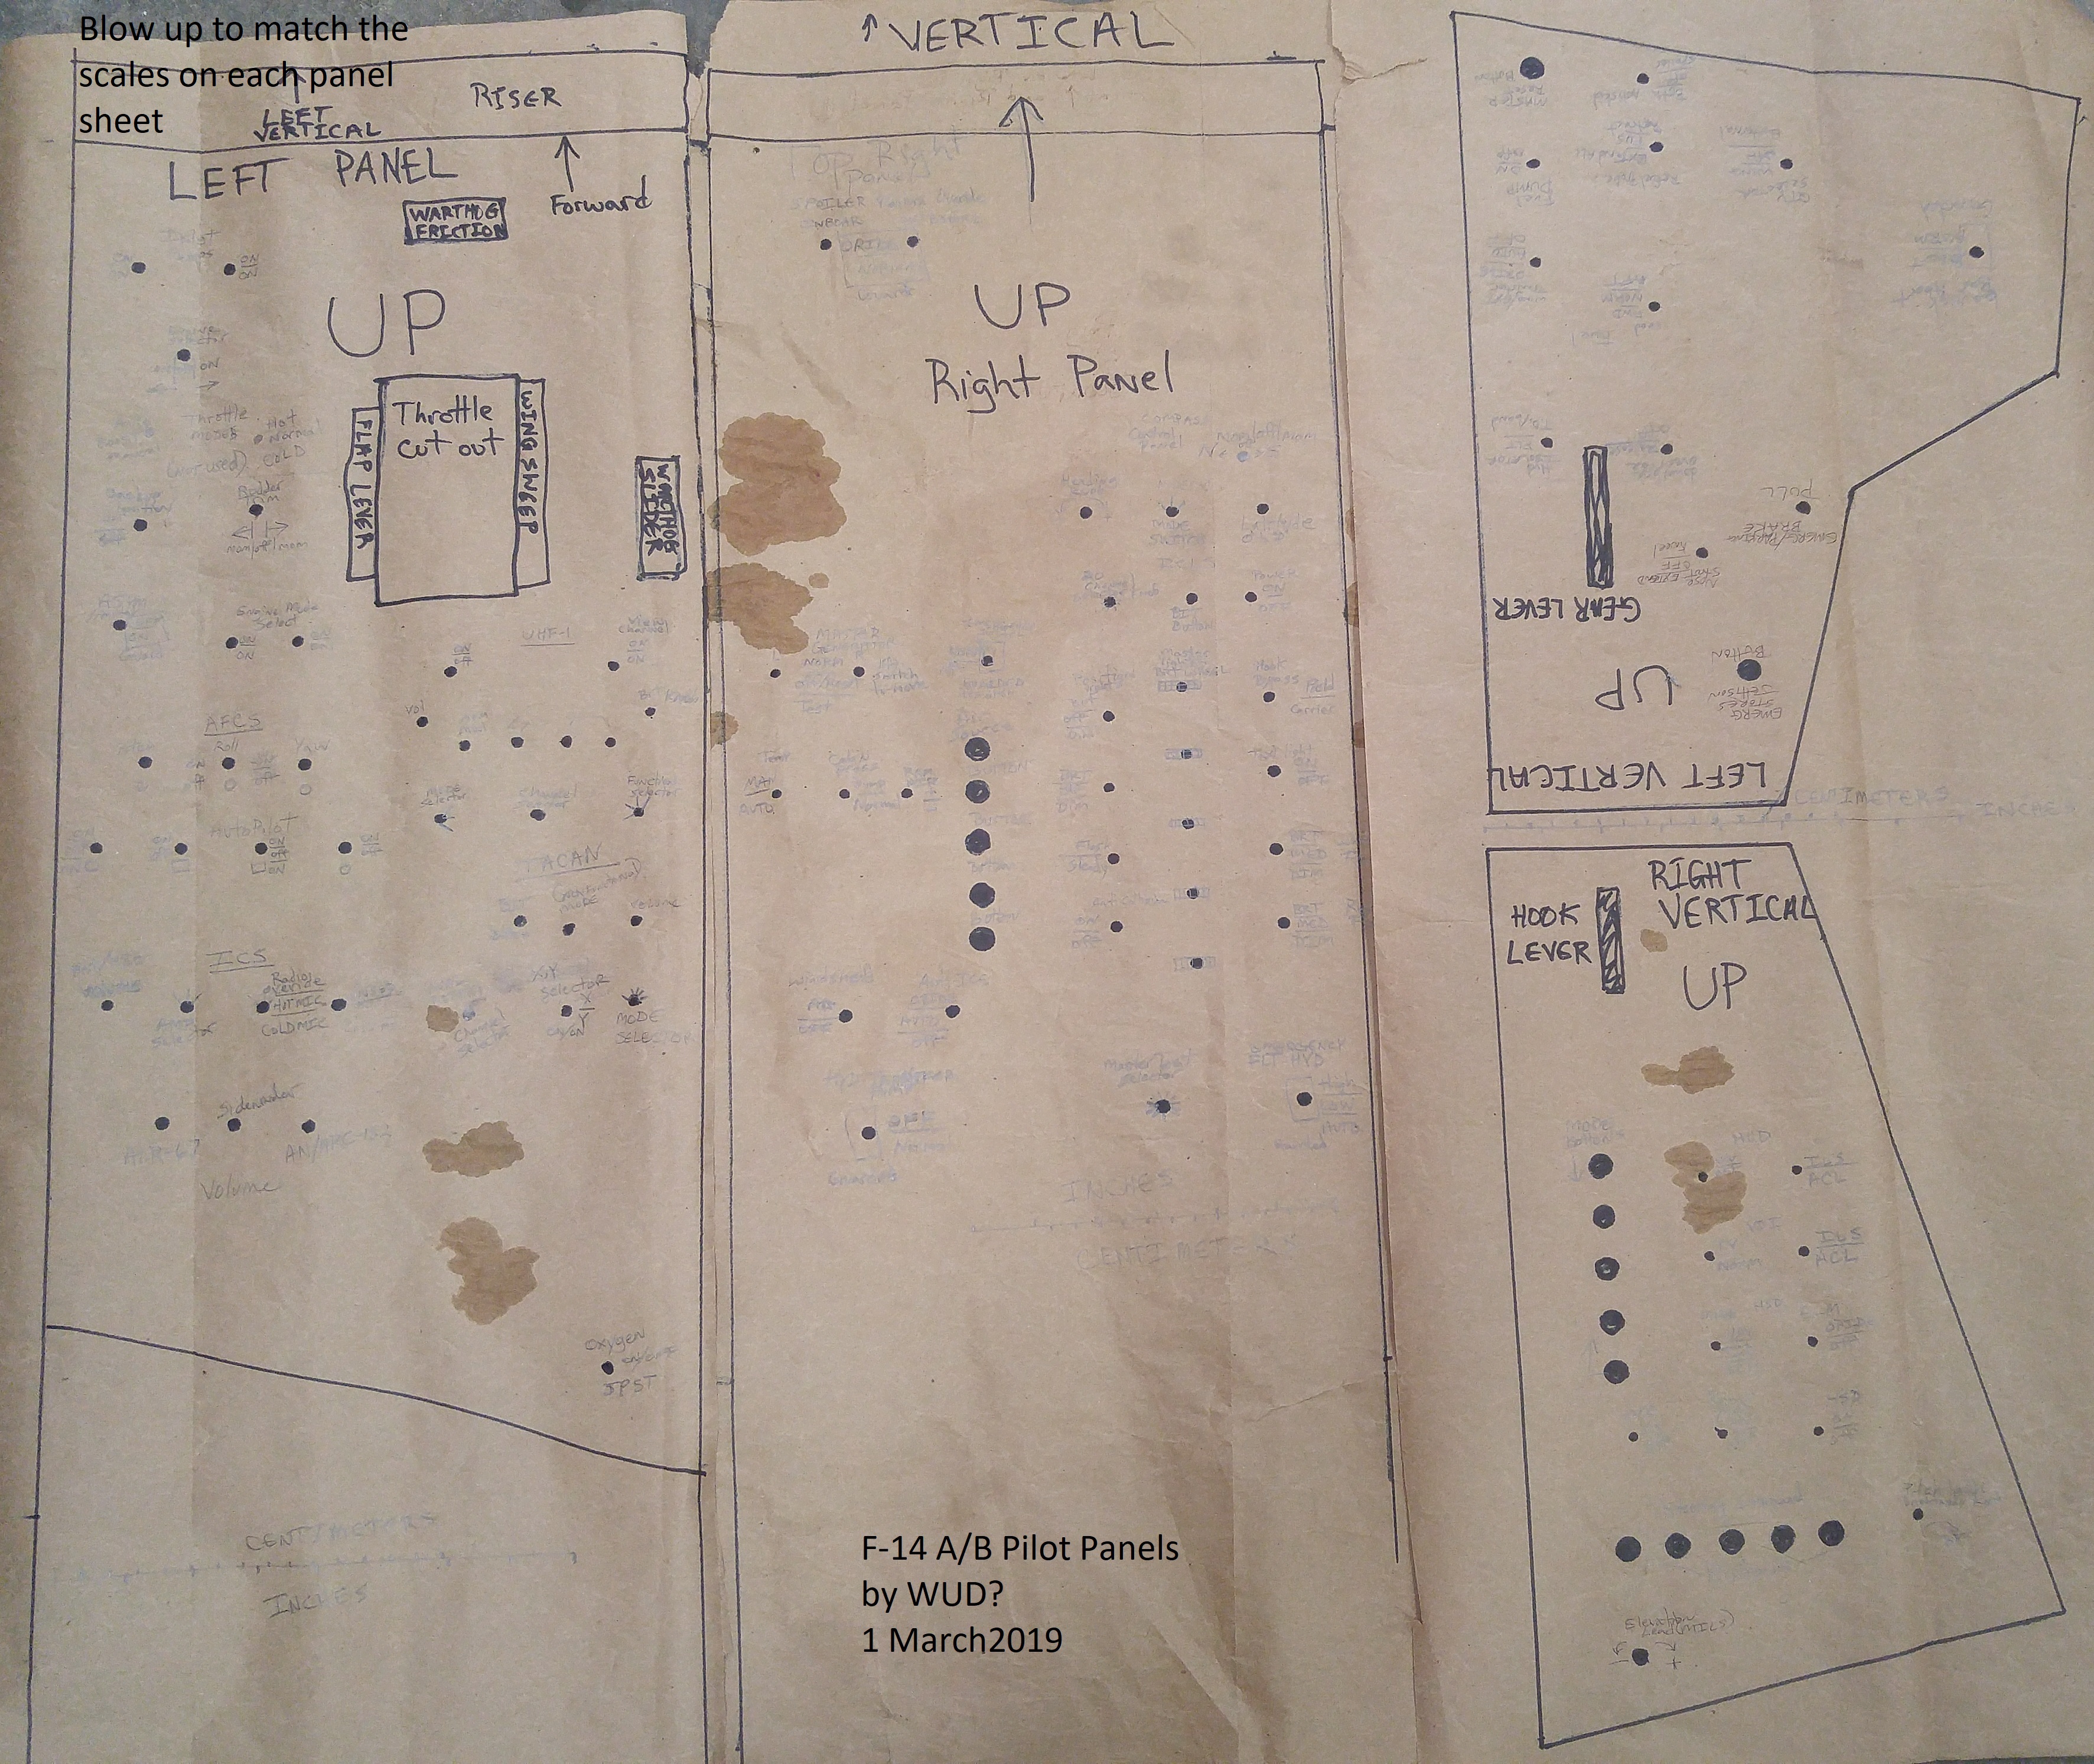
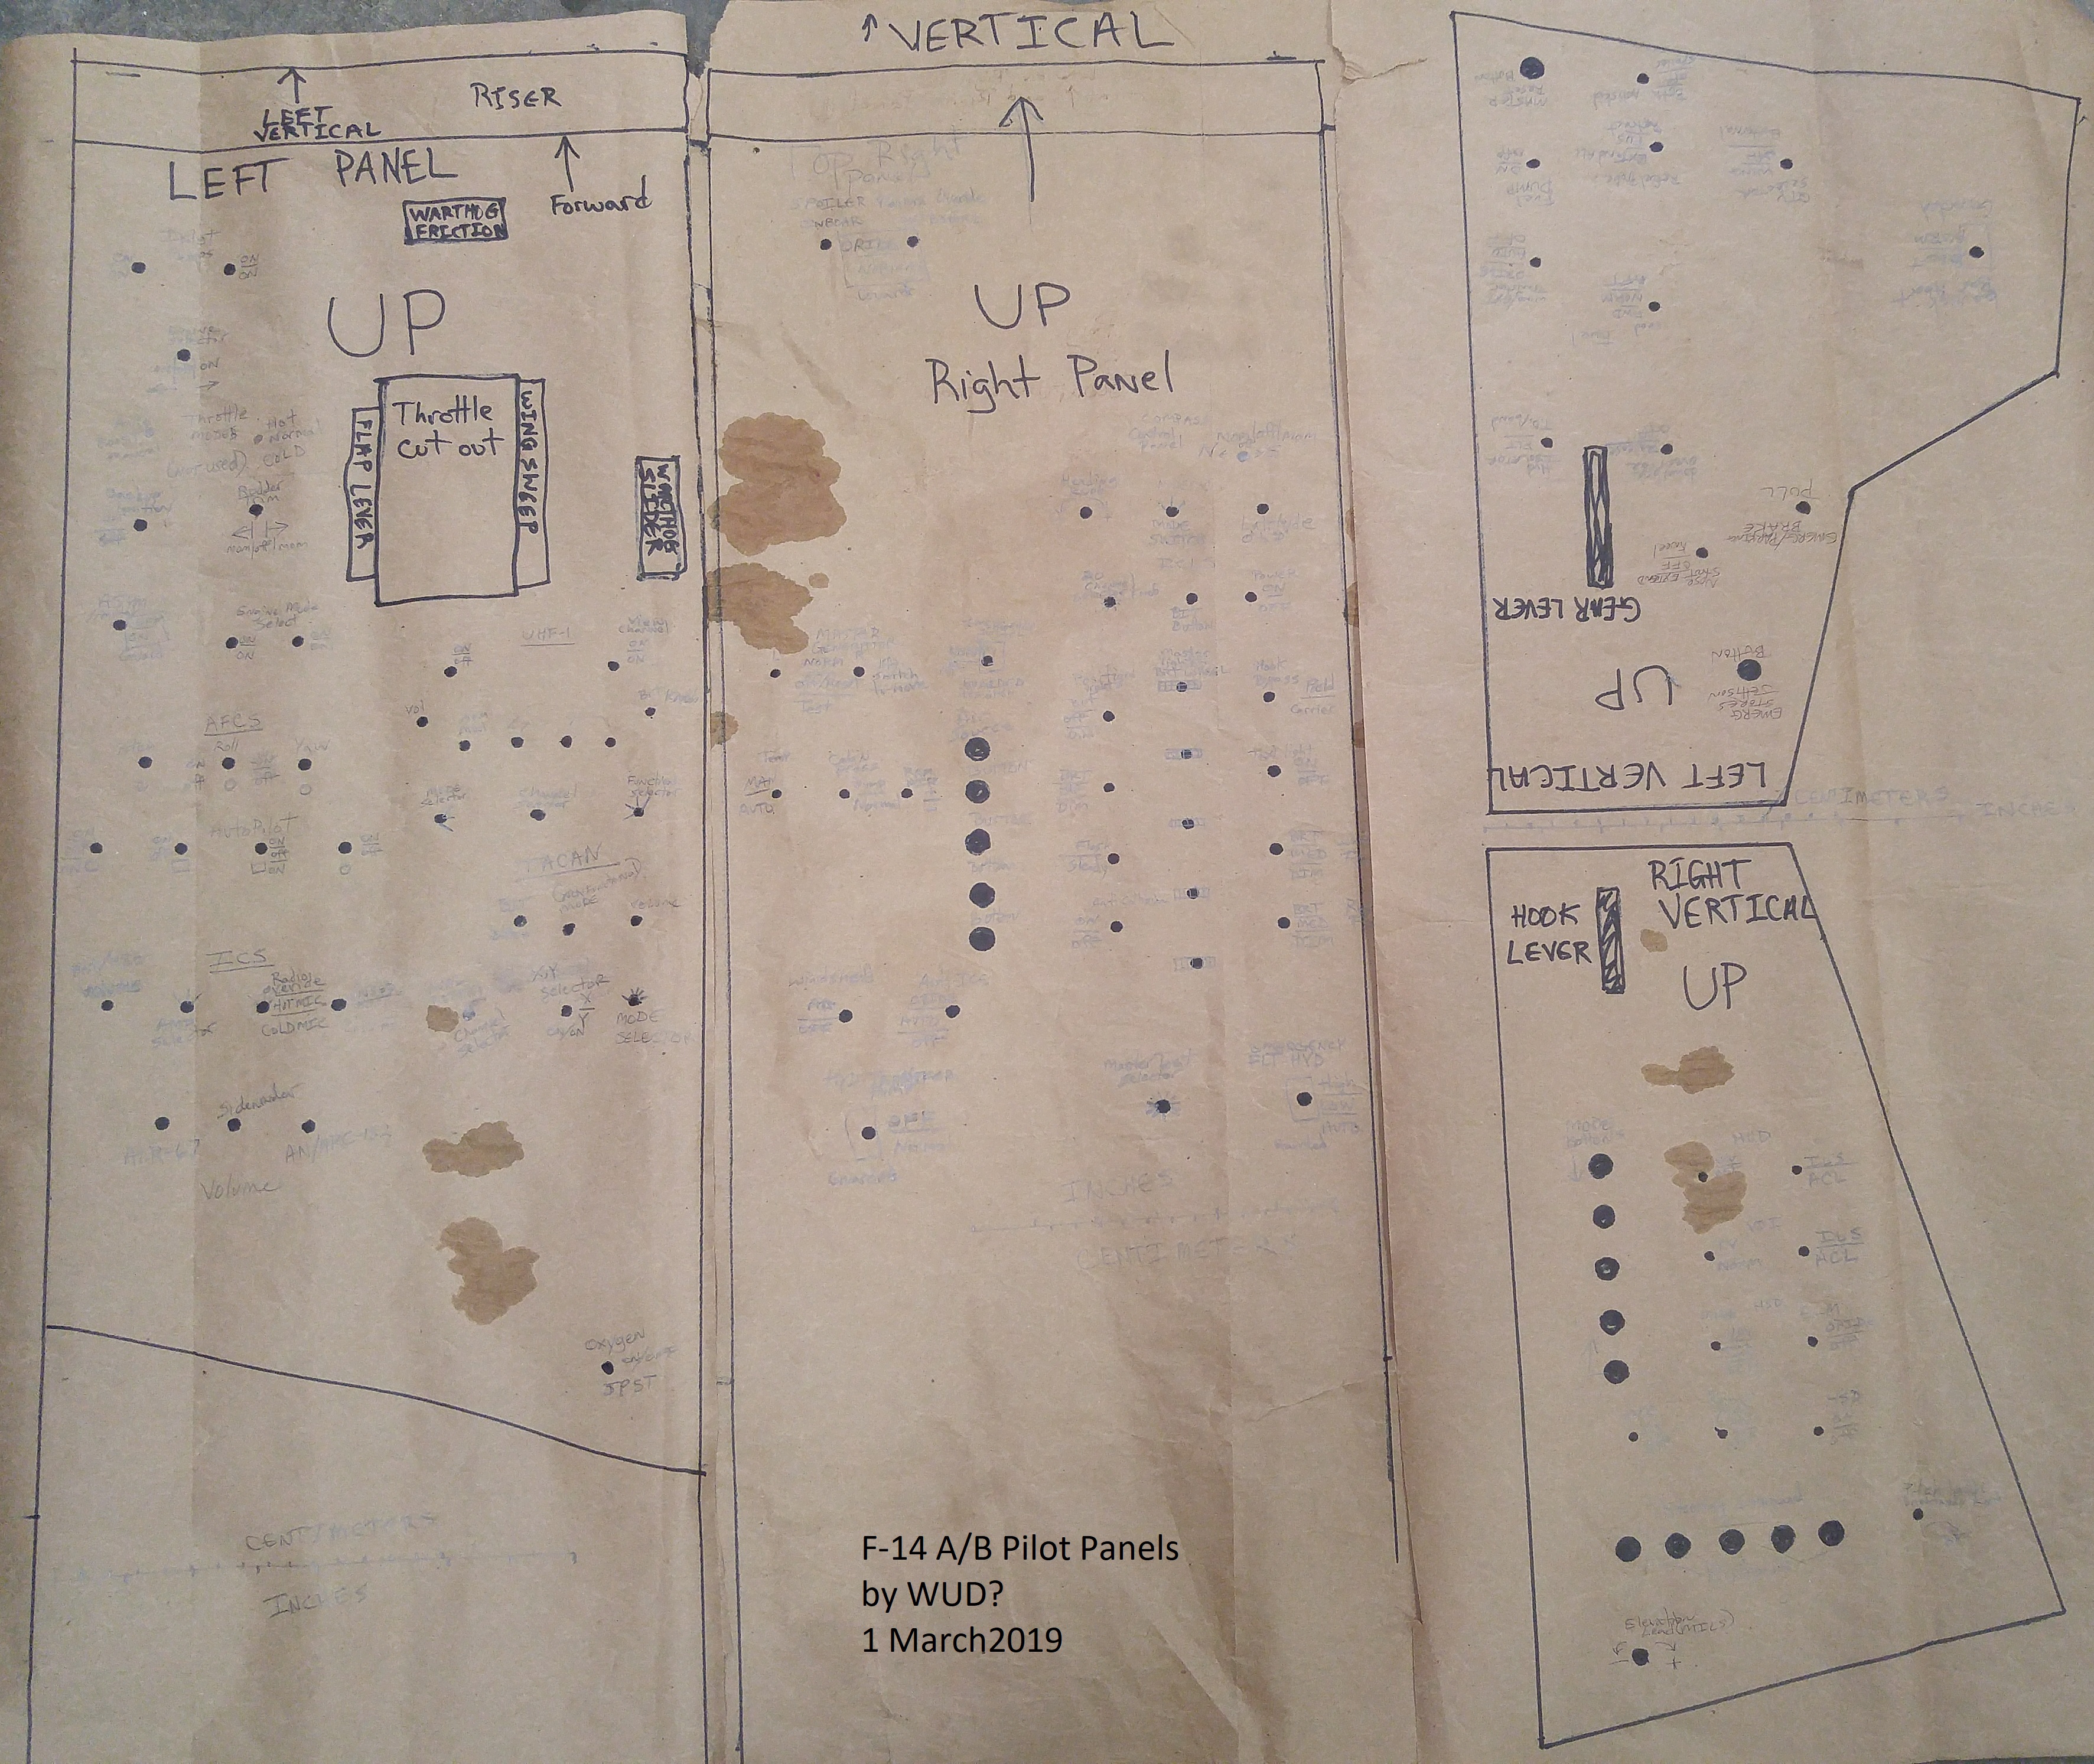
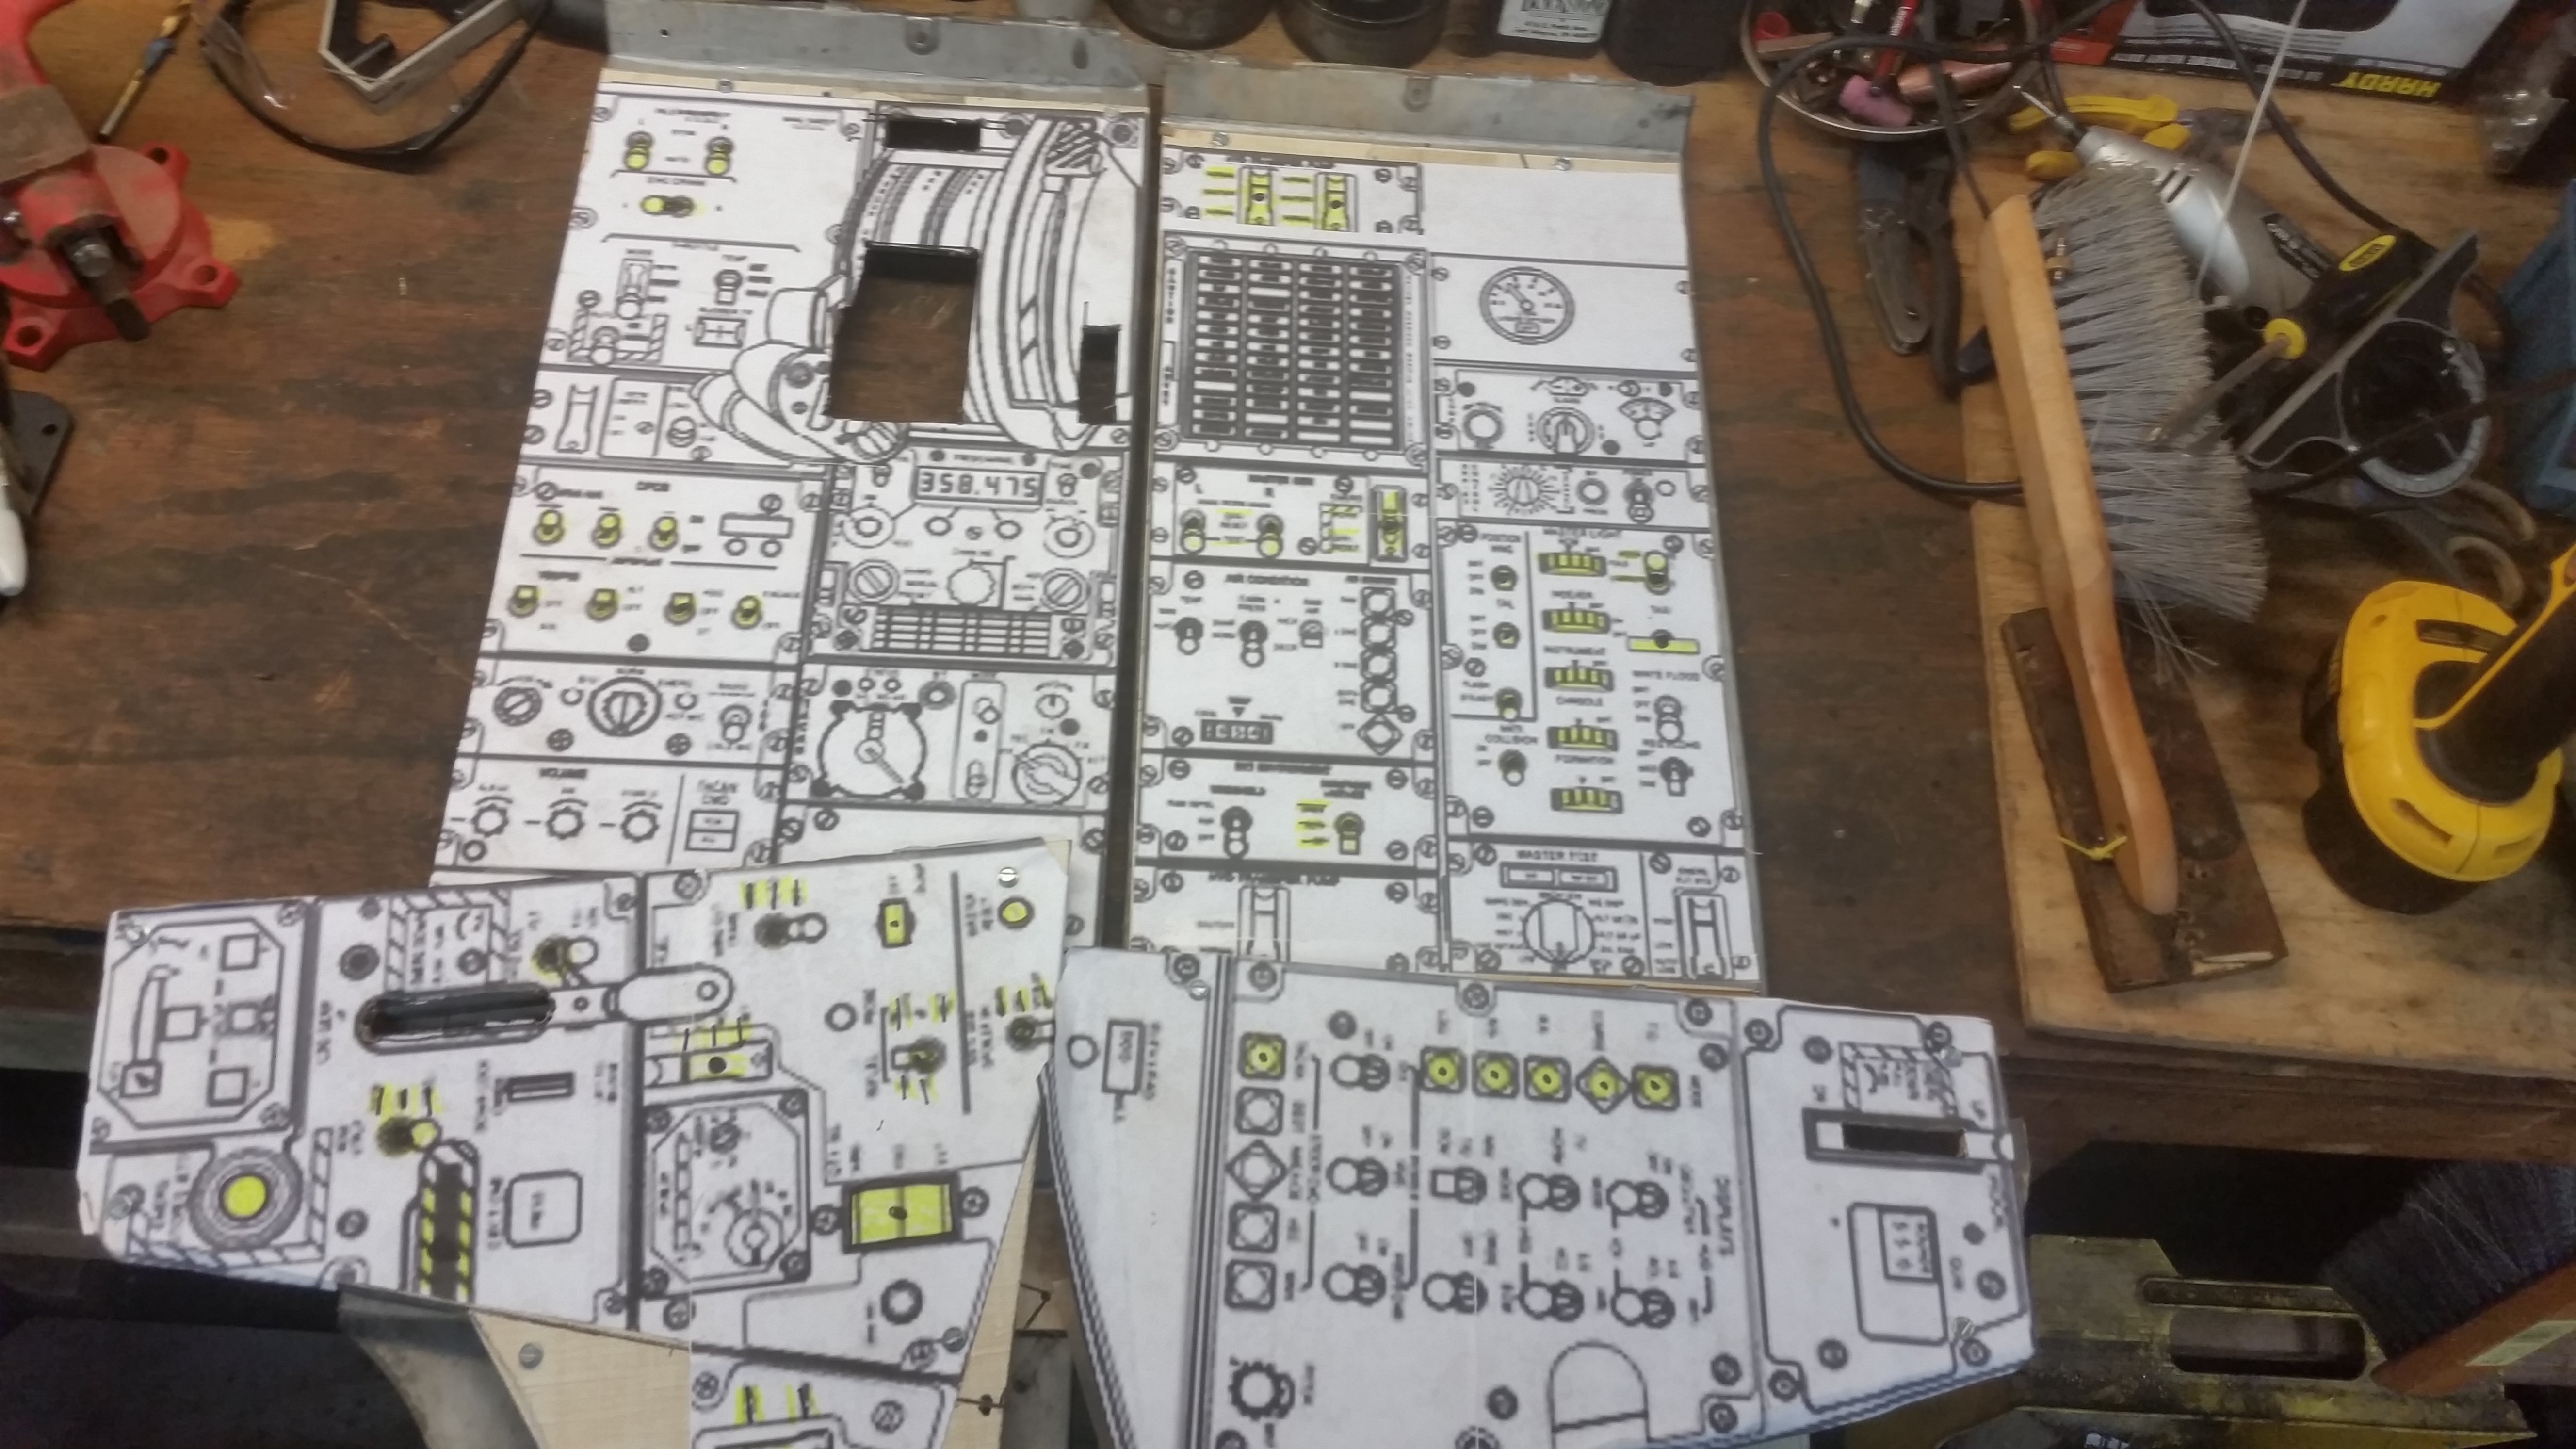
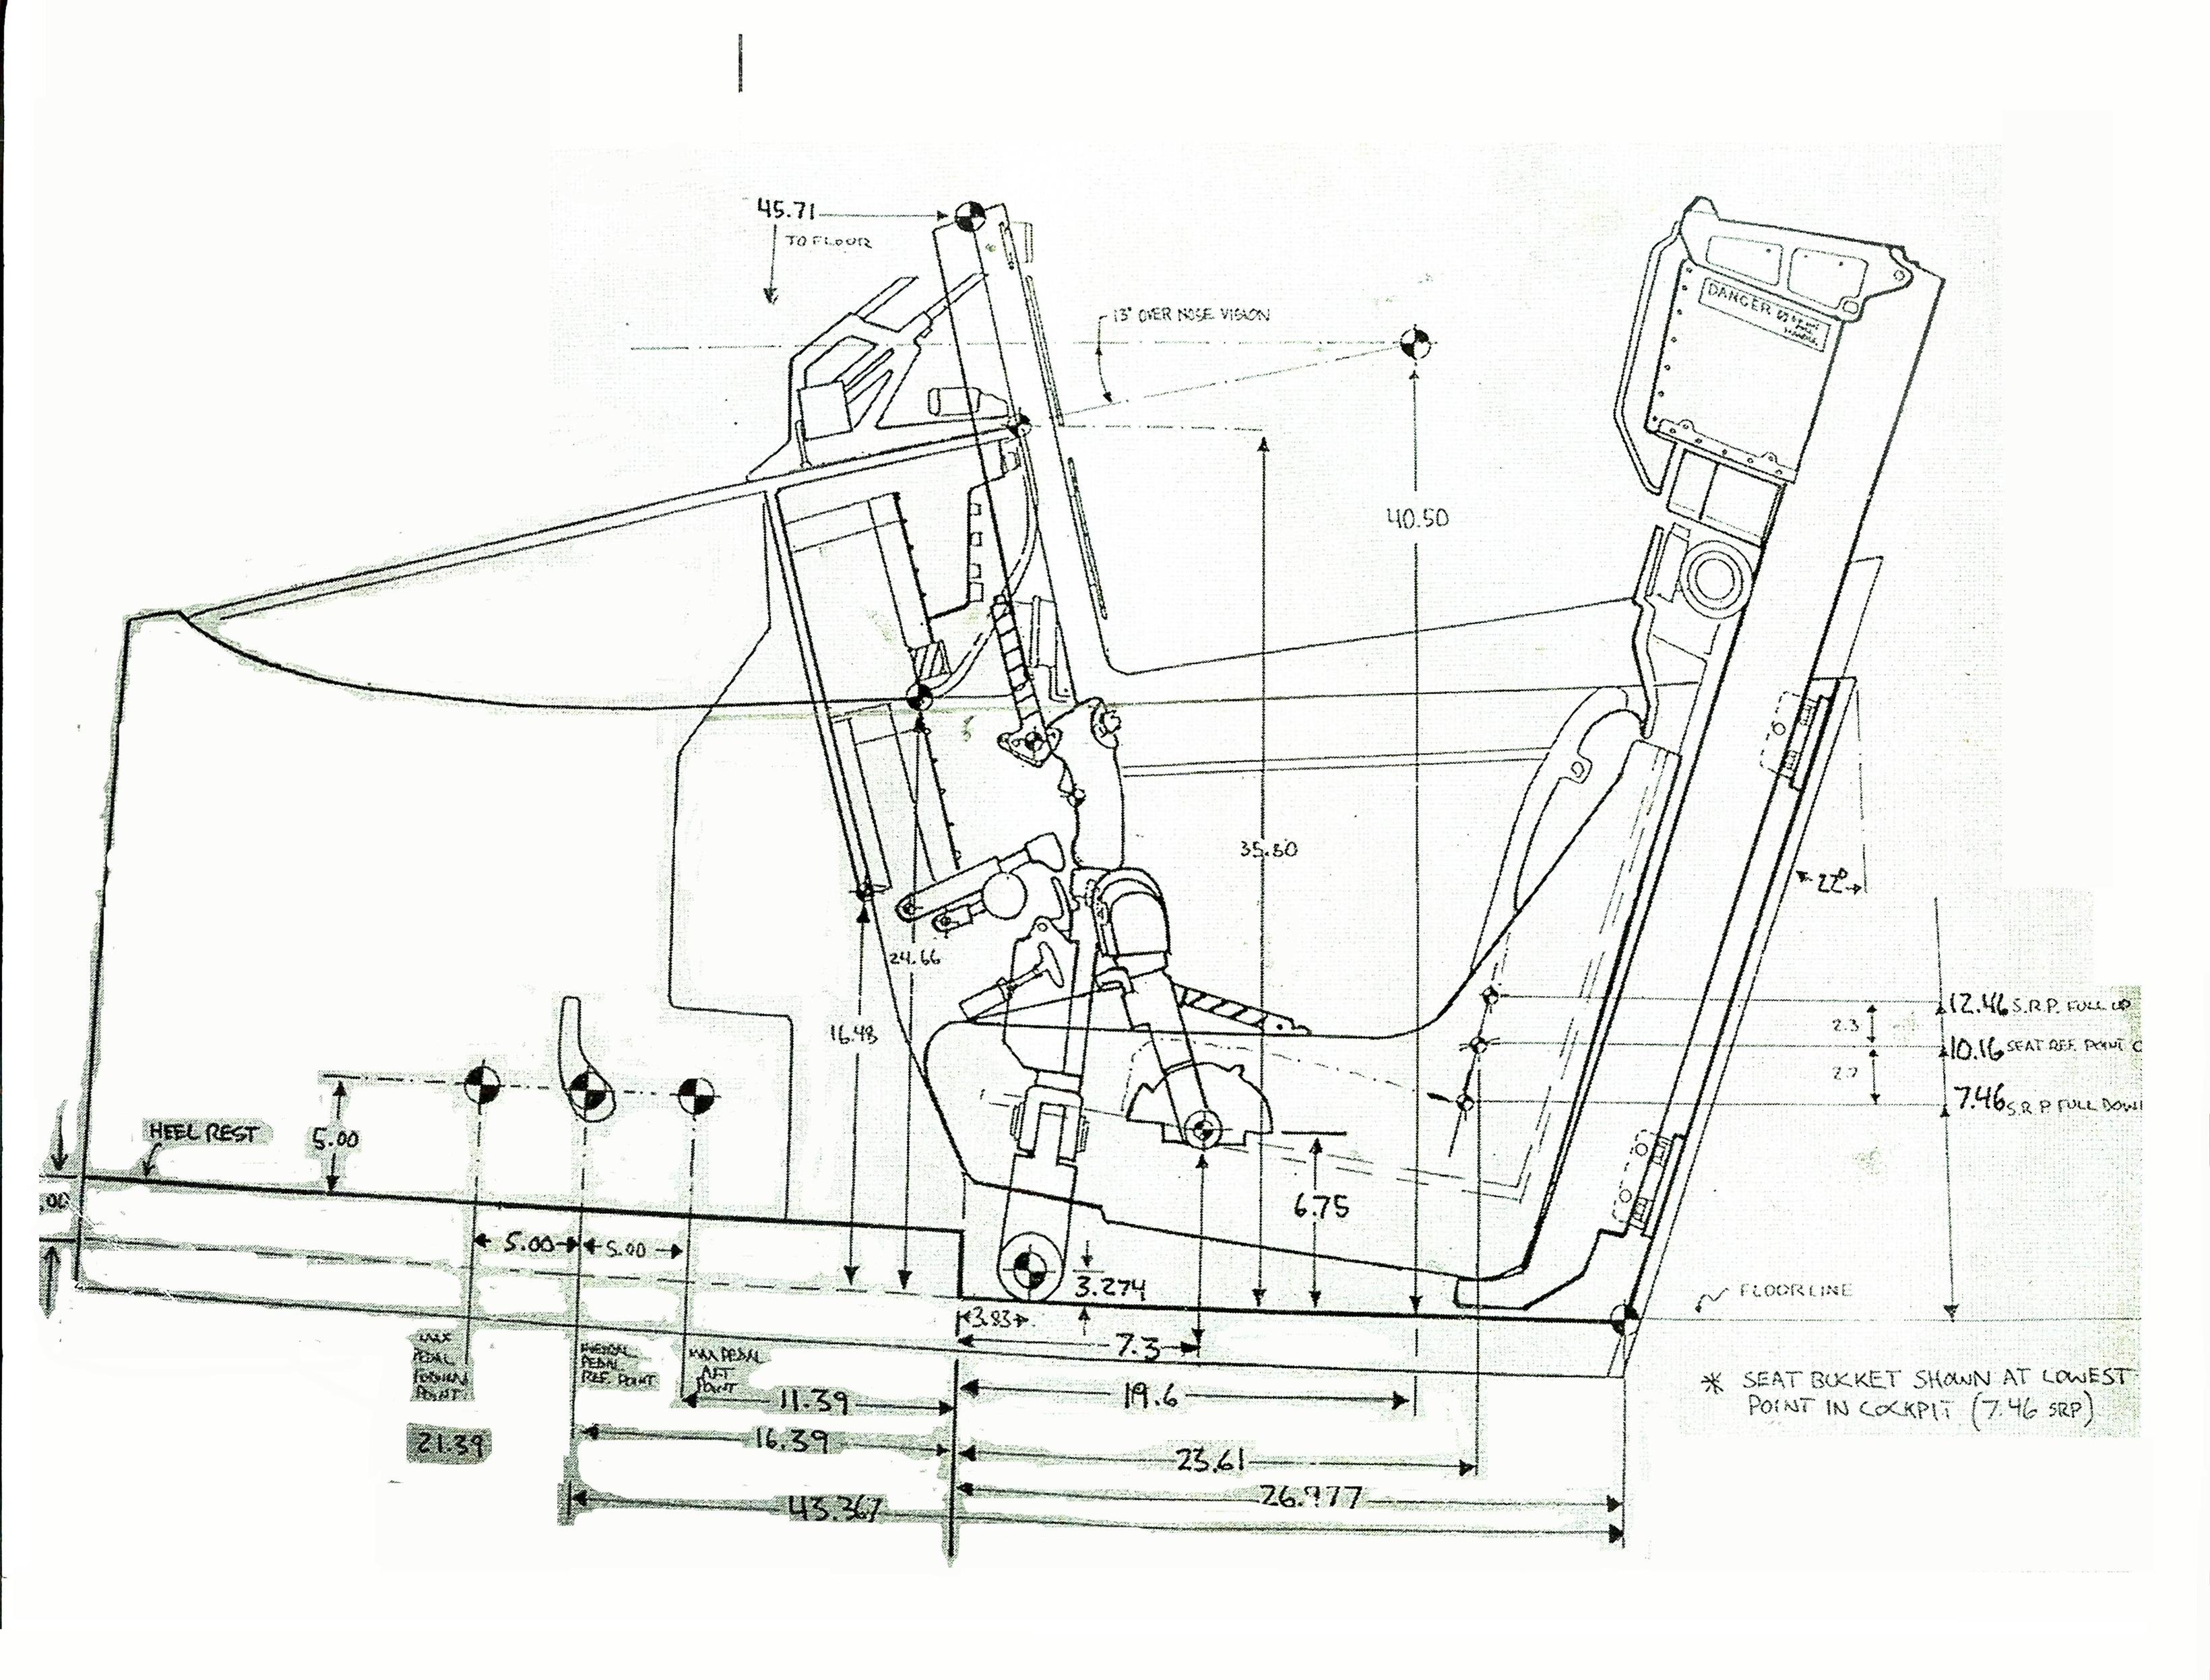
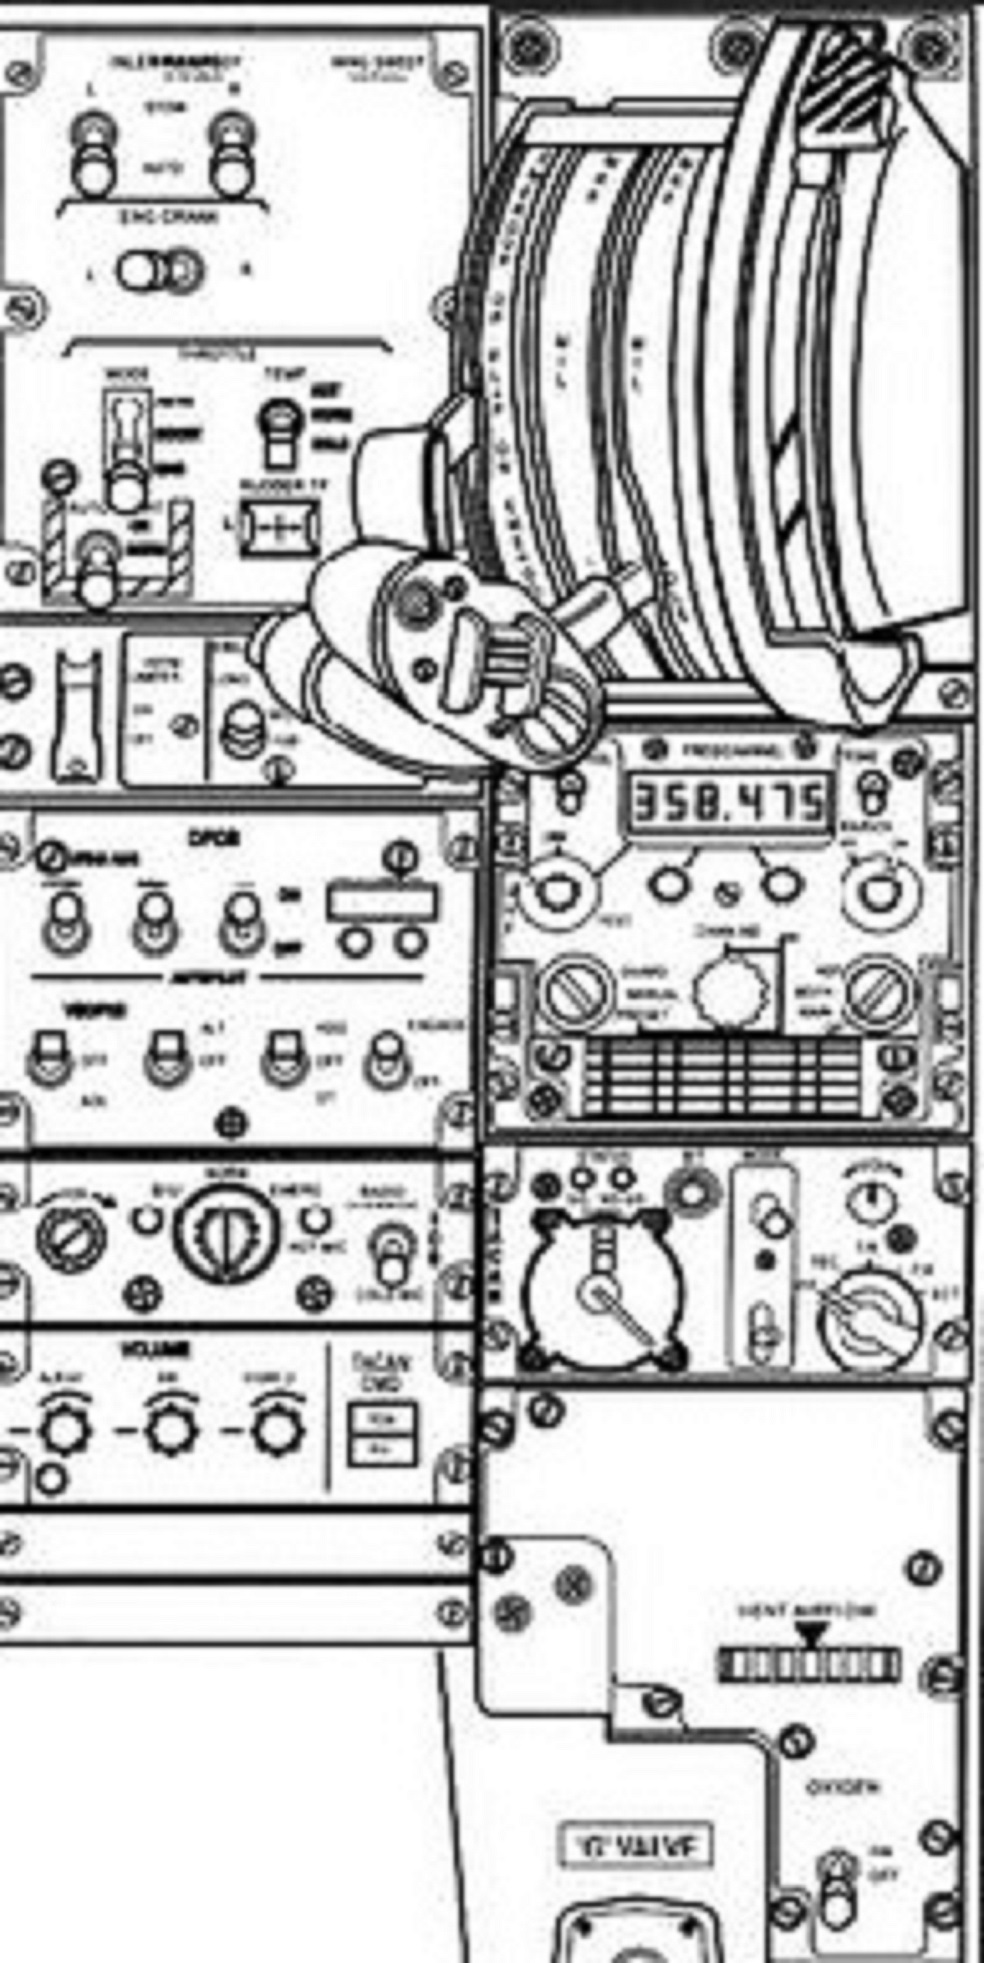
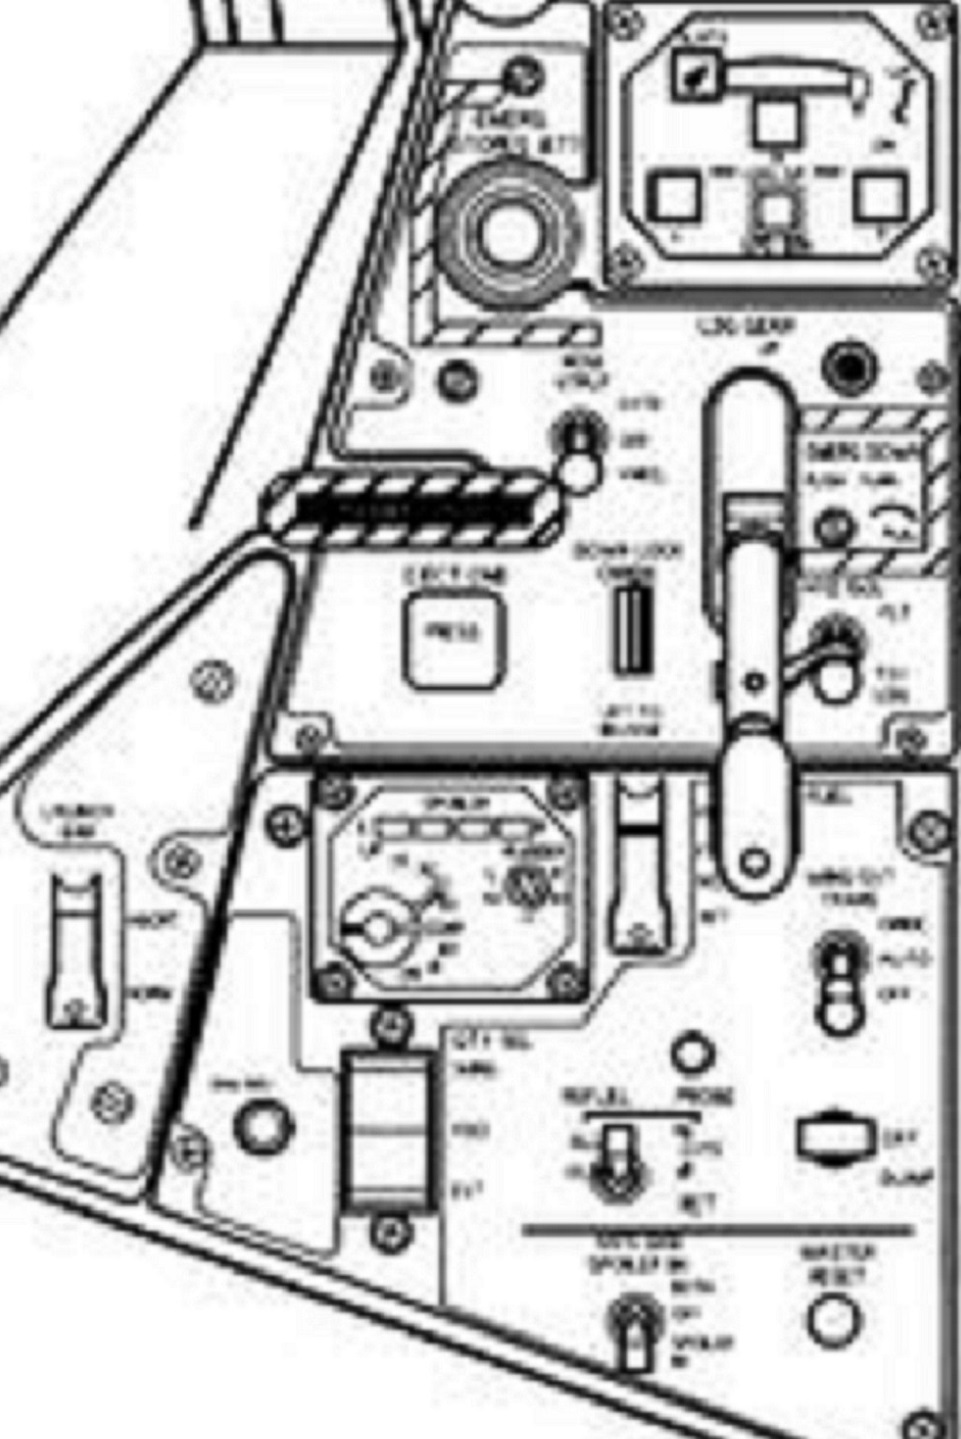
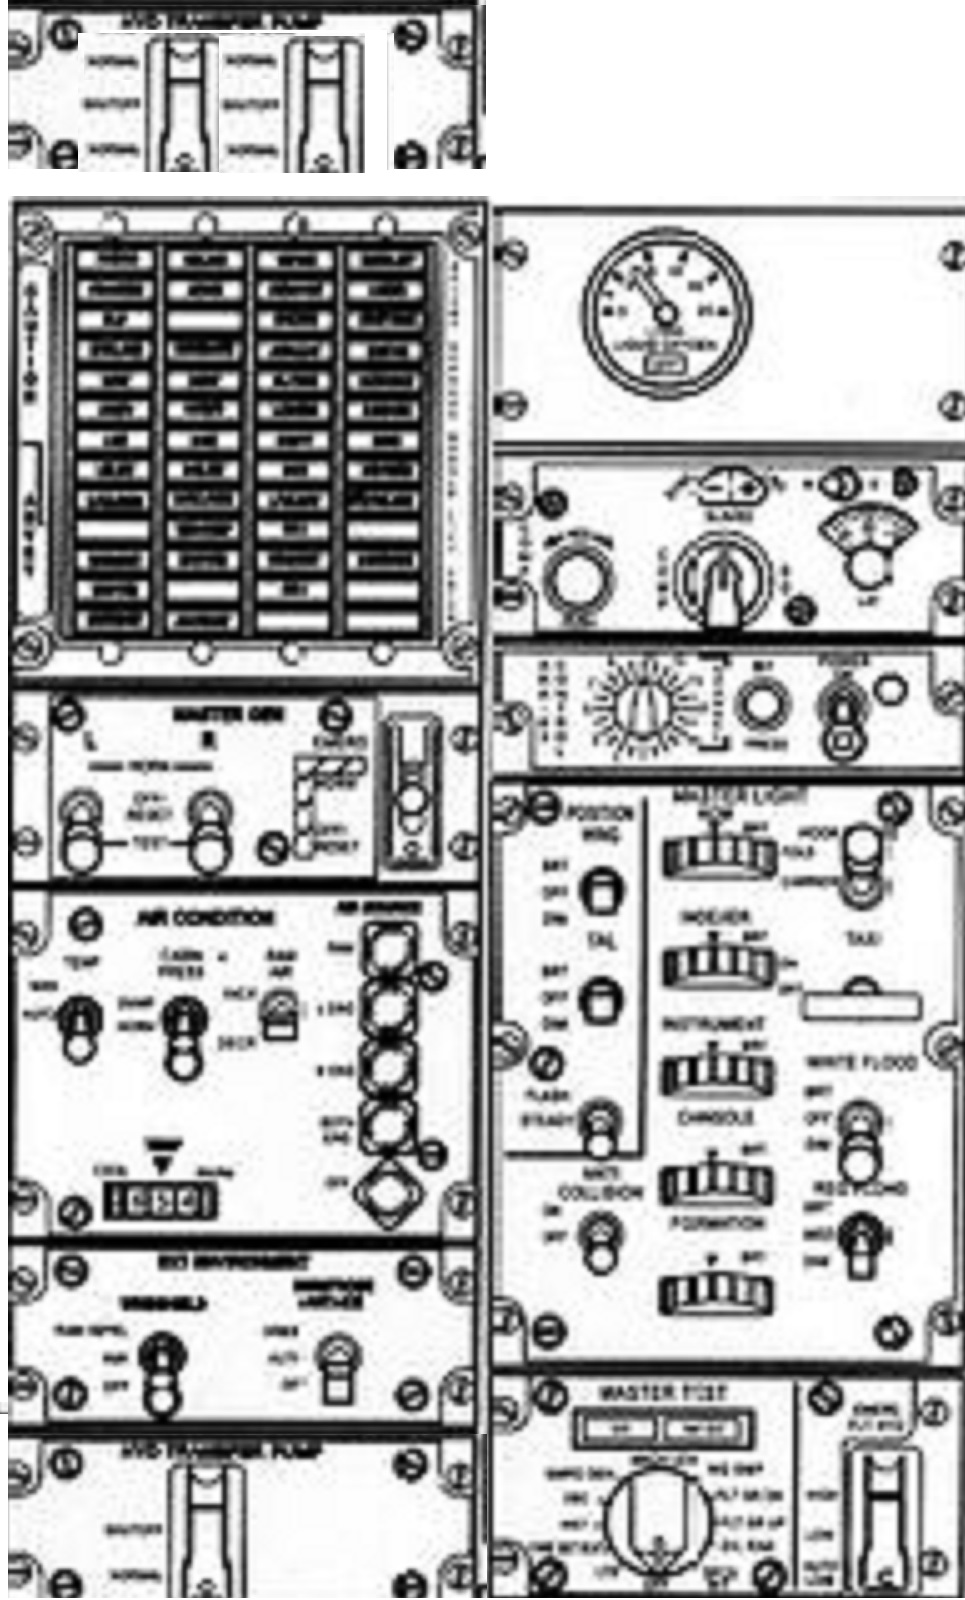
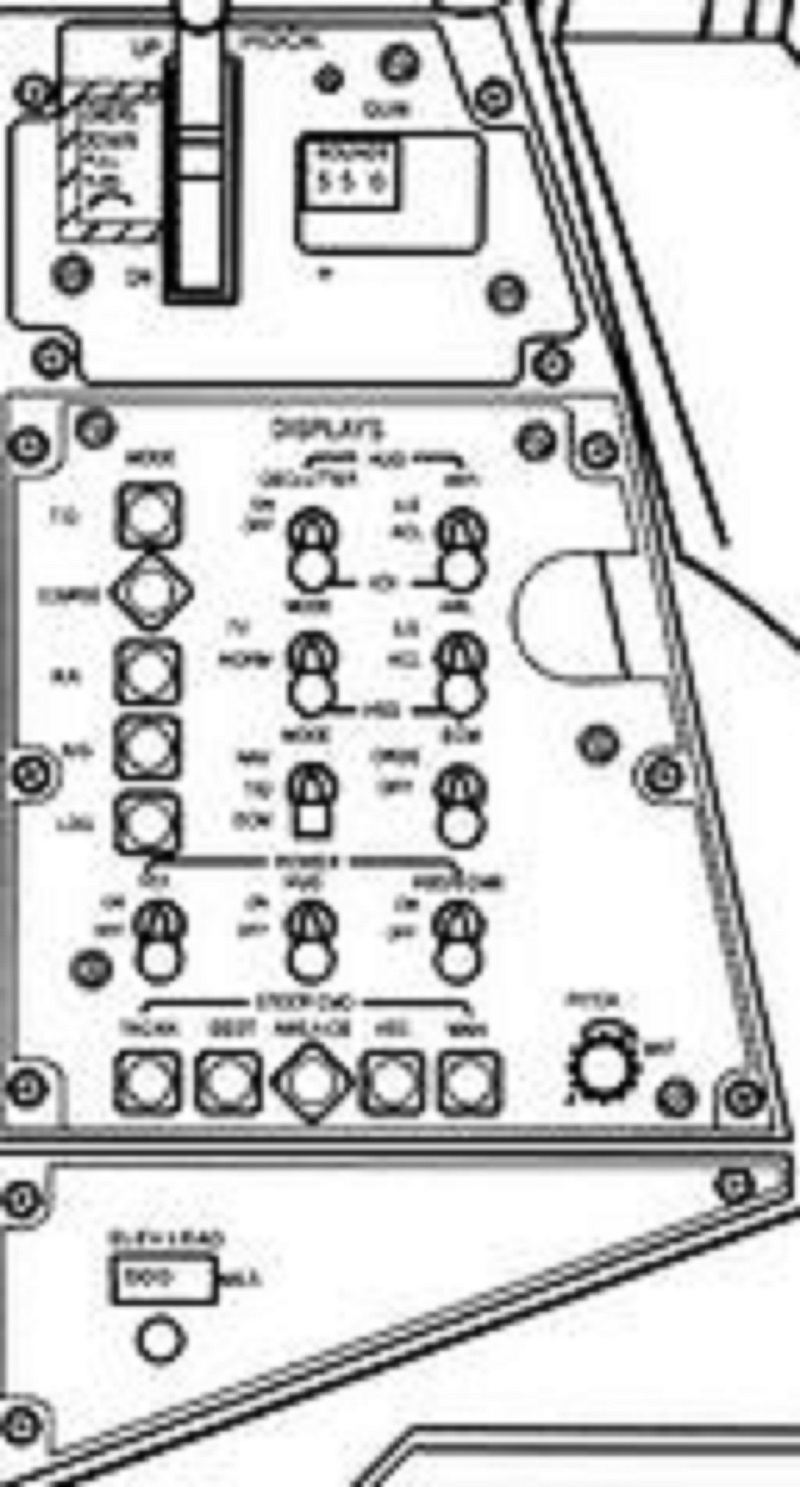
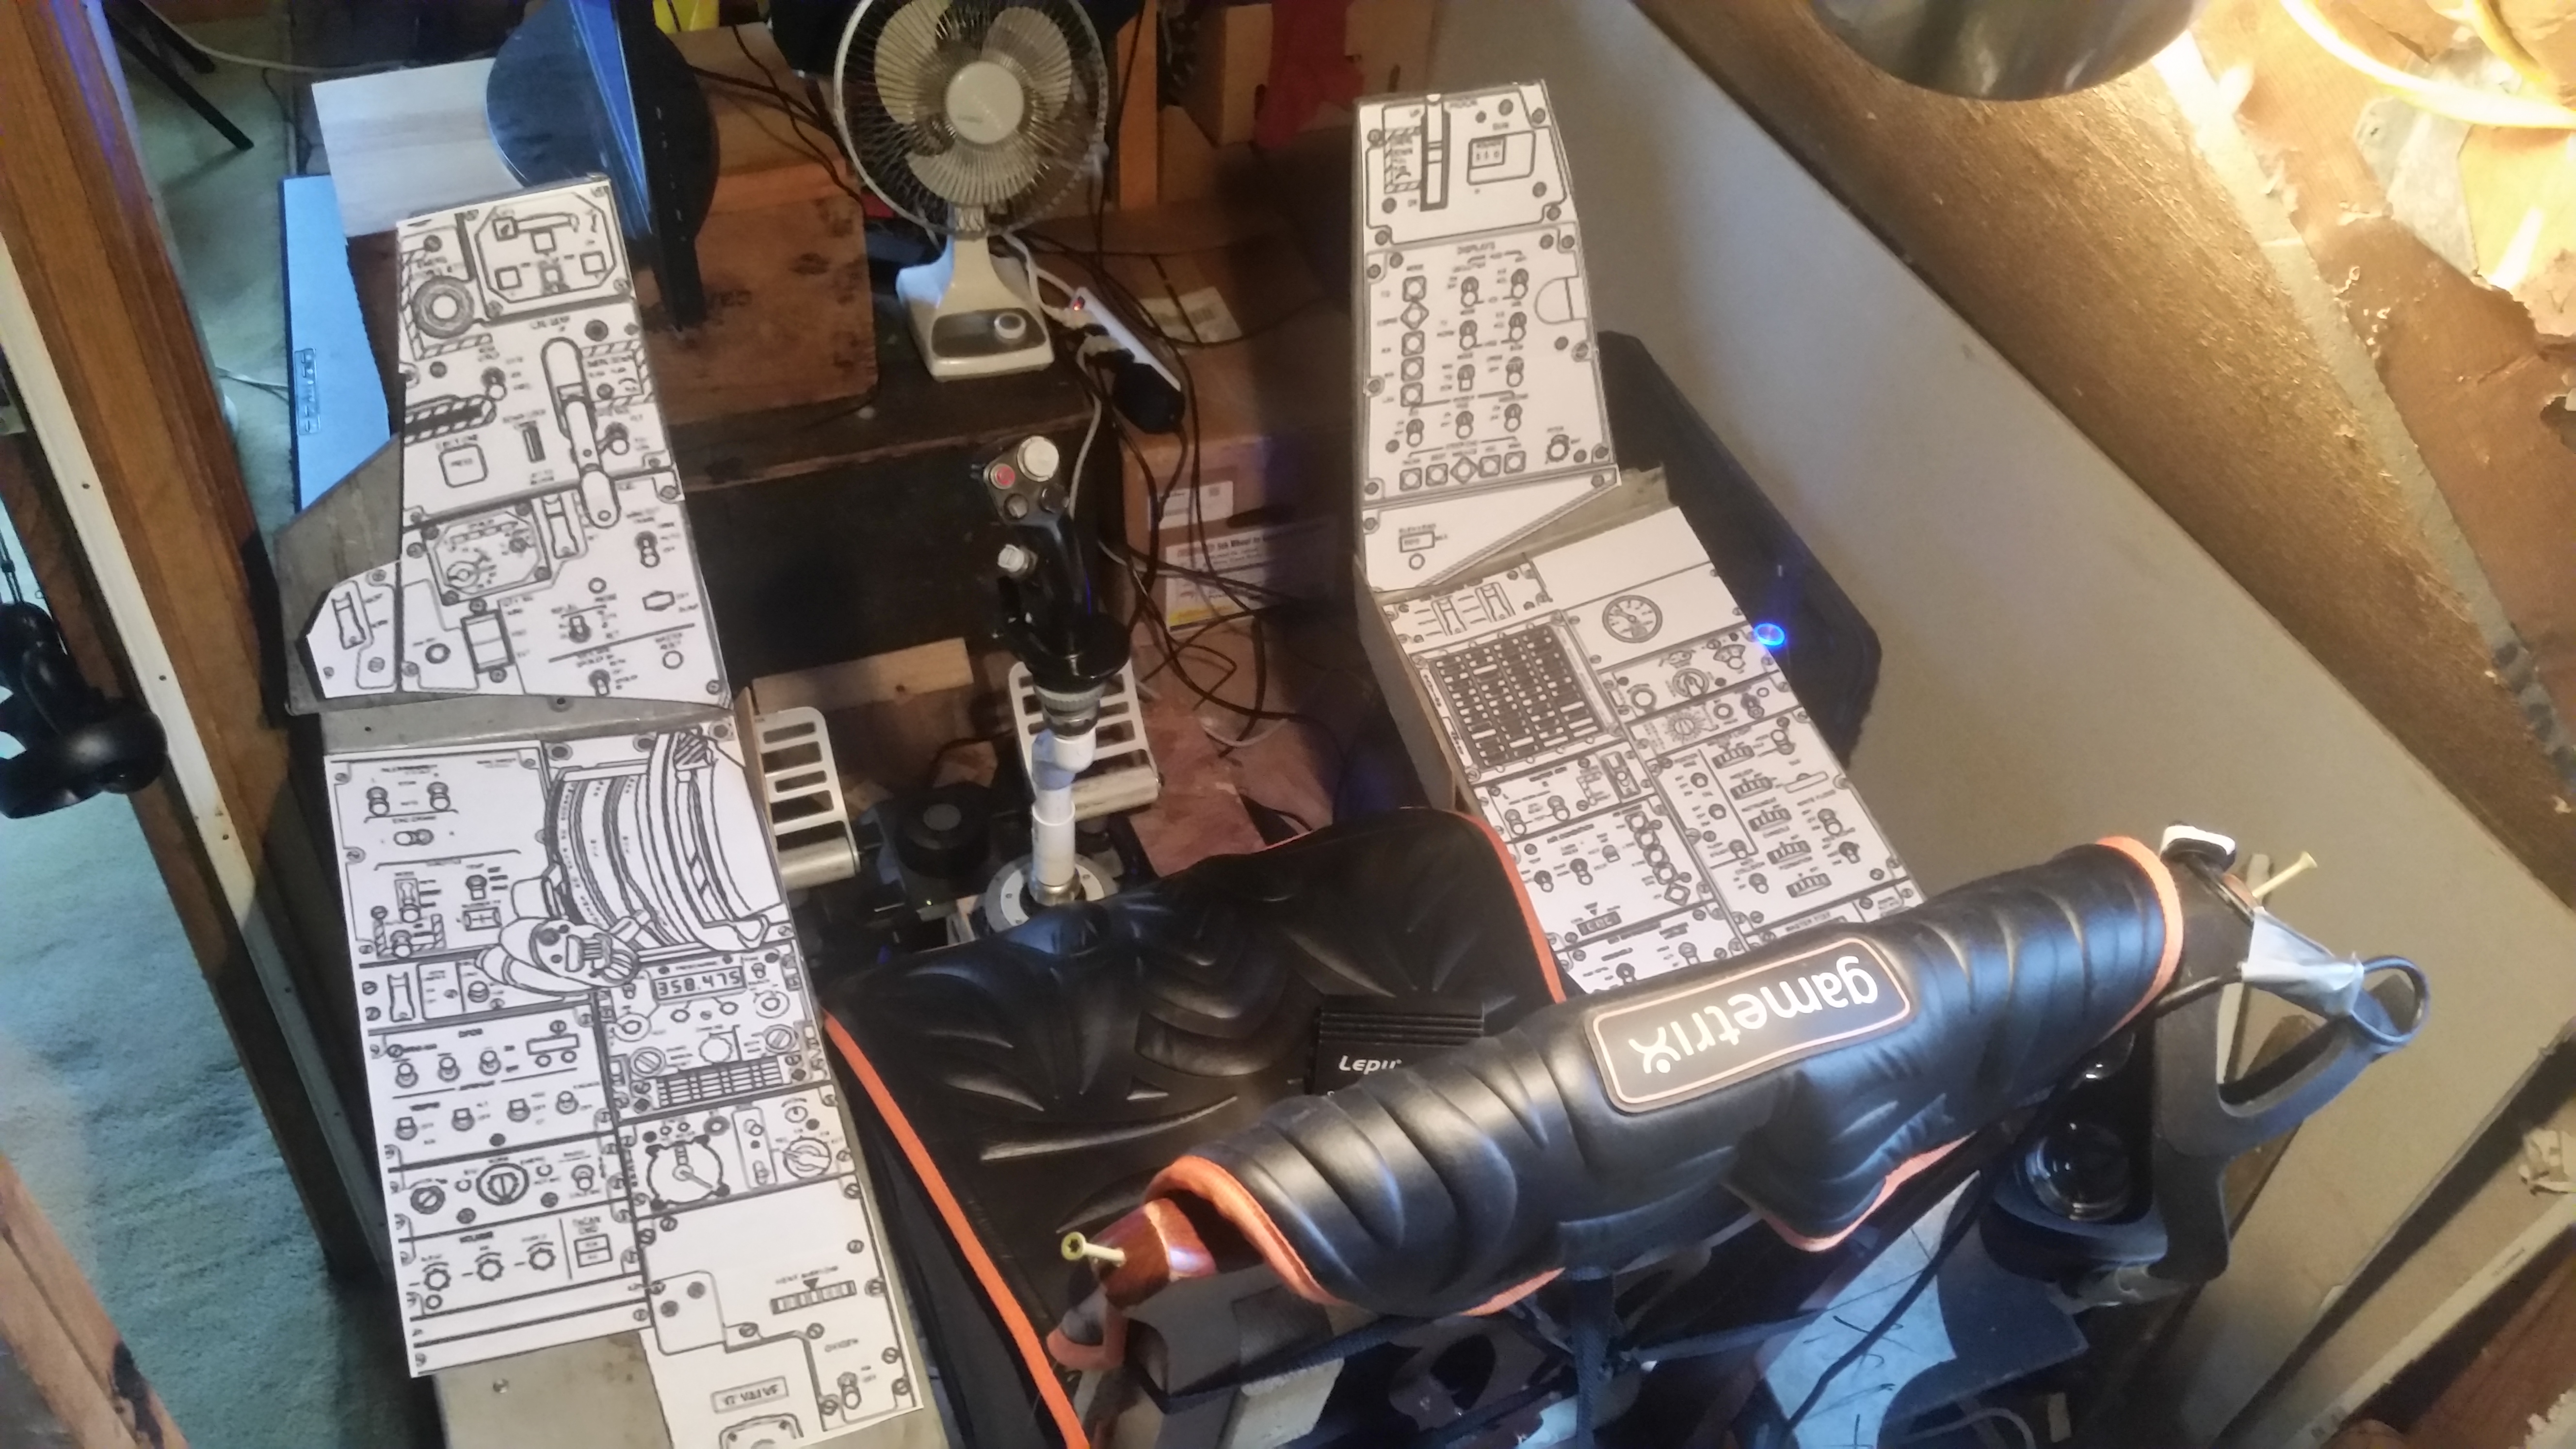
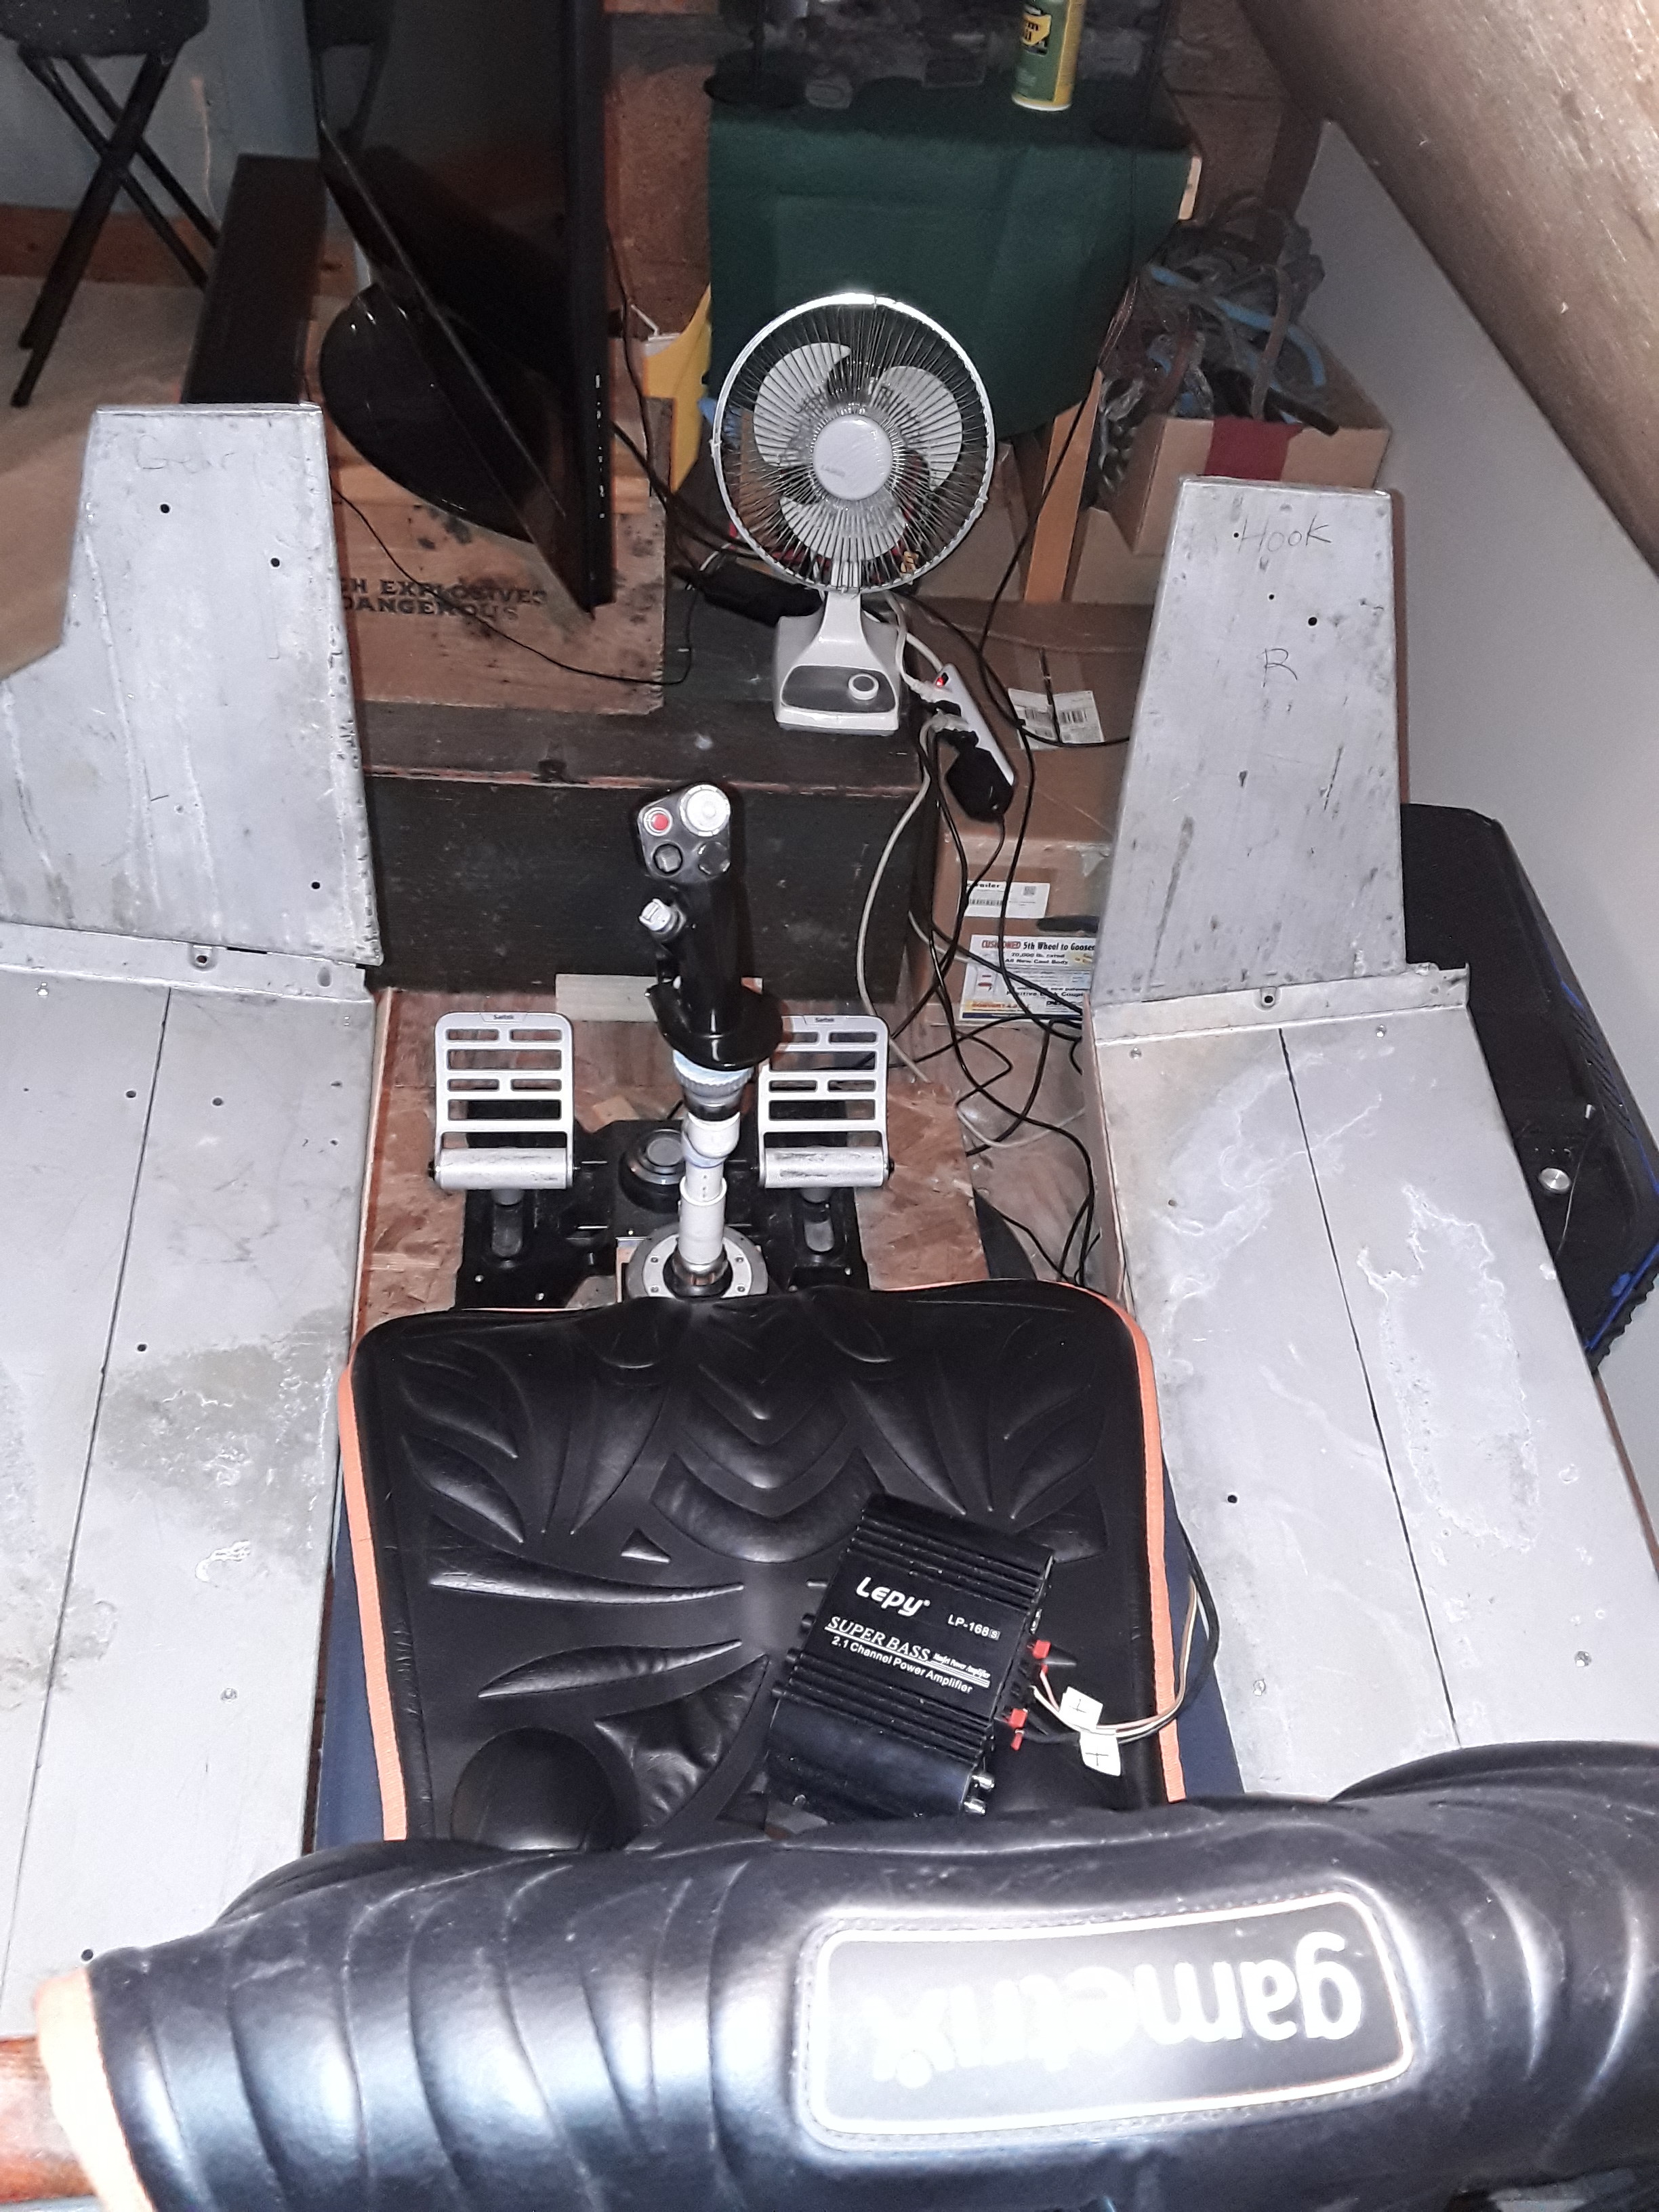
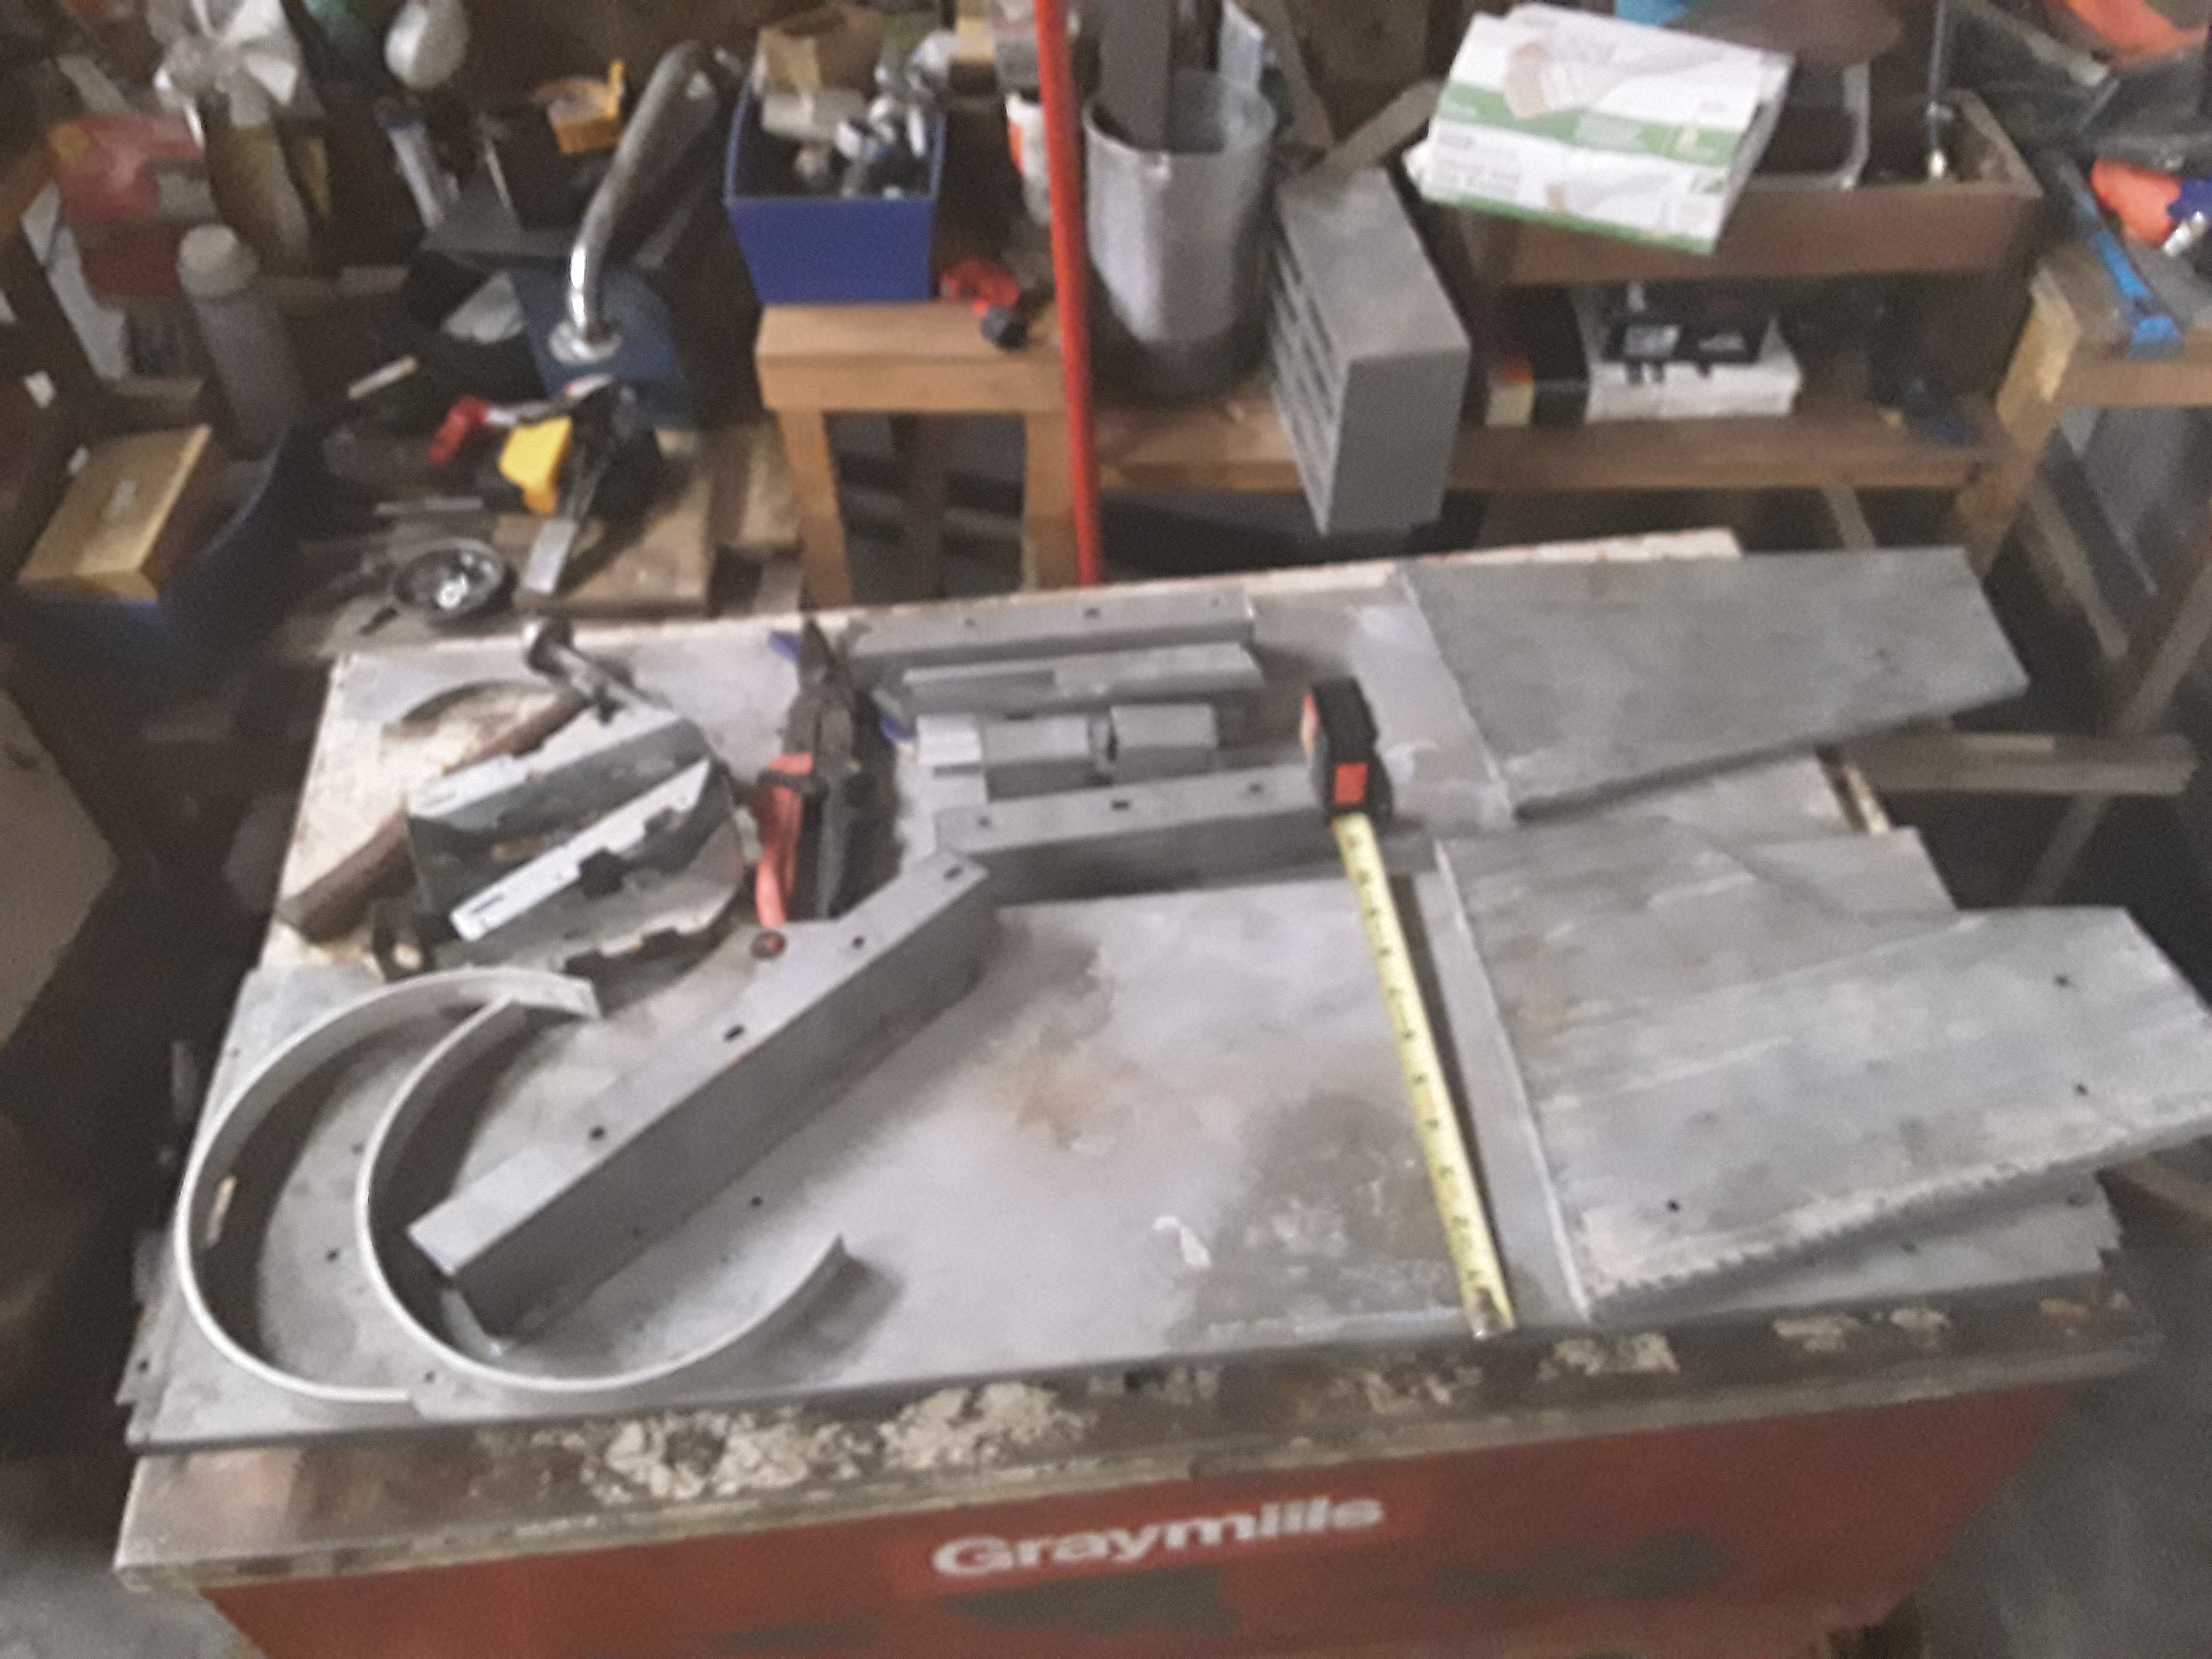
F-14 Tomcat Side and Vertical Panel Traced Layouts
mariner3302 replied to mariner3302's topic in Home Cockpits
A good source of info and dimensions... https://forums.eagle.ru/showthread.php?t=167971 https://forums.eagle.ru/showthread.php?p=3807714#post3807714 -
I put a size scale so you can have them printed and blown up to full size if you wish... The switch locations are for the most part in the exact places they should be in relation to everything else and the scale.
-
Here are the tracings of the panels I built with measuring marks so you can blow them up, have them printed, whatever...
-
Thats a truckload of switches....
-
The yellow/black marked locations are the buttons/switches I think I need to put in first. Any thoughts on additions or deletions?
-
The question of how I did my panel prints has come up and as those before me, I simply used Paint to clean up and resize the images in the NATOPS picture. I have attached the files as I printed them. Use Print Preview to see what you will get. Take the page margins in the print page settings or advanced settings to as close to zero as it will let you, Don't use the fit to page check block. Instead use a setting of 100 to 102% depending on what you want. The actual side switch panel widths are about 11 inches so you want to use Landscape mode. Be aware that printing them is a little trial and error. Use a tape measure to verify the panel width is around 10 1/2 inches and that the top of the vertical panels are about 5 1/4 inches. That will make you very close to the actual panels in the Tomcat. After printing the panels images, I trimmed and taped them together. Then I used spray adhesive to cement them to the wood paneling that will be the cutouts on top of the switch mounting plate. I sprayed the back of the paper then laid them on the panel which was larger than the cutout. After the paper layout was on flat and smooth, I trimmed the edges of the wood panel of any excess around the paper. I did it that way because it was easier to lay the paper down and flat then trim than getting the paper perfect on the trimmed panel. It makes life easier to build in a little slop that you can take out later. It really enhances accuracy. Anyway... So there they are.... I found that using a pilot hole through the wood paneling through the sheet steel, then the required size drill work well if there is a good solid wood underlayment to drill into. It gives a sharper look. F-14 side panel dimensions.pdf
-
Well that was helpful, thanks SO much!
-
Hey Victory! Could you share the files to get those panels cut? How is the Pit coming? Any pics??
-
A little progress!
-
Hey Dino, what happened with this? https://forums.eagle.ru/showthread.php?t=194249&page=6
-
fixed [REPORTED]NS 430 overlay invisible in VR
mariner3302 replied to fargo007's topic in Bugs and Problems
Actually, that was added AFTER most of us bought it! -
fixed [REPORTED]NS 430 overlay invisible in VR
mariner3302 replied to fargo007's topic in Bugs and Problems
Every VR user should get a REFUND and apology from ED. There should/could have been a warning that it doesn't work in VR. Basically we gave them cash for nothing!