Leaderboard


Popular Content
Showing content with the highest reputation on 11/21/10 in all areas
-
I don't know about others, but I did much of my weapons training and familiarization using the "Shooting Gallery" mission on Nevada. Now that We no longer have this map, I needed a replacement where I can train without things shooting back. This mission in it's current state is quite early in development, but I thought I'd share it here now both to make it available to others and to get feedback for additions and bugs to fix. I'd like to morph this in to a sort of ultimate training mission where you can practice nearly anything. Current setup/design philosophy: -There are no dedicated red force anti-air defenses: Feel free to train without fear of retribution (although if you're close enough, the BMP's will shoot at you). -Ancillary support training: AWACS and a KC-135 are placed in the mission so that you may practice communications and refuelling. -Variety: There is one static bunker and a mix of trucks, BMP, tanks, helicopter (harmless Mi-8's) and SMERCHes. -Easy to find targets: in theme of the old "Shooting Gallery" mission, targets are at waypoints appropriately named. -You can practice everything: Ramp start, refueling, attack profiles, ILS/visual landing. -Familiarity: targets are all near (but not on) the abandoned airfield used in the training missions. -Short transit times: no need to spend 35 minutes flying to the target for 15 minutes of practice. Plans for the future: -Addition of moving ground targets to practice point tracking versus area tracking on the TGP. -Addition/refinement of more airbase "environment" (there's just a few static aircraft right now). -Addition of fixed wing A2A targets (maybe). -Possible revision of the current waypoints used to mark target locations. My thoughts would be to make these mission points outside of the flight plan. With this you could switch to the mission points to easily find your targets or keep your flight plan up and rely on JTAC targeting or markpoints in a more realistic fashion. -Addition of a "hostile zone" in the opposite direction of all the targets (to the north instead of the south) with active AAA/SAM to practive missile evasion tactics. -Possible addition of a wingman pending feedback (my wingman in Shooting Gallery just annoyed me, so I've left them out for now) Known Bugs: -The current group of trucks at waypoint "convoy" are oriented perpendicular to the road instead of parallel. -Tanker pilot is on crack. Need to figure out why he's orbiting on a race track at 2,000' MSL. Please report any bugs you as well as suggestions for new additions and/or refinement of the current mission. I will continue to update this mission and upload it here. Once this mission is relatively stable, I'll add a version with IFR weather and a night mission for further training. Change log: v1.01 -Added briefing information -Removed erroneous A-10C's on bunker roofs -Added some additional static aircraft v1.02 -Added JTAC with tasking -Tried to smooth out tanker track Training Grounds.miz4 points
-
hello i dont know why i join this forum to get help and my posts are moved dosent any body here help any body here all iam asking is i cant get a-10c to work i payed 59.00 for it and sitting here doing nothingif u dont want to help help me i get my money back i wrote to support they are worthless i will ask one more time i down load a10c beta 3 that what u down load online here now the problem i don tknow what bin file goes with it and when i go to install a window comes up saying the bin file missing and i have a bin file in the folder with the setup exe the question if someone will plese help me how do i get it to install with bin file they wont open i keep getting bin file not in folder and wont let me install i ask this on this forum since monday and been ingored or my post moved i dont want to put a stop on my credit card for the money i want to play the game is there step u have to take to get the files to work thank u i hope i can get some help warthog224 points
-
Slightly updated textures, and with external model showing this time (little glitch before)2 points
-
Multi monitor set-up guide: DCS-A10c & BlackShark 2 Display your MFCDs, CDU, RWR etc on a 2nd, 3rd etc monitor Initial note: This guide is to help people create bespoke multimonitor configurations in DSC-Warthog, no matter what your configuration the principles are the same. Please add any tips or correct any errors i have made. I'll adjust this accordingly. My set-up is two 22inch displays side by side, i'll use this as the primary example, but the logic covers any set-up. I have included several monitor set-up examples to help explain the principles. Essential Requirements: Full screen OFF (ingame). Extended desktop enabled in Windows. The 'primary' monitor, in Windows, needs to be your top left most monitor, otherwise you may have problems. You need to create one lua file. BlackShark 2 note: Shkval is Left_MFCD Abris is Right_MFCD ** Before editing DCS files please read this post: http://forums.eagle.ru/showpost.php?p=599686&postcount=1 The Guide: 3 steps Step 1: 1st thing you need to do is workout your total resolution of your combined monitors. Use the image below to help you work this out if you are unsure. Here you will find 3 example layouts.. Note this figure down, this is your combined resolution. Step 2: Create you own bespoke multimonitor *.lua file and save it here: \Eagle Dynamics\DCS A-10C\Config\MonitorSetup\ How do this: (Read through this entire section before starting your *lua file), 1st time through you might well go WTF!, but trust me it is not that complicated. :) First look at the default existing files in this location; (\Eagle Dynamics\DCS A-10C\Config\MonitorSetup\). They are good examples and the default ones provided with the game: There is one example original ED file: LMFCD+Camera+RMFCD.lua My example: My_example.lua NOTES: What it all means: ED have used wording rather than numeric x/y coordinates. This is to allow flexibility. You can also use this format, but i find it more complicated, so i use the numeric pixel option. In ED's method screen.width = the combined width of all your monitors, (x), screen.height = the combined height of all your monitors, (y). So for me screen.width = 3360 (2x1680), screen.height = (1050) I wanted both MFCDs on my 2nd monitor, this is located on the right of my main monitor. Both my monitors are 1680x1050. Center = your cockpit view x=0, y=0; is always located at the top left corner of your 'primary' monitor, in Windows. The x & y coordinates always refer to the top left corner of each element. i.e the location of each MFCD is their top left corner. You do not generally need to edit viewDx, viewDy or aspect. But it's worth checking the aspect ratio. This is calculated by dividing your width by height of you cockpit monitor. name = is the name that will be displayed in the game options drop down under Monitors. (Make it unique) width = & height = are x & y resolutions in pixels associated with each item, cockpit (centre), MFCDs, RWR, CDU etc. Look at the spoilers below to explain the x/y system: Screen coordinates explanation: 3 example setups to help explain screen coordinates. Both x & y start on the top left corner of the left most monitor. x goes across the horizontal while y goes down the vertical. My example set-up displayed: - putting it into practice, refer to my lua file My_example.lua above to understand what is going on. Ok now you should be able to start creating your own bespoke multi-monitor file accordingly to your own set-up, if i have made this clear enough and you have wrapped your brain around how this all works. I'd suggest you use my example above and edit it to suite your setup. You need to save this file as file type .lua and save it in \Eagle Dynamics\DCS A-10C\Config\MonitorSetup. Step 3: Launch the game.. go to Options. (Here you need to do two things) Firstly you should now be able to select your bespoke file from the drop down list labelled; MONITORS (If it is not in the list you have most likely made a small mistake with the lua code.. check for missing { , ) etc. if any part of the code is missing it will not be available to select.) Secondly you need to enter your combined resolution, you can simply type this in. This is the total resolution you worked out at the start of this guide. See image below: Your aspect ratio will alter itself. General Notes: You can edit you monitor file on the fly, i.e without having to quit the game. Can save a lot of hassle. If you don't get the results you want simply quit flight, alt tab, edit the file, alt tab back and click fly again... your new setting will be used. I hope this is clear enough. Enjoy. Screenshot of my set-up: ____________________________________________ ____________________________________________ Advanced section: Adding CDU, RWR, Clock etc as Viewports = Please read icemaker's thread http://forums.eagle.ru/showthread.php?t=70716 on how to do this. Below is my present setup incorporating MFCDs, RWR & CDU Incorporating Hawg Touch: Clear Dark's Hawg Touch program: http://forums.eagle.ru/showthread.php?t=71729 My Hawg Touch profiles: http://forums.eagle.ru/showthread.php?t=70364 I'll be releasing a new Hawg Touch profile for the MFCDs, CDU & RWR shortly. Just awaiting to clear up a issue with it. Here is what it looks like: Updated 27th June 2011.1 point
-
I thought I would release the beta version of my airfield diagrams for DCSW as the charts are at the point where I need to print a copy and then work my way through the airfields to get the rest of the detail right. The radio frequencies, elevations, directions and measurements should be accurate with the mission editor the F10 view and the A10C's internal MAGVAR. I'll do the release as a separate thread to the design discussion to avoid the release getting lost in that thread. I'm working through tower placement and taxiway labelling in addition to points of interest however a lot of the Russian airfields dont have the taxiways labelled which complicates the matter, I'm thinking it may be worth waiting until the DCS release prior to revisiting this. I've also added references to the ADF's from the BS manual and if the interest is there I will release a Russian air force version with Metric measurements once the maps are finished. If anyone picks a bug or has some reference notes for the airfields let me know. UPDATE: Updated airfield name plus some error corrections For those of you printing this, I recommend printing in color to A5 directly, as the map lines blend better in color then gray-scale, however you can print 2 per page on A4/letter Airfield Diagrams.pdf1 point
-
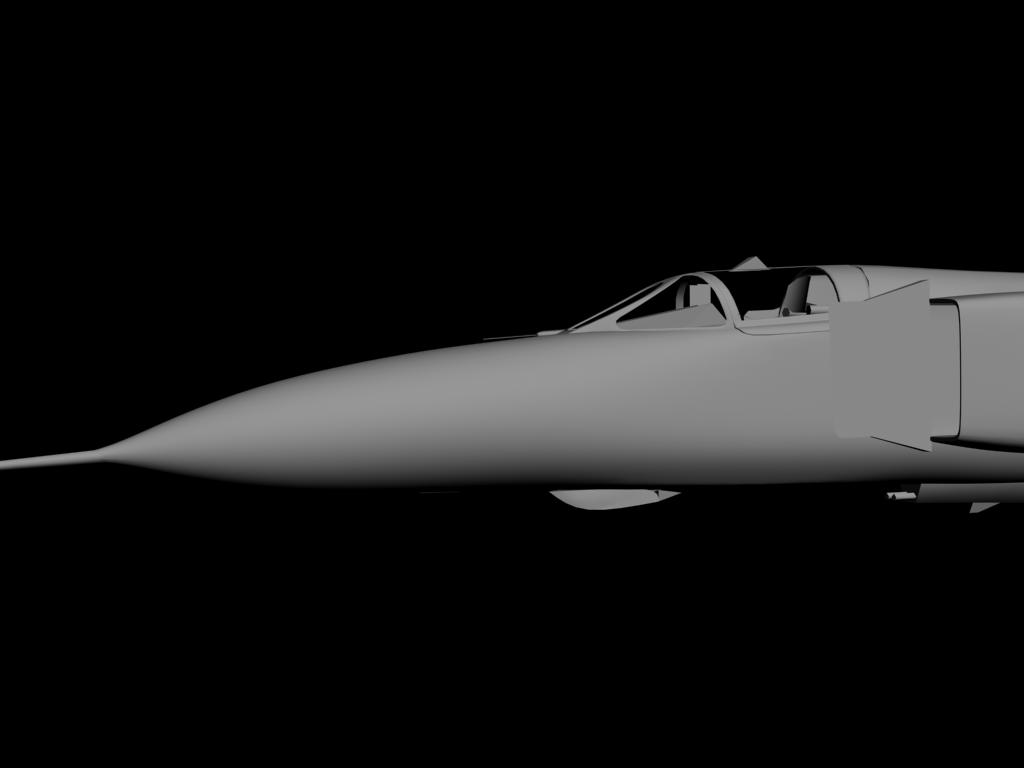
because i finished the 3dmodel of the iar93/sokoj22 and i don't know how to do the animations(in fact i do an usuall anim,what i don't know is what are the arguments and how to work with them), i started another project.mig23 i intend to model all the next versions: MLD,MF,UB. all 3 models wil be extra smooth at only 15000 polys.here you have a preview:
 1 point
 -
Ladies and Gentlemen, The 104thPhoenix is proud to present: Operation 'Dane' http://www.104thphoenix.com/downloads/bstrain/A10Missions/Op_dane.rar This mission Augments the IVS (Instructional Video Series) that you can find on my YouTube page or in this post: http://forums.eagle.ru/showthread.php?t=60331 Enjoy. :thumbup: Regards 'T'1 point
-
Hello guy's :) I allow to post you my second realization Black Shark with the squadron 16Th Black Reapers I wish you good flight :) Link Viméo : http://vimeo.com/16980157 Link FULL HD : http://www.megaupload.com/?d=FPIEU1AV http://www.megaupload.com/?d=3HJWEGWR Warning MegaUpload on some concerns it moment he(it) goes can be to say to you that the file is unavailable it is necessary to insist just a little Enjoy :)1 point
-
Oh, the irony... I bet team CH are laughing their collective butt off at this. Seriously, I bet TM manufactured to mil spec too, right?1 point
-
Unless you create a macros on your stick for an instant ejection. :D1 point
-
Suit yourself. But the real A-10 & F-15 have plastic throttle handles. As to the "flat spot / divot", let me put it like this. Take a small flashlight ('torch' to you I guess) of standard design (a couple of cells inline to power it...the 'maglite' brand we have over here is an example of what I mean) Stand it up with the bulb pointing down. Grab the flashlight like a joystick and tip it around. You'll notice that there's a small bump when you go through the pure vertical position where it would stand on its own. That's _exactly_ how the Warthog feels, minus the spring tension. For good reason...that's essentially how the mechanism hits center.1 point
-
I have had time with a nxt modded cougar (a mate of mine has one), and I agree the difference isn't great, but the difference is there.1 point
-
We too, will be flying the A-10C.............of course. As for the 'hardcore' ramble..............................'yawn' ;-) 'T'1 point
-
http://forums.eagle.ru/showpost.php?p=412436&postcount=6 Well the 'A' turned into a 'C'....1 point
-
For what it's worth, I haven't flubbed a landing yet and it's because I landed precisely the same way I've been landing (and teaching people to land) Falcon for years. 1 - be at the proper altitude. If you're not seeing the near end of the runway at about -2.5 to -3.0 on the pitch ladder, you're not at the right altitude. 2 - Dirty the aircraft. Once you've got the near end of the runway at about -3 degrees, point the nose up/down as needed to put the velocity vector on the near end of the runway, too. Concentrate on slowing the aircraft below landing gear speed (about 250 I think). Get the gear down, "landing flaps", and full speedbrake. As your aircraft slows, bring the nose up to keep the velocity vector on the near end of the runway. When your nose is about 5-6 degrees up, feed in power to maintain that flight path and hold the nose as steady as you can. Use trim to make it easier. With a dirty A-10 you're going to need a high power setting to keep it flying. When you later start trying to land with weapons, only then might you actually need to close the brakes a little bit. An empty airframe with full fuel (which is how you should now be practicing) can (and should) be done at full brakes. 3 - Fly your approach with the nose at about 5 degrees above the horizon (A bit lower than in an F-16 where I'd say ~ 8 degrees) 4 - Vary the power to walk the velocity vector onto your desired landing point. 5 - Speed? Hell if I know. Speed will be what speed will be. It will vary based on how much you're carrying in weapons and fuel. I couldn't care less what number is displayed. The following were written/recorded with Falcon, but the principle is the same. Paul Wilson's excellent text based tutorial: http://www.87th.org/modules.php?name=Sections&op=viewarticle&artid=22 My video tutorial:1 point
-
Sweet looking Cali! Hope your wife's friend's dad can help us out with our pits. ;)1 point
-
Yes it is.. don't know why, but it is.. I suspect because of the lack of room, but then again... how big is a switch? I dont know.. but I dont use that switch all too much1 point
-
Finally got mine-yay!; Original cost=400; shipping=200; customs and tax=400; total cost=anal rape. What got me is that they calculated customs based on price+shipping, then calculated tax based on price+shipping+customs. So I'm paying tax on customs! The F*CK? Is the outer switch on the left throttle looser than the switches on the base (e.g. the APU switch)?1 point
-
It´s VEAO Mate ;)1 point
-
Very nice work VEAO (fixed!) :thumbup:1 point
-
I just flew the latest version of the Landing tutorial. HOLY COW, no wonder someone was confused by it. There's a lot more going on there than simple landing practice. 90% of the instruction is about practices not directly related to a typical visual landing.1 point
-
Remember that you have made a back-order for the original sim and you are supposed to wait for its release. You have received a BETA TESTER access and BETA version as a bonus. This is uncompleted version of the flight sim that is not ready to receive fully backed customer support. You are here to test it and through-fully report bugs, or otherwise wait for the full release with your pre-order. BETA puts responsibility in your hands and if you can't cope with that you shouldn't complain, but just wait for full release. PS. It would be much easier to understand you if you bothered to write in sentences.1 point
-
Decision Altitude (DA) is specified in MSL, and is associated with CAT I precision approaches. Decision Height (DH) is specified in AGL, and is associated with CAT II/III approaches. Minimum Descent Altitude (MDA) is specified in MSL, is associated with non-precision approaches (like TACAN), and is to be flown until reaching the MAP which is specified either by a DME fix, crossing radial, timing, etc. TACAN is actually a non-precision approach. As above, the most common type of approach - the Category I ILS - specifies a DA which is expressed in MSL. Only a few certain types of approaches - Category II and III ILS - specify a DH expressed in AGL. (I'm purposely leaving out GLS, MLS, WAAS, etc...) MAPs are not specific to an airport, they are specific to a particular approach to a particular runway. A given runway may have multiple types of approaches, for instance: Runway 23R at Wright-Patterson AFB has 3 unique ILS approaches (plus a LOC-only variation), an RNAV GPS approach, and two unique TACAN approaches. The MAP can be completely different for each of the non-precision approaches. Using my example, the MAP for the GPS approach is 1.6nm from the threshold at 1380ft MSL, while the TACAN MAP is 2.1nm away at 1320ft MSL. Finally, DA(H) is not common across the entire category of approach. The ABSOLUTE minima are, but ACTUAL minima for each approach to each runway is determined based upon local factors. See below: CAT I approaches generally have a 200ft DA, and require 1/2SM visibility. Alternatively, RVR can be substituted for visibility if available, with a minimum value of 1,800ft. Some CAT I approaches have higher minima than 200-1/2 due to considerations such as rising terrain, non-standard lighting, non-standard markings, etc. A few very special CAT I approaches have lower than standard minima (150ft DA, and 1400ft RVR), but those require additional siting requirements, are designated SAACR approaches, and require the use of a Flight Director down to DA. CAT II approaches have a Decision Height not lower than 100ft, and a required RVR of not less than 1000ft. Minima may be higher depending on available ground equipment, lighting, obstacles, etc. CAT IIIa minimum is RVR 700ft, and depending on aircraft capability, a DH may be required and will be not less than 50ft. CAT IIIb minimum is RVR 150ft, and depending on aircraft capability, a DH may be required and will not be less than 50ft. CAT IIIc is not currently used. Again, these are the absolute minimum numbers...all of them can be adjusted upward depending on numerous factors.1 point
-
go to hardware store and buy a 2" PVC pipe and 2 caps. Take WH off base plate and attach to PVC cap put cap on pipe. Bolt other cap to WH base plate and slide on pipe. You now have an extension for your WH. You can also easily rotate the grip for more comfort. I would connect the bottoms of the legs so they are all connected together like the seat base. They will be easy to snap off individually as is.1 point
-
Happened to me also first time I installed Beta 3 over already working Beta 2... do an uninstall of it forst then install again Beta 1 > Beta 2 patch > Beta 3 patch and all key bindings will be there1 point
-
I didnt have it install, but I messed with the default mappings so I think it didnt overwrite. Kuky has an update in this post which includes them and all other keys.1 point
-
SLI-System, 2x GTX480. DCS would manage, it had done it before, as it has with the 12Gig... (taking out a couple isn't an option, as it's all integrated in the cooling circuit and atm I can't drain the circuit) Tested it with a super-clean install and without anything but my mouse coonected also allready. Same for av completly down. FC2 is working fine. Eventviewer is totally empty - no crash reported, nothing... thats the misterious thing - it seem's like the sim-exe has just the opinion "I don't wanna fly" and leaves the base directly at the gates allready. SOLVED (appending this because I was in writing the post while testing around xD): I'd gone through my analogue system log I'm writing by hand, where bigger changes are noted. My eye felt on WindowBlinds... That's an uhm... a Make-Up-programm for Windows I'd tested a few days before. By setting the "Deactivate Desktopstyles" and "deactivate visual designs" on the compatibility tab off the simulator.exe, I got it running, even without having to kick WindowBlinds away. So - Problem solved - if anyone encounters strange behavior, try setting this modes! Big thanks for help anyway, Panzertard.1 point
-
ты Покрышкина читал, он на других самолетах и в другое время летал :) А у нас, в смысле в игре, все просто, с высотой маневренность самолета сильно падает и это правильно, воздух то разряжен, а вот у ракет не падает - не реализовали им этого, поэтому чем ты выше, тем сложнее тебе уйти от ракеты...1 point
-
You have no idea how long and hard I've been searching for this adjustment.1 point
-
I've always hoped that they would some day implement user created trains. Blowing up an old russian missile train has always seemed appealing to me. I suppose you could blame that on Goldeneye.1 point
-
if you have beta 3 installed, there is a UFC catagory in options-controls1 point
-
Glad to be proved wrong - must be the \temp\tempMission.miz that contains the changes and thats the one you're flying then. :)1 point
-
Hi all. You are welcome to the track file and a super HD version of the Youtube Vid (200mb). Please go to: http://www.104thphoenix.com/modules.php?name=Forums&file=viewtopic&p=18906#18906 The files are on our Website, because i`m sure you all understand that it was only right that the 104th members had access to this information prior to the remainder of the community. However, time has passed and you are now welcome to pilage and check i wasn't on 'Arcade' mode, or whatever it is...... ;-) Regards 'T'1 point
-
Yes this was it, thank you Nate !1 point
-
I've never gotten trim to work. I end up constantly retrimming and overtrimming endlessly. Far more work than simply holding the stick where it needs to be. Black Shark's trim system was great. A-10C's is a nightmare.1 point
-
I (in real-life flying) usually trim for a slightly high approach speed, meaning I need to use positive back pressure on short final when reducing the speed. This makes the aircraft easier to control, as you're not going from positive to negative elevator pressure, and also allows you to get a better feel for what the aircraft is doing. I find this especially valuable in pitch-sensitive aircraft. It also means that neutral elevator pressure will give you a bit of a speed margin during the early phases of the approach - good if you catch a wind shear or an abrupt gust. Or if the lump in front should go deafeningly silent. Letting go of the stick would obviously be bad - but why would you? In fact, you should never do that while handling an aircraft anywhere near the ground.1 point
-
That's something i would not do because you handle an extra control of your aircraft at a moment you have difficulties to learn how to use the major controls of the aircraft. On his first few flights with no weapons loaded, there is not much need for trimming anyway. Trim is only needed in a later stage of the learning curve when he knows what the impact is on his controls. It's more important to get a good "stick feeling" first.1 point
-
I have a X52 Pro as well. I agree it's too jumpy stock. I have set curves under axis tune to +15 in options (in game). That adds a nice amount of stabilization.1 point
-
dnme, As you get closer, corrections should be getting smaller. Once you're established on final, try to let go of the stick once in a while and observe what happens. Make sure you've trimmed the aircraft!1 point
-
There is a Thanks-button, left of the post, the middle button under the user's name, Join Date, Posts and reputation ;) i know the problem with the corrections. Just keep calm, bring her in with very very smooth inputs. if you correct too much, you have to re-correct. That will result in the effect you described. try to place the Flight Path Indicator on the runway threshold, set your speed and use the trim function to trim your aircraft. with a little training, you will be able to land without even touching the stick anymore (except the flare maneuver) ;) edit: You can download FC2 here. But you have to buy it, to get the serial code to unlock it after installation ;)1 point
-
In a tighter turn compared to not using thrust vectoring. So what does it do? I don't think that 10°-20° of thrust angle cuts the whole speed. But it reduces the AoA. So it may be twice or 3 times if done right. It may be enough to get you into a good position, but it also might be your doom, just like any other maneouver. The Harrier is not made for dogfighting anyway. A skilled pilot in any dedicated fighter will know how to BnZ it anyway. But it has its capabilities to defend itself, more than other planes like A-10, Su-25 and such. OK, the F-16's definately better in a plain A-A configuration. But it's a whole different kind of plane anyway. Shouldn't compare these :D We will: http://www.thunder-works.com/news.htm http://www.forum.aerosoft.com/index.php?showtopic=39766 (link not working ATM, dunno why) They announced a release date for the first out of 3 modules in late 2010. And that announcement is just a month old, so they've to be *very* confident to schedule such a short time till release. But I doubt this will be DCS-grade simulation, I rather expect FC-level. Still, it's the old Harrier ;). That pretty much sums it up quite well. I'd like the 18C a bit more, but the 16C is a decent multi-role that many countries use (more than the 18). And it's still in USAF service which gives the possibility of a military contract that grants funding, just like it's the case with the A-10C. The old Hornet is getting replaced by the E/F model which is classified. The F-16 hasn't been replaced by the F-35 yet.1 point
-
Кампания готова! Скачать можно здесь: http://files.lockon.ru/ru/708/1 point
-
A lot of time asking for landing help will give you a serious landslide of info. Patterns, overhead break, ILS, etc. are all fine things to know but can distract and overwhelm one from the core practice of safely putting tires to tarmac. Breaking down the landing into its basic components you have: Approach Final Flare & Roll Approach is all that fancy stuff one does to transition from en route flight to final approach. One could write whole books about the many ways this can or should be accomplished. Final is the path from the end of the initial approach to the flare point. Defining characteristics of final are: aligned with runway, constant speed, landing configuration, constant decent slope. Flare is the process of transitioning from final to the runway surface, usually only a few tens of feet above the surface as you pass over the threshold. The roll is what you do after touchdown until you are slow enough to transition to typical taxi behavior. The simplest approach would be something like 10nm from the airport along the extended runway center line, 2000' above the runway surface, roughly 200 kts, and in the clean configuration. From this position the runway will appear ahead as a vertical line somewhere slightly below the horizon. As you fly toward the runway at 2000' the runway will appear to drop visually. As the near end of the runway moves to -3° visually (3/5ths of the way between the horizon line and the -5° ladder rung on the HUD), lower the flaps and drop the gear. Place the TVV on the near end of the runway. You've now established yourself on a 3° glide scope which will fly you right to the near end of the runway. While keeping the TVV on that spot through any necessary adjustments, add or decrease power until the v o ^ angle of attack symbols illuminates only the "o" symbol. Now you are on the correct path to the runway and the airplane is in the correct attitude for landing. Fly this picture until you are about a wingspan above the runway surface at the flare point. If you continued flying the final approach picture onto the runway, you would impact the ground where the TVV was pointed and at whatever vertical descent rate the final was at. The aircraft would probably survive but it would be rough. To soften the landing you want to reduce the descent rate to nearly zero as you near the runway. To do this simply pitch up slightly to walk the TVV symbol toward the far end of the runway. As you do this relax the throttle to idle (full back). As the main wheels touch, set the nose wheel onto the runway and apply the brakes.1 point
-
One Summer - Two Messerschmitts A 1 h 18 min documentary about the two airworthy Bf-109's in the world. Minimal music, just pure Daimler Benz roar. www.youtube.com/watch?v=ZQvvkYyb2iU&feature=related1 point
-
having read your OP again. my sincerest advice is don't concentrate your time on teaching others a skill you have not mastered yourself. Learn the sim, Fly, Navigate, communicate, engage. Once you can do that, give some of your time to teaching others, but until that days arrives, look after no 1! Good luck anyway1 point
-
Congrats :beer: Also congrats to =FV=MAD and luckyboy9 :beer::beer:1 point
-
Только не для наших, вроде.1 point
-
Good news guys. Ok I said earlier that only a few panels now appear in the Options/Control panel. If you have some input hardware like a leo board, it will appear as a column as BU0836 in the key assignment screen. Just select the desired category in the drop down list, find your function, then select the JOY button. This is the simple part. It works. Since the LASTE panel exists in the drop down, I selected that category, then the AAP engage/disengage function, then assigned to JOY BTN 12 on my BU0836. Fired up the sim and went into training to verify. Pushing down my push button wired to the leo board is mirrored in the sim. Cool! Now the more interesting part. What about the many functions added to the keyboard.lua (which is now twice in file size in beta 3) that don't appear in the control panel for button assignment? I learned this from Kuky (thanks Dude!). Here are the steps again. 1. Connect your input hardware. eg. BU0836. Fire up the sim. Let it detect the hardware. It'd add a file eg. BU0836 Interface {F92F83B0-DB0E-11df-8001-444553540000}.lua to the path \config\aircrafts\joystick. When you edit it later you'd have to give write rights else you can't save. 2. Go to the adjacent folder 'keyboard' next to the joystick folder, open up the keyboard.lua. Make a backup copy. Even though you won't be editing this file I found out that when I make changes to the BU0836.lua this got changed somehow. Once inside, choose a function you want, say you want to test the oxygen indicator test button in the environment panel, which doesn't exist in the key assignment window yet. You look for it and copy it from the keyboard.lua and paste it to the bottom of the bu0836 lua file. eg [789] = { ["up"] = 1505, ["name"] = "Oxygen Indicator Test", ["category"] = "Environment System Panel", ["down"] = 1505, }, -- end of [789] 3. you add the section in red. If you have a physical button button wired to joy button 12 in the leo board (verify which joy buton in the windows joystick controller control panel), then below is JOY_BTN12. I assume you know how to wire the leo board pins! [789] = { ["combos"] = { [1] = { ["key"] = "JOY_BTN12", ["reformers"] = { }, -- end of ["reformers"] }, -- end of [1] }, -- end of ["combos"] ["up"] = 1505, ["name"] = "Oxygen Indicator Test", ["category"] = "Environment System Panel", ["down"] = 1505, }, -- end of [789] 4. Save the bu0836 lua file. 5. Launch the sim again. Go in and press you push button. The sim will do likewise! Note: the stuff in red will the same for all toggle/push button functions, except change your joy button number. I can't say it'd work for the more complicated pots/encoders, rotary switches etc. I tested it again for the VHF AM panel load button. Worked like a charm. Note: once you do the above, the category you added now appears in the drop down list. Conclusion: now we have hundreds more switch functions to use compared to the original keyboard.lua. Thanks ED! Even if you can't find the category or the switch function in the key assignment screen, as long as you can find it in the beta 3 keyboard.lua file, do the steps above, copy and paste into the joystick input file, in this case the bu0836.lua, then add the section in red and watch the switches come alive! This is really awesome. The only problem is I don't have my OC cards yet! I tested push buttons in three different panels and all worked! Go hook up some buttons and enjoy! And thanks Kuky!1 point
-
The invalid fuzing will appear on the HUD if you are equal to, or below the HOF set in the weapons Inv page. Visually, you may see something different (we are, dare i say it again, in beta and this IS a WIP) but the effects on the ground in relation to the HOF set for the CBU87 is correct. This, conclusion, after 'extensive' testing with the HOF setting. Test yourself and believe your own findings, not those of others who can easily make a post to the effect of 'it doesn't work'. It does.1 point
-
You need to edit .../Config/View/SnapViewsDefault.lua and set Snap[11][13]["vAngle"] = 01 point


-
Recently Browsing 0 members
- No registered users viewing this page.