Leaderboard
Popular Content
Showing content with the highest reputation on 09/10/23 in all areas
-
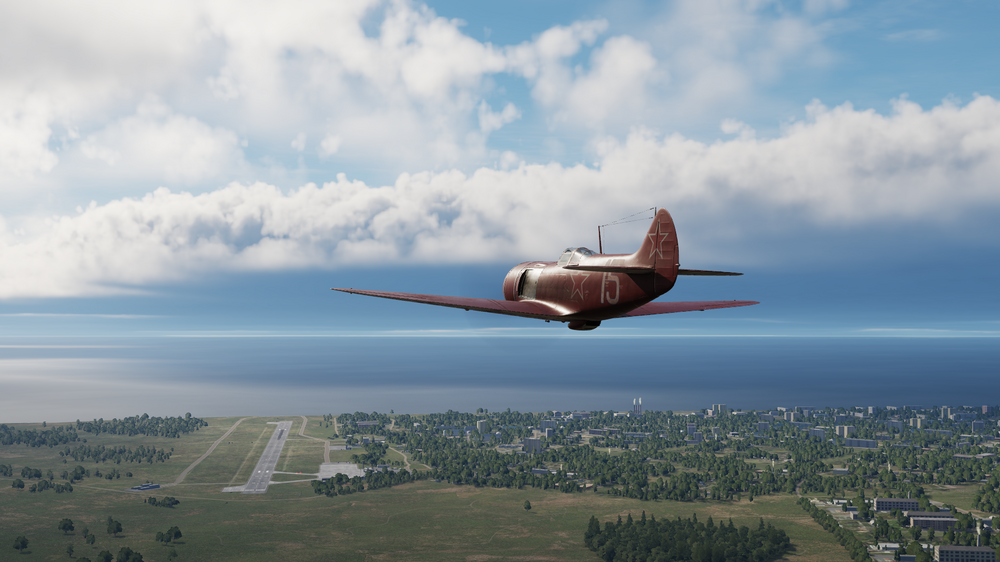
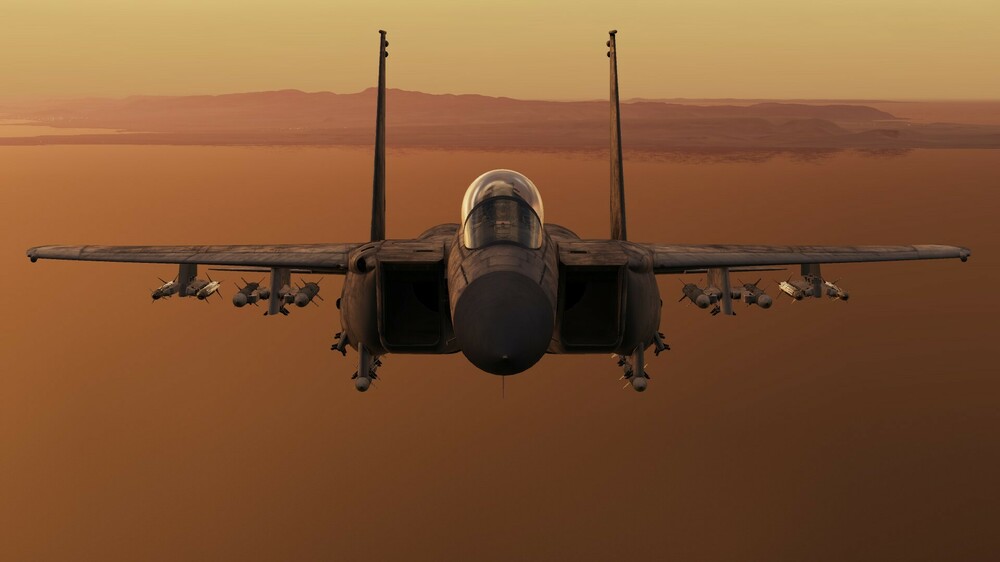
Dear pilots! With this latest development update, we are pleased to announce the successful completion of the intricate flight model tuning process. To mark this achievement, we present our new video showcasing a demonstration flight of the aircraft. From this point forward, we are preparing the module for ED flightworthiness certification. This marks a significant milestone on our journey towards module release!22 points
-
Дорогие друзья! Нынешней заметкой о разработке модуля мы с радостью сообщаем о завершении трудоёмкого процесса настройки лётной модели, чему посвящаем наше новое видео с демонстрационным полётом самолёта. С этого момента мы готовим модуль к ED-сертификации лётной годности, что будет большим шагом навстречу выпуску модуля! null14 points
-
Changes Coming to Sighting Point/Cursor Slews, Snowplow, and VIP/VRP Logics COMING SOON Dear all, In the next update to Open Beta, you can expect a large number of fixes for the DCS: F-16 Viper. Over the past six months, the F-16 team has been revamping the aircraft's air-to-ground sighting and weapon delivery sub-modes to be more authentic and to address many reported bugs in how the F-16 integrates it's sensors, HOTAS, and targeting logic. Along with the upcoming changes to the datalink within the F-16, this has been a very large task that required our dev team to address many aspects of the F-16 all at once, due to the level of integration such changes would require within the aircraft systems. Understandably, this may seem like a lot of changes, but for the most part very little will actually change within the DCS F-16. These changes are mainly focused on ensuring all the minute details that are required for the F-16 avionics to function are properly implemented to prevent any sort of logic conflicts when using the air-to-ground targeting systems. While the Early Access Guide is still receiving revisions to sufficiently explain how all of these weapon delivery sub-modes are intended to work within DCS F-16, we are including a brief conceptual overview for our Viper players to frame the underlying logic in hopes that it will enhance everyone's understanding of why these updates were necessary; until the Early Access Guide can be updated to reflect these concepts. F-16 Conceptual Overview The F-16 sensors (FCR, TGP, and HTS) drive a singular System-Point-of-Interest (SPI). As such, only one sensor can be in a track mode at any given time. When any sensor enters a track mode, it will cause the other sensors to exit their track mode. For example, if the FCR is in Fixed Target Track (FTT) against a surface target location and the TGP enters POINT track, the FCR will exit FTT. This is because the non-tracking sensors must remain aligned to the tracking sensor to maintain the singular SPI location. If two sensors were in track mode simultaneously, the single SPI logic of the F-16 would be violated. When a sensor enters a track mode (FCR FTT/MTT, TGP AREA/POINT, or HAD designation), this automatically puts DTOS, VIS, or EO-VIS into a post-designate state at the corresponding location. The F-16 A-G master mode includes many weapon delivery sub-modes that may be used, depending on the weapon selected on the SMS page. These sub-modes are categorized as either "Pre-planned" or "Visual" weapon delivery sub-modes. "Pre-planned" sub-modes revolve around the use of steerpoints that have been programmed at pre-planned target locations. These sub-modes include CCRP, LADD, PRE, EO-PRE, and EO-BORE. (PRE is used with AGM-154A, GBU-31/38, CBU-103/105, or GBU-24; EO-PRE and EO-BORE are only used with AGM-65) These sub-modes permit direct sighting options (STP/TGT) or offset aimpoint sighting options (OA1/OA2), as well as the Snowplow sighting method. Sighting points are used to ensure the accuracy of the targeting solution to the target steerpoint prior to weapon release. Offset aimpoints are not targets themselves, but are used to ensure the target location (TGT) is accurately placed for weapon delivery (i.e., due to INU drift in a pre-GPS scenario) The selected sighting point determines where the System-Point-of-Interest (SPI) is placed relative to the steerpoint, which directs all sensors to a singular location. Snowplow permits employing a "Pre-planned" weapon delivery mode when existing steerpoints are not practical, and provides a means to rapidly direct the SPI in front of the aircraft at the Snowplow cursor. If a designation is performed while in Snowplow, the main Navigation cursor is slewed to that location and Snowplow is exited. "Visual" sub-modes are geared toward visually acquiring a target location independently of a pre-planned steerpoint. These sub-modes include CCIP, STRF, DTOS, VIS, and EO-VIS. (VIS is used with AGM-154A, GBU-31/38, CBU-103/105, or GBU-24; EO-VIS is only used with AGM-65) Sighting options are not available in these sub-modes, nor is the Snowplow sighting method. The sighting option rotary and the Snowplow OSB options are removed when these sub-modes are entered. These modes will automatically place the FCR in AGR (Air-to-Ground Ranging) and the mode cannot be changed except for placing it in OVRD/STBY. The TGP (if installed) is automatically slaved to the weapon solution in CCIP or STRF sub-modes. The TGP (if installed) is slaved to the TD Box in DTOS, VIS, or EO-VIS sub-modes, even when these modes are in a pre-designate state. This augments the visual identification of targets and assists in optically locating targets at extended ranges. When a target location is designated in DTOS, VIS, or EO-VIS sub-modes, this also updates the current steerpoint location by moving the Navigation cursor to the same location. This ensures a seamless transition between sub-modes (Example DTOS->CCIP->CCRP) against the same target location in which the SPI is maintained on the target. Visual Initial Point (VIP) and Visual Reference Point (VRP) sub-modes are a means of conducting strikes against pre-planned target locations in CCRP sub-mode while using visual landmarks for final alignment of the targeting solution. These are especially useful when conducting low-level strikes in which the target may not be visible until just prior to weapons release. These sub-modes permit cursor slews to be performed to align the targeting symbology with visual landmarks without affecting the cursor deltas of the main Navigation cursor. VIP adds "IP" as an additional sighting point option that may be selected using TMS Right-Short while the HUD or FCR is SOI, or by pressing the corresponding sighting point rotary at OSB 10 on the FCR or TGP MFD formats. When VIP mode is entered, the sighting point is automatically set to "IP", after which the sighting points may be advanced in a sequence of IP->TGT->OA1->OA2->IP. VRP adds "RP" as an additional sighting point option that may be selected using TMS Right-Short while the HUD or FCR is SOI, or by pressing the corresponding sighting point rotary at OSB 10 on the FCR or TGP MFD formats. When VRP mode is entered, the sighting point is automatically set to "TGT", after which the sighting points may be advanced in a sequence of TGT->OA1->OA2->RP->TGT. These modes allow a single overfly designation of the IP or RP in which the SOI is automatically set to the FCR and the sighting point is set to the TGT. This allows a seamless transition with one button press from the ingress phase into the final attack phase, without the requirement to manually slew the cursor to align the diamond symbol in the HUD with the physical landmark that represents the IP or RP. Changelog: Sighting Points & Cursor Slews Cursor slews are now possible in several different modes that are independently accumulated. As an example, the VIP cursor may be slewed and zeroed independently of the Navigation cursor. If Cursor Zero is pressed and "CZ" remains displayed on the MFD, it is because another cursor still has cursor slews applied. This may be seen when the DTOS/VIS cursor is zeroed back to the FPM, but the main Navigation cursor may still be slewed away from the original steerpoint location. To zero the Navigation cursor, CCRP or CCIP should be entered and then CZ pressed. When cursor slews are applied, Cursor Zero is needed to remove them. For a time, changing the selected steerpoint was erroneously zeroizing the cursor when it should not have been. This has been rectified so that cursor deltas are maintained during steerpoint switching (ie, if the TGP was looking 500 meters west of steerpoint 1, it will be looking 500 meters west of steerpoint 2 if the STPT is advanced from 1 to 2). The TD Box occludes the steerpoint diamond. If they are co-located, which is the case in "Pre-planned" A-G sub-modes like CCRP or LADD, the steerpoint diamond will be hidden by the TD Box. When the steerpoint is slewed using the cursor, the OA1 and OA2 offset aimpoints will always slew with it to maintain their programmed offset distance/direction as entered on the DED DEST page. Pressing Cursor Zero no longer zeros the OA1/OA2 settings. These can only be zeroed by manually editing the RNG value to 0 on the DED DEST page. If the RNG value of OA1 or OA2 is set to 0, the OA triangle symbols will be removed from the HUD/HMCS and will not be available in the sighting point rotary options. OA1 and OA2 will not be available in the sighting point rotary options if FIX or A-CAL are displayed on the DED. When not in VIP or VRP modes, the OA1 or OA2 triangle symbols will not be displayed in the HUD/HMCS if not selected using the sighting point rotary option. When in VIP or VRP modes, both OA triangle symbols (if RNG is not 0) are always displayed along with the IP/RP diamond, TGT TD Box, and PUP circle symbols. Sighting point options are not available if in any "Visual" weapon delivery sub-mode: CCIP, STRF, DTOS, or VIS; or if MARK is displayed on the DED with "HUD" as the marking method. Sighting points may be cycled using TMS Right-Short while the HUD or FCR is SOI (prior to this it was only possible with FCR as SOI). The "Ghost A-G Cursor" (white crosshairs) is now displayed on the HSD at the current sighting point location for all sighting points (including OA1, OA2, IP, and RP). Prior to this it was only displayed when TGT was the selected sighting point. The Azimuth Steering Line will only be referenced to the TGT sighting point location, even if the sighting point is changed to OA1, OA2, IP, or RP. Only the direct sighting point (TGT) can represent the target solution for weapon delivery; offset aimpoints only assist in alignment of the targeting solution. Only one sensor can be in a "track" mode at any given time, since the SPI represents the location to which all aircraft sensors are directed. Entering a track mode in one sensor will cause other sensors to break lock. If FCR enters FTT or MTT, the TGP will exit POINT/AREA track and any HAD designation will be dropped. If the TGP enters POINT or AREA track, the FCR will break FTT/MTT lock and any HAD designation will be dropped. If a threat radar symbol is designated on the HAD, the FCR will break FTT/MTT lock and the TGP will exit POINT/AREA track. If the sighting point is changed, the aircraft sensors will exit their respective tracking modes to prevent cursor slews from being erroneously input into the system. The TGP is automatically slaved to the DTOS/VIS TD box while in pre-designate state. If in DTOS/VIS sub-mode and a sensor is commanded into a track mode, the sub-mode will automatically enter post-designate state at the corresponding sensor track location. (ie, if the TGP is SOI and being slewed in DTOS mode and commanded to POINT track, DTOS will enter post-designate at that location) If in any "Visual" weapon delivery sub-mode (CCIP, STRF, DTOS, or VIS; or if MARK is displayed on the DED with "HUD" as the marking method), the FCR will enter AGR mode and cannot be changed. FCR mode selection page is corrected to prevent manually changing the FCR out of AGR mode without changing the weapon delivery sub-mode. When a laser-guided bomb is selected in SMS, the TGP laser will be inhibited from firing if the sighting point is set to OA1, OA2, IP, or RP. This prevents an LGB from being diverted from the intended target location, which is represented by the direct sighting points of TGT or STP. Snowplow Snowplow is only available while in a "Pre-planned" weapon delivery sub-mode: CCRP, LADD, PRE, EO-PRE, EO-BORE; or if in NAV mode if the FCR is not in an A-A mode. When Snowplow is entered (via OSB 8 on the FCR or TGP MFD formats), the SPI is placed at the location of the Snowplow cursor in a pre-designate state (represented by the TD Box in the HUD). In NAV mode when there is no TD Box and the steerpoint diamond represents the steerpoint location, there will be no HUD symbology corresponding with Snowplow cursor while in a pre-designate state. If TMS Up-Short is pressed while the HUD, FCR, or TGP are SOI, Snowplow is exited via post-designate and the main Navigation cursor is moved to the location of the SPI (represented by the TD Box in A-G master mode or the steerpoint diamond in NAV master mode). If Snowplow is exited from pre-designate by pressing "SP" at OSB 8 on the FCR or TGP MFD formats, the SPI simply returns to the existing location of the main Navigation cursor since a designation was not performed. The Snowplow cursor location is placed in three dimensions by the following. Aircraft Heading: The cursor will remain along the aircraft longitudinal axis and cannot be changed. Range: The cursor will be placed in front of the aircraft at 50% the A-G FCR range. Adjusting the FCR range (even if the FCR is in OVRD or STBY modes, or if the RF switch is in QUIET or SILENT) will move the Snowplow cursor in range. If the FCR is powered OFF on the SNSR PWR panel, the Snowplow cursor is fixed 5 NM in front of the aircraft and cannot be changed. Elevation: The cursor is set to the same elevation as the current steerpoint while in pre-designate. When Snowplow is exited via post-designate, the elevation of the SPI is re-calculated to the terrain elevation. When weight-on-wheels, the cursor is set at the same altitude as the aircraft. VIP/VRP It is no longer possible to enable VIP and VRP for the same steerpoint. Enabling one mode will disable the other if set to the same steerpoint. When VIP or VRP mode is entered, a Cursor Zero is no longer performed to the main Navigation cursor. When an overfly designation is performed in VRP mode, the designation will now designate the location of the RP, not the TGT. Only one overfly designation may be performed of the IP in VIP mode or the RP in VRP mode, using TMS Forward-Short while the HUD is SOI. Cursor slews may still be performed before or after the designation, but VIP and VRP modes must be exited and then re-entered to perform subsequent overfly designations. When entering VIP mode, the EHSI will be directed toward the IP and the Azimuth Steering Line will be to the TGT. When an overfly designation of the IP is performed, the EHSI will switch to the TGT. When entering VRP mode, the EHSI and the Azimuth Steering Line will be to the TGT, even after an overfly designation of the RP is performed.11 points
-
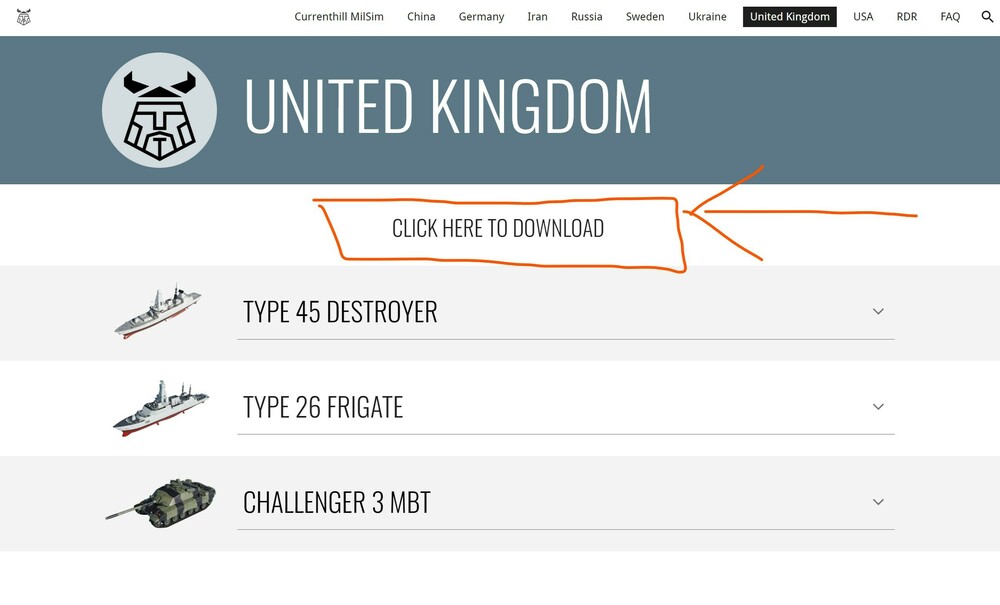
Project 22350 Admiral Gorshkov Class Frigate (Russia) version 1.5.0 released! Changelog Version 1.5.0 Changed 9M96M to 9M96D Changed A-192M firing rate Changed asset name to Admiral Gorshkov Changed missile smoke thickness Changed radar ECM burn through rate Fixed ship collision model and helicopter deck clipping10 points
-
6 points
-
6 points
-
This is fix if you have missing sound for tanks and you are using this mode. Extract and replace it here: \Mods\aircraft\DCS-SK60-Mod-1.1.0\Sounds Sounders.rar More info here:4 points
-
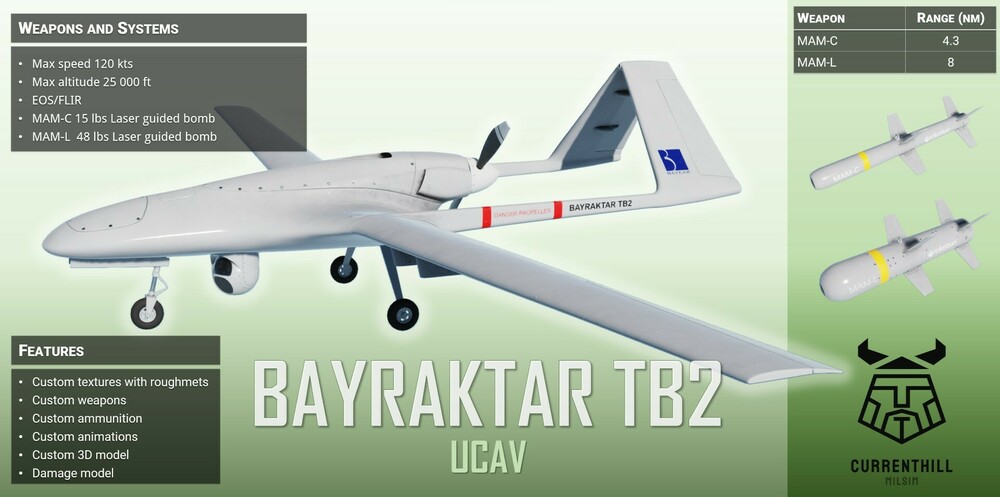
I spend a lot of time on research. I haven't found any of these in use, besides the MAM-C and MAM-L. The UMTAS (made for the T129 heli) was miniaturized (removed motor etc) and became the MAM-L. The TB2 is a relatively small UCAV (compared to a Reaper for example) and it can only carry up to 150 kg of armaments, the MAM-C is only 6.5 kg (compared to a single Hellfire that weighs around 47 kg). The Cirit was miniaturized and became the MAM-C. There is no evidence that the APKWS has been integrated to the TB2 yet. The Bozok is going through integration now, but it's more or less the same as the MAM, an un-powered laser guided glide bomb. Edit: Weapons models are a minor issue, I make them myself.4 points
-
4 points
-
Devs answered me. There's no easy way to fix current Su-25(T) flight model for it was made a long time ago. A new FM will be made at some point (no dates), just like there were new FM for other FC3 aircraft.3 points
-
3 points
-
3 points
-
Hey, as with most our missions, I did. I am very happy to hear that you enjoy them - but the credit should not be taken by me alone, the many voice actors and also SMEs who helped with input deserve their fair share, too! Thank you for your very kind words!3 points
-
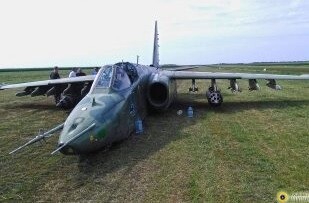
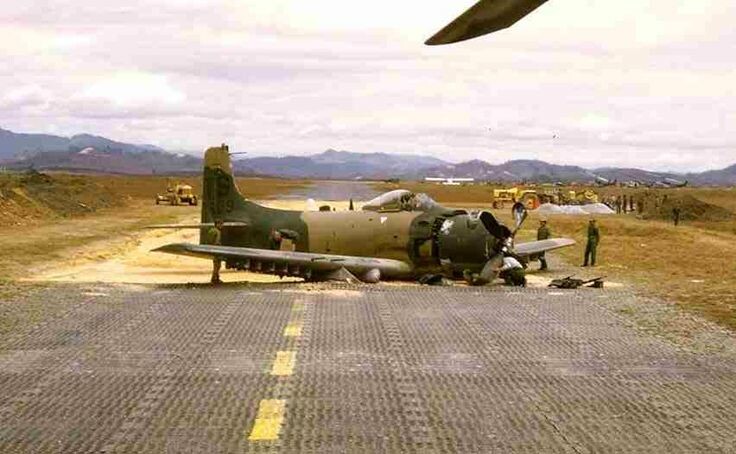
Yes, it was often modeled well in older simulators. Being shot, with deafened hearing, stunned was always very immersive, especially in VR. And especially if getting surprised by enemy fighter or AAA fire. Returning home with badly damaged barely responsive aircraft, with pilot half blinded by the oil, wounds, shattered canopy, either ditching in the field in collapsing cracking airframe or attempting emergency landing, was one of my favouirite parts of the flight if successful saving my virtual pilot's life.3 points
-
Strange. I’ve defeated a staggering amount of tanks during testing, from 25 000 ft and down. I’ll take a look.3 points
-
You don't need to import anything, simply open the .omc file of your context/hub folder...3 points
-
3 points
-
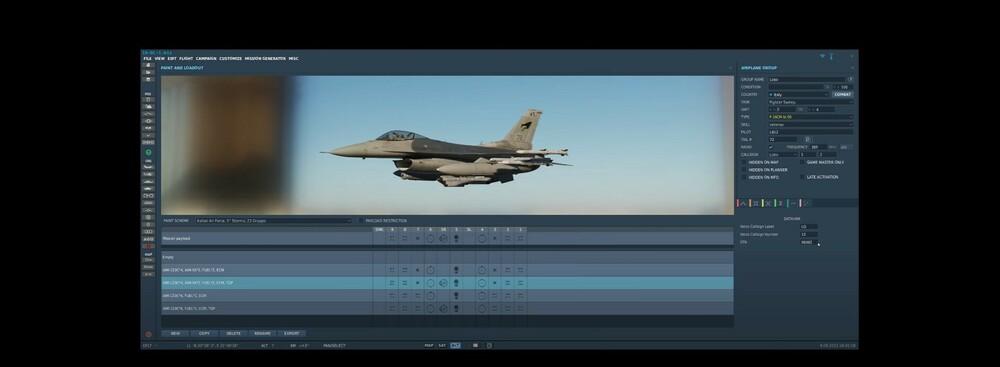
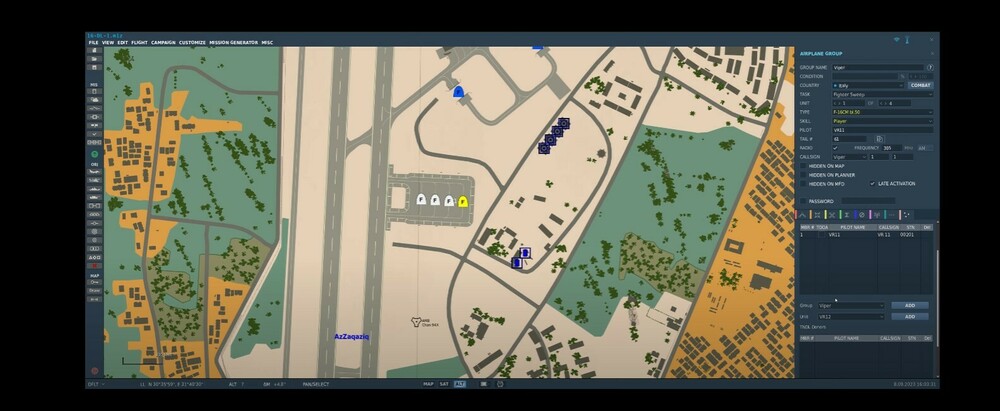
COMING SOON In this DCS: F-16C Viper video, we’ll look at new features coming to the datalink capabilities of our Viper. As many of you already now, data linked flight members are limited to the same four-ship group as set in the Mission Editor. With this update, it will now be based on the Fighter Channel and the Source Track Number, or STN. This will allow you to set aircraft outside a group to your Team of aircraft 1 to 8 and even change this while in a mission. You can also set up to four donors, but those must be set prior to mission start. Let’s get started. Let’s start in the Mission Editor to see how we now set up the Viper’s datalink. When selecting an F-16C Block 50 Airplane Group, you will now have an additional tab called datalinks. We’ve also added some new functionality to the Aircraft Additional Properties tab that we’ll look at first. Along the bottom, we now have three new items under Datalink. The Voice Callsign Label, Voice Callsign Number, and STN are identifiers used when setting up the network. You will probably want to set the Voice Label and Voice Callsign Number to match each aircraft’s callsign. It’s important that each STN be unique within a Fighter Channel and the STN must be entered as an octal, i.e., only values of 0 to 7 are valid. The Tactical Net Datalink, TNDL, tab as two sub-tabs, one for Settings and one for Network. The Settings sub-tab allows you to set the Fighter Channel that the network will reside on, but for the time being, these are fixed to just channel 1 within the Mission Editor. In all but the massive missions possible, you can keep this on Fighter Channel 1. You can also keep the Mission Channel for C2 control and Special Channel for HTS functions to 1. The Voice Callsign is auto filled from the Aircraft Additional Properties tab, and if the aircraft is to be the Team leader, check the Flight Lead radio button. The Transmit Power determines the broadcast range. The Network sub-tab is the meat of setting up the network. The top portion lists up to eight Team members that can exchange data and target assignments over the datalink. Although these can be assigned in the Mission Editor, they can also be edited while in flight. We’ll examine this a bit later. Along the left side of the team member number that is auto assigned and to the right is the Time Difference of Arrival (TDOA) assignment check box. This will determine Team members participating in the HARM Targeting System, HTS, TDOA group. This will be the subject of the next video. To the right of that is the Pilot Name and to the right of that is the Voice Callsign Label and Voice Callsign Number that we discussed earlier. Next is the member’s STN number. The rightmost column can be selected to remove a member from the Team. If you have open Member slots in the Team list, you can add an entire Group or add an individual aircraft. Below the Team Member list is the Donor list that can have up to four aircraft. Note that these must be assigned prior to flight; they cannot be viewed or edited once in the cockpit. Like the Members list, each row displays an aircraft with its Member number, Pilot Name, Callsign, STN, and delete option. As donors cannot take part in a TDOA team, there is no column for it. Also like the Members, you can add Groups and individual units to the list. What is also very important to note is that any aircraft with a TNDL STN can be added to the Member or Donor network, not just other F-16s. We’ll get in the air now and look at this in action. To view our datalink settings, select LIST from the ICP, then Enter for DLNK, and dobber right once. Here we can see that our Fighter Channel is set to channel 1, our Mission Channel is set to Channel 1, and our Special Channel is set to 1. On the right side we can see our callsign, first and last letter of Viper and the number of 11. We can also see that we are the Flight Leader and the transmit power is set to Medium. Dobber once more to the right. Much of this will look familiar from the Mission Editor. We can see our Member Number of 1 to 8, a “T” if the member is assigned to the TDOA team, and the STN. We’ll talk about TDOA in a later video. Looking at the HSD, we can see our flight of four aircraft around us with their Member Number in blue. To the left are Team members 5 to 8, also in blue with Member Number. To the right are the four Donors, marked as green with a center dot. Ahead of us are four aircraft not in our network. Let’s look at an example of changing a Team member assignment; in this case, moving a Donor to Team Member 8. To do so, we’ll first Dobber down until we select the STN of Member 8. Now, we’ll enter the STN of a donor aircraft, in this case, 00304. Upon pressing enter, Member 4 is my Team Member 8. We hope you enjoyed this explanation of expanded datalink functionality for the Viper and recognize it as a major advancement for DCS in general. NOTE 1. There is a known issue with the lack of a dot in the center of the donor icon on the HSD. This will be resolved prior to launch. NOTE 2. Due to complications stemming from our other businesses, we had to adjust datalink terms. In this case, Tactical Net Datalink (TNDL). NOTE 3. As always, these videos provide a preview of an upcoming feature to assist you in understanding a new feature. Later, it is quite possible that the feature will change, and the feature functionality has changed. As much as I’d like to, I lack the time re-record these videos.3 points
-
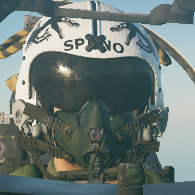
As of right now in game, pretty much any missile (large or small) that ends up touching your plane (large or small) kills your pilot. The only exception to this seems to be the FC3 aircraft that can take an excessive amount of damage before the pilot is killed. There are many in game examples that I can present here where the fatal impact of a missile is questionable but I have decided to use two just to get my point across. Apparently an AIM-9X, with a 9.4 kg warhead, that ends up hitting an F-14 or F-15E (some of the largest fighters in game) in the stern at relatively low speed proves almost always fatal for the entire crew. Tracks Below. To further support the argument that pilots in DCS are killed too easily, I would like to point out a real world example. Captain Scott O'Grady was an F-16 pilot who was shot down by an SA-6 over Bosnia and Herzegovina in June 1995. Granted, its impossible to know exactly what happened (i.e. where the missile hit his plane, whether or not it was a proxy fuse etc.) but he did survive and apparently with no major injuries. Other examples can be found here https://en.wikipedia.org/wiki/List_of_combat_losses_of_United_States_military_aircraft_since_the_Vietnam_War F-14 Kill with 9x.trk F-15E Kill with 9x.trk2 points
-
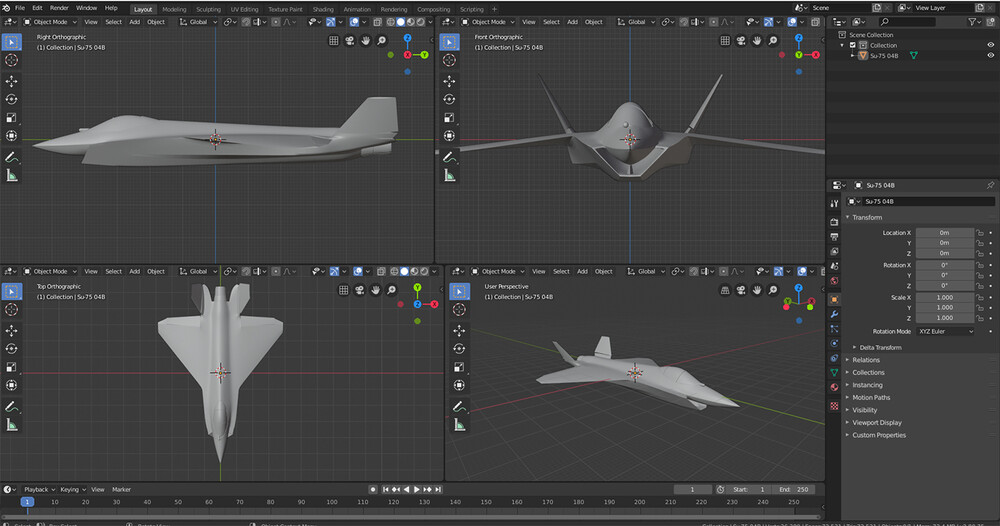
Hola Después de un tiempo de trabajo en Blender, dispongo de una version aceptable de un SU 75 checkmate. Sin texturas. Creo que seria digno de crear un mod para DCS, pero yo no domino ese tema. Alguien se ocuparia de ese aspecto?. Probablemente seria con una cabina que no es la suya, al menos en este momento. Comienzo a hacerla. Aún asi, creo que merece la pena que podamos volarlo ya, en espera de una cabina propia. ¿algun voluntario que implemente el avion a DCS? ah si!, el proyecto quiero que lo disfrute todo el que quiera, asi que ha de ser un mod abierto a el resto de pilotos. GRACIAS!!!!2 points
-
2 points
-
Wow! It's Beriev 12 relict in the background and looks like it's still active.2 points
-
I edited a mission where a column of vehicles followed the route from point a to point b. I then added a simple triger which added a lot of realism: below 50% group life, the units would go towards a waypoint C. Thus, the units followed the road in a column to point B, when they were attacked they dispersed, stopped and fired (default behavior). In the event of major damage, they went to a retreat zone towards the forest. All it takes is a few well-placed trigers to provide more intelligence. One feature I would love is to have the crew automatically disembark and walk away if a unit is under 30% health, or a group is under 10%. mort au peage.miz2 points
-
I have both left and right rpms bound to the grey slider on the Warthog. I have each engine throttle bound individually on the WH throttles. I've been taking off with no flaps for a while but especially when heavy, you should be using at least 10-15 degrees as PeachMonkey says. The lever has to be started and stopped to get the degree you want and there's a lock but a bit of fiddling and you'll suss it. Don't just punch the throttles up to 3,000. Bring them up together smoothly, should take a few seconds. Punching too rapidly seems to pop an engine at times but they do randomly fail now and then. Make sure you open the rads once the engines are running. If you have the WH stick paddle bound to the brake it's helpful. Just for flicks if it needs straightening up while still slow. Once you get a bit of traction it's easier. Enjoy.2 points
-
1) make sure you run flaps at 15 degrees (look at the flaps dial), if you drop them all the way down it's way too much drag for take offs. - engine RPM's should be at 3,000 - throttle 18lbs boost (max) - make sure you aren't pushing on the 'brakes' lever on the stick. There is a single brake lever (no toe brakes), and it can send the braking power to individual wheel if you combine it with the rudder input (differential braking). Check the bindings, as always with WW2 birds the brake axis bindings need to be inverted. 2) yes, you can either assign joystick buttons, or by default it's number 8 on the keyboard (selects the left engine), 9 (selects the right engine), and 0 to select both engines. If you select both engines (via 0), then you can control both engines using a single throttle and single rpm axis.2 points
-
Correct, the Italian S interceptors did not have ECM gear (except for the fighter bombers that were passed to interceptor squadrons as the Tornado came online) at any point of their careers - supposedly the reasoning is that they didn't need defensive gear in their role which is naive at best, but hey, that's the Italian Air Force in the 90s for you, they don't call those years "the crossing of the desert" for nothing. The ASA upgrade did not feature a pulse-doppler radar, more of an MTI-type thing a-la Mirage F1 which was still pretty mediocre in look down. The jets that did have countermeasure dispensers were mostly the Gs that went to Desert Storm, I don't think even the fighter bomber ASA got them. As far as I know the only Starfighters to have a proper RWR like the ones we are used to in DCS were the F-104Cs in their second deployment to Vietnam, and CF-104s when they switched to conventional strike. The Dutch also had specific ECM gear, but I don't know whether it's a RWR antenna, some sort of jammer, or what else. In all 3 cases you can see the fairing under the nose.2 points
-
Was gonna say so do I but after 30 odd years with one... Be careful what you wish for.2 points
-
2 points
-
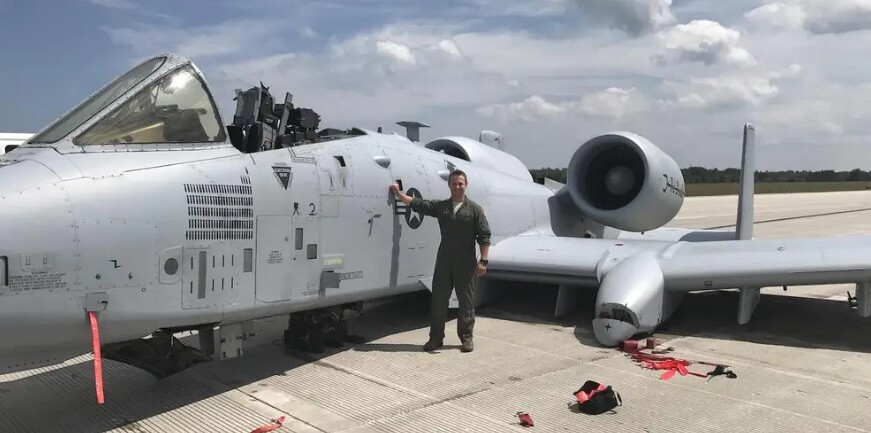
This! Landing damaged aircraft is the coolest thing you can do in a sim. Probably only applicable to WWII here though and the A-10. I’m not sure in a realistic sim how you simulate wounding though, really. Blood splattered on your canopy seems very Call of Duty. Pretty simple. Wounded you survived, killed is self explanatory. In the context of a Dynamic Campaign this could be relevant. Any hit on the pilot shouldn’t be an insta kill. I don’t know how you convey to the player that they’ve been wounded though, as mentioned above. But some indication that this has occurred would be necessary.2 points
-
2 points
-
2 points
-
@Jakko For the stable version it is referred to as @dcs_server.release @BIGNEWY Can we also add that @dcs_server.release to the original post? Also, might be worth mentioning the --quiet option as its quite handy for people to be able to script automated updates. I got that info from the ED Discord when I was asking about the modular server install.2 points
-
I have identical behaviour with 8Gb VRAM. Unfortunately the savings, though substantial, aren't enough for me to avoid stuttering. Guess this was the last nail in the coffin for the 3060ti and will upgrade to the 3090. Offtopic: Love the trees mod by the way! That definitely is a game changer for me, as they know look steady and not flickering as I fly by.2 points
-
VoiceAttack? It's excellent. Get it, 10 bucks. Then you can add VAICOM which is now free, and you don't need the radio menu "ever" again. [emoji6] Sent from my MAR-LX1A using Tapatalk2 points
-
No you don't have to boresight since it is only use for aligning TGP seeker with Maverick seeker. In VIS mode you are only bringing you HUD TD BOX to an area of where the target might be then you fine tune maverick seeker to acquire target lock. You won't be doing target acquire with HUD TD BOX, it is only used to place the SPI in the approximate target area. It is much more accurate if you do the boresight in air at approximately 5 to 7nm distance from target. I usually do it on my way to target area on some small building I find on the way or a car etc.2 points
-
Check your wind. You're running the mission with storm level wind. A 500 kg UCAV with a miniature super light guided bomb doesn't do well in those conditions. I removed the storm and set the drop altitude a bit higher, so it has a chance to guide the bomb. Targets defeated.2 points
-
2 points
-
Thank you sir! The IR marker will be clearly visible not in multi-threading mode. Unfortunately, the multithreading mode is still in early access and has several bugs. One of them is that the IR marker is not visible. Turn off the multi-threading mode, and in the night vision goggles you can see the IR marker very clearly2 points
-
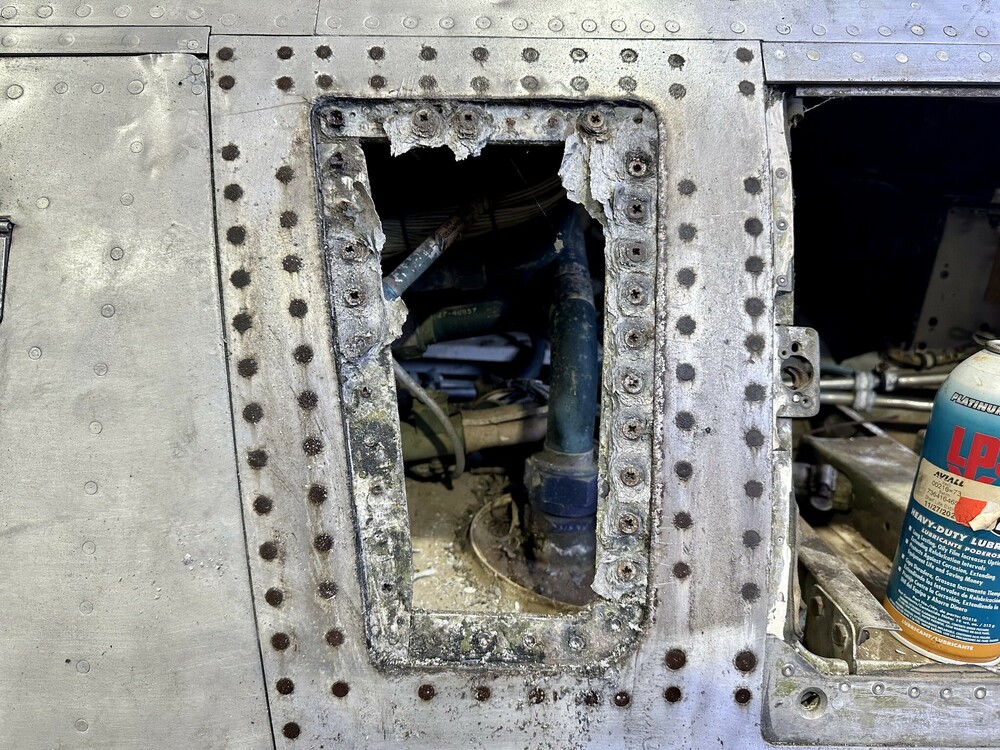
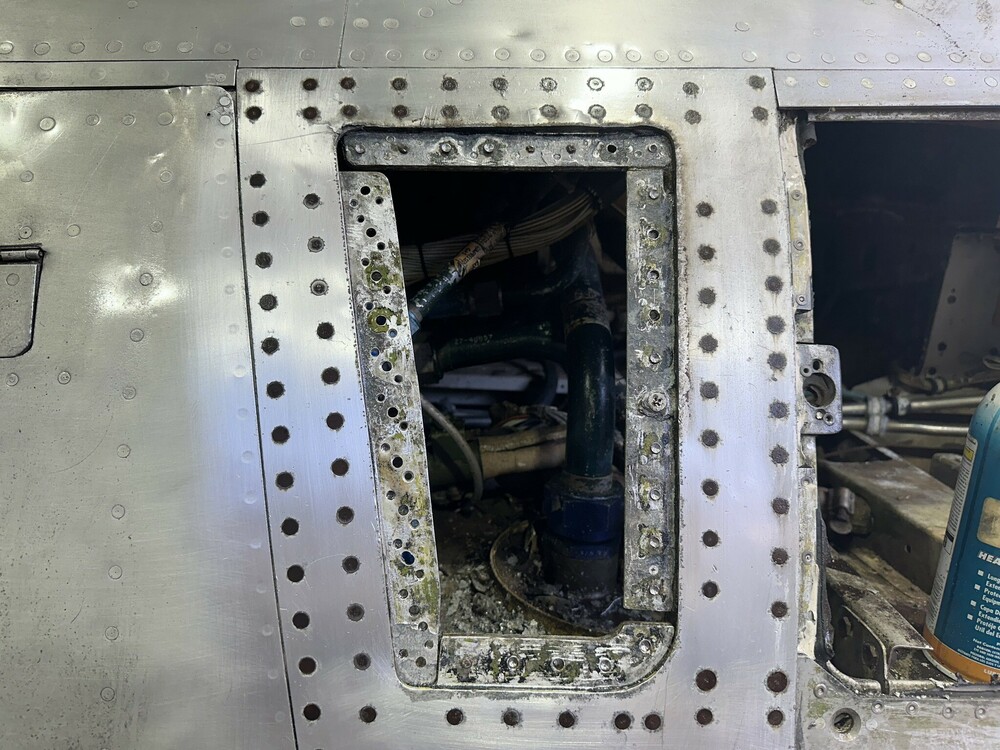
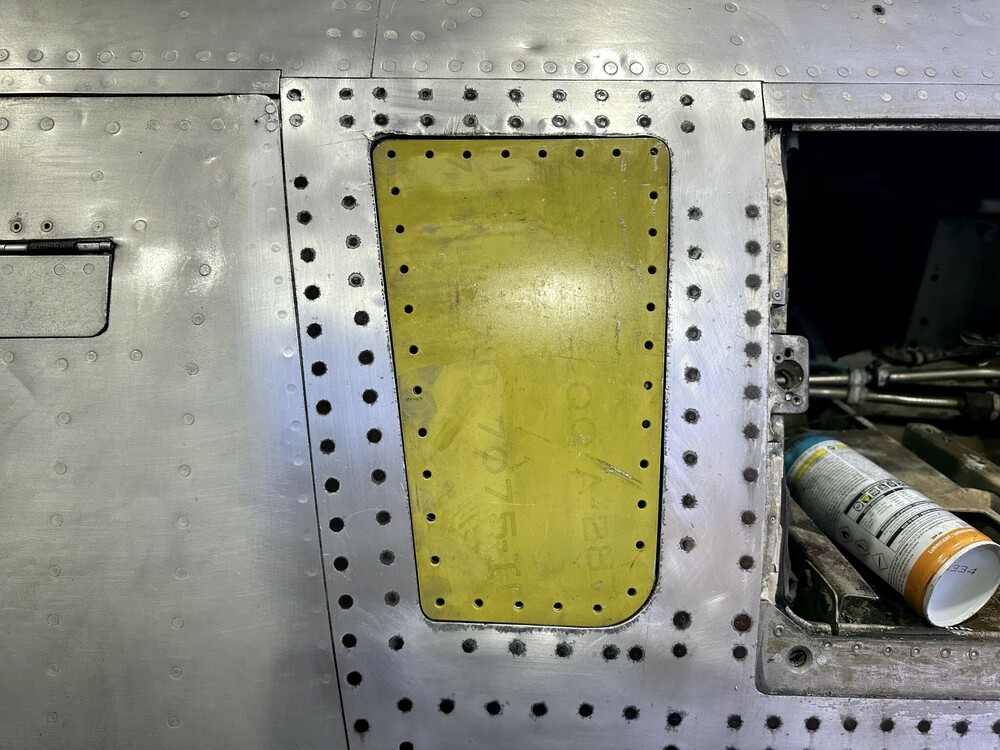
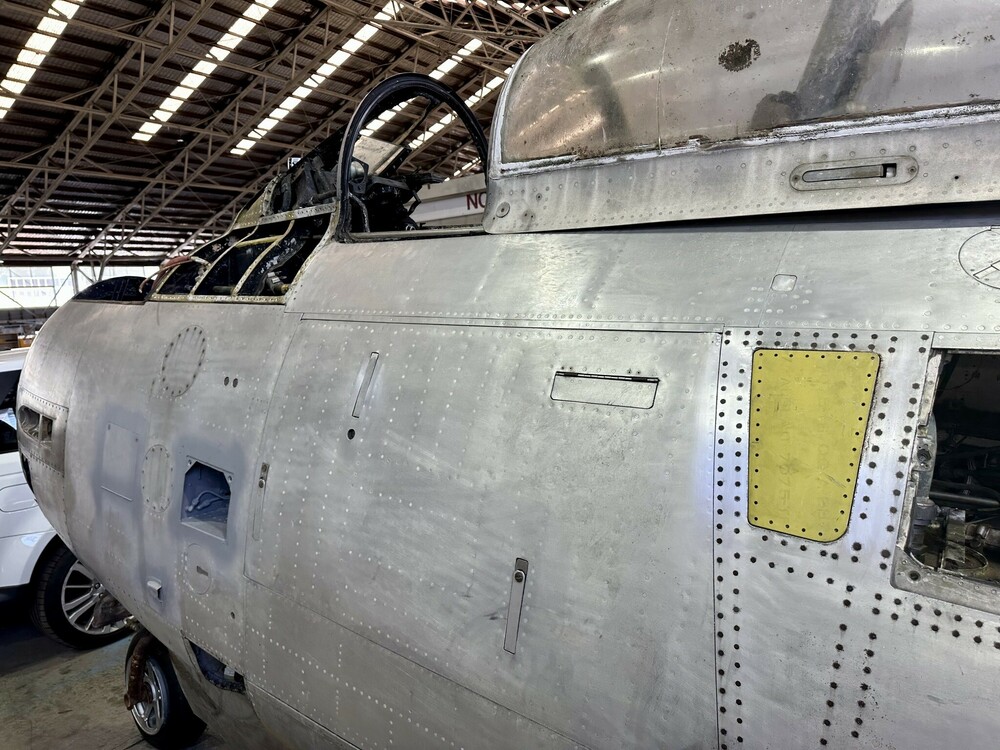
Many thanks to the team for tackling the drill-out of all 34 screws from the heavily corroded inspection panel on the left hand side of the cockpit fuselage. Slow and steady won the race today! With all of the rusted screws drilled out, all of the anchor nuts were drilled out, leaving the structure ready for corrosion clean up. Instead of installing all new anchor nuts and hardware, we will instead install the panel with countersunk rivets, as we will never have a need to open the panel again.2 points
-
Looks and feeling are yes two different things. I prefer feeling the G’s and sitting in the aircraft. VR you just got to take what it gives you. But DCS in 2d is stunning and the clouds are beautiful but the feeling of the sim is not realistic. My VR performance with what I got is great and no more tweaking involved I just get on and fly the sim.2 points
-
From a philosophical viewpoint, denying access to the macrosequencies.lua does not comport with the idea of DCS as a sandbox. ED and multiple third party providers provide access. Razbam does not. I view in the same light as denying custom liveries would be viewed by someone who wants to make their own livery. From a practical standpoint, we are a group of PvP players flying multiple aircraft. Many are retired or active real world aviators with no desire to flip pretend switches. None want to try to stay current on multiple start procedures. And access to the file allows customization far beyond the simple start sequence, doing much more cockpit setup much faster than the stock macro. It is poor customer service unworthy of my dollars.2 points
-
Yeah you can get the heading of the object via getPosition and some math. One of the inputs for spawning a unit is a heading value so you just assign it to whatever you got as the heading. IIRC I had to offset the heading value by 90 degrees and the position slightly to better align the units. local unitpos = unit:getPosition() local heading = math.atan2(unitpos.x.z, unitpos.x.x)2 points
-
DCS-MT has started to improve that and hopefully more will come as they tweak it. Also eye tracked dynamic foveated rendering is really going a long way in helping that. Progress is being made albeit very slowly. More headsets need to integrate the eye tracking tech as well. It is very slow getting there but is improving.2 points
-
Massive update on this inbound likely in next OB release per Wags' video today. See Viper Mini-update thread. I believe that's what the OP was posting thanks regarding.2 points
-
2 points
-
Yes. Sort of. e.g.: DcsBios::Switch2Pos pltMasterCautionReset("PLT_MASTER_CAUTION_RESET", 2); DcsBios::Switch2Pos masterCautionResetSw("MASTER_CAUTION_RESET_SW", 2); This will reset the Master Caution alarm on the F14 and F18 using one switch on pin 2. It will send both commands, but DCS will just ignore the one not meant for the module you're using. You can stack more, but there are a couple of caveats: 1. The names before the parentheses must be unique. Those names are not fixed in the BIOS, so they can be set by you. If you have two the same, change at least one of them. e.g. masterCautionResetSw and masterCautionResetSw_1 2. The parts in quotes, e.g. "MASTER_CAUTION_RESET_SW" are what DCS responds to and cannot be changed. HOWEVER, if your code lines contain duplicates of this argument, you only need one of those lines - all aircraft that use that name will respond to the one line. e.g. DcsBios::Switch2Pos gearHandle("GEAR_HANDLE", 3); // F16 DcsBios::Switch2Pos gearHandle("GEAR_HANDLE", 3); // AJS37 DcsBios::Switch2Pos gearLever("GEAR_LEVER", 3); // A10 DcsBios::Switch2Pos gearLever("GEAR_LEVER", 3); // F18 Would fail to compile because the names before the parentheses are duplicated. It can be corrected and simplified to this: DcsBios::Switch2Pos gearHandle("GEAR_HANDLE", 3); // F16 and AJS37 DcsBios::Switch2Pos gearLever("GEAR_LEVER", 3); // A10 and F18 Other options, such as Lep Bodnar boards or other HIDs, can be set in DCS.2 points
-
Unfortunately that’s part of my startup procedure, drop tanks release cover too when I carry them. I don’t know what is the big issue with adding flares to the Mossie like the 109 has. It is not like this requires difficult crew animations - there is no crew!2 points
-
Stay tuned for further improvements in the Multi-threaded version. The wait will be worth it.2 points
-
Recently Browsing 0 members
- No registered users viewing this page.














![[MVP] Mugga](https://forum.dcs.world/uploads/monthly_2021_03/MVP.thumb.png.398f5fa5eaf57799a81da76f4cc64fc1.png)
