Leaderboard
Popular Content
Showing content with the highest reputation on 12/06/23 in all areas
-
Short video from startup.8 points
-
On another note. The USS Blue Ridge FPS issue has been corrected. You can find updated version 1.0.1 at Admiral189 DCS World Mods along with changes I made to the mod. Also, the Massun 92 Asset pack Rudel_chw shared has a light mod that works great if you need more lighting on the ship flight deck. It's located under static objects/structures. Place it near the Flight deck of the ship and link it to that ship. One thing I forgot to mention. Thank you all who have bought me coffee lately. It shows me you appreciate my efforts. I really really appreciate it.7 points
-
7 points
-
The Pearl Harbor Project Up-dateBrought to you by, Up-Date 2024.7.9 The American Bantam BRC40 https://www.dropbox.com/scl/fi/4exc5etpuk2y8tinleu4a/American-Bantam-BRC40-V2.9.0.zip?rlkey=w411pinbd4zhjebrolq64x0dv&st=c99ravjs&dl=0 https://www.militaryfactory.com/ships/battle-of-midway-warships.php All information from the first two Islands applies here. https://www.dropbox.com/scl/fi/09drlwhhron1otpi0it4n/Midway-Island-1941-RC-V-2.9.0.zip?rlkey=oxw5569rawlsaq32u8ii7ki7e&st=xoub4lne&dl=0 BIG Up Date today! To Celebrate the 4th Of July I am releasing Malta! 1941 And Pearl Harbor! Brought to you by, WW II Aircraft Development Co-op (WW II ADC ) Lead Modder, Hawkeye60 President - Markindel, Model development, Mod development Vice President, Secretary - Hawkeye60, Mod development Members, Artists, Mod development, Eric and Patrick Cuesta Member, Collaborator, Livery Wizard, crazyeddie Presenting, DCS World Pearl Harbor! As stated in the first post, this has been a labor of love. We have worked on this mod for more than seven or eight months. It was not fixed, so you could spawn and land, until a week ago. We also worked on the ground textures to fix display abnormalities up until two days ago. The release version you see here. This is a beta. NOTE! We do not promise to continue work on improving the island unless there is sufficient interest. It works as intended. If bugs are found, we will try to correct them. Some important points to consider, 1) Mario created the original island. The model became so large his pc could not render the edm. He sent it to me. I corrected the collision file, added some eye candy and rendered the edm. It took 3.5 hours to render on a 4.5 ghz pc. The amount of work involved in changing anything aspect could take a half a day to check the results. (See note above) It was then sent to Patrick and Eric, who further embellished the island with eye candy. 2) The collision file has only been tested on the runway. Ships will pass right through the island, although this may be a bug in the sim. We know the ship collision system is currently broken in sim. You may spawn and land upon the runway. Other areas may allow landing. Not tested. Try multiple ai aircraft on the runway........ DO NOT try to spawn with a Helicopter. DCS WILL crash. You have been warned............ 3) Using in the ME. Below are some screens showing the area covered by the island in the ME. This shows the size of our new "land mass" Also screens show possible placement options. You can "Overlap" the island onto sim land to blend the Island in. Can be used alone as well. You select this as a "ship" in the ME. You must set the speed to zero or the island will move just as a ship would. You can also use it as a static object, but doing so will prevent you from spawning. We WILL add additional naval and aircraft assets. They will be announced in this thread. ----------------------------------------- A quick note from me, I came up with this idea one morning at 2pm! when our Yorkii decided to check a creature noise in the yard. There was no going back to sleep. I started out with a small "island land mass" and sent the mod to Mario. The end result is before you. It has exceeded my every expectation! I would like to thank, Bruce, for creating the Japanese aircraft to populate the Carriers with! Mario. Patrick and Eric for enthusiastically embracing the idea and helping with the creation. Stratos, Fragburn and the other testers for testing and providing feedback. THANK YOU! --------------------------------------------------------------------- Created and tested for 2.1.1, the year 1941 and Normandy GvGME ready We hope you enjoy it! The WW II ADC Team https://www.dropbox.com/scl/fi/ztnqrd2vrpwl3rkh51t6w/Pearl-Harbor-1942-RC-V2.9.0.zip?rlkey=1xghzd5qo885vw5hdwkpyivaf&st=23ljf7ki&dl=0 Same rules apply as for Malta Next up, Midway! ----------------------------------------------------------------------------- Presenting, DCS World Malta 1941 This has been a labor of love. I have worked on this mod for more than seven or eight months. The release version you see here. This is a beta. I will support this add on. Some important points to consider, 2) The collision file has only been tested on the runway. AI only. I have not been able to get the Player to spawn without exploding! Ships will pass right through the island, although this may be a bug in the sim. If I create a collision for the island, the sim slows to a crawl. I suspect there is a limit on how large a collision can be. Once I remove this part of the collision shell, it works without stutter. DO NOT try to spawn with a Helicopter. DCS WILL crash. You have been warned............ I will also include Italian forces for this Theater. This represents the period when The Italians controlled the Island, with German support. The Germans are in sim. ----------------------------------------- A quick note from me, I would like to thank, All who offered support. THANK YOU! --------------------------------------------------------------------------- A few other notes My representation only It should no way be construed to be accurate. Use as a Ship/Carrier Give no wayponits The Island is armed with shore batteries Player aircraf5t should be able to spawn, take off, and land With one important Exception No Prop WWII aircraft , as ai will work Only ones coded with FC3 type FM and engine code can be used at present We hope for a Sim up date to address this issue https://www.dropbox.com/scl/fi/fgqygrrv9nkyyh7ghqdan/Malta-1941-V2.9.0-Beta.zip?rlkey=kiqlewb5s7ztwo7esofqol833&st=hcnn83j0&dl=0 Tested, Just now To go along with this release, May I present The Messerschmitt Me 163 Komet Three versions to choose from two ai and one flyable! Makes a great fit on the runway! Both a saved games install OvGME ready Have a Great 4th Everyone! https://www.dropbox.com/scl/fi/mdyni2pwrky4ff0q6jfza/Messerschmitt-Me-163-Komet-V2.9.0-Beta.zip?rlkey=kttemtsfsj9ezkedauym28irn&st=tdhv4n2g&dl=0 The Island looks pretty good from the Cockpit! See screens below Up-date 2024.6.25 Presenting, The Vought SB2U Vindicator This one is a Special edition By that I mean, it has both ai, AND Flyable! The good news? The flyable is stand alone! Let the credits explain A huge thank you goes out to PeeJott17 , Kobra and the rest of the VSN team for Permission to use the FM from the VSN F-9 It required a lot of edits and time to get to work as you see here. Only briefly tested Standard load out A saved games install OvGME ready Custom collision shell A required aircraft for Midway! Enjoy! Shall also be posted in the Warbird Hanger in a day or two https://www.dropbox.com/scl/fi/5dl9z8jqn0mmg7871uz5d/Vought-SB2U-Vindicator-V2.9.0.3.zip?rlkey=4jqibcx4cuneu4nspvalx9kf1&st=eh2pwqe5&dl=0 Cockpit by Markindel No front pilot in the Flyable version He returns in the ai I have been un able to remove this black square Anyone know how? The only views flaw I have found Up-Date 2024.6.18 The Amphibious Vehicles Two versions of the Volkswagen Schwimmwagen A Bonus Volkswagen Beetle,Type 1 circa 1942 all un armed Sitting targets! One Ford GPA Jeep Armed Both CA compatible not tested Collisions not tested The GPA gun shoots Big rounds! A saved games install More to come! https://www.dropbox.com/scl/fi/nwdymdw0y1ysima9bpqp0/Volkswagen-Beetle-Type-1-1942-V2.9.0.zip?rlkey=c5v59tbqt5aw7ml4c0hqqu2m6&st=5myvgh77&dl=0 https://www.dropbox.com/scl/fi/iwdock44yenh4s04n3x6z/Volkswagen-Schwimmwagen-V2.9.0.zip?rlkey=3m41hs40xxovr62lufc3nkhmy&st=lutd02li&dl=0 https://www.dropbox.com/scl/fi/y82cctp4ijhgv9k2jolbp/Ford-GPA-Jeep-V2.9.0.zip?rlkey=nl9ux0xxwnnwr543qn38dwal4&st=0uu4s8st&dl=0 Credits, Markindel, original 3D model work and code Patrick and Eric Cuesta, code work, lua edits and theme Hawkeye60 Add on Re-make Links to assets Let me show you my Junk! https://www.dropbox.com/scl/fi/krf42z2o26etaeeml6enm/Vietnam-Junks-V1.0.0.zip?rlkey=ywhxt44hex4cv7xd61l4yuxb2&dl=0 Testers , @TeTeT @seabat @352ndDeacon If I forgot any testers, I do apologize! This is a Project years in the making. We began five years ago with the Idea of a Pearl Harbor set, With Island, aircraft and ships. This has grown to include the Malta campaigner, through to Midway. All three Islands will be included. I was hoping to have it all ready for December 6TH. I have run out of time. Modding always takes longer than anticipated! As I complete each Island, They will be posted along with additional assets to use, And links to the same. Each 'Island" will have a test mission with the assets set in place to allow you to test it, And get you started with more! Please note, This was created without any terrain API. We adapted to the Sim and what it allows. We claim no accuracy in this model. It is a representation only and is not meant to represent the real thing. Some Pics to get up started! Stay tuned for more! Cheers! Attack on Pearl Harbor https://www.youtube.com/watch?v=XnQ_6h3VtRo Coordinates: 21°21′54″N 157°57′00″W From Wikipedia, the free encyclopedia "December 7, 1941" redirects here. For the date, see December 1941 § December 7, 1941 (Sunday). Attack on Pearl Harbor Part of the Asiatic-Pacific Theater of World War II Photograph of Battleship Row taken from a Japanese plane at the beginning of the attack. The explosion in the center is a torpedo strike on USS West Virginia. Two attacking Japanese planes can be seen: one over USS Neosho and one over the Naval Yard. Date December 7, 1941; 81 years ago Location Oahu, Territory of Hawaii, US 21°21′54″N 157°57′00″W Result Japanese victory Precipitated the entry of the United States into World War II on the side of the Allies See other consequences Belligerents United States Empire of Japan Commanders and leaders Husband E. Kimmel Walter Short Isaac C. Kidd Robert A. Theobald Isoroku Yamamoto Chūichi Nagumo Mitsuo Fuchida Units involved United States US Pacific Fleet Empire of Japan 1st Air Fleet Strength 8 battleships 8 cruisers 30 destroyers 4 submarines 3 USCG cutters[nb 1] 47 other ships[3] 390 aircraft 6 aircraft carriers 2 battleships 2 heavy cruisers 1 light cruiser 9 destroyers 8 tankers 23 fleet submarines 5 midget submarines 414 aircraft (353 took part in the raid) Casualties and losses 4 battleships sunk 4 battleships damaged 1 ex-battleship sunk 1 harbor tug sunk 3 light cruisers damaged[nb 2] 3 destroyers damaged 3 other ships damaged 188 aircraft destroyed 159 aircraft damaged 2,008 sailors killed 109 Marines killed 208 soldiers killed[5] 68 civilians killed[6][5] 2,403 total killed[6][5] 1,178 military and civilians wounded[5] 4 midget submarines sunk 1 midget submarine grounded 29 aircraft destroyed 74 aircraft damaged 64 killed 1 sailor captured[7] Civilian casualties 68 killed[8][9] 35 wounded[10] 3 aircraft shot down Attack on Pearl Harbor is located in Hawaii Attack on Pearl Harbor Location within Hawaii Show map of Hawaii Show map of Pacific Ocean Show all vte Hawaiian Islands Campaign vte Japanese offensives, 1940–1942 vte Pacific War The attack on Pearl Harbor[nb 3] was a surprise military strike by the Imperial Japanese Navy Air Service upon the United States against the U.S. Naval base at Pearl Harbor in Honolulu, Hawaii, just before 8:00 a.m. (local time) on Sunday, December 7, 1941. The United States was a neutral country at the time; the attack led the U.S. to formally enter World War II on the side of the Allies the following day. The Japanese military leadership referred to the attack as the Hawaii Operation and Operation AI,[nb 4] and as Operation Z during its planning.[12][13][14] The attack was preceded by months of negotiations between the U.S. and Japan over the future of the Pacific. Japanese demands included that the U.S. end its sanctions against Japan, cease aiding China in the Second Sino-Japanese war, and allow Japan to access the resources of the Dutch East Indies. Anticipating a negative response from the US, Japan sent out its naval attack groups in November 1941 just prior to receiving the Hull note—the U.S. demand that Japan withdraw from China and French Indochina. Japan intended the attack as a preventive action. Its aim was to prevent the United States Pacific Fleet from interfering with its planned military actions in Southeast Asia against overseas territories of the United Kingdom, the Netherlands, and those of the United States. Over the course of seven hours there were coordinated Japanese attacks on the U.S.-held Philippines, Guam, and Wake Island and on the British Empire in Malaya, Singapore, and Hong Kong.[15] The attack commenced at 7:48 a.m. Hawaiian time (6:18 p.m. GMT).[nb 5] The base was attacked by 353 Imperial Japanese aircraft (including fighters, level and dive bombers, and torpedo bombers) in two waves, launched from six aircraft carriers.[16] Of the eight U.S. Navy battleships present, all were damaged, with four sunk. All but USS Arizona were later raised, and six were returned to service and went on to fight in the war. The Japanese also sank or damaged three cruisers, three destroyers, an anti-aircraft training ship,[nb 6] and one minelayer. More than 180 US aircraft were destroyed.[18] A total of 2,403 Americans were killed and 1,178 others were wounded, making it the deadliest event ever recorded in Hawaii.[19] Important base installations such as the power station, dry dock, shipyard, maintenance, and fuel and torpedo storage facilities, as well as the submarine piers and headquarters building (also home of the intelligence section) were not attacked. Japanese losses were light: 29 aircraft and five midget submarines lost, and 64 servicemen killed.[not verified in body] Kazuo Sakamaki, the commanding officer of one of the submarines, was captured. Japan announced declarations of war on the United States and the British Empire later that day (December 8 in Tokyo), but the declarations were not delivered until the following day. The British government declared war on Japan immediately after learning that their territory had also been attacked, while the following day (December the United States Congress declared war on Japan. On December 11, though they had no formal obligation to do so under the Tripartite Pact with Japan, Germany and Italy each declared war on the U.S., which responded with a declaration of war against Germany and Italy. While there were historical precedents for the unannounced military action by Japan, the lack of any formal warning as required by the Hague Convention of 1907 and the perception that the attack was unprovoked, led then U.S. President Franklin D. Roosevelt, in the opening line of his speech to a Joint Session of Congress the following day, to famously label December 7, 1941 "a date which will live in infamy". Background Main article: Prelude to the attack on Pearl Harbor Diplomacy War between Japan and the United States had been a possibility that each nation had been aware of, and planned for, since the 1920s. Japan had been wary of American territorial and military expansion in the Pacific and Asia since the late 1890s, followed by the annexation of islands, such as Hawaii and the Philippines, which they felt were close to or within their sphere of influence.[20][page needed][21][page needed][22][23] At the same time, Japanese strategic thinkers believed that Japan needed economic self-sufficiency in order to wage modern war. The experiences of World War I taught the Japanese that modern wars would be protracted, require total mobilization and create vulnerabilities for trade embargoes and encirclement. As a consequence, Japan needed access to strategically important resources (e.g. iron, oil) that could not be extracted at sufficient levels in the home islands.[24][25] Although Japan had begun to take a hostile stance against the United States after the rejection of the Racial Equality Proposal,[26] the relationship between the two countries was cordial enough that they remained trading partners.[27][28] Tensions did not seriously grow until Japan's invasion of Manchuria in 1931. Over the next decade, Japan expanded into China, leading to the Second Sino-Japanese War in 1937. Japan spent considerable effort trying to isolate China and endeavored to secure enough independent resources to attain victory on the mainland. The "Southern Operation" was designed to assist these efforts.[21][page needed][29][page needed] Pearl Harbor on October 30, 1941, looking southwest. Ford Island is at its center. Starting in December 1937, events such as the Japanese attack on USS Panay, the Allison incident, and the Nanking Massacre swung Western public opinion sharply against Japan. The US unsuccessfully proposed a joint action with the British to blockade Japan.[30] In 1938, following an appeal by President Roosevelt, US companies stopped providing Japan with implements of war.[31] In 1940, Japan invaded French Indochina, attempting to stymie the flow of supplies reaching China. The United States halted shipments of airplanes, parts, machine tools, and aviation gasoline to Japan, which the latter perceived as an unfriendly act.[nb 7] The United States did not stop oil exports, however, partly because of the prevailing sentiment in Washington that given Japanese dependence on American oil, such an action was likely to be considered an extreme provocation.[20][page needed][33] In mid-1940, President Franklin D. Roosevelt moved the Pacific Fleet from San Diego to Hawaii.[34] He also ordered a military buildup in the Philippines, taking both actions in the hope of discouraging Japanese aggression in the Far East. Because the Japanese high command was (mistakenly) certain any attack on the United Kingdom's Southeast Asian colonies, including Singapore,[35] would bring the US into the war, a devastating preventive strike appeared to be the only way to prevent American naval interference.[36][page needed] An invasion of the Philippines was also considered necessary by Japanese war planners. The US War Plan Orange had envisioned defending the Philippines with an elite force of 40,000 men; this option was never implemented due to opposition from Douglas MacArthur, who felt he would need a force ten times that size.[citation needed] By 1941, U.S. planners expected to abandon the Philippines at the outbreak of war. Late that year, Admiral Thomas C. Hart, commander of the Asiatic Fleet, was given orders to that effect.[37] The U.S. finally ceased oil exports to Japan in July 1941, following the seizure of French Indochina[38] after the Fall of France, in part because of new American restrictions on domestic oil consumption.[39] Because of this decision, Japan proceeded with plans to take the oil-rich Dutch East Indies.[nb 8] On August 17, Roosevelt warned Japan that America was prepared to take opposing steps if "neighboring countries" were attacked.[41][page needed] The Japanese were faced with a dilemma: either withdraw from China and lose face or seize new sources of raw materials in the resource-rich European colonies of Southeast Asia.[citation needed] Japan and the U.S. engaged in negotiations during 1941, attempting to improve relations. In the course of these negotiations, Japan offered to withdraw from most of China and Indochina after making peace with the Nationalist government. It also proposed to adopt an independent interpretation of the Tripartite Pact and to refrain from trade discrimination, provided all other nations reciprocated. Washington rejected these proposals. Japanese Prime Minister Konoye then offered to meet with Roosevelt, but Roosevelt insisted on reaching an agreement before any meeting.[41][page needed][42] The US ambassador to Japan repeatedly urged Roosevelt to accept the meeting, warning that it was the only way to preserve the conciliatory Konoye government and peace in the Pacific.[43] However, his recommendation was not acted upon. The Konoye government collapsed the following month when the Japanese military rejected a withdrawal of all troops from China.[44] Japan's final proposal, delivered on November 20, offered to withdraw from southern Indochina and to refrain from attacks in Southeast Asia, so long as the United States, United Kingdom, and Netherlands supplied one million U.S. gallons (3.8 million liters) of aviation fuel, lifted their sanctions against Japan, and ceased aid to China.[45][44] The American counter-proposal of November 26 (November 27 in Japan), the Hull note, required Japan completely evacuate China without conditions and conclude non-aggression pacts with Pacific powers. On November 26 in Japan, the day before the note's delivery, the Japanese task force left port for Pearl Harbor.[citation needed] The Japanese intended the attack as a preventive action to keep the United States Pacific Fleet from interfering with its planned military actions in Southeast Asia against overseas territories of the United Kingdom, the Netherlands, and the United States. Over the course of seven hours there were coordinated Japanese attacks on the US-held Philippines, Guam, and Wake Island and on the British Empire in Malaya, Singapore, and Hong Kong.[15] Additionally, from the Japanese viewpoint, it was seen as a preemptive strike "before the oil gauge ran empty."[20][page needed] Military planning Preliminary planning for an attack on Pearl Harbor to protect the move into the "Southern Resource Area" (the Japanese term for the Dutch East Indies and Southeast Asia generally) had begun very early in 1941 under the auspices of Admiral Isoroku Yamamoto, then commanding Japan's Combined Fleet.[46] He won assent to formal planning and training for an attack from the Imperial Japanese Navy General Staff only after much contention with Naval Headquarters, including a threat to resign his command.[47] Full-scale planning was underway by early spring 1941, primarily by Rear Admiral Ryūnosuke Kusaka, with assistance from Captain Minoru Genda and Yamamoto's Deputy Chief of Staff, Captain Kameto Kuroshima.[48] The planners studied the 1940 British air attack on the Italian fleet at Taranto intensively.[nb 9][nb 10] Over the next several months, pilots were trained, equipment was adapted, and intelligence was collected. Despite these preparations, Emperor Hirohito did not approve the attack plan until November 5, after the third of four Imperial Conferences called to consider the matter.[51] Final authorization was not given by the emperor until December 1, after a majority of Japanese leaders advised him the "Hull Note" would "destroy the fruits of the China incident, endanger Manchukuo and undermine Japanese control of Korea".[52] By late 1941, many observers believed that hostilities between the US and Japan were imminent. A Gallup poll just before the attack on Pearl Harbor found that 52% of Americans expected war with Japan, 27% did not, and 21% had no opinion.[53] While US Pacific bases and facilities had been placed on alert on many occasions, US officials doubted Pearl Harbor would be the first target; instead, they expected the Philippines would be attacked first. This presumption was due to the threat that the air bases throughout the country and the naval base at Manila posed to sea lanes, as well as to the shipment of supplies to Japan from territory to the south.[nb 11] They also incorrectly believed that Japan was not capable of mounting more than one major naval operation at a time.[36][page needed] Objectives The Japanese attack had several major aims. First, it intended to destroy important American fleet units, thereby preventing the Pacific Fleet from interfering with the Japanese conquest of the Dutch East Indies and Malaya and enabling Japan to conquer Southeast Asia without interference. Second, it was hoped to buy time for Japan to consolidate its position and increase its naval strength before shipbuilding authorized by the 1940 Vinson-Walsh Act erased any chance of victory.[55][56] Third, to deliver a blow to America's ability to mobilize its forces in the Pacific, battleships were chosen as the main targets, since they were the prestige ships of any navy at the time.[55] Finally, it was hoped that the attack would undermine American morale such that the U.S. government would drop its demands contrary to Japanese interests and would seek a compromise peace with Japan.[57][page needed][58][page needed] Striking the Pacific Fleet at anchor in Pearl Harbor carried two distinct disadvantages: the targeted ships would be in very shallow water, so it would be relatively easy to salvage and possibly repair them, and most of the crews would survive the attack since many would be on shore leave or would be rescued from the harbor. A further important disadvantage was the absence from Pearl Harbor of all three of the U.S. Pacific Fleet's aircraft carriers (Enterprise, Lexington, and Saratoga). Imperial Japanese Navy (IJN) top command was attached to Admiral Mahan's "decisive battle" doctrine, especially that of destroying the maximum number of battleships. Despite these concerns, Yamamoto decided to press ahead.[36][page needed][59][page needed][60][page needed] Japanese confidence in their ability to win a short war also meant other targets in the harbor, especially the navy yard, oil tank farms, and submarine base, were ignored since by their thinking the war would be over before the influence of these facilities would be felt.[59][page needed] Route followed by the Japanese fleet to Pearl Harbor and back An Imperial Japanese Navy Mitsubishi A6M Zero fighter on the aircraft carrier Akagi Approach and attack See also: Order of battle of the Attack on Pearl Harbor Part of the Japanese task force prior to leaving On November 26, 1941, a Japanese task force (the Striking Force) of six aircraft carriers – Akagi, Kaga, Sōryū, Hiryū, Shōkaku, and Zuikaku – departed Hittokapu Bay on Etorofu (now Iterup) Island in the Kuril Islands, en route to a position northwest of Hawaii, intending to launch its 408 aircraft to attack Pearl Harbor: 360 for the two attack waves and 48 on defensive combat air patrol (CAP), including 9 fighters from the first wave. The first wave was to be the primary attack, while the second wave was to attack carriers as its first objective and cruisers as its second, with battleships as the third target.[61] The first wave carried most of the weapons to attack capital ships, mainly specially adapted Type 91 aerial torpedoes which were designed with an anti-roll mechanism and a rudder extension that let them operate in shallow water.[62] The aircrews were ordered to select the highest value targets (battleships and aircraft carriers) or, if these were not present, any other high-value ships (cruisers and destroyers). First-wave dive bombers were to attack ground targets. Fighters were ordered to strafe and destroy as many parked aircraft as possible to ensure they did not get into the air to intercept the bombers, especially in the first wave. When the fighters' fuel got low they were to refuel at the aircraft carriers and return to combat. Fighters were to serve CAP duties where needed, especially over US airfields.[citation needed] Before the attack commenced, the Imperial Japanese Navy launched reconnaissance floatplanes from heavy cruisers Chikuma and Tone, one to scout over Oahu and the other over Lahaina Roads, Maui, respectively, with orders to report on US fleet composition and location.[citation needed] Reconnaissance aircraft flights risked alerting the US,[63] and were not necessary. US fleet composition and preparedness information in Pearl Harbor were already known due to the reports of the Japanese spy Takeo Yoshikawa. A report of the absence of the U.S. fleet in Lahaina anchorage off Maui was received from the Tone's floatplane and fleet submarine I-72.[64] Another four scout planes patrolled the area between the Japanese carrier force (the Kidō Butai) and Niihau, to detect any counterattack.[65] Submarines Fleet submarines I-16, I-18, I-20, I-22, and I-24 each embarked a Type A midget submarine for transport to the waters off Oahu.[66] The five I-boats left Kure Naval District on November 25, 1941.[66] On December 6, they came to within 10 nmi (19 km; 12 mi) of the mouth of Pearl Harbor[67] and launched their midget subs at about 01:00 local time on December 7.[68] At 03:42 Hawaiian time, the minesweeper Condor spotted a midget submarine periscope southwest of the Pearl Harbor entrance buoy and alerted the destroyer Ward.[69][70] The midget may have entered Pearl Harbor. However, Ward sank another midget submarine at 06:37[70][nb 12] in the first American shots in the Pacific Theater. A midget submarine on the north side of Ford Island missed the seaplane tender Curtiss with her first torpedo and missed the attacking destroyer Monaghan with her other one before being sunk by Monaghan at 08:43.[70] A third midget submarine, Ha-19, grounded twice, once outside the harbor entrance and again on the east side of Oahu, where it was captured on December 8.[72] Ensign Kazuo Sakamaki swam ashore and was captured by Hawaii National Guard Corporal David Akui, becoming the first Japanese prisoner of war.[nb 13][73] A fourth had been damaged by a depth charge attack and was abandoned by its crew before it could fire its torpedoes.[74] It was found outside the harbor in 1960. Japanese forces received a radio message from a midget submarine at 00:41 on December 8 claiming damage to one or more large warships inside Pearl Harbor.[75] In 1992, 2000, and 2001 Hawaii Undersea Research Laboratory's submersibles found the wreck of the fifth midget submarine lying in three parts outside Pearl Harbor. The wreck was in the debris field where much surplus U.S. equipment was dumped after the war, including vehicles and landing craft. Both of its torpedoes were missing. This correlates with reports of two torpedoes fired at the light cruiser St. Louis at 10:04 at the entrance of Pearl Harbor, and a possible torpedo fired at destroyer Helm at 08:21.[76] There is dispute over this official chain of events though. The "torpedo" that St. Louis saw was also reportedly a porpoising minesweeping float being towed by the destroyer Boggs.[77] A photo taken by a Japanese naval aviator of Battleship Row during the Attack on Pearl Harbor was declassified in the 1990s and publicized in the 2000s to the public.[78] According to numerous historians and naval architects this photo shows that the fifth midget submarine appeared to have fired a torpedo at West Virginia and another one at Oklahoma. These torpedoes were twice the size of the aerial torpedoes so it was possible that both torpedoes fired by the unaccounted for fifth submarine heavily contributed to the sinkings of both ships and especially helped to capsize Oklahoma because Oklahoma was the only battleship that day to suffer catastrophic damage to her belt armor at the waterline from a torpedo. Admiral Chester Nimitz in a report to Congress confirmed that one midget submarine's torpedo (possibly from the other midget submarine that fired torpedoes but failed to hit a target) which was fired but didn't explode was recovered in Pearl Harbor and it was much larger than the aerial torpedoes.[79][80] [81] Japanese declaration of war See also: Japanese war crimes The attack took place before any formal declaration of war was made by Japan, but this was not Admiral Yamamoto's intention. He originally stipulated that the attack should not commence until thirty minutes after Japan had informed the United States that peace negotiations were at an end.[82] However, the attack began before the notice could be delivered. Tokyo transmitted the 5000-word notification (commonly called the "14-Part Message") in two blocks to the Japanese Embassy in Washington. Transcribing the message took too long for the Japanese ambassador to deliver it at 1:00 p.m. Washington time, as ordered, and as such, the message was not presented until more than one hour after the attack had begun — but in fact, US code breakers had already deciphered and translated most of the message hours before it was scheduled to be delivered.[83][84]: pp.2ff The final part of the message is sometimes described as a declaration of war. While it was viewed by a number of senior U.S government and military officials as a very strong indicator negotiations were likely to be terminated[85] and that war might break out at any moment,[86] it neither declared war nor severed diplomatic relations. A declaration of war was printed on the front page of Japan's newspapers in the evening edition of December 8 (late December 7 in the US),[87] but not delivered to the US government until the day after the attack. For decades, conventional wisdom held that Japan attacked without first formally breaking diplomatic relations only because of accidents and bumbling that delayed the delivery of a document hinting at war to Washington.[88] In 1999, however, Takeo Iguchi, a professor of law and international relations at International Christian University in Tokyo, discovered documents that pointed to a vigorous debate inside the government over how, and indeed whether, to notify Washington of Japan's intention to break off negotiations and start a war, including a December 7 entry in the war diary saying, "[O]ur deceptive diplomacy is steadily proceeding toward success." Of this, Iguchi said, "The diary shows that the army and navy did not want to give any proper declaration of war, or indeed prior notice even of the termination of negotiations ... and they clearly prevailed."[89][90] In any event, even if the Japanese had decoded and delivered the 14-Part Message before the beginning of the attack, it would not have constituted either a formal break of diplomatic relations or a declaration of war.[91] The final two paragraphs of the message read:[92] Thus the earnest hope of the Japanese Government to adjust Japanese-American relations and to preserve and promote the peace of the Pacific through cooperation with the American Government has finally been lost. The Japanese Government regrets to have to notify hereby the American Government that in view of the attitude of the American Government it cannot but consider that it is impossible to reach an agreement through further negotiations. U.S. Naval intelligence officers were alarmed by the unusual timing for delivering the message — 1:00 p.m. on a Sunday, which was 7:30 a.m. in Hawaii — and attempted to alert Pearl Harbor. But due to communication problems the warning was not delivered before the attack.[84]: Ch. 1 First wave composition The first attack wave of 183 planes was launched north of Oahu, led by Commander Mitsuo Fuchida.[93] Six planes failed to launch due to technical difficulties.[65] The first attack included three groups of planes:[nb 14] The Japanese attacked in two waves. The first wave was detected by United States Army radar at 136 nautical miles (252 km), but was misidentified as United States Army Air Forces bombers arriving from the American mainland. Top: A: Ford Island NAS. B: Hickam Field. Bellows Field. Wheeler Field. E: Kaneohe NAS. F: Ewa MCAS. R-1: Opana Radar Station. R-2: Kawailoa RS. R-3: Kaaawa RS. G: Kahuku. H: Haleiwa. I: Wahiawa. J: Kaneohe. K: Honolulu. 0: B-17s from mainland. 1: First strike group. 1-1: Level bombers. 1–2: Torpedo bombers. 1–3: Dive bombers. 2: Second strike group. 2-1: Level bombers. 2-1F: Fighters. 2-2: Dive bombers. Bottom: A: Wake Island. B: Midway Islands. Johnston Island. Hawaii. D-1: Oahu. 1: Lexington. 2: Enterprise. 3: First Air Fleet. 1st Group (targets: battleships and aircraft carriers)[95] 49 Nakajima B5N Kate bombers armed with 800‑kg (1760 lb) armor-piercing bombs, organized in four sections (one failed to launch) 40 B5N bombers armed with Type 91 torpedoes, also in four sections 2nd Group – (targets: Ford Island and Wheeler Field) 51 Aichi D3A Val dive bombers armed with 550 lb (249 kg) general-purpose bombs (3 failed to launch) 3rd Group – (targets: aircraft at Ford Island, Hickam Field, Wheeler Field, Barber's Point, Kaneohe) 43 Mitsubishi A6M "Zero" fighters for air control and strafing[94] (2 failed to launch) As the first wave approached Oahu, it was detected by the U.S. Army SCR-270 radar at Opana Point near the island's northern tip. This post had been in training mode for months, but was not yet operational.[96] The operators, Privates George Elliot Jr. and Joseph Lockard, reported a target to Private Joseph P. McDonald, a private stationed at Fort Shafter's Intercept Center near Pearl Harbor.[97][98][99] But Lieutenant Kermit A. Tyler, a newly assigned officer at the thinly manned Intercept Center, presumed it was the scheduled arrival of six B-17 bombers from California. The Japanese planes were approaching from a direction very close (only a few degrees difference) to the bombers,[100] and while the operators had never seen a formation as large on radar, they neglected to tell Tyler of its size.[101] Tyler, for security reasons, could not tell the operators of the six B-17s that were due (even though it was widely known).[101] As the first wave of planes approached Oahu, they encountered and shot down several U.S. aircraft. At least one of these radioed a somewhat incoherent warning. Other warnings from ships off the harbor entrance were still being processed or awaiting confirmation when the Japanese air assault began at 7:48 a.m. Hawaiian time[102] (3:18 a.m. December 8 Japanese Standard Time, as kept by ships of the Kido Butai),[103] with the attack on Kaneohe. A total of 353[16] Japanese planes reached Oahu in two waves. Slow, vulnerable torpedo bombers led the first wave, exploiting the first moments of surprise to attack the most important ships present (the battleships), while dive bombers attacked U.S. air bases across Oahu, starting with Hickam Field, the largest, and Wheeler Field, the main U.S. Army Air Forces fighter base. The 171 planes in the second wave attacked the Army Air Forces' Bellows Field near Kaneohe on the windward side of the island and Ford Island. The only aerial opposition came from a handful of P-36 Hawks, P-40 Warhawks, and some SBD Dauntless dive bombers from the carrier Enterprise.[citation needed][nb 15] City Army base Navy base Attacked targets: 1: USS California. 2: USS Maryland. 3: USS Oklahoma. 4: USS Tennessee. 5: USS West Virginia. 6: USS Arizona. 7: USS Nevada. 8: USS Pennsylvania. 9: Ford Island NAS. 10: Hickam field. Ignored infrastructure targets: A: Oil storage tanks. B: CINCPAC headquarters building. Submarine base. Navy Yard. In the first-wave attack, about eight of the forty-nine 800‑kg (1760 lb) armor-piercing bombs dropped hit their intended battleship targets. At least two of those bombs broke up on impact, another detonated before penetrating an unarmored deck, and one was a dud. Thirteen of the forty torpedoes hit battleships, and four torpedoes hit other ships.[104] Men aboard US ships awoke to the sounds of alarms, bombs exploding, and gunfire, prompting bleary-eyed men to dress as they ran to General Quarters stations. (The famous message, "Air raid Pearl Harbor. This is not drill.",[nb 16] was sent from the headquarters of Patrol Wing Two, the first senior Hawaiian command to respond.) American servicemen were caught unprepared by the attack. Ammunition lockers were locked, aircraft parked wingtip to wingtip in the open to prevent sabotage,[105] guns unmanned (none of the Navy's 5"/38s, only a quarter of its machine guns, and only four of 31 Army batteries got in action).[105] Despite this low alert status, many American military personnel responded effectively during the attack.[nb 17] Ensign Joseph Taussig Jr., aboard Nevada, commanded the ship's antiaircraft guns and was severely wounded but continued to be on post. Lieutenant Commander F. J. Thomas commanded Nevada in the captain's absence and got her underway until the ship was grounded at 9:10 a.m.[107] One of the destroyers, Aylwin, got underway with only four officers aboard, all ensigns, none with more than a year's sea duty; she operated at sea for 36 hours before her commanding officer managed to get back aboard.[108] Captain Mervyn Bennion, commanding West Virginia, led his men until he was cut down by fragments from a bomb which hit Tennessee, moored alongside.[109] Second wave composition The second planned wave consisted of 171 planes: 54 B5Ns, 81 D3As, and 36 A6Ms, commanded by Lieutenant-Commander Shigekazu Shimazaki.[94] Four planes failed to launch because of technical difficulties.[65] This wave and its targets also comprised three groups of planes:[94] 1st Group – 54 B5Ns armed with 550 lb (249 kg) and 132 lb (60 kg) general-purpose bombs[95] 27 B5Ns – aircraft and hangars on Kaneohe, Ford Island, and Barbers Point 27 B5Ns – hangars and aircraft on Hickam Field 2nd Group (targets: aircraft carriers and cruisers) 78 D3As armed with 550 lb (249 kg) general-purpose bombs, in four sections (3 aborted) 3rd Group – (targets: aircraft at Ford Island, Hickam Field, Wheeler Field, Barber's Point, Kaneohe) 35 A6Ms for defense and strafing (1 aborted) The second wave was divided into three groups. One was tasked to attack Kāneʻohe, the rest Pearl Harbor proper. The separate sections arrived at the attack point almost simultaneously from several directions. American casualties and damage Arizona during the attack Nevada, on fire and down at the bow, attempting to leave the harbor before being deliberately beached West Virginia was sunk by six torpedoes and two bombs during the attack. A destroyed Vindicator at Ewa field, the victim of one of the smaller attacks on the approach to Pearl Harbor Ninety minutes after it began, the attack was over. 2,008 sailors were killed and 710 others wounded; 218 soldiers and airmen (who were part of the Army prior to the independent United States Air Force in 1947) were killed and 364 wounded; 109 Marines were killed and 69 wounded; and 68 civilians were killed and 35 wounded. In total, 2,403 Americans were killed, and 1,178 were wounded.[110][111] Eighteen ships were sunk or run aground, including five battleships.[10][112] All of the Americans killed or wounded during the attack were legally non-combatants, given that there was no state of war when the attack occurred.[113][114] Of the American fatalities, nearly half were due to the explosion of Arizona's forward magazine after it was hit by a modified 16-inch (410 mm) shell.[nb 18] Author Craig Nelson wrote that the vast majority of the U.S. sailors killed at Pearl Harbor were junior enlisted personnel. "The officers of the Navy all lived in houses and the junior people were the ones on the boats, so pretty much all of the people who died in the direct line of the attack were very junior people", Nelson said. "So everyone is about 17 or 18 whose story is told there."[115] Among the notable civilian casualties were nine Honolulu Fire Department (HFD) firefighters who responded to Hickam Field during the bombing in Honolulu, becoming the only fire department members on American soil to be attacked by a foreign power in history. Fireman Harry Tuck Lee Pang of Engine 6 was killed near the hangars by machine-gun fire from a Japanese plane. Captains Thomas Macy and John Carreira of Engine 4 and Engine 1 respectively died while battling flames inside the hangar after a Japanese bomb crashed through the roof. An additional six firefighters were wounded from Japanese shrapnel. The wounded later received Purple Hearts (originally reserved for service members wounded by enemy action while partaking in armed conflicts) for their peacetime actions that day on June 13, 1944; the three firefighters killed did not receive theirs until December 7, 1984, at the 43rd anniversary of the attack. This made the nine men the only non-military firefighters to receive such an award in US history.[116] This message denotes the first US ship, St. Louis to clear Pearl Harbor. (National Archives and Records Administration) (Note that this is in answer to question "Is channel clear?" and faint writing at bottom concerning the answer being held until St. Louis had successfully cleared.) Already damaged by a torpedo and on fire amidships, Nevada attempted to exit the harbor. She was targeted by many Japanese bombers as she got under way and sustained more hits from 250 lb (113 kg) bombs, which started further fires. She was deliberately beached to avoid blocking the harbor entrance. California was hit by two bombs and two torpedoes. The crew might have kept her afloat, but were ordered to abandon ship just as they were raising power for the pumps. Burning oil from Arizona and West Virginia drifted down on her and probably made the situation look worse than it was. The disarmed target ship Utah was holed twice by torpedoes. West Virginia was hit by seven torpedoes, the seventh tearing away her rudder. Oklahoma was hit by four torpedoes, the last two above her belt armor, which caused her to capsize. Maryland was hit by two of the converted 16" shells, but neither caused serious damage. Although the Japanese concentrated on battleships (the largest vessels present), they did not ignore other targets. The light cruiser Helena was torpedoed, and the concussion from the blast capsized the neighboring minelayer Oglala. Two destroyers in dry dock, Cassin and Downes, were destroyed when bombs penetrated their fuel bunkers. The leaking fuel caught fire; flooding the dry dock in an effort to fight fire made the burning oil rise, and both were burned out. Cassin slipped from her keel blocks and rolled against Downes. The light cruiser Raleigh was holed by a torpedo. The light cruiser Honolulu was damaged but remained in service. The repair vessel Vestal, moored alongside Arizona, was heavily damaged and beached. The seaplane tender Curtiss was also damaged. The destroyer Shaw was badly damaged when two bombs penetrated her forward magazine.[117] Of the 402 American aircraft in Hawaii, 188 were destroyed and 159 damaged, 155 of them on the ground.[16] Almost none were actually ready to take off to defend the base. Eight Army Air Forces pilots managed to get airborne during the attack,[118] and six were credited with downing at least one Japanese aircraft during the attack: 1st Lieutenant Lewis M. Sanders, 2nd Lieutenant Philip M. Rasmussen, 2nd Lieutenant Kenneth M. Taylor, 2nd Lieutenant George S. Welch, 2nd Lieutenant Harry W. Brown, and 2nd Lieutenant Gordon H. Sterling Jr.[119][120] Of 33 PBYs in Hawaii, 30 were destroyed and three on patrol at the time of the attack returned undamaged. Friendly fire brought down some U.S. planes on top of that, including four from an inbound flight from Enterprise.[121] At the time of the attack, nine civilian aircraft were flying in the vicinity of Pearl Harbor. Of these, three were shot down.[122] Japanese losses Fifty-five Japanese airmen and nine submariners were killed in the attack, and one, Kazuo Sakamaki, was captured. Of Japan's 414[94] available planes, 350 took part in the raid in which twenty-nine were lost; nine in the first wave (three fighters, one dive bomber, and five torpedo bombers) and twenty in the second wave (six fighters and fourteen dive bombers)[123][nb 19] with another 74 damaged by antiaircraft fire from the ground.[citation needed] Possible third wave According to some accounts, several Japanese junior officers including Fuchida and Genda urged Nagumo to carry out a third strike in order to sink more of the Pearl Harbor's remaining warships, and damage the base's maintenance shops, drydock facilities, and oil tank yards.[46] Most notably, Fuchida gave a firsthand account of this meeting several times after the war. However, some historians have cast doubt on this and many other of Fuchida's later claims, which sometimes conflict with documented historic records.[124] Genda, who opined during the planning for the attack that without an invasion three strikes were necessary to fully disable the Pacific Fleet,[125] denied requesting an additional attack.[126] Regardless, it is undisputed that the captains of the other five carriers in the task force reported they were willing and ready to carry out a third strike soon after the second returned,[127] but Nagumo decided to withdraw for several reasons: American anti-aircraft performance had improved considerably during the second strike, and two-thirds of Japan's losses were incurred during the second wave.[128] Nagumo felt if he launched a third strike, he would be risking three-quarters of the Combined Fleet's strength to wipe out the remaining targets (which included the facilities) while suffering higher aircraft losses.[128] The location of the American carriers remained unknown. In addition, the admiral was concerned his force was now within range of American land-based bombers.[128] Nagumo was uncertain whether the US had enough surviving planes remaining on Hawaii to launch an attack against his carriers.[129] A third wave would have required substantial preparation and turnaround time, and would have meant returning planes would have had to land at night. At the time, only the Royal Navy had developed night carrier techniques, so this was a substantial risk.[130] The first two waves had launched the entirety of the Combined Fleet's air strength. A third wave would have required landing both the first and second wave before launching the first wave again. Compare Nagumo's situation in the Battle of Midway where an attack returning from Midway kept Nagumo from launching an immediate strike on American carriers. The task force's fuel situation did not permit him to remain in waters north of Pearl Harbor much longer since he was at the very limit of logistical support. To do so risked running unacceptably low on fuel, perhaps even having to abandon destroyers en route home.[131] He believed the second strike had essentially accomplished the mission's main objective (neutralizing the US Pacific Fleet) and did not wish to risk further losses.[132] Moreover, it was IJN practice to prefer the conservation of strength over the total destruction of the enemy.[133] Although a hypothetical third strike would have likely focused on the base's remaining warships,[134] military historians have suggested any potential damage to the shore facilities would have hampered the US Pacific Fleet far more seriously.[59][page needed][60][page needed] If they had been wiped out, "serious [American] operations in the Pacific would have been postponed for more than a year";[135] according to Admiral Chester W. Nimitz, later Commander in Chief of the Pacific Fleet, "it would have prolonged the war another two years".[136] At a conference aboard his flagship the following morning, Yamamoto supported Nagumo's withdrawal without launching a third wave.[132] In retrospect, sparing the vital dockyards, maintenance shops, and the oil tank farm meant the US could respond relatively quickly to Japanese activities in the Pacific. Yamamoto later regretted Nagumo's decision to withdraw and categorically stated it had been a great mistake not to order a third strike.[137] Ships lost or damaged Further information: List of United States Navy ships present at Pearl Harbor, December 7, 1941 Twenty-one American ships were damaged or lost in the attack, of which all but three were repaired and returned to service.[138] Battleships Arizona (Rear Admiral Isaac C. Kidd's flagship of Battleship Division One): hit by four armor-piercing bombs, exploded; total loss, not salvaged. 1,177 dead. Oklahoma: hit by five torpedoes, capsized; total loss, salvaged, sank en route to scrapping May 1947. 429 dead. West Virginia: hit by two bombs, seven torpedoes, sunk; returned to service July 1944. 106 dead. California: hit by two bombs, two torpedoes, sunk; returned to service January 1944. 104 dead.[139] Nevada: hit by six bombs, one torpedo, beached; returned to service October 1942. 60 dead. Pennsylvania (Admiral Husband E. Kimmel's flagship of the United States Pacific Fleet):[140] in dry dock with Cassin and Downes, hit by one bomb and debris from USS Cassin; remained in service. 9 dead. Tennessee: hit by two bombs; returned to service February 1942. 5 dead. Maryland: hit by two bombs; returned to service February 1942. 4 dead (including floatplane pilot shot down). Ex-battleship (target/AA training ship) Utah: hit by two torpedoes, capsized; total loss, salvage stopped. 64 dead. Cruisers Helena: hit by one torpedo; returned to service January 1942. 20 dead. Raleigh: hit by one torpedo; returned to service February 1942. Honolulu: near miss, light damage; remained in service. Destroyers Cassin: in drydock with Downes and Pennsylvania, hit by one bomb, burned; reconstructed and returned to service February 1944. Downes: in drydock with Cassin and Pennsylvania, caught fire from Cassin, burned; reconstructed and returned to service November 1943. Helm: underway to West Loch, damaged by two near-miss bombs;[141] continued patrol; dry-docked January 15, 1942, and sailed January 20, 1942. Shaw: hit by three bombs; returned to service June 1942. Auxiliaries Oglala (minelayer): damaged by torpedo hit on Helena, capsized; returned to service (as engine-repair ship) February 1944. Vestal (repair ship): hit by two bombs, blast and fire from Arizona, beached; returned to service by August 1942. Curtiss (seaplane tender): hit by one bomb, one crashed Japanese aircraft; returned to service January 1942. 19 dead. Sotoyomo (harbor tug): damaged by explosion and fires in Shaw; sunk; returned to service August 1942. YFD-2 (yard floating dock): damaged by bombs; sunk; returned to service January 25, 1942, servicing Shaw. Captain Homer N. Wallin (center) supervises salvage operations aboard USS California, early 1942. Salvage After a systematic search for survivors, Captain Homer N. Wallin was ordered to lead a formal salvage operation.[142][nb 20] Around Pearl Harbor, divers from the Navy (shore and tenders), the Pearl Harbor Naval Shipyard, and civilian contractors (Pacific Bridge Company and others) began work on the ships that could be refloated. They patched holes, cleared debris, and pumped water out of ships. Melvin Storer and other Navy divers worked inside the damaged ships.[144] Within six months, five battleships and two cruisers were patched or refloated so they could be sent to shipyards in Pearl Harbor and on the mainland for extensive repair.[145] Intensive salvage operations continued for another year, a total of some 20,000 man-hours under water.[146][page needed] Arizona and the target ship Utah were too heavily damaged for salvage and remain where they were sunk,[147] with Arizona becoming a war memorial. Oklahoma, while successfully raised, was never repaired and capsized while under tow to the mainland in 1947. The Nevada proved particularly difficult to raise and repair; two men involved in the operation died after inhaling poisonous gases that had accumulated in the ship's interior.[145] When feasible, armament and equipment were removed from vessels too damaged to repair and put to use aboard other craft.[citation needed] News coverage Pennsylvania, behind the wreckage of Downes and Cassin The initial announcement of the attack on Pearl Harbor was made by the White House Press Secretary, Stephen Early, at 2:22 p.m. Eastern time (8:52 a.m. Hawaiian time): "The Japanese have attacked Pearl Harbor from the air and all naval and military activities on the island of Oahu, principal American base in the Hawaiian islands."[148] As information developed, Early made a number of additional announcements to approximately 150 White House reporters over the course of the afternoon.[149] Initial reports of the attack moved on news wires at approximately 2:25 p.m. Eastern time. The first radio coverage (which, at the time, represented the earliest opportunity for ordinary people to learn of the attack) was on the CBS radio network's scheduled news program, World News Today, at 2:30 p.m. Eastern time. John Charles Daly read the initial report, then switched to London, where Robert Trout ad-libbed on the possible London reaction. The first report on NBC cut into a play, a dramatization of The Inspector-General, at 2:33 p.m. Eastern time and lasted only 21 seconds. Unlike the later practice with major news stories, there were only brief interruptions of scheduled commercial programming.[150] A contemporaneous newspaper report compared the attack to the Battle of Port Arthur in which the Imperial Japanese Navy attacked the Imperial Russian Navy, triggering the Russo-Japanese War, 37 years prior.[151] Modern writers have continued to note parallels between the attacks, albeit more dispassionately.[152] Aftermath Main articles: Consequences of the attack on Pearl Harbor and Day of Infamy speech Part of a series on the History of Hawaii Flag of Hawaii Early history (pre–1795) Hawaiian Kingdom (1795–1893) Provisional (1893–1894) Republic of Hawaii (1894–1898) Territory of Hawaii (1898–1959) State of Hawaii (1959–present) Topics Big Five Legal status NRHP listings Sovereignty movement Sugar plantations Timeline of Honolulu Portal Commons vte The day after the attack, Roosevelt delivered his famous Day of Infamy speech to a Joint Session of Congress, calling for a formal declaration of war on the Empire of Japan. Congress obliged his request less than an hour later. On December 11, Germany and Italy declared war on the United States, even though the Tripartite Pact did not require it.[nb 21] Congress issued a declaration of war against Germany and Italy later that same day. The United Kingdom had already been at war with Germany since September 1939 and with Italy since June 1940, and British Prime Minister Winston Churchill had promised to declare war "within the hour" of a Japanese attack on the United States.[156] Upon learning of the Japanese attacks on Malaya, Singapore, and Hong Kong, Churchill promptly determined there was no need to either wait or further consult the US government and immediately summoned the Japanese Ambassador. As a result, the UK declared war on Japan nine hours before the US did. The attack was an initial shock to all the Allies in the Pacific Theater. Further losses compounded the alarming setback. Japan attacked the Philippines hours later (because of the time difference, it was December 8 in the Philippines). Only three days after the attack on Pearl Harbor, the battleship Prince of Wales and battlecruiser Repulse were sunk off the coast of Malaya, causing Churchill later to recollect "In all the war I never received a more direct shock. As I turned and twisted in bed the full horror of the news sank in upon me. There were no British or American capital ships in the Indian Ocean or the Pacific except the American survivors of Pearl Harbor who were hastening back to California. Over this vast expanse of waters, Japan was supreme and we everywhere were weak and naked."[157] Poster by Allen Saalburg issued in 1942 by the United States Office of War Information Throughout the war, Pearl Harbor was frequently used in American propaganda.[158] One further consequence of the attack on Pearl Harbor and its aftermath (notably the Niihau incident) was that Japanese-American residents and citizens were relocated to nearby Japanese-American internment camps. Within hours of the attack, hundreds of Japanese-American leaders were rounded up and taken to high-security camps such as Sand Island at the mouth of Honolulu harbor and Kilauea Military Camp on the island of Hawaii.[159][page needed][160] Eventually, more than 110,000 Japanese Americans, nearly all who lived on the West Coast, were forced into interior camps, but in Hawaii, where the 150,000-plus Japanese Americans composed over one-third of the population, only 1,200 to 1,800 were interned.[161][page needed][162][163] The attack also had international consequences. The Canadian province of British Columbia, bordering the Pacific Ocean, had long had a large population of Japanese immigrants and their Japanese Canadian descendants. Pre-war tensions were exacerbated by the Pearl Harbor attack, leading to a reaction from the Government of Canada. On February 24, 1942, Order-in-Council P.C. no. 1486 was passed under the War Measures Act, allowing for the forced removal of any and all Canadians of Japanese descent from British Columbia, as well as prohibiting them from returning to the province. On March 4, regulations under the Act were adopted to evacuate Japanese-Canadians.[164] As a result, 12,000 were interned in interior camps, 2,000 were sent to road camps, and another 2,000 were forced to work in the prairies on sugar beet farms.[165] In the wake of the attack, 15 Medals of Honor, 51 Navy Crosses, 53 Silver Stars, four Navy and Marine Corps Medals, one Distinguished Flying Cross, four Distinguished Service Crosses, one Distinguished Service Medal, and three Bronze Star Medals were awarded to the American servicemen who distinguished themselves in combat at Pearl Harbor.[166] Additionally, a special military award, the Pearl Harbor Commemorative Medal, was later authorized for all military veterans of the attack. Niihau Incident Main article: Niihau incident Petty Officer Shigenori Nishikaichi's aircraft ten days after it crashed Japanese planners of the Pearl Harbor attack had determined that some means were required for rescuing fliers whose aircraft were damaged too badly to return to the carriers. The island of Niihau, only thirty minutes by air from Pearl Harbor, was designated as the rescue point.[citation needed] During the second wave, one Zero fighter flown by Petty Officer Shigenori Nishikaichi of the Hiryu was damaged in the attack on Wheeler, so he flew to the rescue point. The aircraft was further damaged on the crash landing. Nishikaichi was helped from the wreckage by one of the Native Hawaiians, who, aware of the tension between the United States and Japan, took the pilot's pistol, maps, codes, and other documents. The island's residents had no telephones or radios and were completely unaware of the attack on Pearl Harbor. Nishikaichi enlisted the support of three Japanese American residents in an attempt to recover the documents. During the ensuing struggles, Nishikaichi was killed, and a Hawaiian civilian was wounded; one collaborator committed suicide, and his wife and the third collaborator were sent to prison.[citation needed] The ease with which the local ethnic Japanese residents had apparently gone to Nishikaichi's assistance was a source of concern for many and tended to support those who believed that local Japanese could not be trusted.[167] Strategic implications Admiral Hara Tadaichi summed up the Japanese result by saying, "We won a great tactical victory at Pearl Harbor and thereby lost the war."[168] While the attack accomplished its intended objective, it turned out to be largely unnecessary. Unbeknownst to Yamamoto, who conceived the original plan, the U.S. Navy had decided as far back as 1935 to abandon 'charging' across the Pacific towards the Philippines in response to an outbreak of war (in keeping with the evolution of Plan Orange).[36][page needed] The U.S. instead adopted "Plan Dog" in 1940, which emphasized keeping the IJN out of the eastern Pacific and away from the shipping lanes to Australia, while the U.S. concentrated on defeating Nazi Germany.[169][better source needed] Fortunately for the United States, the American aircraft carriers were untouched; otherwise the Pacific Fleet's ability to conduct offensive operations would have been crippled for a year or more (given no diversions from the Atlantic Fleet). As it was, the U.S. Navy was left with no choice but to rely on carriers and submarines, the very weapons with which the US Navy halted and eventually reversed the Japanese advance. While six of the eight battleships were repaired and returned to service, their relatively low speed and high fuel consumption limited their deployment, and they served mainly in shore bombardment roles (their only major action being the Battle of Surigao Strait in October 1944). A major flaw of Japanese strategic thinking was a belief that the ultimate Pacific battle would be fought by battleships, in keeping with the doctrine of Captain Alfred Thayer Mahan. As a result, Yamamoto (and his successors) hoarded battleships for a "decisive battle" that never happened.[59][page needed][170][page needed] The Japanese confidence in their ability to win a quick victory meant that they neglected Pearl Harbor's navy repair yards, oil tank farms, submarine base, and old headquarters building.[59][page needed] All of these targets were omitted from Genda's list, yet they proved more important than any battleship to the American war effort in the Pacific. The survival of the repair shops and fuel depots allowed Pearl Harbor to maintain logistical support to the US Navy's operations,[171][172] such as the Doolittle Raid and the Battles of the Coral Sea and Midway. It was submarines that immobilized the Imperial Japanese Navy's heavy ships and brought Japan's economy to a virtual standstill by crippling the importation of oil and raw materials: by the end of 1942, the amount of raw materials brought in was cut in half, "to a disastrous ten million tons", while oil "was almost completely stopped".[nb 22] Lastly, the basement of the Old Administration Building was the home of the cryptanalytic unit which contributed significantly to the Midway ambush and the Submarine Force's success.[173] Retrospective debate on American intelligence Main article: Pearl Harbor advance-knowledge conspiracy theory USS Arizona Memorial Ever since the Japanese attack, there has been debate as to how and why the United States had been caught unaware, and how much and when American officials knew of Japanese plans and related topics. As early as 1924, Chief of U.S. Air Service Mason Patrick displayed a concern for military vulnerabilities in the Pacific, having sent General Billy Mitchell on a survey of the Pacific and the East. Patrick called Mitchell's subsequent report, which identified vulnerabilities in Hawaii, a "theoretical treatise on employment of airpower in the Pacific, which, in all probability undoubtedly will be of extreme value some 10 or 15 years hence".[174] At least two naval war games, one in 1932 and another in 1936, proved that Pearl was vulnerable to such an attack. Admiral James Richardson was removed from command shortly after protesting President Roosevelt's decision to move the bulk of the Pacific fleet to Pearl Harbor.[175][page needed][176] The decisions of military and political leadership to ignore these warnings have contributed to conspiracy theories. Several writers, including decorated World War II veteran and journalist Robert Stinnett, author of Day of Deceit, and former United States Rear Admiral Robert Alfred Theobald, author of The Final Secret of Pearl Harbor: The Washington Background of the Pearl Harbor Attack, have argued that various parties high in the US and British governments knew of the attack in advance and may even have let it happen or encouraged it in order to force the US into war via the so-called "back door". However, this conspiracy theory is rejected by mainstream historians.[177][page needed][178][179][page needed][180][nb 23] In popular culture Pearl Harbor and the Japanese expansion, to July 1942 Pearl Harbor, Hawaii Pearl Harbor, Hawaii Ford Island in Pearl Harbor, Hawaii, as seen from a Japanese aircraft during the attack on the U.S. Pacific Fleet, December 7, 1941. Watch Japanese dive-bombers attack the U.S. naval base at Pearl Harbor to spark the Pacific War Watch Japanese dive-bombers attack the U.S. naval base at Pearl Harbor to spark the Pacific War On December 7, 1941, Japanese airplanes strike the U.S. naval base at Pearl Harbor, bringing the United States into World War II. From “The Second World War: Triumph of the Axis” (1963), a documentary by Encyclopædia Britannica Educational Corporation. See all videos for this article In accordance with Yamamoto’s plan, the aircraft carrier strike force commanded by Admiral Nagumo Chuichi sailed eastward undetected by any U.S. reconnaissance until it had reached a point 275 miles north of Hawaii. From there, on Sunday, December 7, 1941, a total of about 360 aircraft, composed of dive-bombers, torpedo bombers, and a few fighters, was launched in two waves in the early morning at the giant U.S. naval base at Pearl Harbor. The base at that time was accommodating 70 U.S. fighting ships, 24 auxiliaries, and some 300 planes. The Americans were taken completely by surprise, and all eight battleships in the harbour were hit (though six were eventually repaired and returned to service); three cruisers, three destroyers, a minelayer, and other vessels were damaged; more than 180 aircraft were destroyed and others damaged (most while parked at airfields); and more than 2,330 troops were killed and over 1,140 wounded. Japanese losses were comparatively small. The Japanese attack failed in one crucial respect, however; the Pacific Fleet’s three aircraft carriers were at sea at the time of the attack and escaped harm, and these were to become the nucleus of the United States’ incipient naval defense in the Pacific. Pearl Harbor’s shore installations and oil-storage facilities also escaped damage. The Pearl Harbor attack, unannounced beforehand by the Japanese as it was, unified the American public and swept away any remaining support for American neutrality in the war. On December 8 the U.S. Congress declared war on Japan with only one dissenting vote. On the day of the attack, December 8 by local time, Formosa-based Japanese bombers struck Clark and Iba airfields in the Philippines, destroying more than 50 percent of the U.S. Army’s Far East aircraft; and, two days later, further raids destroyed not only more U.S. fighters but also Cavite Naval Yard, likewise in the Philippines. Part of the U.S. Asiatic Fleet, however, had already gone south in November; and the surviving major ships and bomber aircraft, which were vulnerable for lack of fighter protection, were withdrawn in the next fortnight to safety in bases in Java and Australia. Japanese forces began to land on the island of Luzon in the Philippines on December 10. The main assault, consisting of the bulk of one division, was made at Lingayen Gulf, 100 miles north-northwest of Manila, on December 22, and a second large landing took place south of Manila two days later. Manila itself fell unopposed to the Japanese on January 2, 1942, but by that time the U.S. and Filipino forces under General Douglas MacArthur were ready to hold Bataan Peninsula (across the bay from Manila) and Corregidor Island (in the bay). The Japanese attack on Bataan was halted initially, but it was reinforced in the following eight weeks. MacArthur was ordered to Australia on March 11, leaving Bataan’s defense to Lieutenant General Jonathan M. Wainwright. The latter and his men surrendered on April 9; Corregidor fell in the night of May 5–6; and the southern Philippines capitulated three days later. Japanese bombers had already destroyed British air power at Hong Kong on December 8, 1941, and the British and Canadian defenders surrendered to the ground attack from the Kowloon Peninsula (the nearest mainland) on December 25. To secure their flank while pushing southward into Malaya, the Japanese also occupied Bangkok on December 9 and Victoria Point in southernmost Burma on December 16. The Japanese landings in Malaya, from December 8 onward, accompanied as they were by air strikes, overwhelmed the small Australian and Indian forces; and the British battleship Prince of Wales and the battle cruiser Repulse, sailing from Singapore to cut Japanese communications, were sunk by Japanese aircraft on December 10. By the end of January 1942, two Japanese divisions, with air and armoured support, had occupied all Malaya except Singapore Island. In Burma, meanwhile, other Japanese troops had taken Moulmein and were approaching Rangoon and Mandalay. On the eastern perimeter of the war zone, the Japanese had bombed Wake Island on December 8, attempted to capture it on December 11, and achieved a landing on December 23, quickly subduing the garrison. Guam had already fallen on December 10. Having also occupied Makin and Tarawa in the Gilbert Islands in the first days of the war, the Japanese successfully attacked Rabaul, the strategic base on New Britain (now part of Papua New Guinea), on January 23, 1942. A unified American–British–Dutch–Australian Command, ABDACOM, under Wavell, responsible for holding Malaya, Sumatra, Java, and the approaches to Australia, became operative on January 15, 1942; but the Japanese had already begun their advance on the oil-rich Dutch East Indies. They occupied Kuching (December 17), Brunei Bay (January 6), and Jesselton (January 11), on the northern coast of Borneo, as well as Tarakan Island (off northeastern Borneo) and points on Celebes. Balikpapan (on Borneo’s east coast) and Kendari (in southeastern Celebes) fell to the Japanese on January 24, 1942, Amboina on February 4, Makasar City (in southwestern Celebes) on February 8, and Bandjarmasin (in southern Borneo) on February 16. Bali was invaded on February 18, and by February 24 the Japanese were also in possession of Timor. The fall of Singapore Meanwhile, on February 8 and 9, three Japanese divisions had landed on Singapore Island; and on February 15 they forced the 90,000-strong British, Australian, and Indian garrison there, under Lieutenant General A.E. Percival, to surrender. Singapore was the major British base in the Pacific and had been regarded as unassailable due to its strong seaward defenses. The Japanese took it with comparative ease by advancing down the Malay Peninsula and then assaulting the base’s landward side, which the British had left inadequately defended. On February 13, moreover, Japanese paratroopers had landed at Palembang in Sumatra, which fell to an amphibious assault three days later. When ABDACOM was dissolved on February 25, 1942, only Java remained to complete the Japanese program of conquest. The Allies’ desperate attempt to intercept the Japanese invasion fleet was defeated in the seven-hour Battle of the Java Sea on February 27, in which five Allied warships were lost and only one Japanese destroyer damaged. The Japanese landed at three points on Java on February 28 and rapidly expanded their beachheads. On March 9 the 20,000 Allied troops in Java surrendered. In the Indian Ocean, the Japanese captured the Andaman Islands on March 23, and began a series of attacks on British shipping. After the failure of ABDACOM, the U.S.–British Combined Chiefs of Staff placed the Pacific under the U.S. Joint Chiefs’ strategic direction. MacArthur became supreme commander of the Southwest Pacific Area, which comprised the Dutch East Indies (less Sumatra), the Philippines, Australia, the Bismarck Archipelago, and the Solomons; and Admiral Chester W. Nimitz became commander in chief of the Pacific Ocean Areas, which comprised virtually every area not under MacArthur. Their missions were to hold the U.S.–Australia line of communications, to contain the Japanese within the Pacific, to support the defense of North America, and to prepare for major amphibious counteroffensives. Japan’s initial war plans were realized with the capture of Java. But despite their military triumphs, the Japanese saw no indication that the Allies were ready for a negotiated peace. On the contrary, it seemed evident that an Allied counterstroke was in the making. The U.S. Pacific Fleet bombed the Marshall Islands on February 1, 1942, Wake Island on February 23, and Marcus Island (between Wake and Japan) on March 1. These moves, together with the bombing of Rabaul on February 23 and the establishment of bases in Australia and a line of communications across the South Pacific, made the Japanese decide to expand so as to cut the Allied line of communications to Australia. They planned to occupy New Caledonia, the Fiji Islands, and Samoa and also to seize eastern New Guinea, whence they would threaten Australia from an air base to be established at Port Moresby. They planned also to capture Midway Island in the North Pacific and to establish air bases in the Aleutians. In pursuance of this new program, Japanese troops occupied Lae and Salamaua in New Guinea and Buka in the Solomon Islands in March 1942 and Bougainville in the Solomons and the Admiralty Islands (north of New Guinea) early in April. Learn how Japan failed to invade Port Moresby despite winning the Battle of the Coral Sea Learn how Japan failed to invade Port Moresby despite winning the Battle of the Coral Sea In the Battle of the Coral Sea (May 1942), U.S. naval airplanes thwarted Japanese plans to occupy Port Moresby, New Guinea. From The Second World War: Allied Victory (1963), a documentary by Encyclopædia Britannica Educational Corporation. See all videos for this article Something to raise the Allies’ morale was achieved on April 18, 1942, when 16 U.S. bombers raided Tokyo—though they did little real damage except to the Japanese government’s prestige. Far more important were the consequences of the U.S. intelligence services’ detection of Japanese plans to seize Port Moresby and Tulagi (in the southern Solomons). Had these two places fallen, Japanese aircraft could have dominated the Coral Sea. In the event, after U.S. aircraft on May 3, 1942, had interfered with the Japanese landing on Tulagi, U.S. naval units, with aircraft, challenged the Japanese ships on their circuitous detour from Rabaul to Port Moresby. On May 5 and 6 the opposing carrier groups sought each other out, and the four-day Battle of the Coral Sea ensued. On May 7 planes from the Japanese carriers sank a U.S. destroyer and an oil tanker, but U.S. planes sank the Japanese light carrier Shoho and a cruiser; and the next day, though Japanese aircraft sank the U.S. carrier Lexington and damaged the carrier Yorktown, the large Japanese carrier Shokaku had to retire crippled. Finally, the Japanese lost so many planes in the battle that their enterprise against Port Moresby had to be abandoned. Examine how the U.S. Navy defeated Japan's fleet to check Japanese expansion in the Battle of Midway Examine how the U.S. Navy defeated Japan's fleet to check Japanese expansion in the Battle of Midway In June 1942, one month after the Battle of the Coral Sea, U.S. naval airplanes stopped the advance of the Japanese Imperial Navy near Midway Island. From “The Second World War: Allied Victory” (1963), a documentary by Encyclopædia Britannica Educational Corporation. See all videos for this article Despite the mixed results of the Battle of the Coral Sea, the Japanese continued with their plan to seize Midway Island. Seeking a naval showdown with the remaining ships of the U.S. Pacific Fleet and counting on their own numerical superiority to secure a victory, the Japanese mustered four heavy and three light aircraft carriers, two seaplane carriers, 11 battleships, 15 cruisers, 44 destroyers, 15 submarines, and miscellaneous small vessels. The U.S. Pacific Fleet had only three heavy carriers, eight cruisers, 18 destroyers, and 19 submarines, though there were some 115 aircraft in support of it. The Americans, however, had the incomparable advantage of knowing the intentions of the Japanese in advance, thanks to the U.S. intelligence services’ having broken the Japanese Navy’s code and deciphered key radio transmissions. In the ensuing Battle of Midway, the Japanese ships destined to take Midway Island were attacked while still 500 miles from their target by U.S. bombers on June 3. The Japanese carriers were still able to launch their aircraft against Midway early on June 4, but in the ensuing battle, waves of carrier- and Midway-based U.S. bombers sank all four of the Japanese heavy carriers and one heavy cruiser. Appalled by this disaster, the Japanese began to retreat in the night of June 4–5. Though the U.S. carrier Yorktown was sunk by torpedo on June 6, Midway was saved from invasion. In the Aleutians, the Japanese bombed Dutch Harbor effectively and on June 7 occupied Attu and Kiska. The Battle of Midway was probably the turning point of the war in the Pacific, for Japan lost its first-line carrier strength and most of its navy’s best trained pilots. Henceforth, the naval strengths of the Japanese and of the Allies were virtually equal. Having lost the strategic initiative, Japan canceled its plans to invade New Caledonia, Fiji, and Samoa. The Chinese front and Burma, 1941–42 K'un-ming, China, during World War II K'un-ming, China, during World War II Chinese line the streets of K'un-ming as the first supply convoy reaches the city over the Allied-controlled Burma-Ledo road during World War II. Japan’s entry into war against the western Allies had its repercussions in China. Chiang Kai-shek’s government on December 9, 1941, formally declared war not only against Japan (a formality long overdue) but also, with political rather than military intent, against Germany and Italy. Three Chinese armies were rushed to the Burmese frontier, since the Burma Road was the only land route whereby the western Allies could send supplies to the Nationalist Chinese government. On January 3, 1942, Chiang was recognized as supreme Allied commander for the China theatre of war; and a U.S. general, Joseph W. Stilwell, was sent to him to be his chief of staff. In the first eight weeks after Pearl Harbor, however, the major achievement of the Chinese was the definitive repulse, on January 15, 1942, of a long-sustained Japanese drive against Ch’ang-sha, on the Canton–Han-k’ou railway. Thereafter, Chiang and Stilwell were largely preoccupied by efforts to check the Japanese advance into Burma. By mid-March 1942 two Chinese armies, under Stilwell’s command, had crossed the Burmese frontier; but before the end of the month the Chinese force defending Toungoo, in central Burma between Rangoon and Mandalay, was nearly annihilated by the more soldierly Japanese. British and Indian units in Burma fared scarcely better, being driven into retreat by the enemy’s numerical superiority both in the air and on the ground. On April 29 the Japanese took Lashio, the Burma Road’s southern terminus, thus cutting the supply line to China and turning the Allies’ northern flank. Under continued pressure, the British and Indian forces in the following month fell back through Kalewa to Imphāl (across the Indian border), while most of the Chinese retreated across the Salween River into China. By the end of 1942 all of Burma was in Japanese hands, China was effectively isolated (except by air), and India was exposed to the danger of a Japanese invasion through Burma. Since the U.S. bombers that raided Tokyo on April 18 flew on to Chinese airfields, particularly to those in Chekiang (the coastal province south of Shanghai), the Japanese reacted by launching a powerful offensive to seize those airfields. By the end of July they had generally achieved their objectives. Developments from autumn 1941 to spring 1942 Allied strategy and controversies, 1940–42 In the year following the collapse of France in June 1940, British strategists, relying as they could on supplies from the nonbelligerent United States, were concerned first with home defense, second with the security of the British positions in the Middle East, and third with the development of a war of attrition against the Axis powers, pending the buildup of adequate forces for an invasion of the European continent. For the United States, President Roosevelt’s advisers, from November 1940, based their strategic plans on the “Europe first” principle; that is to say, if the United States became engaged in war simultaneously against Germany, Italy, and Japan, merely defensive operations should be conducted in the Pacific (to protect at least the Alaska–Hawaii–Panama triangle) while an offensive was being mounted in Europe. Atlantic Charter Atlantic Charter Atlantic Charter Conference, August 1941. For the Full text, download these. https://www.dropbox.com/scl/fi/g9zckxtwtu8m2xq5k660e/Attack-on-Pearl-Harbor.zip?rlkey=p0anx2cvhr2nzkceivo7settw&dl=0 https://www.dropbox.com/scl/fi/p8jrrvnji60d040wsjqfg/The-Pearl-Harbor-Project.zip?rlkey=o6sn4icz5j5kr2h4plxk3o430&dl=0 The Pearl Harbor Project.zip6 points
-
Very grateful and it is an honor, thank you.6 points
-
I salute your decade long dedication for our sake, @Silver_Dragon. Thank you for keeping us updated on the state of things! This post deserves to be in the hall of fame!5 points
-
The real question is what you're doing here, the solution to your problem would be to not read this thread. The other people in here seem perfectly happy about their discussion.5 points
-
In this DCS: AH-64D video, I’ll be going over the controls and pages of the Fire Control Radar, or FCR. The FCR can be used by the Pilot or the CPG to detect and engage targets; however, it can only be used by one crewmember at any given time. Like the HMD and TADS, the FCR must be selected as the crewmember’s sight before it can be used. Once selected as a sight, the various controls of the FCR become active within that crew station. FCR controls can be found on the collective Mission Grip in either crew station, or on the left and right TEDAC grips in the CPG crew station. Regardless of whether the FCR is operated from the TEDAC grips or the Collective Mission Grip, the FCR functions for each switch remain the same. Let’s start by having a look at the relevant controls on the axis controls and collective Mission Grip : 1. To start off with, the MPD Cursor Controller is not necessarily part of the FCR itself, but these controls will prove very useful for interacting with the FCR page. This is best set as an axis. 2. The FCR Mode Switch sets the FCR to one of four modes; but for now, we’ll only be using Ground Targeting Mode, or GTM. The other modes are planned for later in early access. 3. The FCR Scan Size Switch is used to set the total volume of the battlefield that is scanned by the FCR, and this functions similarly to the TADS Field-Of-View switch. 4. The FCR Scan Switch can be momentarily pressed to either S, for Single, or C, for Continuous. 5. Then of course the Sight Select Switch is used to select the FCR as the sight. The LINK position of the Sight Select Switch will come later in early access as well. Now let’s look at the FCR page. While we are here in the CPG crew station, you can see that the same FCR controls that are on the Mission Grip are split between the two TEDAC grips, with the Sight Select Switch and FCR Scan Size Switch on the right grip; and the FCR Mode Switch and the FCR Scan Switch on the left grip. But again, whether you use the collective grip or the TEDAC grips, the FCR will function the same way. The first thing we’ll need to do is power the FCR system, which can be performed from the Weapon Utility page, just like powering the TADS; or it can be powered from the FCR Utility page. It doesn’t matter which. You’ll notice that the FCR option is barriered because the state of the Mast Mounted Assembly, or MMA, is still set to PINNED. If I press that button to toggle the MMA state to NORM, you’ll see that the FCR automatically begins its power-up sequence. The built-in test will go on for approximately 1 minute, but if you like, you can abort this test. Now that the FCR is powered, I’m going to change selected sight to FCR using the left position of the Sight Select Switch. You’ll notice that when I select FCR as my sight, the left MPD will automatically autopage to the FCR page. You’ll also notice that the CPG’s helmet display changes to TADS video, which will be especially useful when the LINK function is added later in early access. For now, we’ll move the helmet display out of the way. The two of the three main sections of the FCR page are the Heading Tape along the top and the High Action Display along the bottom, which function identically to those in the IHADSS symbology. The third main section is the FCR display itself, which is a top-down view of the battlefield. Along either side are some additional FCR controls. The left and right arrows will rotate the FCR one full scan width left or right with each button press. If I were to press the left arrow, you can see a small FCR radome symbol along the bottom of the Heading Tape will move to show the direction to which the FCR scan zone is pointed, even though the FCR display on the MPD itself does not rotate. Additionally, you can also see a solid vertical line in the Field-Of-Regard box that shows which direction the FCR scan zone is pointed. Alternatively, I can use the MAN TRACK controller on the right TEDAC grip to slew the FCR smoothly left and right, if SLAVE is disabled. It’s important to note that the TSD also displays the FCR scan zone as it is depicted in real time, which can be easily seen as I slew the FCR scan zone left and right using the controller. This can be useful for orienting yourself to orientation of the FCR page, since the FCR page displays the view as seen from the FCR. Just as the TADS footprint on the TSD can be used to orient either crewmember to the video displayed by the TADS sensor. Below the left arrow we have the TGT, or Target button, which we will go over in a future video. Next is the Elevation mode button, which can be used to toggle the FCR elevation control to Manual. When I press this button, it is replaced by two arrows that allow you to manually slew the FCR antenna in the vertical axis, which can be referenced by the FCR elevation scale directly below the bottom arrow. Alternatively, when the FCR elevation control is set to Manual, I can use the MAN TRACK controller to adjust the FCR antenna elevation as well, in addition to slewing it left and right. In the bottom right corner, we have the ACQ, or Acquisition, selection menu, which functions the same way as it would on the Weapon or TSD pages. Finally, we have the C-SCOPE and ZOOM options, which are planned for a future update. Let’s now have a look at the FCR Utility page again. Along the left side we have an option to toggle the FCR elevation control between Auto and Manual, which will be necessary to return the FCR elevation back to Automatic. Another option worth noting is setting a different Priority Scheme between A, B, or C, which is reflected in the High Action Display as well. We’ll de-select the UTIL option to return to the main FCR page again. Next, if I press the FCR button along the top of the TEDAC, I can also display the FCR page on the TDU screen. This allows me to use the FCR directly from the TEDAC for targeting, which then frees up my MPDs for other things like the WPN or TSD pages. I can even interact with the FCR page directly on the TDU by moving my cursor to the FCR display. To do this, I will need to use a “bump” method that would otherwise be used to move the MPD cursor between each MPD. However, if the FCR page is displayed on the TDU, the MPD cursor will move between the MPDs and the TDU in a linear sequence. I apply pressure to the MPD controller to place the cursor along the inside edge of the MPD, release pressure, and then re-apply pressure again and now I have the MPD cursor on the FCR page in the center. I can even interact with the FCR options along the edges, just like the MPDs. I’m going to ensure my FCR is pointed toward where I want to scan, I am going to adjust my FCR scan size to the area I want to scan, let’s say Medium FOV, and then I can either perform a single scan or a continuous scan. Right now, I’m just going to perform a single scan by momentarily pressing the FCR Scan Switch to the forward “S” position. As you can see, the FCR will display a “wiper” as it scans the battlefield back and forth. When targets are detected, they are displayed as yellow symbols on the FCR page and on the TSD page. As targets are displayed, you can see their range using the range arcs and tick marks. Each range arc corresponds with an even range value, 2 kilometers, 4 kilometers, 6 kilometers, and the furthest edge at 8 kilometers. Each tick mark between them represents the odd range values. The type of symbol displayed by the FCR represents the type of target the FCR has classified it as. 1. The H-shaped symbols are tracked vehicles like tanks or other armored vehicles. 2. The circle symbols are wheeled vehicles like trucks or some types of APCs. 3. The triangle symbols are air defense units like the ZSU-23-4 or SA-8. 4. The square symbols are an unknown target type. In addition, there are also unique target symbols for helicopters or fixed-wing aircraft, but we will go over those when the Air Targeting Mode is implemented. Each of these target symbols may also be solid with a black dot in the center to display that they are moving, or hollow to display that they are a stationary target. It is worth noting that only moving target symbols will be displayed beyond 6 kilometers. Two additional symbols are displayed, which are the Next-To-Shoot, or NTS, diamond; and the Alternate Next-To-Shoot triangle. These represent the highest priority target that is detected, and the second highest priority target detected. When targets are detected, you will also notice the appearance of the total target count in the top right corner; and the NTS button at the top right. We’ll discuss the NTS symbols and the NTS button in the next video. In the next video, we’ll go over how to set target priorities, how to select different targets for engagement, and how to employ the onboard weapons against FCR targets. Thanks for watching.5 points
-
It is not a matter of want. The AH-64D in US Army has never been capable of employing Stingers or any air-to-air missiles. Such a feature would be as unrealistic as giving the AH-64 AGM-65 missiles. Further, there are no public references for how these weapons function in any of the foreign variants of the AH-64 that have been modified to do so.5 points
-
Let me clarify a few things, because right now you are asking the wrong things, to the wrong people, in the wrong order. Let's start with the basics: DCS does implement quad views rendering in their engine. So the title of this thread isn't going to make sense to any one looking at it. My guess is that Eagle Dynamics added support for it in order to enable Bionic Display on Varjo's VR-3 and XR-3 high-end professional headsets. Quad views rendering is the only option today that Varjo offers to enable Bionic Display. Now here are the 3 issues that need to be addressed 1) DCS only implements the Bionic Display flavor of quad views, which is by nature fixed foveated rendering, because the extra video panel in the Bionic Display is fixed (it does not move with your eyes, that would require absolutely crazy mechanical tech). Now this fixed foveated rendering does not help too much with performance, because it is set up specifically for the Bionic Display usage, where the high density panel is fairly large. So in order to make a performance boost in DCS, we want to use dynamic foveated rendering with quad views. However Eagle Dynamics did not implement that. This is what my original Varjo-Foveated mod did: it forces the eye tracking capability into DCS' implementation of quad views in order to achieve dynamic foveated rendering. So ask number 1 to Eagle Dynamics is: can you implement the dynamic foveated rendering flavor of quad views in DCS? This is a very simple change to make. Stated in technical terms: Can you add support for XR_VARJO_foveated_rendering? It's really simple, all you need to do is add a couple of extra flags when initializing the OpenXR instance, the querying the resolution for your swapchains, and querying the view pose/FOV for rendering at each frame. 2) DCS implementation of quad views has bugs. In particular, related to the addition of dynamic foveated rendering above, there is a bug in DCS MT version where data from the next/previous frame is being incorrectly used for the current frame. Because of this bug, the foveated region cannot work properly when eye tracking is used, because the region ends up being warped out of place when you move your eyes. I implemented a workaround to this issue in both Varjo-Foveated and Quad-Views-Foveated. This bug was reported to @BIGNEWY on March 18th in the post linked below, with a very detailed explanation including a detailed trace log. Actually both 1) and 2) were logged in that post back in March. So ask number 2 to Eagle Dynamics is to fix this bug with XrFovf submission in order to make their implementation of quad views compatible with XR_VARJO_foveated_rendering. 3) Quad views support is currently only implemented by Varjo in their OpenXR runtime. The quad views technique and OpenXR extensions were coined by Varjo and as a result, only they had stakes to implement it in their platforms. This means that Valve, Meta, etc do not bother implementing support for quad views applications. So even when an application like DCS implements quad views, these vendors will not be able to run the application in quad views mode. This limitation is not on Eagle Dynamics, and there is nothing they can do about it. This is why I developed my second mod, Quad-Views-Foveated, and if you read closely the description of it, it doesn't talk at all about adding anything into the application: What does that mean? It means that Quad-Views-Foveated does not fill a gap in the application (DCS), but instead it fills a gap in the platform (Oculus, Pimax, etc...). Yes, Eagle Dynamics could pull in the entire quad views on top of stereo emulation framework that I created, but it's way outside of the scope of what any normal game engine should do and I would not expect (or even encourage) any game developer to do that. In addition, there are many challenges linked to eye tracking, because just like Meta, Valve, etc did not implement quad views support in their OpenXR runtimes, they also did not implement eye tracking support in them. Only Varjo implements the proper OpenXR interface for eye tracking (XR_EXT_eye_gaze_interaction). Meta chose to only expose social eye tracking data through a proprietary extension in Developer Mode only and recently Steam Link also only forwards eye tracking via a non-standard OSC interface. This is what a 3rd project of mine, OpenXR-Eye-Trackers, aimed at fixing. This is a complete nightmare for any game developer to have to deal with this mess and they really don't have to put up with it. It's not Eagle Dyamics you need to ask the feature to: it's Meta, Valve, Pimax, etc. instead. They are the ones who need to build support for XR_VARJO_quad_views and XR_VARJO_foveated_rendering into their platforms. Summary - Eagle Dynamics, please resolve issue 1) and 2) described above in order to offer an implementation of dynamic foveated rendering that can work out-of-the-box on platforms like Varjo and Somnium. Resolving these two issues is a very small matter than could be achieved with little effort. - Meta, Valve and other major platform vendors, please provide support for quad views configuration type out-of-the-box in your PC runtimes. Only by having major vendors with mass volume of users supporting the technology out-of-the-box we will encourage developers like Eagle Dynamics and others to provide support for this great technology that really benefits the end users. Until all vendors align with providing quad views support in their OpenXR runtimes, I am afraid my Quad-Views-Foveated mod is going to remain the only way to do dynamic foveated rendering in DCS for Quest Pro, Reverb G2 Omnicept and Pimax Crystal users, and this is not a problem Eagle Dynamics can fix.5 points
-
I think I may have found it. It might be another bomb rack that carries practice bombs
 4 points
 -
Since I have been vocal in criticizing the DCS MiG-21bis FM, I want to add my $0.02 on this topic: $0.01 -> The player controlled -21 FM in DCS turns better than it should under some conditions, but it is not super OP like the AI -21 FM. Even compared to the somewhat unrealistic DCS -21, a realistic F-4E will have have a comfortable sustained turn-rate advantage and good enough handling to capitalize on that. Meanwhile the DCS -21 will perform better at low speed. Not realistic, but from a game design perspective this should actually be pretty balanced in multiplayer. $0.02 -> I want to fly a realistic F-4E. I want to fly a realistic MiG-21bis. For better or worse, this is the only game where either of those things might happen within the next few years. At the moment it looks like the realistic F-4E is happening first. I will take what I can get.4 points
-
An F-111 would be so amazing!4 points
-
One of the key aspects of the AH-64D's FCR system when it was conceived was to be less reliant on other helicopter types to perform its mission in destroying large numbers of tanks and armor. But as @NeedzWD40 mentioned, the advantage of the AH-64D is its ability to work in large groups as a singular fighting force. Now, this is not a "this aircraft" versus "that aircraft type" sort of rivalry, but rather a different type of fighting style. In the 80's and 90's when the original concept of the AAWWS was being conceived, there were a variety of different unit types doing different missions with different aircraft. You had AH-64's as both attack battalions and as cavalry squadrons, with some differences in doctrine for each. Conversely, you also had OH-58's in both cavalry squadrons and light attack battalions. Again, different mission sets and doctrine. If you had a company of mechanized armor in one valley and an entire regiment of armor in the other, you would obviously send the light attack unit to take on the armor company while the heavy attack battalion takes on the regiment of armor. If you weren't sure where the enemy was, you could either use a cavalry squadron of AH-64's or one of OH-58D's, or even a combination of the two. Depending on how large the enemy force is anticipated to be, how far you are planning to send your helos, or for how long they need to be out there; this would dictate what capabilities, weapons load, and range/station time you would need, which drives which aircraft types would be best suited. The bottom line is, don't get locked into only doing a type of mission based on what the first letter of the helicopter designation may be. Use each aircraft in ways that take advantage of their abilities.3 points
-
Hey Guys. Thanks all for the compliments. I'm recovering well but I'm not there yet. After that Surgery, things will never be the same again. Todays Topic. Missiles and more Missiles. - Let's talk about Missile Speeds because this seems to always be a burning issue. So the SeaCeptor has a speed of Mach 3 which is 3,588 kph. Everything in DCS is configured in Kph and meters. I'm not an expert in missile speeds so I try to configure the speeds based on information I obtain on the web. The question is what is the correct speed that the SeaCeptor missile should be launched and travel at? If one of you knows the correct speed let me know and I will try to calibrate it. Also, all players must agree to that speed which I don't see happening because all of you have a different opinion about missile speeds. With that said whoever configures the missile speed correctly will become my new DCS AI Ship Mod Missile Speed configuration manager. Highmaintenance to answer your question. There is a way to configure the missile speed. First, adjust Line number 25 In the Richmond_SeaCeptor.Lua File. That is the average missile speed. Lower the average speed to what you think it should be. Second, Adjust line 93 under Thrust, t-march. This is the missile launch speed. Reduce the 63,000 down to what you think it should be launched at. Be careful with that line because it makes the missile go crazy after launch if you reduce it too much. - So the question about why the missile explodes after launch. I honestly don't know. To me, it seems like the missile loses track of the incoming missile and just decide to explode en route. Either way that is controlled by the DCS Game Engine. I honestly don't know how to correct it. I'm sure there is a way but I don't know how honestly. Remember all we do is configure the weapons and the DCS Game Engine does the rest. Once that missile is launched we have no control of it. For all please place your Missile Speed results here and we can all go from there. Thanks3 points
-
Indeed it was. The air defence role trained with it quite a bit, it would have been a pain downloading the pod, then uploading again and having to re-align the gun. Dispersion could vary greatly if the pod had the slightest hint of “shimmy”. The mud movers also could use gun, but where the A2A used LCOSS, the ground role would use a set depression for range, and the combination of dive angle and target altitude would dictate your initial pitch in alt, giving you a few seconds to get your sight picture and at the relevant time - make the pod a few rounds lighter (hopefully showering your desired aim point with sufficient lead). For a good approximation, if you own the F-5 module, the way the HUD symbology is utilised in the A2A role - both Sidewinder and gun, is very close to the F-4.3 points
-
Hi, as already mentioned by Raptor it is not correct for the US Army AH-64D3 points
-
"Lined up right, fair two wire"? NO way that was a fair. Absolutely an OK TWO! seabat3 points
-
A reminder for all, keep politics out of this thread and our forum. thank you3 points
-
A few thoughts: - VR will always require more horsepower than a monitor, simply because it’s handling more pixels - Remember when that new Civ sim arrived in 2020 and everyone went nuts about its graphics? That’s simply competition. ED cannot stand still with an aging platform and just hope for the best. Want an example, look at Falcon 4. That even has VR support now, but it still looks pap. Do you really think that it sells in big numbers, and that has an unbelievable level of community support. - my belief is that DCS looks better than that Civ Sim, certainly on my rig, which is very similar to yours. Whenever I go near a city in that Civ Sim, it runs terribly and the buildings look like melted marshmallows - as most of the community (based upon the last poll on here) still use a monitor, and it’s easier to run, ED are clearly pushing what can be done on a monitor, with top end gear, which is as it should be. If they didn’t, you’d have users asking that they did. Translating those same settings into VR is never going to work, because of the additional grunt required In short, you need to learn to compromise on your settings and be thankful for what we currently have. I was out yesterday in the Gulf on a JDAM strike in my F15E in VR. Sun setting in the west, low level clouds, looked utterly amazing.3 points
-
the charts exist for the E without CFTs with both -220 engines and -229 engines, and they're right next to the charts with CFTs, but we are straying a little bit. I would agree with the general notion that the two-seat Eagles handle differently but it's not a completely different jet either. I mean the flight model changes every time you fire a missile or drop a bomb this isn't some impossible task3 points
-
By that same logic all the difficulty settings are gatekeeping. I don’t think anybody cares if you want to use the feature, but if a server operator would prefer to disable it so people don’t have a magic button that tells them their exact location anytime they want, I don’t think it’s unreasonable for them to have an option to prevent its use. Just like they already have options to disable external views, f10 map icons, and require the use of the realistic flight models.3 points
-
Thanks I have watched some of the Bunyap Sims stuff in the past and it's very good quality. Not seen this Viggen series though so will add it to my watch later list.3 points
-
Vereinfachter Funk bringt meistens mehr Fluch als Segen. Am besten diese Option wieder abwählen und dich mit den Radios auseinandersetzen.3 points
-
I second this! Bring on the cold war!3 points
-
Honestly, this kind of seems like ED is missing the forest for the trees. Great attention to detail, but I’m sure the vast majority would like the important stuff working first. For example, fixing the spawn/cat issues, or adding actual useful features such as automatic stear-into-wind without 3rd party scripts, or bolter support, especially during case iii procedures.3 points
-
Well, Christmas comes early this year! The english translation of ATIS37 is now done, including the flight diagrams. The documents can be downloaded here. The translation should be 99.99% correct, although there were a couple of abbreviations I didn't know even in Swedish, so I left them as is. In some cases I have added the Swedish translation for reference in parenthesis, such as "dual command (DK)", or "Solo (EK)", which should make cross referencing easier. For you Swedish guys, I have also fixed quite a few typos in the Swedish version, so please re-download if needed. So looking forward, what's next? Well, I will take timeout for the rest of the year. However, I'm seriously considering embarking on translating SFI Part 1-2. In fact, they have already been run through the AI translator. But I will consider if it's doable, especially regarding the text inside the images. We'll see what happens in 2024 Anyway, I hope you enjoy the english ATIS37! All the best!2 points
-
For our Phase II, full remodel and textures.2 points
-
Its more like a standing order: "you either win or die" … subtly hinting that a chilean navy vessel will never surrender.2 points
-
Of course they did. Check out the IDF, which had a boatload of gunkills. The USAF just chose to not employ the F-4E as a fighter more. Instead, they'd use the F-4D with the bigger radar. The F-4E was mostly employed for fighter-bomber (read: bomber) sorties.2 points
-
Hi, I dont think you have a full enough picture to say if it is successful or not, yes we have people having issues and we want them to post here on the forum with as much data as possible so we can continue tweaking, but we also have thousands of users having no issues at all. Multithreading from our point of view has been successful, we have measured results and data from performance increases. Your system performance depends a lot on your hardware and settings, like any of us, often there are bottlenecks to contend with and compromises to make to reach the desired frame rate / performance. DCS will always push the performance of any machine, as performance improves new features can be added and the tug of war between visuals and performance continue. Once we have multithreading tweaked some more we can looked towards Vulkan implementation, and again we will be looking for feedback and data, we will all be changing our settings and tweaking to find the best results. Best thing to do is post a thread with track replay examples and your dcs log and dxdiag so we can take a look. thanks2 points
-
??? That doesn’t really make sense. The move to multi core will have been a massive undertaking and stands DCS in a much better place long term It’s worth remembering that the Civ Sim 2024 is primarily to allow introduction of multi core, for which they give you the pleasure of paying for it.2 points
-
In one of the latest updates there where a new trigger where you can change the lightning of a supercarrier. The trigger is called "SET CARRIER LIGHTNING MODE"2 points
-
Hi, quick update on the pending updates. I was not able to make the planes reliably stop before the flight deck ends. If there's any setting that can be altered to achieve this, let me know. On the model side three changes were implemented: On the CVA-31 the white landing lights are now aligned with the center stripe on the landing deck On the CVA-31 the yellow landing lights at the tail have been re-aligned On the Maddox the mast has been swapped with a more 1964 looking one, the search radar is not authentic though Some screens: Landing sometimes works on Bon Homme Richard, but not always: New light arrangement at the tail: New mast by Erwin23p for the Maddox: Note that the search radar has been hi-jacked from CVA-31 and is not the correct type for the DD.
2 points
-
I hope you're referring to that French one2 points
-
You need to use rudder to counteract the forces from the tail rotor. When you lock the tail wheel again, it won't actually lock until you roll forwards with it straight ahead. Try unlocking the tail wheel before you pull any collective, counter that and slowly increase collective to see how much rudder you need.2 points
-
Guys, it's not cheating it's just making it easier for players just starting up to not have to do all the math and finding monuments and all that, it simply just takes off the load. if you don't agree with this then don't use it.2 points
-
I don't think there is any truth in that at all. If you have your settings right, you can have great looking flights in older modules on any of the maps. Play with the lighting and the weather and, for example, you can have great eye candy on the Caucasus map with the F-5.2 points
-
They are, but these things can be very sensative. Airfoil profile, relative to the rest of the shape of the plane is extremely minor, yet can be the difference between being able to exceed Mach 1 or not, or the ability to fly at 10 alpha or not. The canopy shape difference can't be dismissed purely visually.2 points
-
Just to update this old report, we do not have "physical" waves just yet, and until that is done this will not work. So for the time being this will be the way they look.2 points
-
@Terry Dactil Your voice attack profile is very nice addition. Thank you! It may be just a typo. On my pc the folder is 'Saved Games\DCS.openbeta\Scripts'2 points
-
I love the UH-1. Had some awesome fun in it. DCS's future is looking bright for the UH-1 too from what I can gather in MP. With the C130 & Chinook on the way, I have high hopes that there are going to be a wider variety of tasks on various multiplayer servers that will further enhance the experience, plus the opportunity for more flying in the UH-1 as well. Like Ricktoberfest - I sometimes after work just spin up DCS just for a 10 min flight in the UH-1. I've found it a pleasant way to unwind the day. There's few other aircraft that give me such satisfaction for such short flights. Of course, that is in VR - which is so immersive in the UH-12 points
-
Captain, I'm ready for adventure! I don't have much time to do it now. Therefore, if I manage to add a brick to the game that will make fire and drive, I will be happy. I will make something good out of it in the future) @TeTeT shared a great article from which I can learn a lot, that's exactly what I was asking for. I didn't work much with the blender, but I think I can make a brick) If there are any questions, I will definitely contact you! Thank you for your support!2 points
-
Uncle Sam's gonna give you four Sparrows and a backseater. The MiG's got a radar with booze-coolant which the crew chief's probably peed out two weeks ago. Plus you can always part the MiG-pilot's hair with your tailhook. Be creative and don't let ole Col. Robin down.2 points
-
Вот я и спрашивал, где можно узнать об этих изменениях на отечественном великом и могучем.2 points
-
It's a DCS bug, a fix should be in the next open beta update.2 points
-
"Бомбят" "бомбилы", а мы - нагибаем (говорить шепотом и томно)2 points
-
The problem with the old system was that no-one was on the same song sheet to begin with, so forcing the spotting off wouldn't actually achieve that goal — it would just lead to a different kind of “I don't know what the other guy sees” than if you let the clients choose. To an extent, you'd probably want the exact opposite: the ability to force it on so you can at least be a bit more certain of the outcome.2 points
-
See the problem with stements like this one is - it only holds true when you think about maximum settings. What exactly do you expect from ED (or any other game developer for that matter). To stall developement and freeze the game on a 2010 level to keep hardware demands at bay? Personally I expect ED to raise the bar in visual fidelity (and any other metric, but this on is the most hardware demanding) every year. When my hardware can't keep up, I have to skip the newest eye candy or reduce settings otherwise. But I can still play it just fine. But I would never expect them to stall developement until I can keep up with my hardware. That would be foolish. Edit: For the longest time I couldn't play new games like the Witcher 3 for example on release, because I wanted to play them on high(ish) settings. So I only started playing it a couple years after release when I was ready. Same for other demanding titles. But it was a me-problem. It never came to my mind to expect them to downgrade their game to meet my needs (and btw. there had been an option right from the start - I simply could have played it on a lower res with medium settings. I just didn't want to. MY choice).2 points

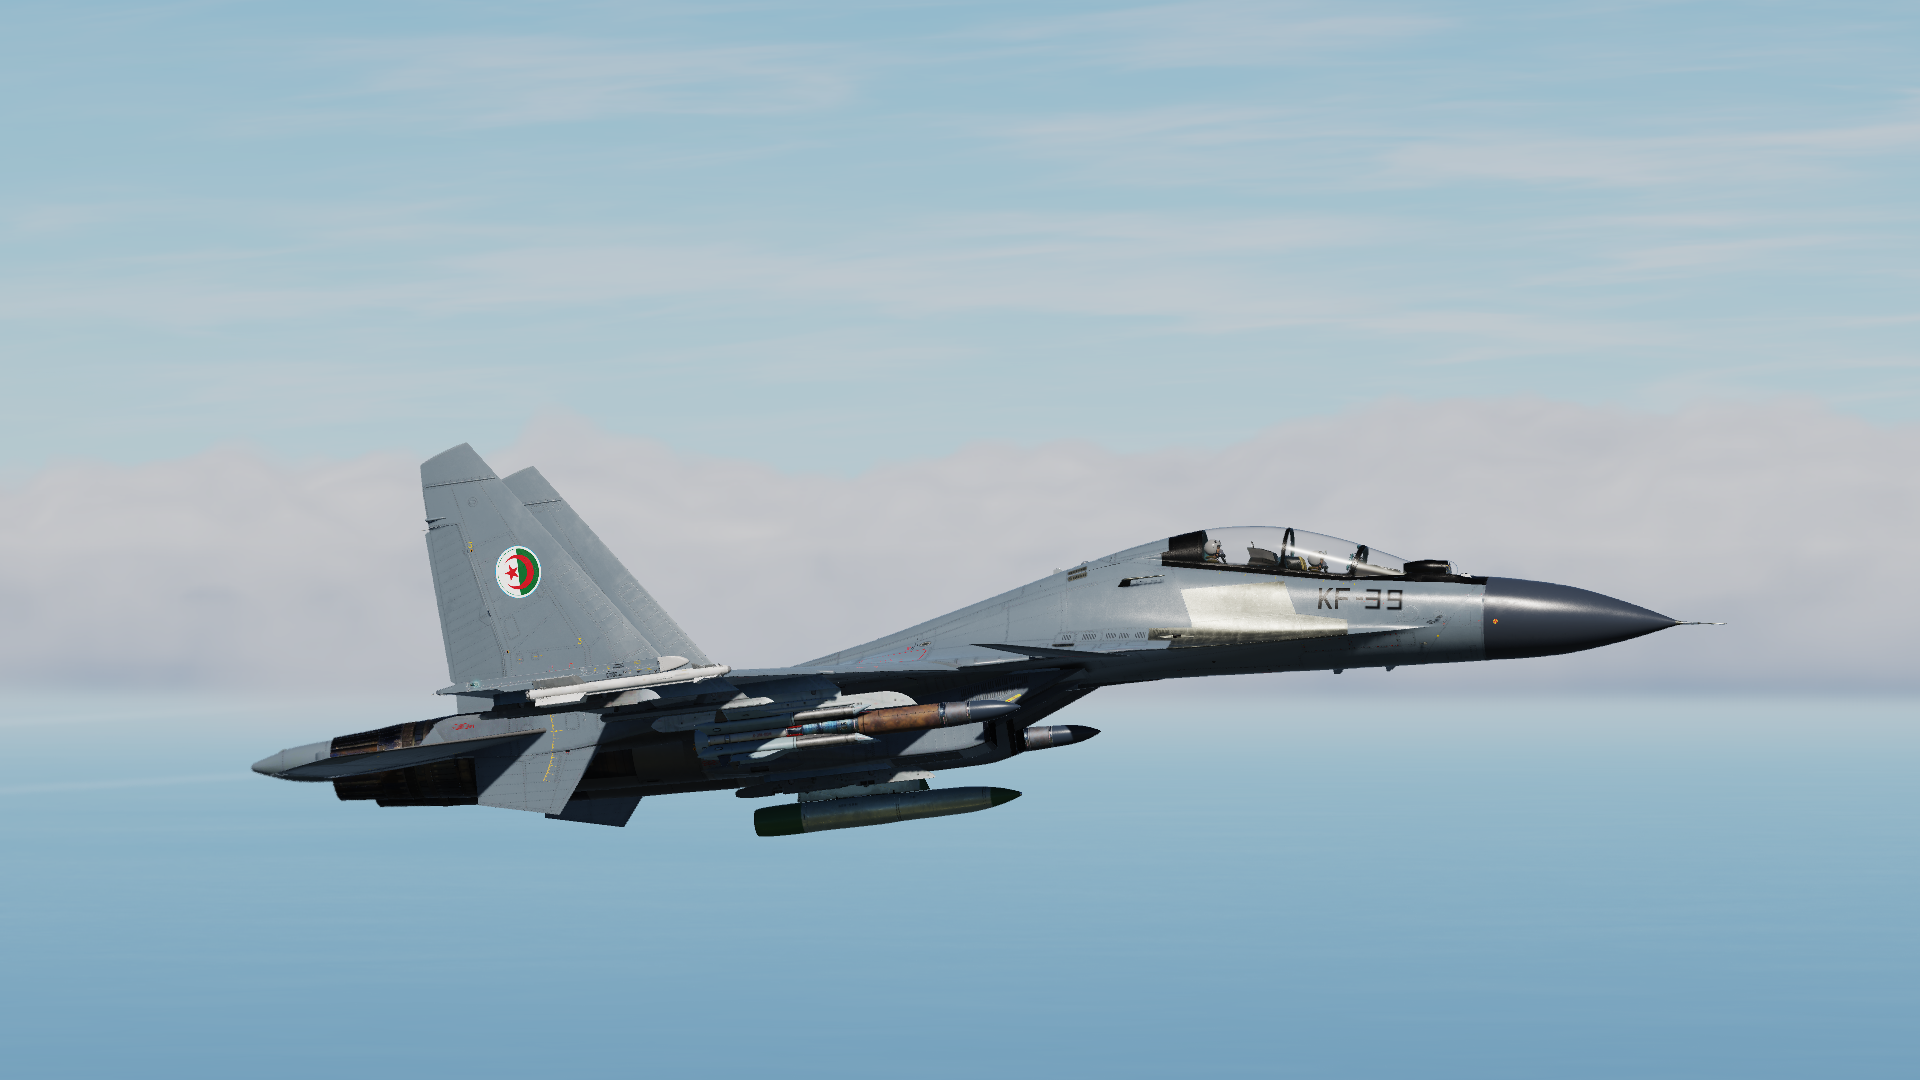


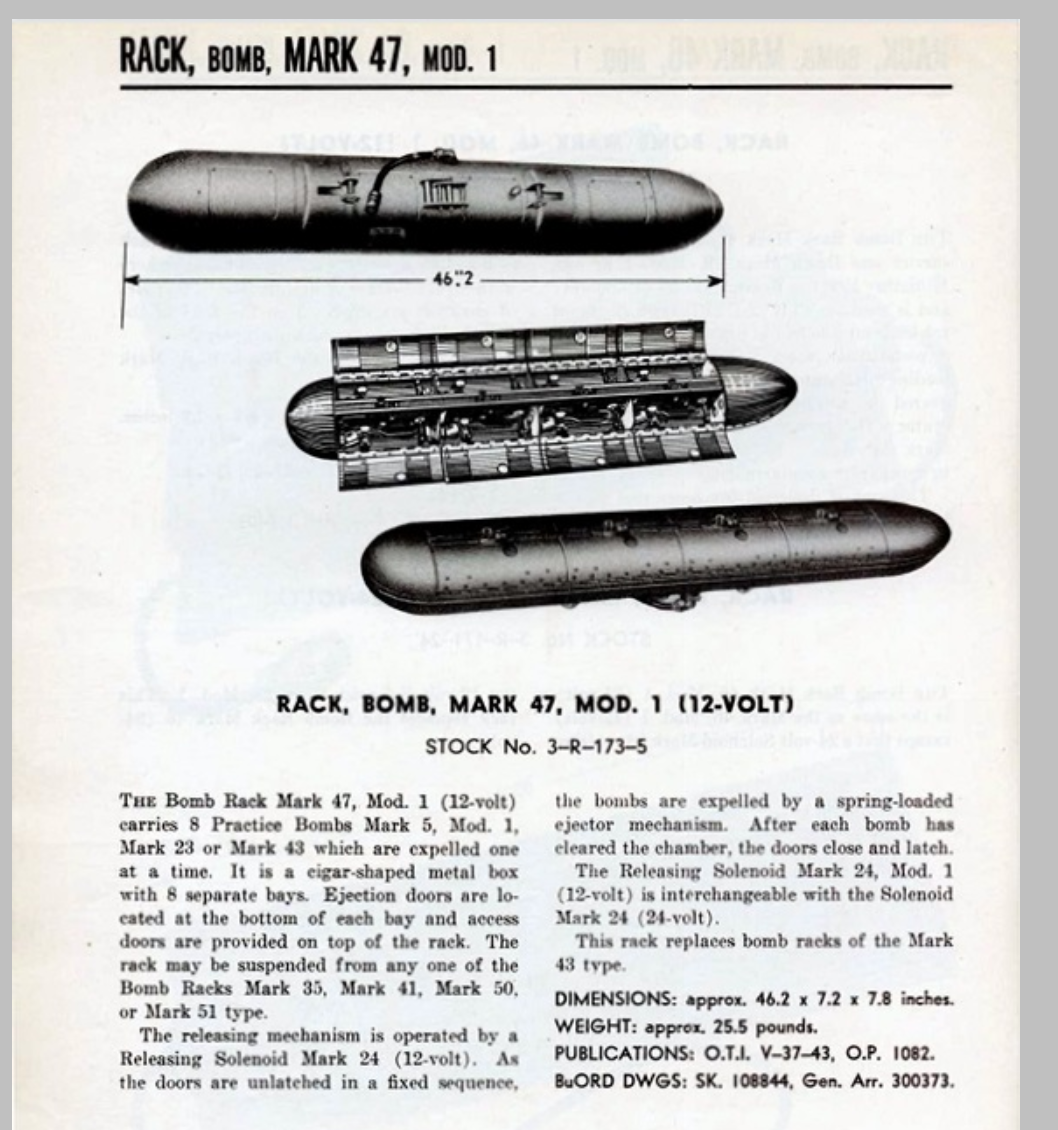
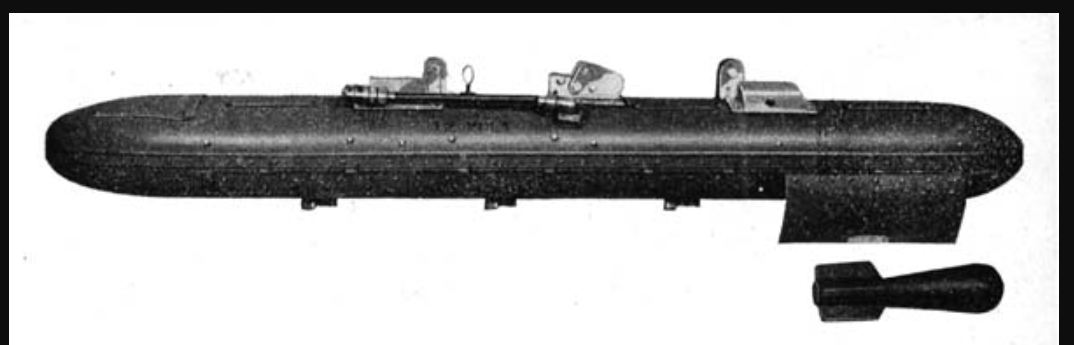

.thumb.jpeg.ff29d7e0524dee222d06c4b0e09841cf.jpeg)

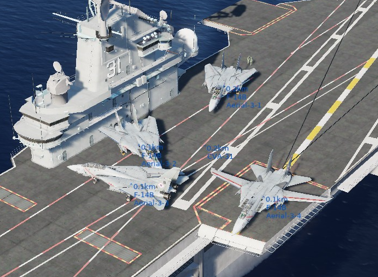
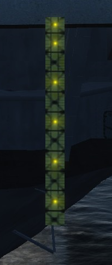
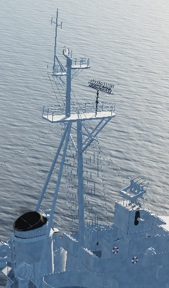
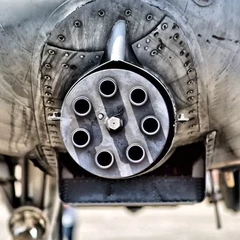


-
Recently Browsing 0 members
- No registered users viewing this page.