Leaderboard
Popular Content
Showing content with the highest reputation on 12/07/23 in all areas
-
FlyingIron A-7E Corsair II11 points
-
Further to screenshot posted above, from Heatblur twitter - TARPS (Tactical Airborne Reconaissance Pod System) is coming, though will initially just be cosmetic, but later will have some gameplayer functionality. Cobra also confirmed on Discord that the AN/ALQ-167 "Bullwinkle" DECM pod and the Expanded Chaff Adapter is also coming:8 points
-
Hey Djiuce, I do collab with CH. He is the reason I am declaring missiles for the warships and if he created a warship with similar missiles. I would compare missile configurations to ensure they aligned as I did with the SeaCeptor but the Richmond SeaCeptor missile has greater range. I hope that answered your question. Hey Mizuri, I only tested the UH-1 and the AH-64. You can adjust the height of other aircraft using these settings. Line # 60 "GT.Landing_Point = {-77.72, 13.208, -0.0}." To explain the settings. -77.72 is forward and aft. The center setting is for the height of the aircraft. So try adjusting from 13.208 to 13.400 and so forth until you reach a height you're satisfied with. Let me know if you need assistance. Sorry, I can't stop the helicopter from moving. Honestly not sure why it does that. Thanks for the short videos. Thanks, Enoy. I appreciate you making the effort to get involved but as Toan mentioned. The Type 26 and the Type 23 SeaCeptor missile ranges are different but the configuration is the same. Thanks, Toan for chiming in and explaining the missile settings. I appreciate that. Thank you all for getting involved. For every problem, there is always a solution. We're all here to learn.6 points
-
Hi. CCIP is calculated using DCS API. CCRP is calculated using the CCIP calculation and then taking into account the "impact distance" from target. At the beginning i was doing the CCIP calculations by my own and realized that DCS does not take into account draw or it was negligible in their calculation. Because when I used drag, the bombs always fell longer. avSimplest.dll was developed based on DCS API without the SDK, using headers that I've put together from the exported functions and methods from DCS dll files. Now the headers are so big that they work like a SDK, but with no ED support. It is why after each DCS update i need to check what have changed and modify on my headers. It is not impossible to make camera and laser designation work without the SDK. It is just hard. Took me about 7 months of very intense work to do it. Several guys asked me how I did it and I showed them on a Discord call. No secrets. I can show you. It only requires C++, VS Windows programming, assembly experience and patience. In four months I was able to create my own custom avDevice in C++ and in seven got FLIR and Laser to work. I was willing to release the source code but a bunch of jealous guys (which came from community developers to 3rd parties) created a narrative that it was against ED terms. At some point some ED guys said that as long as all the code was made by me (and it was) there wasn't a problem, but they would check it out. Since I never got a straight answer it is closed source by now. What i usually do is to "license" the dll to work in free open source public mods, when asked. I put that lock because I saw that some people were using my dlls to make profit in private mods.6 points
-
Official Changelog for the December 2023 OB release: DCS: F-15E Suite 4+ by RAZBAM Simulations. Version 1.8.1.219 Added: AGM-154A JSOW Added: Smart Weapons MC Synch Added: Full featured IFF transponder Added: Radar IFF Interrogator Modes 1/2/3/4 Added: Radar IFF AUTO ID Added: Radar IFF AAI slave mode Added: IFF Latched status displayed with cursor highlight Added: IFF Interrogation possible in RBM Added: Can stop AAI/EID with another long press Added: IFF Mode 2 code configurable in Mission Editor Added: TWS > STT retains IFF and NCTR tags Added: Other seat scratchpad display Added: Dumb bomb & CBU lofting Added: A/G RDR Cursor BullsEye coordinates Updated: All bombs have now a 30ms minimum release interval Updated: A/G RDR quickstep relatches to PB17 first Updated: BE points now allowed in A/G RDR PB17 Improved: NCTR behavior Improved: Radar IFF correlation mechanism Improved: BOT aiming significantly more accurate Improved: Low drag bombs accuracy Improved: CBU accuracy Improved: Bomb calculator wind compensation Improved: Station position accounted for in CDIP/AUTO Improved: RBM gain logic Fixed: GBU-31V3 x 2 load not showing in CFTs when selected Fixed: CBU height/time release modes not being applied Fixed: ASL issues Fixed: RCD saving all mimpap sizes Fixed: Frozen HRM patch images being lost when taking control Fixed: Jumping cursor coords & symbols in RB Fixed: A/G RDR behavior of cursor latched to an offscreen SP Fixed: UFC Wind direction TO instead of FROM Fixed: HUD laser cue not synchronised Fixed: JDAM Terminal Angle is reversed Fixed: JDAM laser code not used Fixed: TGP ALAS mode fires the laser when it is not armed6 points
-
On another note. The USS Blue Ridge FPS issue has been corrected. You can find updated version 1.0.1 at Admiral189 DCS World Mods along with changes I made to the mod. Also, the Massun 92 Asset pack Rudel_chw shared has a light mod that works great if you need more lighting on the ship flight deck. It's located under static objects/structures. Place it near the Flight deck of the ship and link it to that ship. One thing I forgot to mention. Thank you all who have bought me coffee lately. It shows me you appreciate my efforts. I really really appreciate it.6 points
-
For those of you who didn't see it, @Neo47 uploaded some wonderful liveries for @Eight Ball's Seaking mod. Looks more than promising - I'm already thinking of some missions I might build with those https://www.digitalcombatsimulator.com/en/files/3334623/ https://www.digitalcombatsimulator.com/en/files/3334622/5 points
-
Sidekick65 has created a video on the carrier, enjoy:5 points
-
I think this is true for the Hornet and the Viper, but not the Eagle. The Eagle was probably 75% of the maintenance problem that the F-14A was (somewhat fewer hydraulic problems and many fewer electronics problems) - while the Air Force doesn't publish maintenance hours per flight hour numbers like the Navy and USMC do, it does publish costs per flight hour, and the Eagle is more expensive than other 4th gen jets by a mile; the exact numbers differ from annual report to annual report, but it's generally about 2x what the F-16 costs to run (circa $40k vs $20k/hour in recent years, with fuel costs making up only a small fraction of that difference). Even the projected target cost-per-flight-hour of the F-15EX (designed to be more maintainable) is still high compared to everything else 4th-gen that's still in the air, and that's a number coming from the manufacturer's sales & marketing department, not an observed figure. It's interesting to look at how the Air Force treated the F-15 versus how the Navy treated the F-14 in terms of upgrades over the common service life of both aircraft (roughly 1976-2006). Everybody knows about the boneheaded spares decision in the early 1980s (I had a copy of the appropriations hearing where that decision was made, but I can't find it now), but look at the original Grumman/Navy plan for F-14 development and it's similar to what the Air Force actually did with the F-15. Different program offices, budget priorities, etc. Nb. that there would be no F-15Cs in service in 2023 and no F-15EX if the original Raptor buy hadn't been repeatedly clipped until ending up at a quarter of what was originally intended. Similarly, there'd probably be no SuperHornet if the specific sequence of events in the early 90s hadn't played out about the way they did, with the A-6 upgrades being cancelled because the A-12 was in the works, then the A-12 being cancelled, then the F-117N proposals all being rejected, then the A-6 and S-3 in their entirety and the F-14 Block I Strike program and the AAAM program being killed for budget reasons after Desert Storm, then the F-14D buy being severely clipped because NATF was in the works, then NATF being cancelled, then the joint USMC/RN program to replace the Harrier becoming 'jointer' and then 'jointest' as it metastasized into the JSF program, then the legacy Hornet program executive office needing a few billion for the MLU and CBR programs, then finally SuperHornet winning over QuickStrike and all other "Super Tomcat" variants to be the stopgap until a 5th-gen flight deck was achieved - and there's plenty that I missed. At least we can say that the Superbug was a very good aircraft for the wars we actually ended up fighting during its service life. Further note that, despite both design improvements for enhanced maintainability and an extra two decades of experience maintaining the design, the F/A-18E/F has seen substantially worse availability than the legacy Hornet at the same point in its service life. Want to guess why? My two cents say the culprits are minimal manning, near-constant high op tempo, penny-wise/pound-foolish budget decisions (esp. during sequestration), and having killed their tankers and thus having to do a ton of buddy tanking. It's almost a blessing the Tomcat got spared most of these, and got to end on a high note as the "most capable strike fighter on the flight deck" with, comically, also the best availability and cost-per-flight-hour numbers for its last cruise (there are obviously some asterisks that belong on that figure).4 points
-
Запросто. Отапливаемый и с охраной. Работниками ФСИН.4 points
-
Their loss. After a 6 month multi-player campaign we are finding the AIM-54C mk60 Phoenixes have a Pk of almost 40%. That does not take into account the bugged implementation that occurred in May where the performance was dismal. Note that his will have brought the average down. This compares to 51% for AIM-7s. Our sister Hornet squadron was achieving a 52% Pk with their AIM-120Cs. Is this realistic? We will never know. The only succesful Phoenixes launched in anger were AIM-54As by the Islamic Republic of Iran Air Force and we have no corroborating data of what their Pk was. Several things we have learned: 1. TWS is not great for anti-fighter work. Flying as a section, sorting properly and using STT against fighter targets is much more reliable for keeping the Phoenie-bombs from going to space. It is documented by real RIOS that the AWG-9 was not brilliant for TWS tracking multiple fighter-sized manoeuvring targets over-land. Some of the problems you may be experiencing are the result of the AWG-9 and it's limitations, not the missiles. 2. Successful engagements have been had at 55nm against hot, co- or near-alt bandits from ~30,000ft. However, if the bandit is significantly lower the AIM-54 suffers a lot more from it's draggy form as the missile gets lower, resulting in lower energy at terminal phase. You have to compensate for that by reducing the launch range appropriately. Similarly, if targets are not directly hot but slightly oblique, this has to allowed for by compressing the launch range slightly. 3. Firing between 20 and 30nm is a bit of a black hole for the missile - it's trajectory, to make sure it doesn't loft over the target at this range, does not allow it to get to high enough altitude to benefit from the lower air pressure and reduced drag up there and this results in lower energy at terminal phase. Upshot, is take shots from 60nm down to 30nm. 4. Under 16nm the missile is pretty capable - the long burn time means it still has good E at burnout. Plus when it goes active you have the benefit of going cold. 5. The latest Phoenix versions have reasonable notch resistance - not exemplary, but not awful - with the important aspect that if the target reappears from the notch within the Phoenix seeker's Field of View it WILL reacquire. Compared to the AIM-120 it seems like a reasonable performer considering the older age of the Phoenix. This however relies on your target not maintaining good notch discipline. If your target is an experienced breather operator, well... they'll defeat it. 6. Your AI targets have a vote. If they defend by cranking when the AIM-54 goes active then, given good launching parameters, the AIM-54 hit's more often than not. However, if the AI have the altitude to perform a Split-S defence when they detect the active Phoenix, more often than not they defeat it kinematically. There are questions as to the whether AI's efficacy at detecting and reacting to active missiles is OP but that's an AI problem. 7. DCS netcode is a factor. I have more reliable performance from the AWG-9/AIM-54 offline than I do online. This is to be expected. Packet loss and vagaries in connection cause less reliable track files in TWS (one reason for our decision to push to STT launches) and even in STT we still get some 'airball' AIM-54s. Is there still polishing to do? I suspect so. We're still to see EDs new missile API and what that brings to the AIM-54 so... watch this space. Ultimately, expecting a 1970's radar and missile to perform as well as a 1980's radar with a 1990's missile is... disingenuous. There are challenges to using the Cat and the Phoenix. It ain't an I win button, especially against an opponent who is cogent of it's limitations. But that's where the challenge - and dare I say, the fun - lies. Again, it's not an I win button. And I for one am glad of that.4 points
-
From Baltic Dragon X:4 points
-
I don't use Forrestal because it doesn't have the same immersion as SuperCarrier. I hope it gets integrated into SuperCarrier.4 points
-
The missile is detected by both systems simultaneously, but the systems detect threats in different ways. The RLWR detects the launch of a radar-guided missile by the change in the radar signals from the launching air defense system. The CMWS optically detects the missile itself. But just because the missile is detected by two different systems, that does not mean the weapon itself is being guided via two methods. The CMWS just passively detects the presence of a missile launch; it doesn't know what type of missile it is. The RLWR detects a change in radar signals associated with some types of radar-guided missiles. However, neither of these systems will 100% tell you what sort of weapon system is being fired at you. A MiG-29 locks on to your aircraft and fires a radar-guided R-27R, the RLWR will detect the MiG-29's radar switching to missile guidance mode to guide the R-27R toward your aircraft; and the CMWS will detect the missile itself. A MiG-29 locks on to your aircraft and fires an IR-guided R-27T, the RLWR will detect the MiG-29's radar tracking you but will not indicate the radar switching to a missile guidance mode since the R-27T requires no such guidance; while the CMWS will detect the missile itself. A MiG-29 keeps its radar silent and fires an IR-guided R-73, the RLWR won't detect the MiG-29 at all but the CMWS will detect the missile itself. In each instance, the CMWS sees a missile coming, regardless of what radar signals (if any) the RLWR detects. It isn't so much what each of the two systems are telling you as much was what they are individually not telling you.4 points
-
Что вы за дичь несёте? На самолетах семейства Су30 есть только 2 типа вертикального оперения по высоте: высокие, как у Су30М2/МКК, и низкие как на Су30СМ/МКИ/МКМ/МКА. Если в кратце: у самолетов с ПГО кили короткие, без ПГО - длинные. Так вот в моде киле действительно выше чем нужно.4 points
-
For our Phase II, full remodel and textures.4 points
-
The real question is what you're doing here, the solution to your problem would be to not read this thread. The other people in here seem perfectly happy about their discussion.4 points
-
I could not agree more with rkk01's request for a map of the Solomon Islands. This would be the mission builder's dream map for early to mid Pacific war battles!!3 points
-
И кто же этот разговор в сторону забитых молотком шурупов аки рака за камень заводить то начал? Ай-яй-яй-яй-яй! А кто это сделал?3 points
-
Looks like they've been busy there: TARPS, ladders, stairs...3 points
-
Well, Christmas comes early this year! The english translation of ATIS37 is now done, including the flight diagrams. The documents can be downloaded here. The translation should be 99.99% correct, although there were a couple of abbreviations I didn't know even in Swedish, so I left them as is. In some cases I have added the Swedish translation for reference in parenthesis, such as "dual command (DK)", or "Solo (EK)", which should make cross referencing easier. For you Swedish guys, I have also fixed quite a few typos in the Swedish version, so please re-download if needed. So looking forward, what's next? Well, I will take timeout for the rest of the year. However, I'm seriously considering embarking on translating SFI Part 1-2. In fact, they have already been run through the AI translator. But I will consider if it's doable, especially regarding the text inside the images. We'll see what happens in 2024 Anyway, I hope you enjoy the english ATIS37! All the best!3 points
-
3 points
-
Да потому что у вас из каждого поста лезет "стандарты нато, собрано на коленке из стиралок" и всё в этом духе. Я так то сам работаю на авиазаводе, могу говна накидать так, что в текущих реалиях на пару сроков хватит. Но вот эти "шурупы молотком заколачивают", это уж слишком забористая клюква. А по поводу индусов. Ни одна страна не покупает технику потому что она лучше или хуже. ВСЕ и ВСЕГДА покупают по политической дружбе. Потому что разница между конкурентами не такая уж и большая. А вот как эту технику содержать на перспективе вопрос большой. Т.е. союзник не должен слиться, у самого союзника должно быть всё в порядке, не должно быть косяков с поставками и так далее. Именно по этому одним из ключевых для индусов условий было частичная локализация производства. Если бы им штаты предложили F-35 с приличным процентом локализации, они не долго думали бы.3 points
-
Суть одна и та же. Рабочий использует ручную пневматическую дрель, для зенковки отверстий. И с темы можно было бы слезать и как то более умело. Изначально речь шла о забивание шурупов молотком. Потом оказывается, что точно такой же инструмент используют и LM на своих производствах (да естественно у LM более технологичное производство, можно сравнить бюджеты и понять почему, хотя можно найти фото и видео использование дополненной реальности и на производстве на КнААЗе), Теперь речь зашла о количестве. Ну давайте сравним количество заводов по всем странам выпускающих F-35 и количество заводов выпускающих Су-57. Потом сравним дату первой серийной машины, потом капитализацию завода и так далее. Пока что я не увидел пруфов о забивание шурупов молотками и о штучных изделиях. Одно непонятное фото, ещё не известно с какого производства (возможно это устранение брака вообще). И если уж на то пошло, плазовошаблонный метод придумали ещё в 60ых. Но вам гордон ссыт в уши, что у русских всё штучное, непременно с чипами из стиралок и вообще медведи по улицам ходят.3 points
-
Аа, т.е. использование пневмоинструмента это забивание молотком шурупов. Ой смотрите, надо же. В лучшей стране в мире (хотя не, не лучшей, лучшая ведь имеет самую сильную армию в Европе), нанотехнологичный Джон 3000 использует ТАКОЙ ЖЕ инструмент. Ай яй, ну дела. В обще как обычно, пук среньк, стандарты нато. Ничего нового
 3 points
 -
Would it be possible to integrate QVFR into DCS? Mbucchia's development of this tool has made a massive improvement in VR performance for me (and many others judging by the forum discussions). Now support has been discontinued is this an opportunity to bring this directly into DCS?2 points
-
We shall first present Siege of Malta - World War II I am still working on the Island collision From the WIKI Service personnel and civilians clear bombing debris from Kingsway in Valletta in 1942 Date 11 June 1940 – 20 November 1942 (2 years, 5 months, 1 week and 2 days)[1] Location Malta Result Allied victory Belligerents United Kingdom Malta Southern Rhodesia Canada South Africa Australia New Zealand Naval support: Free France Greece Poland Norway United States Italy Germany Commanders and leaders United Kingdom Andrew Cunningham United Kingdom William Dobbie United Kingdom Hugh Lloyd United Kingdom Keith Park Nazi Germany Hans Geisler Nazi Germany Albert Kesselring Nazi Germany Martin Harlinghausen Fascist Italy (1922–1943) Francesco Pricolo Strength 716 fighter aircraft over the course of the campaign[2] c. 2,000 aircraft over the course of the campaign Casualties and losses 369 fighters (air) 64 fighters (ground)[2] 1 battleship[3] 2 aircraft carriers[3] 4 cruisers[4] 19 destroyers[4] 38 submarines[3] 2,301 airmen killed or wounded[5] 30,000 buildings destroyed or damaged[6] 1,300 civilians killed[6] 357 German aircraft 175 Italian aircraft[2] 72 percent of the Italian Navy transport fleet lost 23 percent of the Axis merchant fleet lost[7] 2,304 merchant ships sunk[8] 17,240 killed at sea[9] ~50 German U-boats (in entire MTO)[3] Italian submarine losses ~16[3] Campaigns of World War II Mediterranean and Middle East Theatre Battle of the Mediterranean The siege of Malta in World War II was a military campaign in the Mediterranean theatre. From June 1940 to November 1942, the fight for the control of the strategically important island of the British Crown Colony of Malta pitted the air and naval forces of Fascist Italy and Nazi Germany against the Royal Air Force (RAF) and the Royal Navy. The opening of a new front in North Africa in June 1940 increased Malta's already considerable value. British air and sea forces based on the island could attack Axis ships transporting vital supplies and reinforcements from Europe; Churchill called the island an "unsinkable aircraft carrier".[10] General Erwin Rommel, de facto field command of Axis forces in North Africa, recognised its importance quickly. In May 1941, he warned that "Without Malta the Axis will end by losing control of North Africa".[1] The Axis resolved to bomb or starve Malta into submission, to soften it up for invasion, by attacking its ports, towns, cities, and Allied shipping supplying the island. Malta was one of the most intensively bombed areas during the war. The Luftwaffe (German Air Force) and the Regia Aeronautica (Italian Royal Air Force) flew a total of 3,000 bombing raids, dropping 6,700 tons of bombs on the Grand Harbour area alone,[11] over a period of two years.[12] Success would have made possible a combined German–Italian amphibious landing (Operation Herkules) supported by German airborne forces (Fallschirmjäger), but this did not happen. Allied convoys were able to supply and reinforce Malta, while the RAF defended its airspace, though at great cost in materiel and lives. In November 1942 the Axis lost the Second Battle of El Alamein, and the Allies landed forces in Vichy French Morocco and Algeria under Operation Torch. The Axis diverted their forces to the Battle of Tunisia, and attacks on Malta were rapidly reduced, effectively ending the siege.[1] In December 1942, air and sea forces operating from Malta went over to the offensive. By May 1943, they had sunk 230 Axis ships in 164 days, the highest Allied sinking rate of the war.[13] The Allied victory in Malta played a major role in the eventual Allied success in North Africa. Background Map of Malta Malta was a military and naval fortress, being the only Allied base between Gibraltar and Alexandria, Egypt. In peacetime it was a way station along the British trade route to Egypt and the Suez Canal to India and the Far East. When the route was closed Malta remained a forward base for offensive action against Axis shipping and land targets in the central Mediterranean. Owing to its exposed position close to Italy, the British had moved the headquarters of the Royal Navy Mediterranean Fleet from Valletta, Malta in the mid-1930s to Alexandria in October 1939.[14] Malta is 27 km × 14 km (17 mi × 9 mi) with an area of just under 250 km2 (97 sq mi).[15] It had a population of around 250,000 in June 1940, all but 3% or 4% of them native Maltese.[16] According to the 1937 census, most of the inhabitants lived within 6.4 kilometres (4 mi) of Grand Harbour, where the population density was more than six times that of the island average. Amongst the most congested spots was Valletta, the capital and political, military and commercial centre, where 23,000 people lived in an area of around 0.65 km2 (0.25 sq mi). Across Grand Harbour, in the Three Cities, where the Malta Dockyard and the Admiralty headquarters were located, 28,000 people were packed into 1.3 km2 (0.50 sq mi). It was these small areas that suffered the heaviest, most sustained and concentrated aerial bombing in history.[17] There were hardly any defences on Malta because of a pre-war conclusion that the island was indefensible. The Italian and British surface fleets were evenly matched in the region but the Italians had far more submarines and aircraft. The Admiralty had to protect the Suez Canal with the Mediterranean Fleet (Admiral Andrew Cunningham) and Gibraltar with Force H (Vice-Admiral James Somerville).[18] In October 1939, the Mediterranean Fleet was transferred eastwards to Egypt, stripping the island of its naval protection. Only the monitor HMS Terror and a few British submarines were still based at the island. When the Maltese government questioned British reasoning, they were told that the island could be defended just as adequately from Alexandria as from Grand Harbour, which was untrue. This led the Maltese to doubt the British commitment to defend the island.[19] The armed trawler HMS Coral within a bomb-damaged Dry Dock No 3 during World War II[20] Despite concerns that the island, far from Britain and close to Italy, could not be defended, the British decided in July 1939 to increase the number of anti-aircraft guns and fighter aircraft on Malta.[21] The British leadership had further doubts about whether to hold the island in May 1940, when during the Battle of France the French Prime Minister Paul Reynaud suggested that the Italian prime minister and dictator Benito Mussolini might be appeased by concessions, including Malta. After some discussion, Winston Churchill convinced the British War Cabinet that no concessions should be made.[22] With the British home islands in danger, the defence of Malta was not the priority and it was lightly protected. Only six obsolete Gloster Sea Gladiator biplanes were stationed on the island, with another six in crates when, on 10 June 1940, Mussolini declared war on the United Kingdom and France.[18] In the 1930s, Italy had sought to expand in the Mediterranean and Africa, regions dominated by the British and French. The Allied defeat in France from May–June 1940 removed the French Navy from the Allied order of battle and tilted the balance of naval and air power in Italy's favour.[23][24] Upon declaring war, Mussolini called for an offensive throughout the Mediterranean and within hours, the first bombs were dropped on Malta. After the French surrender on 25 June, Mussolini tried to exploit the situation, conducting Operazione E, the Italian invasion of Egypt, in September. The 10th Army was crushed in Operation Compass, a British counter-stroke, and Adolf Hitler decided to come to the aid of his ally. In February 1941, the Deutsches Afrikakorps (DAK, German Africa Corps under General Erwin Rommel) was sent to North Africa as a blocking detachment (Sperrverband).[25] RAF and Royal Navy anti-shipping squadrons and submarines on Malta threatened the Axis supply line to North Africa and both sides recognised the importance of Malta in controlling the central Mediterranean.[18] In 1940, an Italian assault on Malta stood a reasonable chance of gaining control of the island, an action giving the Italians naval and air supremacy in the central Mediterranean.[26] The Mediterranean would have been split in two, separating the British bases at Gibraltar and Alexandria. The reluctance of the Italians to act directly against Malta throughout 1940 was strengthened by the Battle of Taranto, in which much of the Italian surface fleet was put out of action by Royal Navy Fleet Air Arm (FAA) torpedo bombers.[18] The Italians adopted an indirect approach and cut off the island. To the Italians (and later the Germans), air power was the key weapon against Malta.[18] Italian siege (June–December 1940) An Italian Savoia-Marchetti S.M.79 bomber Italian air actions Air power was the method chosen to attack Malta. The Regia Aeronautica (Italian Air Force) began the aerial bombardment of the island from airbases in Sicily. On the first day, 55 Italian bombers and 21 fighters flew over Malta and dropped 142 bombs on the three airfields at Luqa, Hal Far and Ta Qali.[27] Later, 10 Italian Savoia-Marchetti SM.79s and 20 Macchi C.200s flew over the island, with no air opposition. At the time of these first air raids, the defending fighters on Malta consisted of obsolete Gloster Sea Gladiators, in the Hal Far Fighter Flight. Ten Gladiators in crates for transit were assembled and as no more than three aircraft flew at once, were called 'Faith', 'Hope' and 'Charity'. The pilots were flying boat aircrew and other fliers with no experience of fighter operations. One Gladiator was shot down but the rest managed to shoot down several Italian aircraft.[28][29] The Italians flew at around 6,100 metres (20,000 ft) and the monitor Terror and gunboats HMS Aphis and Ladybird opened fire. In the afternoon, another 38 bombers escorted by 12 fighters raided the capital. The raids were designed to affect the morale of the population rather than inflict damage to dockyards and installations. A total of eight raids were flown on that first day. The bombing did not cause much damage and most of the casualties suffered were civilian. No interception of the raiders was made because there was no RAF force ready to meet them.[30] No RAF airfield on Malta was operational at that time; one, at Luqa, was near to completion.[5] Italian bombing of the Grand Harbor Despite the absence of any operational airfields, at least one RAF Gladiator flew against a raid of 55 Savoia Marchetti SM 79 and their 20 escorting fighters on 11 June. It surprised the Italians, but the defences, almost non-existent on the ground and in the air, failed to impede the Italian force.[31] On 12 June an Italian aircraft on a reconnaissance flight over Malta was shot down.[32] Twelve Fairey Swordfish torpedo bombers escaped from southern France following the French capitulation and flew to the French colony of Tunisia. They then flew on arriving at the FAA base at Hal Far, 767 (Training) NAS, on 19 June. They formed the nucleus of what was to become 830 Naval Air Squadron, providing Malta with its first offensive strike aircraft. Before June was out, they raided Sicily and sank one Italian destroyer, damaged a cruiser and destroyed oil storage tanks in the port of Augusta.[31] By the start of July, the Gladiators had been reinforced by Hawker Hurricanes and the defences organised into No. 261 Squadron RAF in August. Twelve aircraft were delivered by HMS Argus in August, the first of several batches ferried to the island by the carrier. A further attempt to fly 12 Hurricanes into Malta on 17 November, led by a FAA Blackburn Skua, (Operation White) ended in disaster with the loss of eight Hurricanes; they took off too far west of the island due to the presence of the Italian fleet and ran out of fuel, and several pilots were lost.[33] A further two Hurricanes crashed, with one of the pilots rescued by a Short Sunderland flying boat.[34] The arrival of more fighters was welcome. After eight weeks, the original force of Hurricane units was grounded owing to a lack of spare parts.[35] By the year's end, the RAF claimed 45 Italian aircraft had been shot down. The Italians admitted the loss of 23 bombers and 12 fighters, with a further 187 bombers and seven fighters having suffered damage, mainly to anti-aircraft artillery.[33] Invasion plan DG10/42 In 1938 Mussolini had considered an invasion of Malta under Plan DG10/42, in which a force of 40,000 men would capture the island. Nearly all 80 purpose-built sea craft that would land the Italian Army ashore were expected to be lost but landings would be made in the north, with an attack upon the Victoria Lines, across the centre of the island. A secondary landing would be made on Gozo, north-west of Malta and the islet of Comino, between the two. All of the Italian navy and 500 aircraft would be involved, but the lack of supplies led the planners to believe that the operation could not be carried out. With the German success in the Battle of France from May–June 1940, the plan was reduced to 20,000 men with the addition of tanks. The Allied defeat in France gave the Italians an opportunity to seize Malta but Italian intelligence overestimated the Maltese defences and Mussolini thought that an invasion would be unnecessary once Britain made peace. Mussolini also expected Francoist Spain to join the Axis and capture Gibraltar, which would close the Mediterranean to the British from the west.[36] War at sea Italian battleship Giulio Cesare firing during the Battle of Calabria, on 9 July 1940 The reluctance of the Italian Admiralty to act was also due to other considerations. The Italians believed they could keep the Royal Navy's fleet of ageing battleships bottled up in Alexandria.[citation needed] Another factor was the lack of crude oil (the Italians did not discover the large reserves in Libya during their occupation of the country). The Germans took most of the oil from Romania and left few resources for Italy to pursue large-scale operations in the Mediterranean. Not only did this preclude any large-scale naval operations, it also left the Italians without adequate fuel for combat training at sea. By the start of 1941, a limited petroleum stockpile meant only seven months of fuel could be guaranteed.[37] On the other hand, British confidence was eroded when aircraft began to dominate the actions at sea later on in 1941 and 1942, as the Royal Navy had long been expected to be the principal defender of the island.[38] Cunningham brought to light the reluctance of the Italian Navy to engage by probing their defences. On 9 July 1940, the Battle of Calabria was the only time the main Italian and British (with supporting Royal Australian Navy vessels) fleets engaged each other. Both sides claimed victory, but in fact the battle was inconclusive, and everyone returned to their bases as soon as possible. It confirmed to the Maltese people that the British still controlled the seas, if not from the Grand Harbour.[39] This was confirmed again in March 1941, when the Royal Navy decisively defeated the Italian Navy in the Battle of Cape Matapan. The Italians had been heading to intercept the British convoys transporting reinforcements to aid Greece in the Greco-Italian War.[40] British counter-attacks British U-class submarine When it became clear to the British that the Italian air forces were limited and having little impact on the population, which could endure, a steady stream of reinforcements arrived. The potential of the base was realised and Whitehall ordered further aircraft into the island; including Hurricane fighters, Martin Marylands, Sunderlands, Vickers Wellingtons, more Swordfish and submarines. It provided an increasingly potent offensive arm.[41] The Wellingtons arrived in October 1940, from No. 148 Squadron RAF.[42][33] Meanwhile, the Italian invasion of Egypt had failed to achieve its goals and the British counter-offensive, Operation Compass, destroyed several divisions of the Italian army at Cyrenaica. The diversion of the North African Campaign drew away significant Italian air units which were rushed from Italy and Sicily to deal with the disasters and support the Italian ground forces embattled in Egypt and Libya. The relief on Malta was significant as the British could now concentrate their forces on offensive, rather than defensive operations. In November 1940, after months of poorly coordinated Italian air strikes, the FAA and Royal Navy struck at Italian naval forces in the Battle of Taranto, a victory for sea-air power and definite proof that aircraft could wreak havoc on naval vessels without air cover. Fairey Swordfish torpedo bombers disabled a number of Italian heavy units during the battle. The withdrawal of the Italian fleet to Naples, out of reach of British aircraft, was a strategic victory which handed naval supremacy to the British for the time being.[43] The Royal Navy's submarines also began a period of offensive operations. British U-class submarines began operations as early as June. Larger submarines also began operations, but after 50% losses per mission, they were withdrawn. U-class submarines operated from the Manoel Island Base known as HMS Talbot. Unfortunately no bomb-proof pens were available as the building project had been scrapped before the war, owing to cost-cutting policies. The new force was named the Tenth Submarine Flotilla and was placed under Flag Officer Submarines, Admiral Max Horton, who appointed Commander G.W.G. Simpson to command the unit. Administratively, the Tenth Flotilla operated under the First Submarine Flotilla at Alexandria, itself under Cunningham. In reality, Cunningham gave Simpson and his unit a free hand. Until U-class vessels could be made available in numbers, British T-class submarines were used. They had some successes, but suffered heavy losses when they began operations on 20 September 1940. Owing to a shortage of torpedoes, enemy ships could not be attacked unless the target in question was a warship, tanker or other "significant vessel".[44][45] The performance of the fleet was mixed at first. They sank 37,000 long tons (38,000 t) of Italian shipping, half of which was claimed by one vessel, HMS Truant. It accounted for one Italian submarine, nine merchant vessels and one motor torpedo boat (MTB). The loss of nine submarines and their trained crews and commanders was serious. Most of the losses were due to mines.[46] On 14 January 1941, U-class submarines arrived, and the submarine offensive began in earnest.[47] Luftwaffe arrives (January–April 1941) German intervention over Malta was more a result of the Italian defeats in North Africa than Italian failures to deal with the island. Hitler had little choice other than to rescue his Italian ally or lose the chance of taking the Middle Eastern oilfields in Arabia. The Deutsche Afrika Korps (DAK or Africa Corps) under Erwin Rommel was dispatched to secure the Axis front in Africa in February 1941. Operation Colossus signalled a dramatic turn around. The Germans launched Operation Sonnenblume, which reinforced the Italians in North Africa. They then began a counter-offensive and drove the British back into Egypt. But operating overseas in Africa meant most of the supplies to Axis forces would come via the sea. This made Malta a dangerous threat to Axis logistical concerns. In response, the Oberkommando der Luftwaffe (OKL or Air Force High Command) sent Fliegerkorps X (Flying Corps Ten) to Sicily, which arrived in January 1941, to strike at naval forces in and around Malta, and RAF positions on the island, to ease the passage of supplies.[48] The British submarines failed to interdict the German ships transporting the German forces to Libya. The damaging of the 7,889-ton German ship Duisburg was the only noteworthy attack. On 9 February 1941, three submarines missed the same convoy bringing supplies to Tripoli, the principal Italian port in Libya. The port facilities could unload six ships at a time, making the port the best facility west of Alexandria, 1,600 km (990 mi) to the east.[49] A large part of the Axis defensive success was due to naval mines. The Italians deployed 54,000 mines around Malta to prevent it being supplied. These mines were the bane of the Royal Navy's submarines. Around 3,000 mines were laid off Tunisia's coast by Italian naval forces as well.[50] The failure to intercept Axis shipping was evident in the figures which extended far beyond February 1941. From January–April, the Axis sent 321,259 tons to Libya and all but 18,777 tons reached port. This amounted to a 94% success rate for convoy safety running the British interdiction. Of the 73,991 men sent by sea, 71,881 (97%), arrived in Africa.[51] On 10 December 1940, Fliegerkorps X, under the command of Hans Ferdinand Geisler, and with support of his chief of staff Major Martin Harlinghausen, was ordered to Sicily to attack Allied shipping in the Mediterranean. By the start of the first German operation, Geisler had 95 aircraft and 14,389 men in Sicily. Geisler persuaded the OKL to give him four more dive-bomber gruppen (Groups). On 10 January, he could muster 255 (179 serviceable) aircraft including 209 dive and medium bombers.[52] By 2 January 1941, the first German units reached Trapani on Sicily's southern coast. The Luftwaffe's two units were both Junkers Ju 87 Stuka Gruppen (Groups). The first was I./Sturzkampfgeschwader 1 and II./Sturzkampfgeschwader 2 (I and II Group Dive Bomber Wings 1 and 2). The units numbered some 80 Ju 87s. This led to a notable increase in the bombing of Malta. A Stabsstaffel of Sturzkampfgeschwader 3 (StG 3) arrived. Oberstleutnant Karl Christ, Geschwaderkommodore of StG 3 gave orders to intercept heavy units. One particular target was aircraft carriers. Days later, he ordered the Ju 87 gruppen to sink the new carrier HMS Illustrious. It had played the key role in the Battle of Taranto, handing naval supremacy to the British, hence it became top of the Axis' target list.[53] Excess and Illustrious "blitz" HMS Illustrious under Ju 87 attack in the Grand Harbour. The carrier is to the right of the large crane The Luftwaffe crews believed four direct hits would sink the ship and began practice operations on floating mock-ups off the Sicilian coast. The vast flight deck offered a target of 6,500 square metres. An opportunity to attack the vessel came on 6 January. The British Operation Excess was launched, which included a series of convoy operations by the British across the Mediterranean Sea. On 10 January they were within range of the Ju 87 bases. II./StG 2 sent 43 Ju 87s with support from I./StG 1. Ten Italian SM 79s had drawn off the carrier's Fairey Fulmar fighters while the escorting cruiser HMS Bonaventure sank the Italian torpedo boat Vega. Some 10 Ju 87s attacked the carrier unopposed. Witnessed by Andrew Cunningham, C-in-C of the Fleet from the battleship HMS Warspite, the Ju 87s scored six hits. One destroyed a gun, another hit near her bow, a third demolished another gun, while two hit the lift, wrecking the aircraft below deck, causing explosions of fuel and ammunition. Another went through the armoured deck and exploded deep inside the ship. Two further attacks were made without result. Badly damaged, but with her main engines still intact, she steered for the now dubious haven of Malta.[54][55][56] The attack lasted six minutes;[57] killed 126 crew members and wounded 91.[58] Within sight of Malta, Italian torpedo bombers also attacked the carrier, but were driven off by intense anti-aircraft fire.[59] The British operation should not have been launched: Ultra had informed the Air Ministry of Fliegerkorps X's presence on Sicily as early as 4 January. They did not pass on the intelligence to the Admiralty, who probably would not have sailed within range of the Ju 87s if they had known.[60] The RAF was in no condition to prevent a major German air attack, with only 16 Hurricanes and a couple of Gladiator aircraft serviceable.[61] On 11 January 1941, 10 more Ju 87s were sent to sink Illustrious. They chanced upon the light cruisers HMS Southampton and Gloucester. Hits were scored on both; Southampton was so badly damaged her navy escorts scuttled her. Over the next 12 days, the workers at the shipyard in the Grand Harbour repaired the carrier under determined air attack so that she might make Alexandria. On 13 January, the Ju 87s, now equipped with SC 1000 bombs failed to achieve a hit. On 14 January, 44 Ju 87s scored a hit on the ill-fated after lift. On 18 January, the Germans switched to attacking the airfields at Hal Far and Luqa in an attempt to win air superiority before returning to Illustrious. On 20 January, two near misses breached the hull below the water line and hurled her hull against the wharf. Nevertheless, the engineers won the battle. On 23 January, she slipped out of Grand Harbour, and arrived in Alexandria two days later. The carrier later sailed to America where she was kept out of action for a year.[62] The Luftwaffe had failed to sink the carrier. However, their losses were few—three aircraft on 10 January and four Ju 87s over several weeks—and the Germans had impressed the British with the effectiveness of land-based air power. They withdrew their fleet's heavy units from the central Mediterranean and risked no more than trying to send cruisers through the Sicilian Narrows. Both the British and Italian navies digested their experiences over Taranto and Malta.[63] German and Italian air superiority Messerschmitt Bf 109 escorting a Ju 87 over the Mediterranean The appearance in February of Messerschmitt Bf 109 E-7 fighters of 7. Staffel (squadron) Jagdgeschwader 26 (26th Fighter Wing or JG 26), led by Oberleutnant Joachim Müncheberg, quickly led to a rise in RAF losses; the German fighter pilots were experienced, confident, tactically astute, better-equipped and well-trained.[64] The Allied pilots on Malta had little combat experience and their Hawker Hurricanes were worn-out and for four months, JG 26 had few losses.[65][66] The Luftwaffe claimed 42 air victories, 20 of them (including one over Yugoslavia) credited to Müncheberg.[67] The RAF Hurricanes were kept operational by being patched up and cannibalised and their performance, already inferior to the Bf 109E-7, deteriorated. Five Hurricanes arrived at Malta in early March, another six on 18 March. but five Hurricanes and five pilots were lost.[68] On 1 March, the Luftwaffe attacks on airfields destroyed all of the Wellingtons brought in in October. Royal Navy warships and Sunderland flying boats could not use the island for offensive operations, and the main fighter squadrons, Nos. 261 and 274, were put under severe pressure.[33] There were several raids per day and over 107 Axis attacks took place in February and 105 in March, with Bf 109 fighters strafing any signs of movement on the ground. By February around 14,600 men, 1⁄6 of the island's work force, had volunteered, rationing began reducing morale even more. and all males from ages 16 to 56 were conscripted to join the volunteers, the Royal Malta Artillery guarding Grand Harbour.[69][70] The Allies had a success in April, with victory in the Battle of the Tarigo Convoy.[71] Allied surface forces managed to sink only one small Axis convoy in daylight hours during the whole North African Campaign but on the night of 15/16 April, Axis ships were intercepted by Commander P. J. Mack's 14th Destroyer Flotilla, comprising HMS Janus, Jervis, Mohawk, Juno and Nubian.[72] The destroyers sank Sabaudia (1,500 tons), Aegina (2,447 tons), Adana (4,205 tons), Isetlhon (3,704 tons) and Arta. The Italian destroyers Tarigo, Lampo and Baleno were sunk for the loss of Mohawk.[73] The flotilla had been officially formed on 8 April 1941, in response to the need for a Malta Strike Force. This formation was to interdict Axis convoys. Commander Lord Louis Mountbatten's 5th Destroyer Flotilla was later ordered to merge with Mack's fleet to increase its striking power. The destroyers HMS Jackal, Kashmir, Kipling, Kelly, Kelvin and Jersey were a part of Mountbatten's fleet. The cruisers HMS Dido and Gloucester accompanied the ships as part of the force. The strike force had considerable success, which justified basing it at Malta despite the danger from air attack. On 21 May, the force was sent to join the Battle of Crete. It was several months before the depleted strike force returned.[74] Italian bomber being refuelled in Sicily Further success was had by the Malta Convoys. An urgent supply convoy from Gibraltar to Alexandria (Operation Tiger) coincided with reinforcements for the Mediterranean Fleet, two small convoys from Egypt to Malta and 48 more Hurricanes flew off HMS Ark Royal and Furious in Operation Splice, with only the loss of the SS Empire Song, which hit a mine and sank with 10 Hurricane fighters and 57 tanks on board.[75] Convoy Tiger transported 295 Matilda II tanks, new Crusader tanks and 24,000 tons of oil for operations in North Africa.[76] They were completed on 12 May. I., II., and III.; StG 1 made a determined effort against Tiger and Malta without result.[77] The Axis air forces maintained air superiority; Hitler ordered Fliegerkorps X to protect Axis shipping, prevent Allied shipping passing through the central Mediterranean and neutralise Malta as an Allied base. Around 180 German and 300 Italian aircraft carried out the operation, and the RAF struggled to fly more than six or eight fighter sorties. Occasionally, 12 Hurricanes were flown in from British carriers but the replacements were soon used up. By mid-May, the central Mediterranean was again closed to Allied shipping and the DAK in North Africa was able to receive reinforcements, only 3% of its supplies, personnel and equipment being lost en route. From 11 April – 10 May, 111 Axis raids were carried out against military installations on Malta. Most of the heavy equipment in Grand Harbour was destroyed and the dry-docks could only be operated by hand. Efficiency of most workshops was reduced to 25% – 50%. During the first four months of German operations, the Luftwaffe dropped 2,500 tons of high explosives on Malta. It was many more times the tonnage dropped by the Italians, but far short of the amount dropped the following year. More than 2,000 civilian buildings were destroyed as opposed to only 300 during the Italian siege. Civilian casualties were low, and after the bombing of HMS Illustrious most civilians moved to safer surroundings in the countryside; by May 1941, nearly 60,000 people had left the cities, some 11,000 people (2⁄3 or 66% of the population) leaving Valletta.[79] To illustrate the scale of the damage, by the close of 1941 approximately 70% of churches on the island had been reduced to rubble.[80] The British had concentrated on protecting military targets and few shelters were available for civilians. Eventually, 2,000 miners and stonemasons were recruited to build public shelters but the pay was poor and the miners threatened to strike, and were threatened with conscription into the army. The workers capitulated but instituted a go-slow, trebling the cost of the work.[81] German withdrawal In April, Hitler was forced to intervene in the Balkans which led to the campaign of that name; it was also known as the German invasion of Yugoslavia and included the Battle of Greece. The subsequent campaign and the heavy German losses in the Battle of Crete convinced Hitler that air drops behind enemy lines, using paratroopers, were no longer feasible unless surprise was achieved. German airborne forces did not undertake any such operations again. This had important consequences for Malta, as it indicated the island was only at risk from an Axis siege. When, in June, Hitler attacked the Soviet Union under Operation Barbarossa, Fliegerkorps X departed for the Eastern Front, and the Regia Aeronautica was left to continue its highly effective air campaign against Malta in the coming months.[82] Geisler, commanding the remnants of Fliegerkorps X, could only count upon mine-laying aircraft from Kampfgeschwader 4 (KG 4) and Ju 87s in night operations. Supply issues were bad, the small German force left was forced to abandon operations on 22 April 1941. By early May 1941, the Luftwaffe had flown 1,465 bomber, 1,144 fighter and 132 reconnaissance missions for just 44 losses.[83] III./Kampfgeschwader 30 (KG 30) and III./Lehrgeschwader 1 (KG 1) flew sporadic night attacks during April.[84] Allied recovery (April–October 1941) Hugh Lloyd On 1 June, Air Vice Marshal Forster Maynard, Malta's Air Officer Commanding, was replaced by Air Commodore Hugh Lloyd.[85] When he arrived on the island Lloyd found little to work with. Still, he had every intention of taking the offensive. Outside his office, in the underground headquarters at Lascaris, he hung a sign outside; "Less depends on the size of the dog in the fight than on the size of the fight in the dog".[86] Within a few hours Lloyd had made an inspection tour of the airfields and the main workshops at Kalafrana. The state of the island was worse than he expected. The slackening of German air activity had allowed the number of aircraft to increase, but the RAF still had fewer than 60 machines of all types. Maintenance was difficult. Hardly any spare or replacement parts were available—spares had to be obtained by sifting through the debris of wrecks or by cannibalising undamaged aircraft. Furthermore, the airfields were too small; there was no heavy equipment to work with; and even the commonest sorts of tools, such as hammers and wrenches, were all but impossible to find. All refuelling had to be done by hand from individual drums. The shelter was also inadequate, so there was little protection for what equipment they did have. Most aircraft were clustered together on open runways, presenting tempting targets. At Kalafrana, all the buildings were close together and above ground. The single engine-repair facility on Malta was located right next to the only test benches. Lloyd himself said, "a few bombs on Kalafrana in the summer of 1941 would have ruined any hope of Malta ever operating an air force".[87] Usually, the protection of air defences and naval assets on the island would have had priority. Certainly bringing in more supplies would have made greater strategic sense, before risking going on to the offensive and thus in turn risking the wrath of the enemy. But the period was an eventful one. In North Africa, the DAK was on the move and Rommel was pressing his army towards the Suez Canal and Alexandria in Egypt. RAF forces on Malta could not afford to sit idle; they could prevent Rommel's advance, or slow it down, by striking at his supply lines. Malta was the only place from where British strike aircraft could launch their attacks. Lloyd's bombers and a small flotilla of submarines were the only forces available to harass Rommel's supply lines into the autumn. Only then did the surface fleets return to Malta to support the offensive.[88] Allied reinforcement With the exception of coal, fodder, kerosene and essential civilian supplies were such that a reserve of 8–15 months was built up. Operation Substance was particularly successful in July 1941. The supplies included spares and aircraft. Around 60 bombers and 120 Hurricanes were now available.[89] Around 65,000 tons eventually reached Malta in July despite heavy damage inflicted by the Italian navy and air forces. No supplies were sent in August, but Operation Halberd in September 1941 brought in 85,000 tons of supplies, shipped by nine merchant vessels escorted by one aircraft carrier, five cruisers and 17 destroyers. One cargo ship, the Imperial Star was sunk, and the battleship HMS Nelson was damaged by a torpedo. This convoy proved critical to saving Malta, as its supplies were deemed to be essential when the Germans returned in December.[90] In mid-1941, new squadrons—No. 185 and No. 126—were formed and the defenders received the first cannon-armed Hurricane Mk IICs. Naval carriers flew in a total of 81 more fighters in April–May. By 12 May, there were 50 Hurricanes on the island. On 21 May, No. 249 Squadron RAF arrived, taking over from No. 261. 46 Squadron arrived in June, to be renumbered 126 Squadron.[91] In May 1941, 47 Hurricanes were flown into the island.[92] From May–December, the first Bristol Blenheim units (No. 113 Squadron RAF and 115 Squadron) began to arrive[93] and Bristol Beaufighter units, 252 and 272 Squadrons.[91] Malta was now being used as a base for supplying Egypt. Between July and December 1941, 717 RAF fighters passed through Malta and 514 left for North Africa. By early August, Malta now had 75 fighters and 230 anti-aircraft guns. Bristol Blenheim bombers also joined the defenders and began offensive operations.[94] Besides preparing for offensive operations and reinforcing the RAF on the island, Lloyd also rectified many of the deficiencies. Thousands of Maltese and 3,000 British Army soldiers were drafted in to better protect the airfields. Even technical staff, clerks and flight crews helped when required. Dispersal strips were built, repair shops were moved underground from dockyards and airfields. Underground shelters were also created in the belief that the Luftwaffe would soon return.[95] On 26 July, a night attack was carried out by Italian fast attack craft of the elite Decima Flottiglia MAS unit.[96] The force was detected early on by a British radar facility, and the coastal artillery at Fort Saint Elmo opened fire on the Italians. In the attack, 15 men were killed and 18 captured, and most of the boats were lost. An MT boat hit St Elmo Bridge, which collapsed. The bridge was never restored, and it was only in 2011 that a new one was built in its place. Allied offensive Radius of action of Allied aircraft operating from Malta in relation to Axis shipping routes, summer and autumn, 1941 The Allies were able to launch offensive operations from Malta and some 60% of Axis shipping was sunk in the second half of 1941. The DAK and its partners were not receiving the 50,000 short tons (45,000 t) of supplies a month they needed, and as a result they were unable to resist a strong counter-offensive by British forces in Operation Crusader.[1] In July 62,276 tons of supplies were landed by the Axis, half of the figure in June.[97] In September 1941, 830 Naval Air Squadron sank or damaged the ships Andrea Gritti (6,338 tons) and the Pietro Barbaro (6,330 tons). Ultra intercepts found that 3,500 tons of aerial bombs, 4,000 tons of ammunition, 5,000 tons of food, one entire tank workshop, 25 Bf 109 engines and 25 cases of glycol coolant for their engines were lost.[98] Further success was had later in the month, although British losses from anti-aircraft fire from Italian ships were often heavy.[99] One reason for accepting heavy losses was the difficulty in bombing accurately. Lloyd asked his bombers to attack at mast-height, increasing accuracy but making them easier targets for Italian anti-aircraft defences. Losses averaged 12% during this time.[100] 38 Squadron, 40 Squadron and 104 Squadron, equipped with Wellington bombers, hit Axis convoys in Tripoli.[101] In concert with Royal Navy submarines, the RAF and FAA sank 108 Axis ships (300,000 grt) between June and September.[94] In September, 33% of the 96,000 tons of supplies dispatched were lost to British submarine and air attack.[102] Part of the reason for this favourable outcome in November 1941, was the arrival of Force K of the Royal Navy, which during the Battle of the Duisburg Convoy sank all the ships, which practically blockaded Libyan ports.[103] Soon after, Force K was reinforced by the arrival in Malta of Force B with the light cruisers HMS Ajax and Neptune and the K-class destroyers, Kimberley and Kingston, on 27 November.[104] Joint operations with the RAF were so effective that during November 1941, Axis fuel losses amounted to 49,365 tons out of 79,208 tons.[105] Among the contributors to the sinking of Axis shipping was 828 Naval Air Squadron, 830 Naval Air Squadron, the British 10th Naval Flotilla and 69 Squadron which shadowed convoys with their Maryland aircraft.[106] Special flights of RAF Wellingtons fitted with air-to-surface vessel (ASV) radar, were important to Force K operations, and Ultra intelligence reached Malta on Axis convoy movements. The RAF Malta Command would then dispatch the ASV-Wellingtons to sweep the seas and direct the British naval forces to the convoy.[107] On 13 November, the carrier HMS Ark Royal— returning to Gibraltar after transporting aircraft to Malta—was sunk by a U-boat.[108] Twelve days later, the battleship HMS Barham was sunk by a U-boat, followed by the light cruiser HMS Galatea on 15 December.[109] On 19 December, ships from both forces ran into a minefield while pursuing an Italian convoy. Damage from the mines sank the cruiser Neptune and damaged the cruiser HMS Aurora. The destroyer HMS Kandahar was also mined while attempting to assist Neptune.[110] Kandahar was scuttled the next day by the destroyer HMS Jaguar. Following the disaster and with a resurgence of the Axis aerial bombardment of Malta, surface ships were withdrawn from the central Mediterranean in January 1942.[111] While Italian bombing was again proving successful against the British, the Luftwaffe returned in force in December 1941 to renew intensive bombing.[112] The Kriegsmarine sent nearly half of all the German U-boats on operations in the Atlantic Ocean to the Mediterranean to support the effort against Malta and by 15 December, half of these vessels were either in the Mediterranean, or en route, having to run the gauntlet past the RAF and the navy based in Gibraltar.[113] Until the return of the Luftwaffe over Malta, the RAF defenders had claimed 199 aircraft shot down from June 1940 – December 1941, while losses were at least 90 Hurricanes, three Fairey Fulmars and one Gladiator in air combat; 10 more Hurricanes and one Gladiator destroyed in accidents and many more destroyed on the ground. Eight Marylands, two other aircraft, three Beaufighters, one Blenheim fighter and many bombers were also lost.[114] No. 185 Squadron claimed 18 destroyed, seven probable victories and 21 damaged for 11 killed or missing. Among those losses was Squadron Leader Peter "Boy" Mould.[115] Actual Axis losses amounted to 135 bombers (80 German) and 56 fighters plus a number of other aircraft.[114] Luftwaffe returns (December 1941 – August 1942) Kesselring (OB Süd) By June 1941, Geisler had been moved to Libya to support the DAK in the North African Campaign. In the Mediterranean and on Malta, the Allies recovered and began offensive operations against Axis shipping bringing supplies to the DAK in North Africa. The mounting shipping supply losses affected Geisler's ability to support Erwin Rommel and his forces, which caused tension between the Wehrmacht and the Luftwaffe. Geisler was to be returned to Sicily with his remaining air strength to solve the issue. However, the Germans backed down over Italian protests. On 6 October Geisler did extend his air sector responsibilities to cover the Tripoli-Naples sea route to curtail losses.[94] On 2 October, Hermann Göring, commander-in-chief of the Luftwaffe met with his Regia Aeronautica counterpart Francesco Pricolo, to discuss reinforcements. Hans Jeschonnek, Goring's chief of staff, suggested sending Luftflotte 2 and its commander Albert Kesselring to Sicily from the Eastern Front. Göring agreed, and was willing to send 16 Gruppen to Sicily, anticipating a Soviet collapse in the east; Fliegerkorps II (Bruno Loerzer), arrived in January 1942, with Kesselring as Oberbefehlshaber Süd (OB Süd, Commander-in-Chief South) from 1 December 1941.[116] German pressure, Spitfire arrival Spitfire Vc (trop) in North Africa. The Spitfire arrived in Malta in March 1942, becoming the main RAF fighter Messerschmitt Bf 110s and Ju 88 night fighters from Zerstörergeschwader 26 (ZG 26, or Destroyer Wing 26) and Nachtjagdgeschwader 1 (NJG 1 or Night Fighter Wing 1), were flown into Sicily to support Fliegerkorps II. They quickly eliminated Malta's striking force, which was beyond the range of fighter escort while over the Mediterranean. In the first two months, around 20 RAF bombers and reconnaissance aircraft were shot down.[114] The success against Axis shipping soon dried up. The only notable triumph was the sinking of the 13,089-ton Victoria merchant ship, one of the fastest merchantmen afloat, by a Fairey Albacore of 826 Squadron, flown by Lieutenant Baxter Ellis, on 23 January.[117] Over the island, the defensive arm of the RAF was also put under pressure. Kesselring began 1942 with a raid on New Year's Day, the 1,175th raid of the war.[118] In January the RAF lost 50 Hurricanes on the ground and another eight shot down in combat. Of the 340 fighters that had passed through or stayed on the island since the war began, only 28 remained.[119] The Axis conducted 263 raids in that month, compared to 169 in December 1941.[120] Fliegerkorps II was recovering from its losses in the Soviet Union, and could only contribute 118 aircraft in January, but grew to 390 in March, reaching a peak strength of 425 aircraft.[121] One-third of all raids were directed against airfields. At Ta' Qali, 841 tons of bombs were dropped, because the Germans believed the British were operating an underground hangar; the Germans used rocket-assisted PC 18000RS Panther bombs. The usual tactic involved a sweep ahead of the bombers by German fighters to clear the skies; this worked, and air superiority was maintained. Only slight losses were suffered by the bombers. One notable loss was the Geschwaderkommodore of KG 77, Arved Crüger. Around 94% of the strikes were made in daylight and the Italians supported the Luftwaffe by flying 2,455 sorties in February and March.[122] Dobbie and the British naval and air commanders argued for modern aircraft, particularly Spitfires, to be sent to Malta. The AOC Middle East, Arthur Tedder, sent Group Captain Basil Embry to Malta to assess the situation. The pilots told Embry that the Hurricanes were useless and that the Spitfire was their only hope. They claimed that the Germans purposely flew in front of the Hurricanes in their Bf 109Fs to show off the performance superiority of their fighters. The squadron leaders argued the inferiority of their aircraft was affecting morale. Embry agreed and recommended that Spitfires be sent; the type began arriving in March 1942.[123] Axis invasion plan Main article: Operation Herkules On 29–30 April 1942, a plan for the invasion of the island was approved by Adolf Hitler and Benito Mussolini during a meeting at Berchtesgaden. It envisaged an airborne assault with one German and one Italian airborne division, under the command of German General Kurt Student. This would have been followed by a seaborne landing of two or three divisions protected by the Regia Marina. The Italians, in agreement with Kesselring, made the invasion of Malta the priority in the region. However, two major factors stopped Hitler from giving the operation the green light. The first was Erwin Rommel. Due to Kesselring's pounding of the island the supply lines to North Africa had been secured. He was able to gain the ascendancy in North Africa once again. Although Rommel believed Malta should be invaded, he insisted the conquest of Egypt and the Suez Canal, not Malta, was the priority. The second was Hitler himself. After the Battle of Crete in May–June 1941, Hitler was nervous about using paratroopers to invade the island since the Crete campaign had cost these units heavy losses, and he started to procrastinate in making a decision. Kesselring complained. Hitler proposed a compromise. He suggested that if the Egyptian border was reached once again in the coming months (the fighting at the time was taking place in Libya), the Axis could invade in July or August 1942 when a full moon would provide ideal conditions for a landing. Although frustrated, Kesselring was relieved the operation had seemingly been postponed rather than shelved.[124] RAF air superiority Canadian fighter ace George Beurling, known as the "Knight of Malta", shot down 27 Axis aircraft in just 14 days over the skies of Malta during the summer of 1942. Before the Spitfires arrived, other attempts were made to reduce losses. In February 1942, Squadron Leader Stan Turner arrived to take over 249 Squadron. Lloyd had requested a highly experienced combat leader be sent and Turner's experience flying with Douglas Bader over Europe meant he was qualified to lead the unit.[125] He began the adoption of the loose finger-four formation in an attempt to cut RAF losses by introducing more flexible tactics to compensate for technical inferiority. The outmoded Hurricanes still struggled against the very latest Bf 109Fs of Jagdgeschwader 53 (JG 53) and Italian Macchi C.202s; the Junkers Ju 88 bomber also proved a difficult enemy.[126] However, the Hurricanes did record occasional victories against the Bf 109Fs, during one attack in February 1942 only three managed to break up a raid by fifty Bf 109s.[127] On 7 March 1942, a contingent of sixteen Spitfire Mk Vs flew to Malta from the aircraft carrier HMS Eagle as part of Operation Spotter.[128] A further run by Eagle delivered nine Spitfires.[129] The Club Run (delivery of aircraft to Malta by carrier) became more frequent through 1942. Then, USS Wasp despatched 47 more aircraft (Operation Calendar) on 13 April 1942. All but one reached the island.[130] While the Spitfires were a match for the Axis aircraft, many of those delivered in March and April were destroyed on the ground and in the air, where they were outnumbered; for five days in April there was just one Spitfire available to defend the island, for two days there were none.[131] The Germans had watched their delivery and pressed home heavy attacks. By 21 April 1942 just 27 Spitfires were still airworthy, and by evening that had fallen to 17.[132] The overwhelming Axis bombardments had also substantially eroded Malta's offensive naval and air capabilities.[133] By March–April 1942, it was clear the Luftwaffe had achieved a measure of air superiority.[134] The Regia Aeronautica also pressed home attacks with determination. Often, three to five Italian bombers would fly very low over their targets and drop their bombs with precision, regardless of the RAF attacks and ground fire.[135] Along with the advantage in the air, the Germans soon discovered that British submarines were operating from Manoel Island, not Grand Harbour, and exploited their air superiority to eliminate the threat. The base came under attack, the vessels had to spend most of their time submerged, and the surrounding residences where crews had enjoyed brief rest periods were abandoned.[136] Mine-laying by Axis aircraft also caused a steady rise in submarine losses.[137] By the end of March 1942, 19 submarines had been lost.[138] The effectiveness of the air attacks against Allied naval assets was apparent in the Italian naval records. In April, 150,389 tons of supplies that were sent to North Africa from Italy reached their destination out of a total of 150,578. Hitler's strategy of neutralising Malta by siege seemed to be working.[139] Kesselring reported to the German High Command that "There is nothing left to bomb."[140][141] The determination of the Axis effort against Malta is indicated in the sorties flown. Between 20 March and 28 April 1942, the Germans flew 11,819 sorties against the island and dropped 6,557 tons of bombs (3,150 tons on Valletta). The Germans lost 173 aircraft in the operations.[142] The Allies moved to increase the number of Spitfires on the island. On 9 May, Wasp and Eagle delivered 64 more Spitfires (Operation Bowery).[143][144] Malta now had five full Spitfire squadrons; No. 126, 185, 249, 601 and 603 Squadrons.[145] The impact of the Spitfires was apparent. On 9 May, the Italians announced 37 Axis losses. On 10 May, the Axis lost 65 aircraft destroyed or damaged in large air battles over the island. The Hurricanes were able to focus on the Axis bombers and dive-bombers at lower heights, while the Spitfires, with their superior rate of climb, engaged enemy aircraft at higher levels.[146] From 18 May – 9 June, Eagle made three runs carrying another 76 Spitfires to Malta. With such a force established, the RAF had the firepower to deal with any Axis attacks.[147] By the spring of 1942, the Axis air forces ranged against the island were at their maximum strength. The main adversaries for the defenders were the 137 Bf 109Fs of JG 53 and II./JG 3 'Udet' and the 80 Macchi C.202s of the 4th and 51st Stormo. Bomber units included 199 Ju 88s of II./Lehrgeschwader 1,[148] II and III./Kampfgeschwader 77,[149] I./Kampfgeschwader 54,[150] and 32–40 Ju 87s.[151][152] However, in May the numerical and technical improvements in the RAF defences wrested air superiority from the Luftwaffe. By the end of May 1942, Kesselring's forces had been reduced to just 13 serviceable reconnaissance aircraft, six Bf 110s, 30 Bf 109s and 34 bombers (mostly Ju 88s): a total of 83 compared with several hundred aircraft two months earlier. After the battles of May and June, the air attacks were much reduced in August and September.[154] While air superiority had been won back by the RAF, German pressure had allowed Axis convoys to re-supply the Panzer Army Africa. The island appeared to the Axis forces to be neutralised as a threat to their convoys. Rommel could now look forward to offensive operations with the support of the Luftwaffe in North Africa. At the Battle of Gazala he won a major victory, while the Battle of Bir Hakeim was less successful. Even so, he was soon back in Egypt fighting at El Alamein. Despite the reduction in direct air pressure over Malta itself, the situation on the island was serious. It was running out of all essential commodities, particularly food and water, as the bombing had crippled pumps and distribution pipes. Clothing was also hard to come by. All livestock had been slaughtered, and the lack of leather meant people were forced to use curtains and used tyres to replace clothing and shoe soles. Although the civilian population was enduring, the threat of starvation was very real.[155] Poor nutrition and sanitation led to the spread of disease. Soldiers’ rations were also reduced, from four to two thousand calories a day and the British prepared to supply the island with two convoy operations.[156] In June, the Royal Navy sent two convoys, Operation Harpoon from Gibraltar and Operation Vigorous from Haifa and Port Said, to Malta. The move was designed to split Axis naval forces attempting to intervene.[157] Lloyd the AOC, wanted to give No. 601 Squadron over to convoy escort duty. Although he could afford this diversion, he could maintain a standing patrol of only four Spitfires over the convoy. If Axis aircraft attacked as they were withdrawing, they had to stay and fight. Bailing out if the pilots ran low on fuel was the only alternative to landing on Malta. The pilots had to hope that they would be picked up by the ships.[158] The western convoy lost the destroyer HMS Bedouin, three merchants and a tanker after being engaged by the Italian cruisers Raimondo Montecuccoli and Eugenio di Savoia, supported by a number of destroyers and Axis aircraft.[159] The Polish destroyer ORP Kujawiak was sunk and another merchant was damaged by mines near Malta.[160] The eastern convoy was forced to turn back after a series of naval and air engagements, despite the British ships still having 20% of their ammunition left—it was considered insufficient to see them into Malta, especially with the Italian fleet still in the area and ready to intercept them. The losses of the convoy were heavy. Among the British losses was the cruiser HMS Hermione. Three destroyers and 11 merchant vessels were also sunk. Malta sent Bristol Beauforts to engage the Italian fleet and German U-boats attacking the convoy. They torpedoed and sank the heavy cruiser Trento and damaged the battleship Littorio. Two freighters of the western convoy reached Malta and delivered supplies, making them the only ships out of a total of 17 to deliver their loads, 25,000 tons of supplies. A further 16 Malta-based pilots were lost in the operations.[161] In August, the Operation Pedestal convoy brought vital relief to the besieged island, but at heavy cost. It was attacked from the sea and from the air. Some 146 Ju 88s, 72 Bf 109s, 16 Ju 87s, 232 Italian fighters, and 139 Italian bombers (a large number being the highly effective SM.79 torpedo bomber) took part in the action against the convoy.[162] Out of the 14 merchant ships sent, nine were sunk. Moreover, the aircraft carrier HMS Eagle, one cruiser and three destroyers were sunk by a combined effort from the Italian Navy, Kriegsmarine, and Luftwaffe. Nevertheless, the operation though costly in lives and ships, was vital in bringing in much-needed war materials and supplies.[163] British destroyers saved 950 of Eagle's crew.[164] The Regia Aeronautica had played the central role against the convoy. Indeed, according to Sadkovich and others, to pretend that the air offensive against Malta had been a purely German affair is misleading.[165] According to Sadkovich, from 1940 to 1943 the Italians flew 35,724 sorties against the island and the Germans 37,432 – but 31,391 of the Luftwaffe's missions were completed in 1942. The Italians must thus get some share of the credit for the destruction of 575 British fighters on Malta, and the sinking of 23 of 82 merchantmen dispatched to the island. But the RAF preferred to credit its losses to the Germans, even though the Italians flew more fighter missions over the island, had almost as many fighters on Sicily (184) as the Germans in the whole Mediterranean (252) in November 1942, and seem to have been better pilots, losing one aircraft per 63 sorties, compared to a German loss rate of one per 42 sorties. — Sadkovitch[165] The surface convoys were not the only supply line to Malta. British submarines also made a substantial effort. The submarine HMS Clyde was converted into an underwater supply ship. She could not go as deep or dive as quickly as the T- and U-class types, but she still made nine supply missions to Malta, which was more than any other vessel of its type. The ability of the submarine to carry large loads enabled it to be of great value in the campaign to lift the siege.[166] Arrival of Keith Park In July, Lloyd was relieved of RAF command on Malta. It was felt that a man with past experience of fighter defence operations was needed. For some reason, the Air Staff did not choose to do this earlier, when the bombing ceased in 1941, and the RAF forces on Malta became primarily fighter-armed while the principal aim changed to one of air defence. Air Vice Marshal Keith Park replaced Lloyd as AOC. Park arrived on 14 July 1942 by flying boat. He landed in the midst of a raid although Lloyd had specifically requested he circle the harbour until it had passed. Lloyd met Park and admonished him for taking an unnecessary risk.[167] Park had faced Kesselring before during the Battle of Britain. During that battle, Park had advocated sending small numbers of fighters into battle to meet the enemy. There were three fundamental reasons for this. First, there would always be fighters in the air covering those on the ground if one did not send their entire force to engage at once. Second, small numbers were quicker to position and easier to move around. Third, the preservation of his force was critical. The fewer fighters he had in the air (he advocated 16 at most), the smaller target the numerically superior enemy would have. Over Malta, he reversed these tactics owing to changed circumstances. With plenty of Spitfires to operate, Park sought to intercept the enemy and break up his formations before the bombers reached the island. Until this point, the Spitfires had fought defensively. They scrambled and headed south to gain height, then turned around to engage the enemy over the island. Now, with improved radar and quicker take off times (two to three minutes) and improved air-sea rescue, more offensive action became possible. Using three squadrons, Park asked the first to engage the escorting fighters by 'bouncing them' out of the sun. The second would strike at the close escort, or, if unescorted, the bombers themselves. The third was to attack the bombers head-on.[168] The impact of Park's methods was instant. His Forward Interception Plan, issued officially on 25 July 1942, forced the Axis to abandon daylight raids within six days. The Ju 87s were withdrawn from operations over Malta altogether. Kesselring responded by sending in fighter sweeps at even higher altitudes to gain the tactical advantage. Park retaliated by ordering his fighters to climb no higher than 6,100 feet (1,900 m). While this did give away a considerable height advantage, it forced the Bf 109s to descend to altitudes more suitable for the Spitfire than the German fighter. The methods would have great effect in October when Kesselring returned.[169] Allied victory (October–November 1942) British offensive operations HMS Splendid, photographed on 18 August 1942, ten days after she was commissioned While the RAF and Royal Navy defensive operations dominated for the most part, offensive strikes were still being carried out.[170] The year 1942 was particularly impressive for offensive operations as well. Two-thirds of the Italian merchant fleet was sunk; 25% by British submarines, 37% by Allied aircraft. Axis forces in North Africa were denied around half of their supplies and two-thirds of their oil.[171] The submarines of Simpson's 10th Flotilla were on patrol constantly, except for the period May–July 1942, when Kesselring made a considerable effort against their bases. Their success was not easy to achieve, given most of them were the slow U-class types. Supported by S- and T-class vessels, they dropped mines. British submarine commanders became aces while operating from Malta. Commanders Ian McGeoch (commanding HMS Splendid),[172] Hugh "Rufus" Mackenzie and David Wanklyn[173] had particular success. Lieutenant Commander Lennox Napier sank the German tanker Wilhelmsburg (7,020 tons). It was one of the few German tankers exporting oil from Romania. The loss of the ship led Hitler to complain directly to Karl Dönitz, while comparing the Kriegsmarine unfavourably with the Royal Navy. Dönitz argued that he did not have the resources to protect the convoy, though the escort of the ship exceeded that which the Allies could have afforded to give a large convoy in the Atlantic at that point in the war. It was fortunate for Dönitz that Hitler did not probe the defence of the ship further.[174] The submarine proved to be one of the most potent weapons in the British armoury when combating Axis convoys. Simpson, and George Phillips, who replaced him on 23 January 1943, had much success. The estimated tonnage sunk by British U-class submarines alone was 650,000 tons, with another 400,000 tons damaged. The island base, HMS Talbot, supplied 1,790 torpedoes at that time. The number fired by the 10th Flotilla was 1,289, with a hit rate of 30%.[175] The Chief of Staff of the DAK, Fritz Bayerlein once claimed: "We should have taken Alexandria and reached the Suez Canal had it not been for the work of your submarines".[176] Wing Commander Patrick Gibbs and 39 Squadron, flew their Beauforts against shipping and increased the pressure on Rommel by attacking his supply lines in September. Rommel's position was now critical. The army in North Africa was starved of supplies while the British reinforced their lines in Egypt, prior to the Second Battle of El Alamein. He complained to the OKW that he was severely short of ammunition and fuel for offensive action. The Axis organised a convoy to relieve the difficulties. Ultra intercepted the Axis communications, and Wellingtons of 69 Squadron confirmed the Axis operation was real. Gibbs's Beauforts sank two ships and one of Simpson's submarines sank a third. Rommel still hoped another tanker, San Andreas, would deliver the 3,198 tons of fuel needed for the Battle of Alam el Halfa. Rommel did not wait for it to dock, and launched the offensive before its arrival. The ship was sunk by an attack led by Gibbs.[177] Of the nine ships sent, five were sunk by Malta's forces. The Beauforts were having a devastating impact on Axis fuel supplies which were now nearly used up. On 1 September, Rommel was forced to retreat. Kesselring handed over Luftwaffe fuel, but this merely denied the German air units the means to protect the ground forces, thereby increasing the effectiveness of British air superiority over the frontline.[178][179] In August, Malta's strike forces had contributed to the Axis' difficulties in trying to force an advance into Egypt. In that month, 33% of supplies and 41% of fuel were lost.[180] In September 1942, Rommel received only 24% of the 50,000 tons of supplies needed monthly to continue offensive operations. During September, the Allies sank 33,939 tons of shipping at sea. Many of these supplies had to be brought in via Tripoli, many kilometres behind the battle front. The lack of food and water caused a sickness rate of 10% among Axis soldiers.[181] The British air-submarine offensive ensured no fuel reached North Africa in the first week of October 1942. Two fuel-carrying ships were sunk, and another lost its cargo despite the crew managing to salvage the ship. As the British offensive at El Alamein began on 23 October 1942, Ultra intelligence was gaining a clear picture of the desperate Axis fuel situation. On 25 October, three tankers and one cargo ship carrying fuel and ammunition were sent under heavy air and sea escort, and were likely to be the last ships to reach Rommel while he was at El Alamein. Ultra intelligence intercepted the planned convoy route, and alerted Malta's air units. The three fuel-carrying vessels were sunk by 28 October. It cost the British one Beaufighter, two Beauforts, three (out of six) Blenheims and one Wellington. Rommel lost 44% of his supplies on October, a jump from the 20% lost in September.[182] Siege lifted By August 1942, 163 Spitfires were on hand to defend Malta of which 120 were serviceable.[183] On 11 and 17 August and 24 October 1942, under the respective actions, Operation Bellows, Operation Baritone and Operation Train, HMS Furious brought another 85 Spitfires to Malta.[184] Often, the Spitfires were asked to undertake flights of five and a half hours; this was achieved using 170-gallon ferry tanks. The ferry tanks, combined with a 29-gallon tank in the rear fuselage, brought the total tank capacity up to 284 gallons. From the WIKI And more! https://www.dropbox.com/scl/fi/1tn0okp4qym8pgr7ebnem/Siege-of-Malta.rar?rlkey=jrhs42x385liar22ht2xf8ezi&dl=0 One way or the other, Friday I release this, Part one! Stay tuned!2 points
-
The bi-directional pump transfers pressure, not fluid. They use exiting fluid in the system with the failed pump. Transfer pumps are common on twin engine hydraulic control/systems aircraft. They don’t transfer fluid for obvious reasons, a leak in one system would deplete the other. Basically, it’s redundancy for a failed hydraulic pump, not for a fluid leak. They do create a single point failure should the bi-directional pump catastrophically itself fail, which happened to me in an airliner, thankfully sitting on the ramp, waiting for a gate.2 points
-
Какой ещё гордости? Ты написал глупость, а я тебе на неё ответил глупостью же. Но ты и тут какую-то гойдо-гордость нашёл. A-7 не жмёт нигде случайно?2 points
-
So that's about 80% skill issue 20% trying to play in the 2000s arena most DCS missions are in. Shocking for a 70s light fighter to be exactly that.2 points
-
Nope, target just needs to be in the ballpark of the radar azimuth as the antenna is what transmits the MDL, even with the radar off. It doesn’t really matter how the trackfile was created Sent from my iPad using Tapatalk2 points
-
I guess you could do a campaign about the battle of Marianas with the Hellcat. Mag3 seems to be making some of the required Japanese ground assets. But we don't know anything about Japanese infantry assets or any American ground assets. Ideally we should get a Solomons map. That area is appropriate for wildcat, Hellcat, Corsair, zero, p40, p39, p38 etc. Naturally we'd need various Japanese and American AI aircraft, and ships.2 points
-
Еще раз: в моде реализован вариант Су-30 в модификация с ПГО- у которого в реале кили только короткие (независимо это СМ/МКИ/МКА).2 points
-
Could this be another example of F-5's RWR... *cough* modelling *cough*... shining through, and not an issue with the MiG-21's radar (even thought it's also quite funky....)?2 points
-
This is the possibly the best map in DCS with a very unique look and feel, it stands out from the crowd and has a realistic edge compared to most of the other maps. We invest a lot of time and hard earned money into our flight sim hobby, with technology moving forward we should embrace any new advancement that brings us closer to that real flight feeling as has happened with the rapid development's in VR. Do we want a modern military flight sim or a game?. Following the synthetic route only stagnates and delays the advancement of improvements and development techniques. Someone has to stand up and push the boundaries first. I to do not believe that changing to synthetic will increase its popularity. Some say they get bad performance and visuals at low level, but for me this is the same on any map including Syria, every map has areas that don't match or are a bit 'low quality', and even using different aircraft modules can have an adverse effect on the same maps performance and our enjoyment. The look and textures of this map is what drew me to it, for me it is getting closer to visual realism, whether flying a Hind or a Hornet, high or low. In an ideal world we would have both a synthetic and a satellite option, and the choice would be yours as to which you purchased. I personally choose satellite.2 points
-
I can only agree that DLAA is currently the best anti-aliasing method in DCS. Thanks for this technology Eagle Dynamics.2 points
-
Yes, the burst range is ~150m from set range at launch. So you could manually set a range and put a burst of rockets ahead of an aerial target like flak. You would likely have to manually range the rockets to get this just right, otherwise the speed of motion is likely to rapidly outpace the burst distance. So while I believe that there should be a few improvements to both the K and L's ability to track and hit aerial targets, I have no real evidence of such; or at least, I have no real open source evidence that can be shared in that regard. I can say that within DCS, I have utilized both K and L models as a last-ditch effort to defend myself from enemy aerial threats, both rotary and fixed, but the PK is incredibly small as aiming points are ridiculously sensitive. By that I mean if I don't put the IAT track exactly on the nose of a Mi-24, the missile will harmlessly sail past the aircraft, but if I get the IAT perfectly on the nose, it's almost a hit every time. The same is true of fixed wing aircraft, which is quite hard depending on aspect and maneuvering. The AGM-114L adapted for surface-to-air use does have a different warhead and proximity fuze, but this is a way more modern variant (2016+) and wouldn't be available to us anyways. I have a larger problem with the AI's ability to perfectly track with AT-6/9/16, as even if you hit the launch platform, those missiles will continue to happily plow into your face. On top of this, they're able to track at a rate greater than I as a player can with those same weapons. No. This has been covered extensively. Sidewinder: Never. Ever. Pure fantasy. Lies. Deception. Stinger: AH-64D's made by Japan. AH-64Es of various export models. There were plans and indications that AH-64Es in US Army service would be upgraded to use Stinger on the primary hardpoints by v6, but I have no idea if that went through or got put on the backburner. Regardless, since we have a 2005-2010 era AH-64D, this does not apply for our variant. Further reading: Per the above, at the time of the Jane's Longbow series (as well as Digital Integration's Apache Longbow, Gunship 2000, et al), the AH-64D was envisioned to employ ATAS on the wingtips. Changing priorities, budget, envisioned strategy, etc. modified this requirement and we got CMWS instead. Largely, in the 90s, it was noted that the AH-64's defensive suite was coming up short with evolving threats like MANPADS. This was seen as a greater problem than enemy aircraft. This topic always seems to come up for a variety of reasons, but largely because the scenarios within DCS don't reflect how the US Army and US military as a whole plan to fight. Let's take a peek at FM 3-04, Chapter 3, page 3-52, section 3-220: Egads! What's this? We're supposed to avoid threats first of all?! Madness! How can I make my ace combat 20 kill streak pwning n00bs in my ultimate attack chopper, the AH-64D when I'm supposed to avoid threats?! This sucks, I want my money back! Yet as we can see above, engaging threats is a last resort by doctrine. Bear in mind that this is the modern picture and older publications treat the subject differently. However, as we're largely concerned with the modern picture (see: 2005-2010 era AH-64D), we can assume the above applies to our module. Why? Well, because of a few things: 1. Patriot. 2. SHORAD a la MANPADS, Avenger. 3. USAF. 4. USN. 5. USMC. The last three are the important bit, because at any given time, somebody, somewhere, has an AIM-120 (or AIM-9), and several somebodies likely know about enemy air power. Said somebodies want enemy air power dead. Many times over. So throw several pointy nosed fighters (and probably a few blunt nosed as well) at the problem, all chomping at the bit to be the next "chopper popper". Then once enemy air is killed a hundred times over, somebody with a few bombs (and a few cruise missiles) is going to find where enemy air came from and ensure that enemy air will not come from there again. Well, you might have some pigeons and a few vultures eating some good BBQ afterward, but unless you're planning to ingest bird guts (you sicko), they're probably not a concern to your helicopter. Now, should you, within a fictional DCS scenario, attempt to seek out and engage enemy air? Nothing is stopping you (I've done it), but one must understand that it is an inherently disadvantageous situation to be in. Be prepared to die - a lot.2 points
-
I would have to agree! There is no room for Politics, the subject just makes people angry! I've been a Member of DCS World since its release, it's an amazing Simulator! DCS World has become a true hobby! So let's just keep things fun! Timex 32 points
-
Coming back on the 1070 with my lower spec rig: Intel(R) Core(TM) i7-6700K@4.00GHz GTX1070 40GB RAM @3000MHz Flat screen monitor 1920x1080@60Hz with NVIDA VSYNC set to ON Comparing ST with MT in Openbeta 2.9.1.48335: In ST the performance is pretty fine in ST, there are no frame spikes at all, everything is super fluid (the little spike to the most right is taking the screenshot) In MT things are REALLY bad: During the mission (1 single aircraft on map), spikes at no reasonable times stop the simulation completely for some milliseconds, and it stutters therefore: This is the reason why I still fly in ST. MT is not ready for this kind of configuration. If anybody has tips, I would love to read them. System is configured following all tips & tricks around here. Windows Service Power OFF Windows Graphic Settings HIGH PERFORMANCE Installation on fast SSD with plenty of room for the installation, and the page file on another SDD disk. Again: the ST version runs fine, no stutters!!! IMHO the biggest problem is with MT, nothing else. options.lua
2 points
-
А ни чё что тема "DCS: Лучшие моды" ?2 points
-
Short video from startup.2 points
-
I predict.... - A deep looming voice thanking us and wishing us well. - Soft music replete with a sense of impending doom. - Dramatic overwhelming sounds and visuals all leading a hushed... wait for it... wait for it... "Oh cool!" .2 points
-
Why do people have such a hard-on for arguing about which airplane is best? Just fly the damn thing and have fun.2 points
-
In this DCS: AH-64D video, I’ll be going over the controls and pages of the Fire Control Radar, or FCR. The FCR can be used by the Pilot or the CPG to detect and engage targets; however, it can only be used by one crewmember at any given time. Like the HMD and TADS, the FCR must be selected as the crewmember’s sight before it can be used. Once selected as a sight, the various controls of the FCR become active within that crew station. FCR controls can be found on the collective Mission Grip in either crew station, or on the left and right TEDAC grips in the CPG crew station. Regardless of whether the FCR is operated from the TEDAC grips or the Collective Mission Grip, the FCR functions for each switch remain the same. Let’s start by having a look at the relevant controls on the axis controls and collective Mission Grip : 1. To start off with, the MPD Cursor Controller is not necessarily part of the FCR itself, but these controls will prove very useful for interacting with the FCR page. This is best set as an axis. 2. The FCR Mode Switch sets the FCR to one of four modes; but for now, we’ll only be using Ground Targeting Mode, or GTM. The other modes are planned for later in early access. 3. The FCR Scan Size Switch is used to set the total volume of the battlefield that is scanned by the FCR, and this functions similarly to the TADS Field-Of-View switch. 4. The FCR Scan Switch can be momentarily pressed to either S, for Single, or C, for Continuous. 5. Then of course the Sight Select Switch is used to select the FCR as the sight. The LINK position of the Sight Select Switch will come later in early access as well. Now let’s look at the FCR page. While we are here in the CPG crew station, you can see that the same FCR controls that are on the Mission Grip are split between the two TEDAC grips, with the Sight Select Switch and FCR Scan Size Switch on the right grip; and the FCR Mode Switch and the FCR Scan Switch on the left grip. But again, whether you use the collective grip or the TEDAC grips, the FCR will function the same way. The first thing we’ll need to do is power the FCR system, which can be performed from the Weapon Utility page, just like powering the TADS; or it can be powered from the FCR Utility page. It doesn’t matter which. You’ll notice that the FCR option is barriered because the state of the Mast Mounted Assembly, or MMA, is still set to PINNED. If I press that button to toggle the MMA state to NORM, you’ll see that the FCR automatically begins its power-up sequence. The built-in test will go on for approximately 1 minute, but if you like, you can abort this test. Now that the FCR is powered, I’m going to change selected sight to FCR using the left position of the Sight Select Switch. You’ll notice that when I select FCR as my sight, the left MPD will automatically autopage to the FCR page. You’ll also notice that the CPG’s helmet display changes to TADS video, which will be especially useful when the LINK function is added later in early access. For now, we’ll move the helmet display out of the way. The two of the three main sections of the FCR page are the Heading Tape along the top and the High Action Display along the bottom, which function identically to those in the IHADSS symbology. The third main section is the FCR display itself, which is a top-down view of the battlefield. Along either side are some additional FCR controls. The left and right arrows will rotate the FCR one full scan width left or right with each button press. If I were to press the left arrow, you can see a small FCR radome symbol along the bottom of the Heading Tape will move to show the direction to which the FCR scan zone is pointed, even though the FCR display on the MPD itself does not rotate. Additionally, you can also see a solid vertical line in the Field-Of-Regard box that shows which direction the FCR scan zone is pointed. Alternatively, I can use the MAN TRACK controller on the right TEDAC grip to slew the FCR smoothly left and right, if SLAVE is disabled. It’s important to note that the TSD also displays the FCR scan zone as it is depicted in real time, which can be easily seen as I slew the FCR scan zone left and right using the controller. This can be useful for orienting yourself to orientation of the FCR page, since the FCR page displays the view as seen from the FCR. Just as the TADS footprint on the TSD can be used to orient either crewmember to the video displayed by the TADS sensor. Below the left arrow we have the TGT, or Target button, which we will go over in a future video. Next is the Elevation mode button, which can be used to toggle the FCR elevation control to Manual. When I press this button, it is replaced by two arrows that allow you to manually slew the FCR antenna in the vertical axis, which can be referenced by the FCR elevation scale directly below the bottom arrow. Alternatively, when the FCR elevation control is set to Manual, I can use the MAN TRACK controller to adjust the FCR antenna elevation as well, in addition to slewing it left and right. In the bottom right corner, we have the ACQ, or Acquisition, selection menu, which functions the same way as it would on the Weapon or TSD pages. Finally, we have the C-SCOPE and ZOOM options, which are planned for a future update. Let’s now have a look at the FCR Utility page again. Along the left side we have an option to toggle the FCR elevation control between Auto and Manual, which will be necessary to return the FCR elevation back to Automatic. Another option worth noting is setting a different Priority Scheme between A, B, or C, which is reflected in the High Action Display as well. We’ll de-select the UTIL option to return to the main FCR page again. Next, if I press the FCR button along the top of the TEDAC, I can also display the FCR page on the TDU screen. This allows me to use the FCR directly from the TEDAC for targeting, which then frees up my MPDs for other things like the WPN or TSD pages. I can even interact with the FCR page directly on the TDU by moving my cursor to the FCR display. To do this, I will need to use a “bump” method that would otherwise be used to move the MPD cursor between each MPD. However, if the FCR page is displayed on the TDU, the MPD cursor will move between the MPDs and the TDU in a linear sequence. I apply pressure to the MPD controller to place the cursor along the inside edge of the MPD, release pressure, and then re-apply pressure again and now I have the MPD cursor on the FCR page in the center. I can even interact with the FCR options along the edges, just like the MPDs. I’m going to ensure my FCR is pointed toward where I want to scan, I am going to adjust my FCR scan size to the area I want to scan, let’s say Medium FOV, and then I can either perform a single scan or a continuous scan. Right now, I’m just going to perform a single scan by momentarily pressing the FCR Scan Switch to the forward “S” position. As you can see, the FCR will display a “wiper” as it scans the battlefield back and forth. When targets are detected, they are displayed as yellow symbols on the FCR page and on the TSD page. As targets are displayed, you can see their range using the range arcs and tick marks. Each range arc corresponds with an even range value, 2 kilometers, 4 kilometers, 6 kilometers, and the furthest edge at 8 kilometers. Each tick mark between them represents the odd range values. The type of symbol displayed by the FCR represents the type of target the FCR has classified it as. 1. The H-shaped symbols are tracked vehicles like tanks or other armored vehicles. 2. The circle symbols are wheeled vehicles like trucks or some types of APCs. 3. The triangle symbols are air defense units like the ZSU-23-4 or SA-8. 4. The square symbols are an unknown target type. In addition, there are also unique target symbols for helicopters or fixed-wing aircraft, but we will go over those when the Air Targeting Mode is implemented. Each of these target symbols may also be solid with a black dot in the center to display that they are moving, or hollow to display that they are a stationary target. It is worth noting that only moving target symbols will be displayed beyond 6 kilometers. Two additional symbols are displayed, which are the Next-To-Shoot, or NTS, diamond; and the Alternate Next-To-Shoot triangle. These represent the highest priority target that is detected, and the second highest priority target detected. When targets are detected, you will also notice the appearance of the total target count in the top right corner; and the NTS button at the top right. We’ll discuss the NTS symbols and the NTS button in the next video. In the next video, we’ll go over how to set target priorities, how to select different targets for engagement, and how to employ the onboard weapons against FCR targets. Thanks for watching.2 points
-
Let me clarify a few things, because right now you are asking the wrong things, to the wrong people, in the wrong order. Let's start with the basics: DCS does implement quad views rendering in their engine. So the title of this thread isn't going to make sense to any one looking at it. My guess is that Eagle Dynamics added support for it in order to enable Bionic Display on Varjo's VR-3 and XR-3 high-end professional headsets. Quad views rendering is the only option today that Varjo offers to enable Bionic Display. Now here are the 3 issues that need to be addressed 1) DCS only implements the Bionic Display flavor of quad views, which is by nature fixed foveated rendering, because the extra video panel in the Bionic Display is fixed (it does not move with your eyes, that would require absolutely crazy mechanical tech). Now this fixed foveated rendering does not help too much with performance, because it is set up specifically for the Bionic Display usage, where the high density panel is fairly large. So in order to make a performance boost in DCS, we want to use dynamic foveated rendering with quad views. However Eagle Dynamics did not implement that. This is what my original Varjo-Foveated mod did: it forces the eye tracking capability into DCS' implementation of quad views in order to achieve dynamic foveated rendering. So ask number 1 to Eagle Dynamics is: can you implement the dynamic foveated rendering flavor of quad views in DCS? This is a very simple change to make. Stated in technical terms: Can you add support for XR_VARJO_foveated_rendering? It's really simple, all you need to do is add a couple of extra flags when initializing the OpenXR instance, the querying the resolution for your swapchains, and querying the view pose/FOV for rendering at each frame. 2) DCS implementation of quad views has bugs. In particular, related to the addition of dynamic foveated rendering above, there is a bug in DCS MT version where data from the next/previous frame is being incorrectly used for the current frame. Because of this bug, the foveated region cannot work properly when eye tracking is used, because the region ends up being warped out of place when you move your eyes. I implemented a workaround to this issue in both Varjo-Foveated and Quad-Views-Foveated. This bug was reported to @BIGNEWY on March 18th in the post linked below, with a very detailed explanation including a detailed trace log. Actually both 1) and 2) were logged in that post back in March. So ask number 2 to Eagle Dynamics is to fix this bug with XrFovf submission in order to make their implementation of quad views compatible with XR_VARJO_foveated_rendering. 3) Quad views support is currently only implemented by Varjo in their OpenXR runtime. The quad views technique and OpenXR extensions were coined by Varjo and as a result, only they had stakes to implement it in their platforms. This means that Valve, Meta, etc do not bother implementing support for quad views applications. So even when an application like DCS implements quad views, these vendors will not be able to run the application in quad views mode. This limitation is not on Eagle Dynamics, and there is nothing they can do about it. This is why I developed my second mod, Quad-Views-Foveated, and if you read closely the description of it, it doesn't talk at all about adding anything into the application: What does that mean? It means that Quad-Views-Foveated does not fill a gap in the application (DCS), but instead it fills a gap in the platform (Oculus, Pimax, etc...). Yes, Eagle Dynamics could pull in the entire quad views on top of stereo emulation framework that I created, but it's way outside of the scope of what any normal game engine should do and I would not expect (or even encourage) any game developer to do that. In addition, there are many challenges linked to eye tracking, because just like Meta, Valve, etc did not implement quad views support in their OpenXR runtimes, they also did not implement eye tracking support in them. Only Varjo implements the proper OpenXR interface for eye tracking (XR_EXT_eye_gaze_interaction). Meta chose to only expose social eye tracking data through a proprietary extension in Developer Mode only and recently Steam Link also only forwards eye tracking via a non-standard OSC interface. This is what a 3rd project of mine, OpenXR-Eye-Trackers, aimed at fixing. This is a complete nightmare for any game developer to have to deal with this mess and they really don't have to put up with it. It's not Eagle Dyamics you need to ask the feature to: it's Meta, Valve, Pimax, etc. instead. They are the ones who need to build support for XR_VARJO_quad_views and XR_VARJO_foveated_rendering into their platforms. Summary - Eagle Dynamics, please resolve issue 1) and 2) described above in order to offer an implementation of dynamic foveated rendering that can work out-of-the-box on platforms like Varjo and Somnium. Resolving these two issues is a very small matter than could be achieved with little effort. - Meta, Valve and other major platform vendors, please provide support for quad views configuration type out-of-the-box in your PC runtimes. Only by having major vendors with mass volume of users supporting the technology out-of-the-box we will encourage developers like Eagle Dynamics and others to provide support for this great technology that really benefits the end users. Until all vendors align with providing quad views support in their OpenXR runtimes, I am afraid my Quad-Views-Foveated mod is going to remain the only way to do dynamic foveated rendering in DCS for Quest Pro, Reverb G2 Omnicept and Pimax Crystal users, and this is not a problem Eagle Dynamics can fix.2 points
-
@Zimmerdylan the truth hurts. I hate to see it go, but the cons far outweigh the pros now. Developing & bringing in more modules is useless. When ppl can't use them and therefore stop buying them. I know the airframes make the $, but the virtual platform and it's ability to operate make the entire ecosystem. It's a touchy balancing act I guess. I know the devs are following orders, from those who sign their checks. I don't blame them of course. But it's pretty pissy going through all the posts reporting bugs that are making it unplayable for so many ppl, and the only replies, if any. Are from other members, trying to help them at least make it playable. Seems like only a select few get in depth responses from the ED team now. My install just mostly gathers dust now to. When I do try and play, I can use only a couple certain modules and ai objects. To try and soften the performance bugs.2 points
-
Very grateful and it is an honor, thank you.2 points
-
Are mod makers not using initials in their classnames? You guys should take a hint from Arma editing and do that. So for instance, if I made a similar S300, I would title it something like SS9_S300 or ss9S300 or something similar so it doesn't conflict. All classes could be prefaced with HDSP_ or hdsp or whatever you want and it won't conflict with anything with different mod pack/maker initials. Mod and mission makers don't already know about this? You can do it to the saves for persistent missions too. <profanity>, this goes back to the original Operation Flashpoint. That was over 20 years ago. You should all be adding initials to classes created. Every time.2 points
-
DLAA on - a game changer since the shimmering was the single worst gfx effect in DCS.2 points
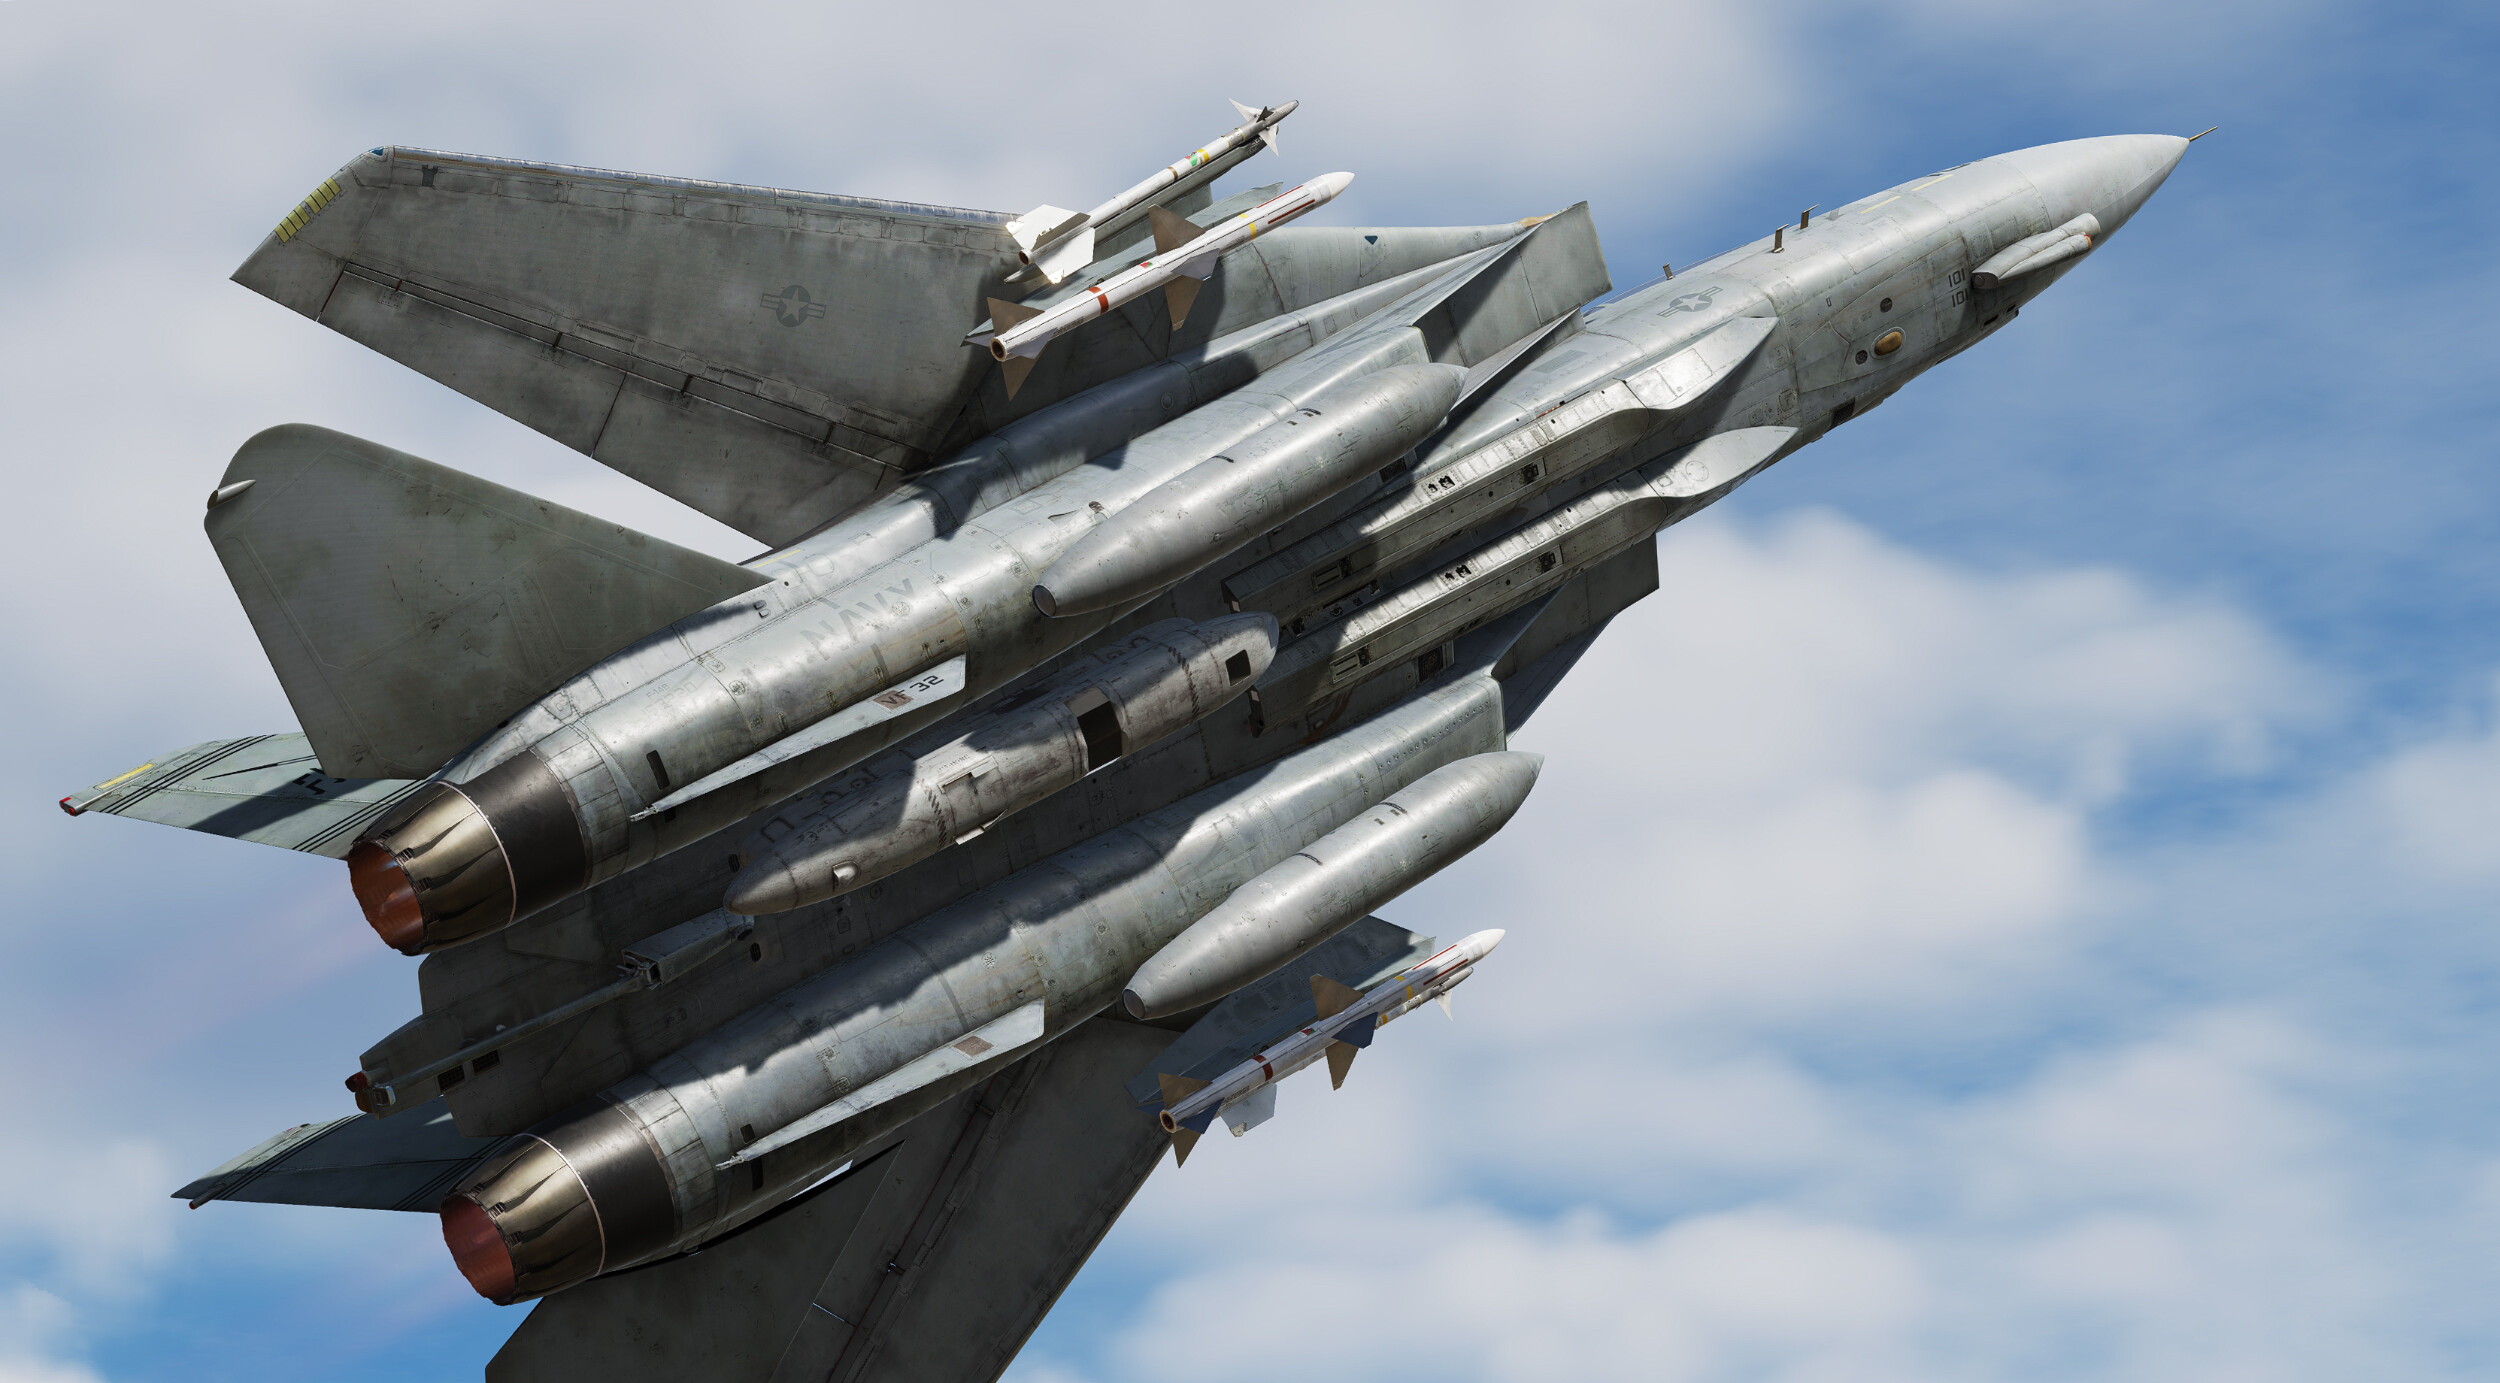
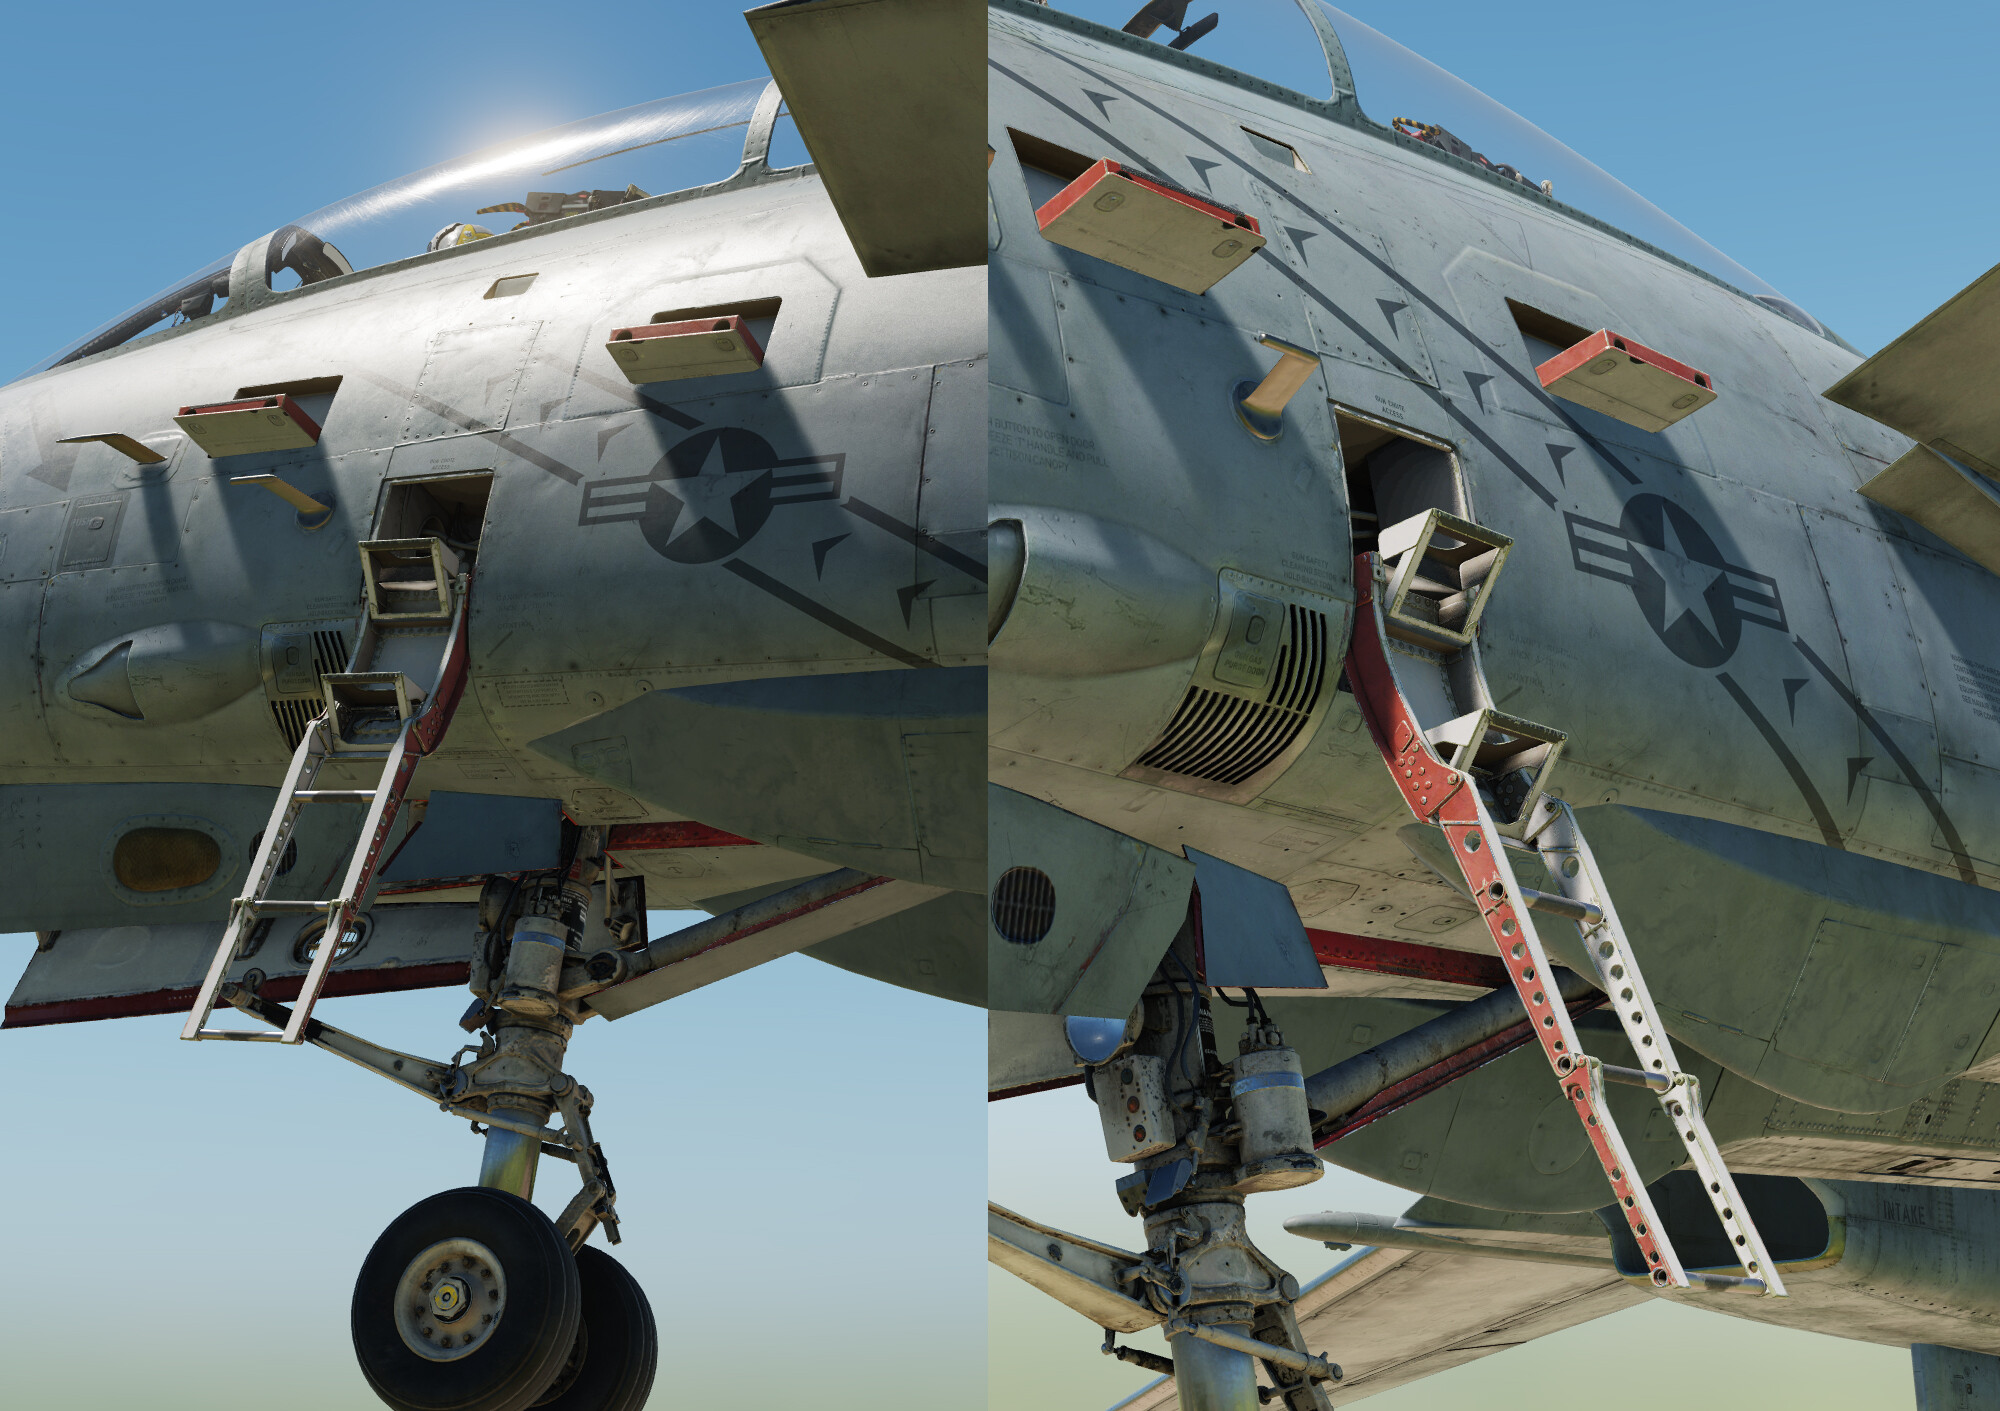
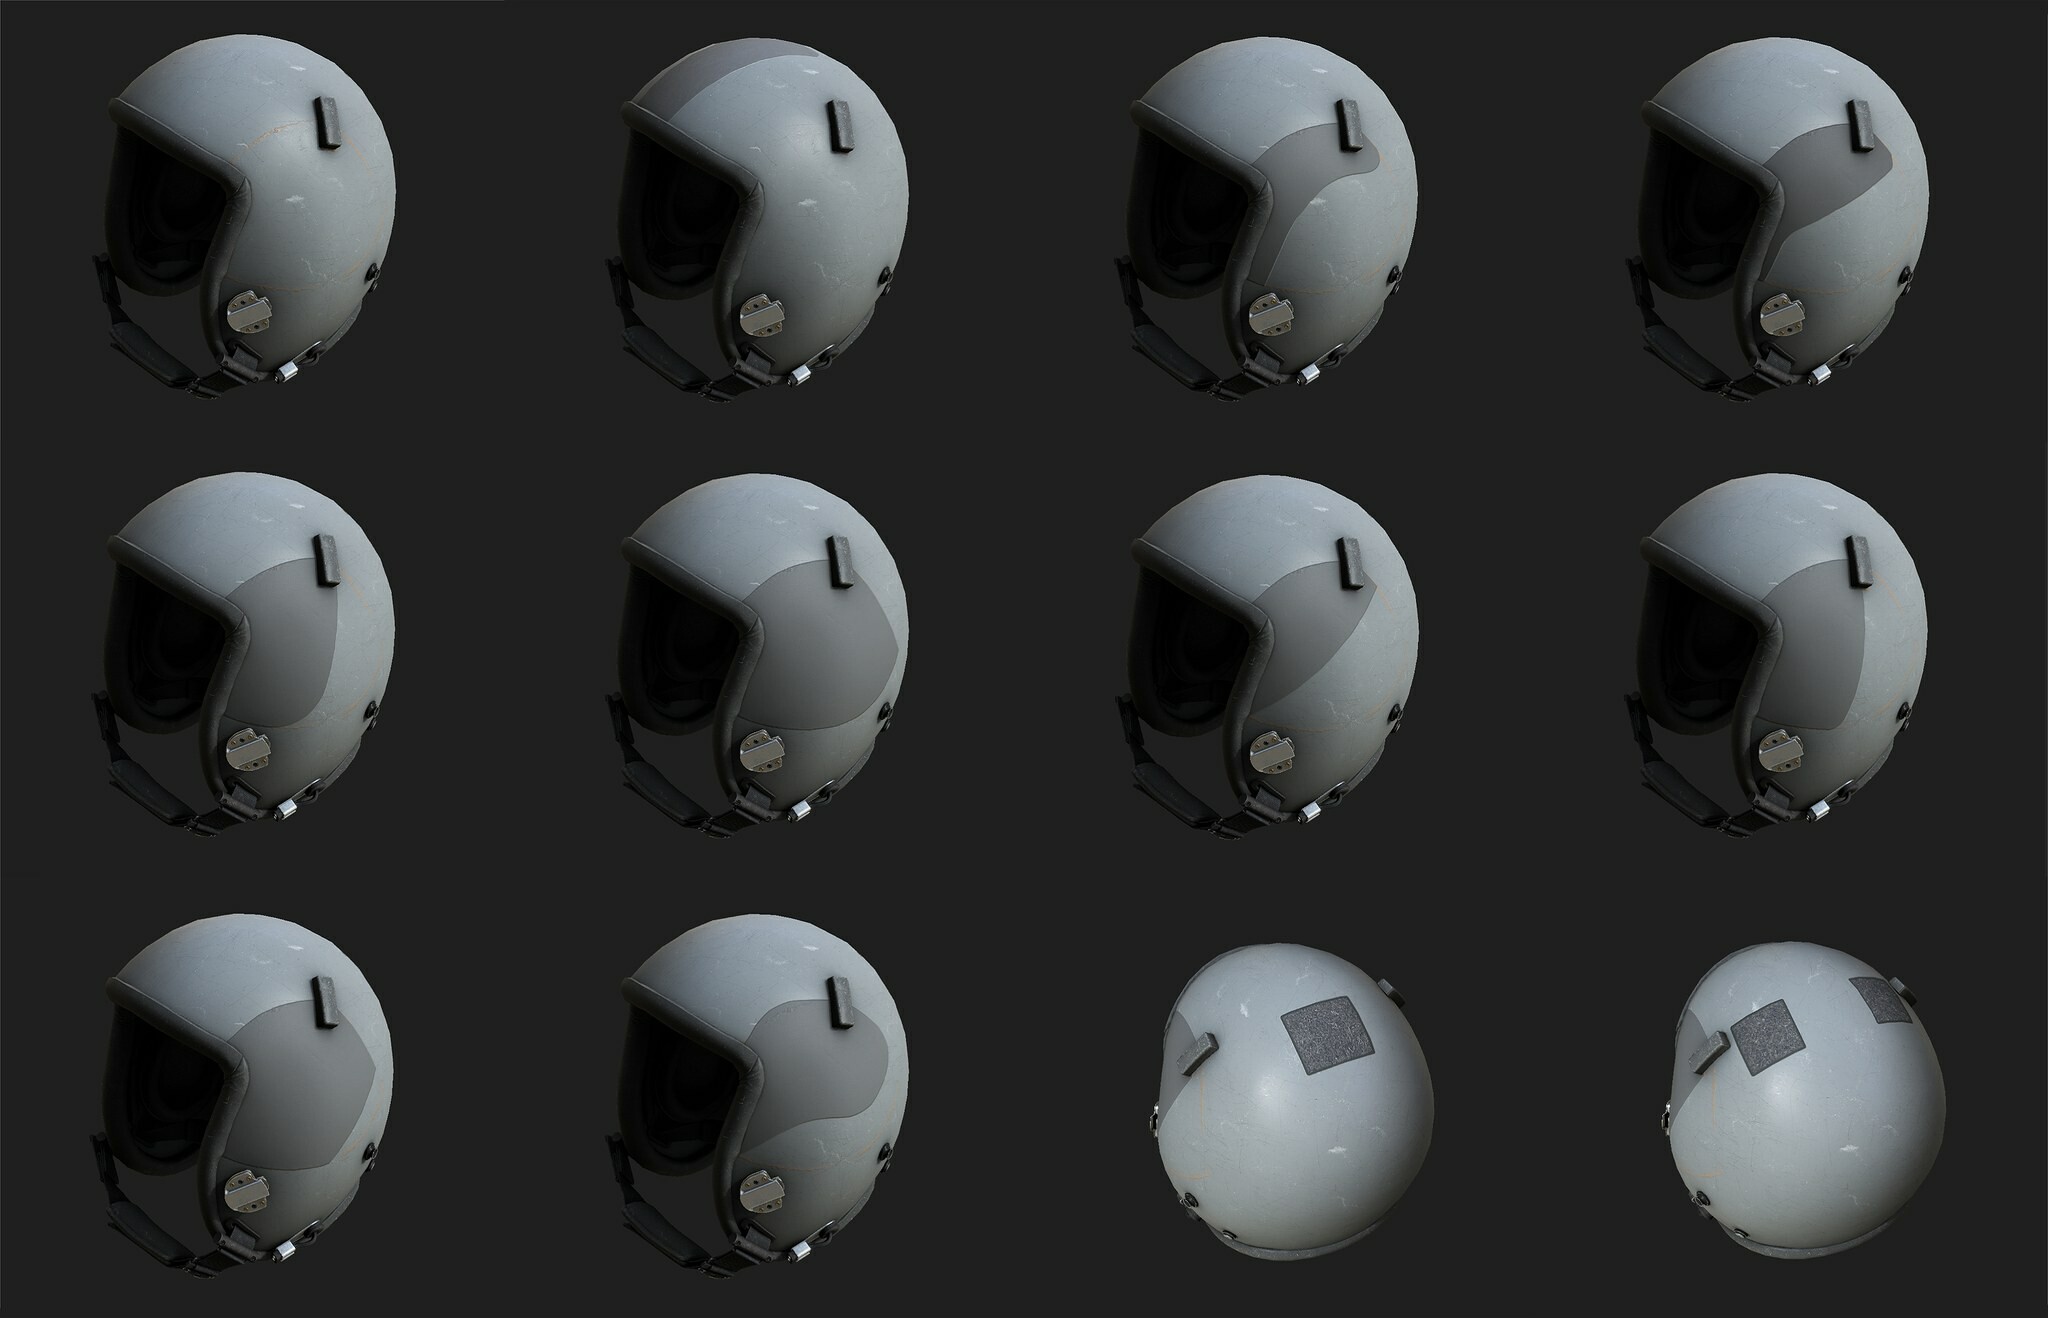
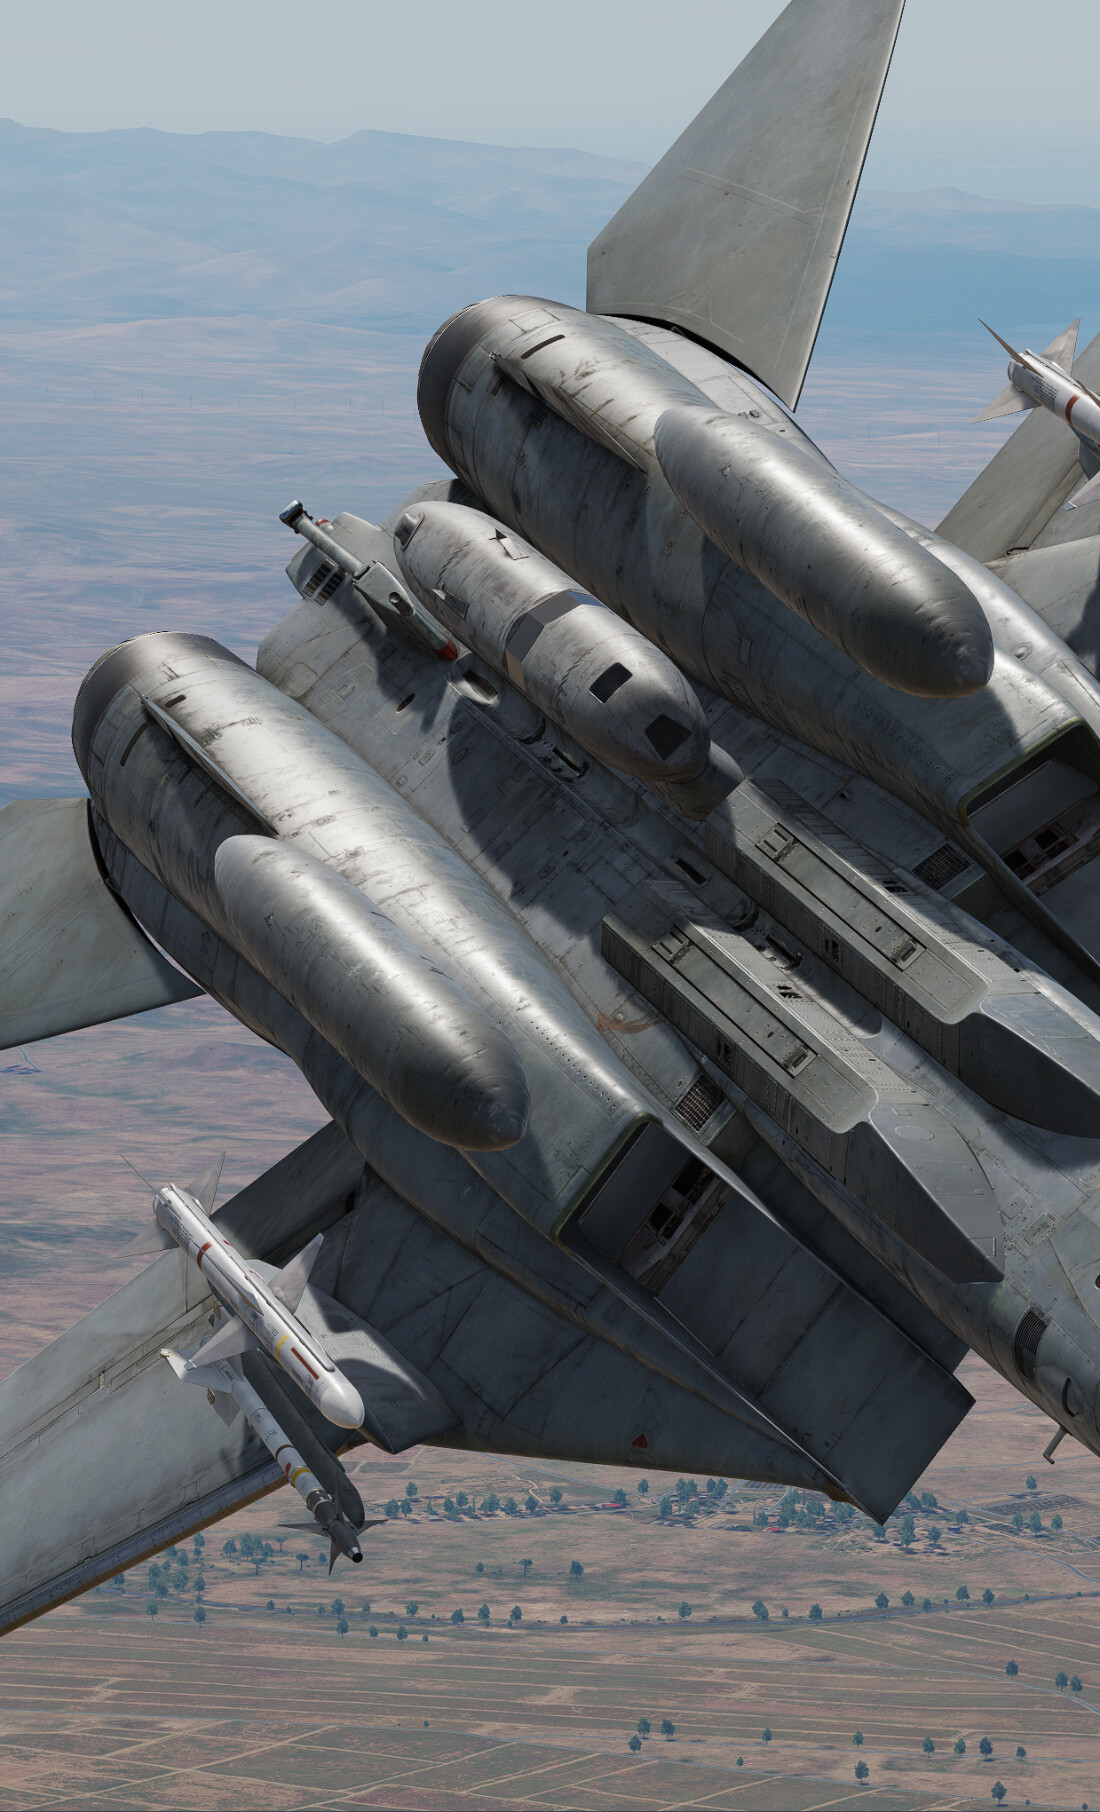


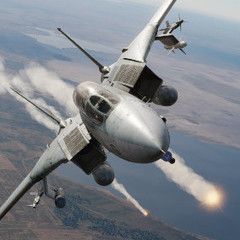


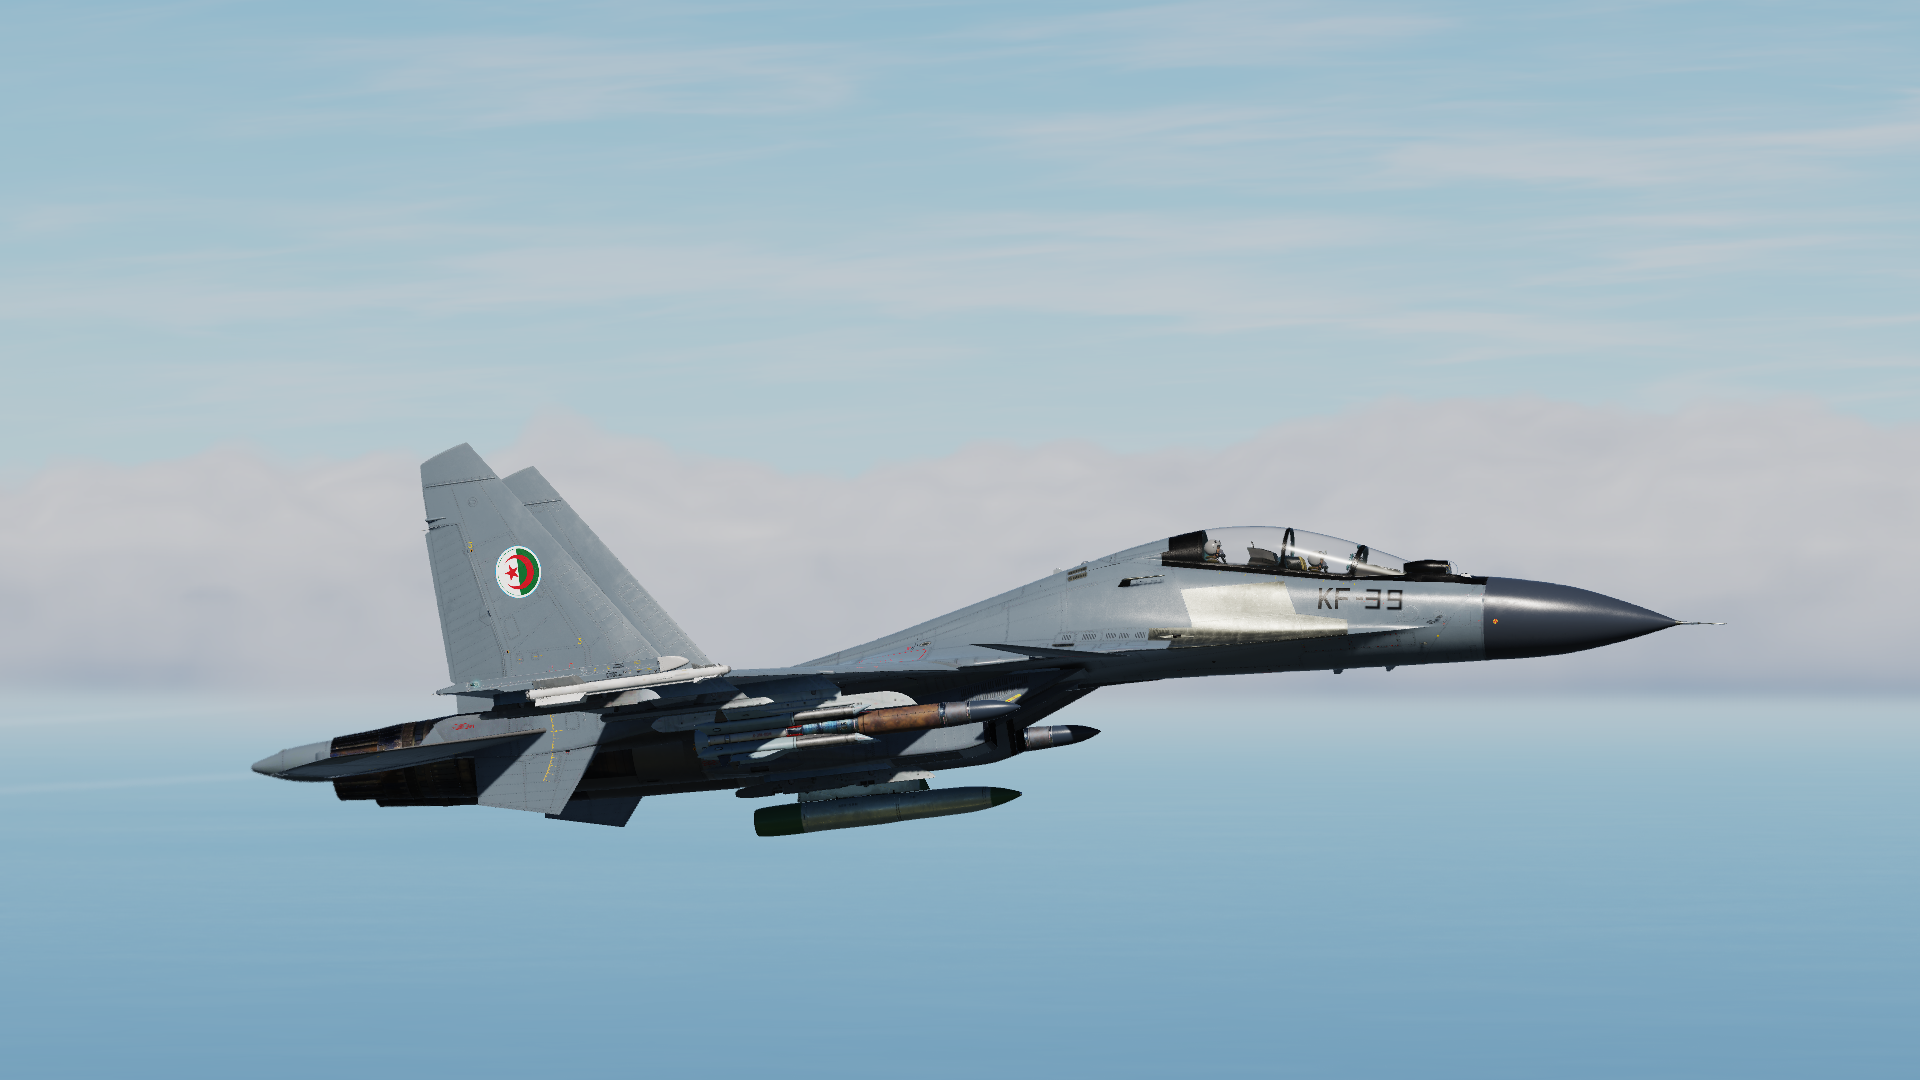

.thumb.jpeg.e9a5eea36533302653032ca510164dc5.jpeg)
.thumb.jpeg.b9a38a8127c434fd6eba974eb2776d00.jpeg)
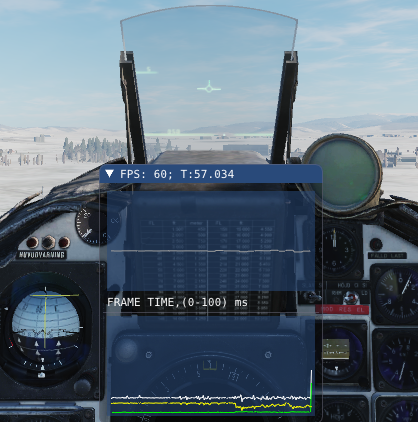
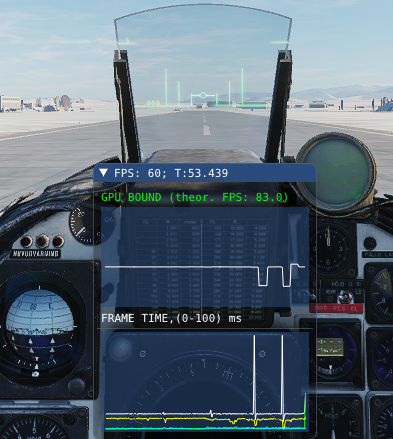
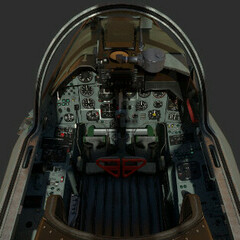

-
Recently Browsing 0 members
- No registered users viewing this page.