Leaderboard


Popular Content
Showing content with the highest reputation on 07/30/25 in all areas
-
DCS C-130J, cargo hold.15 points
-
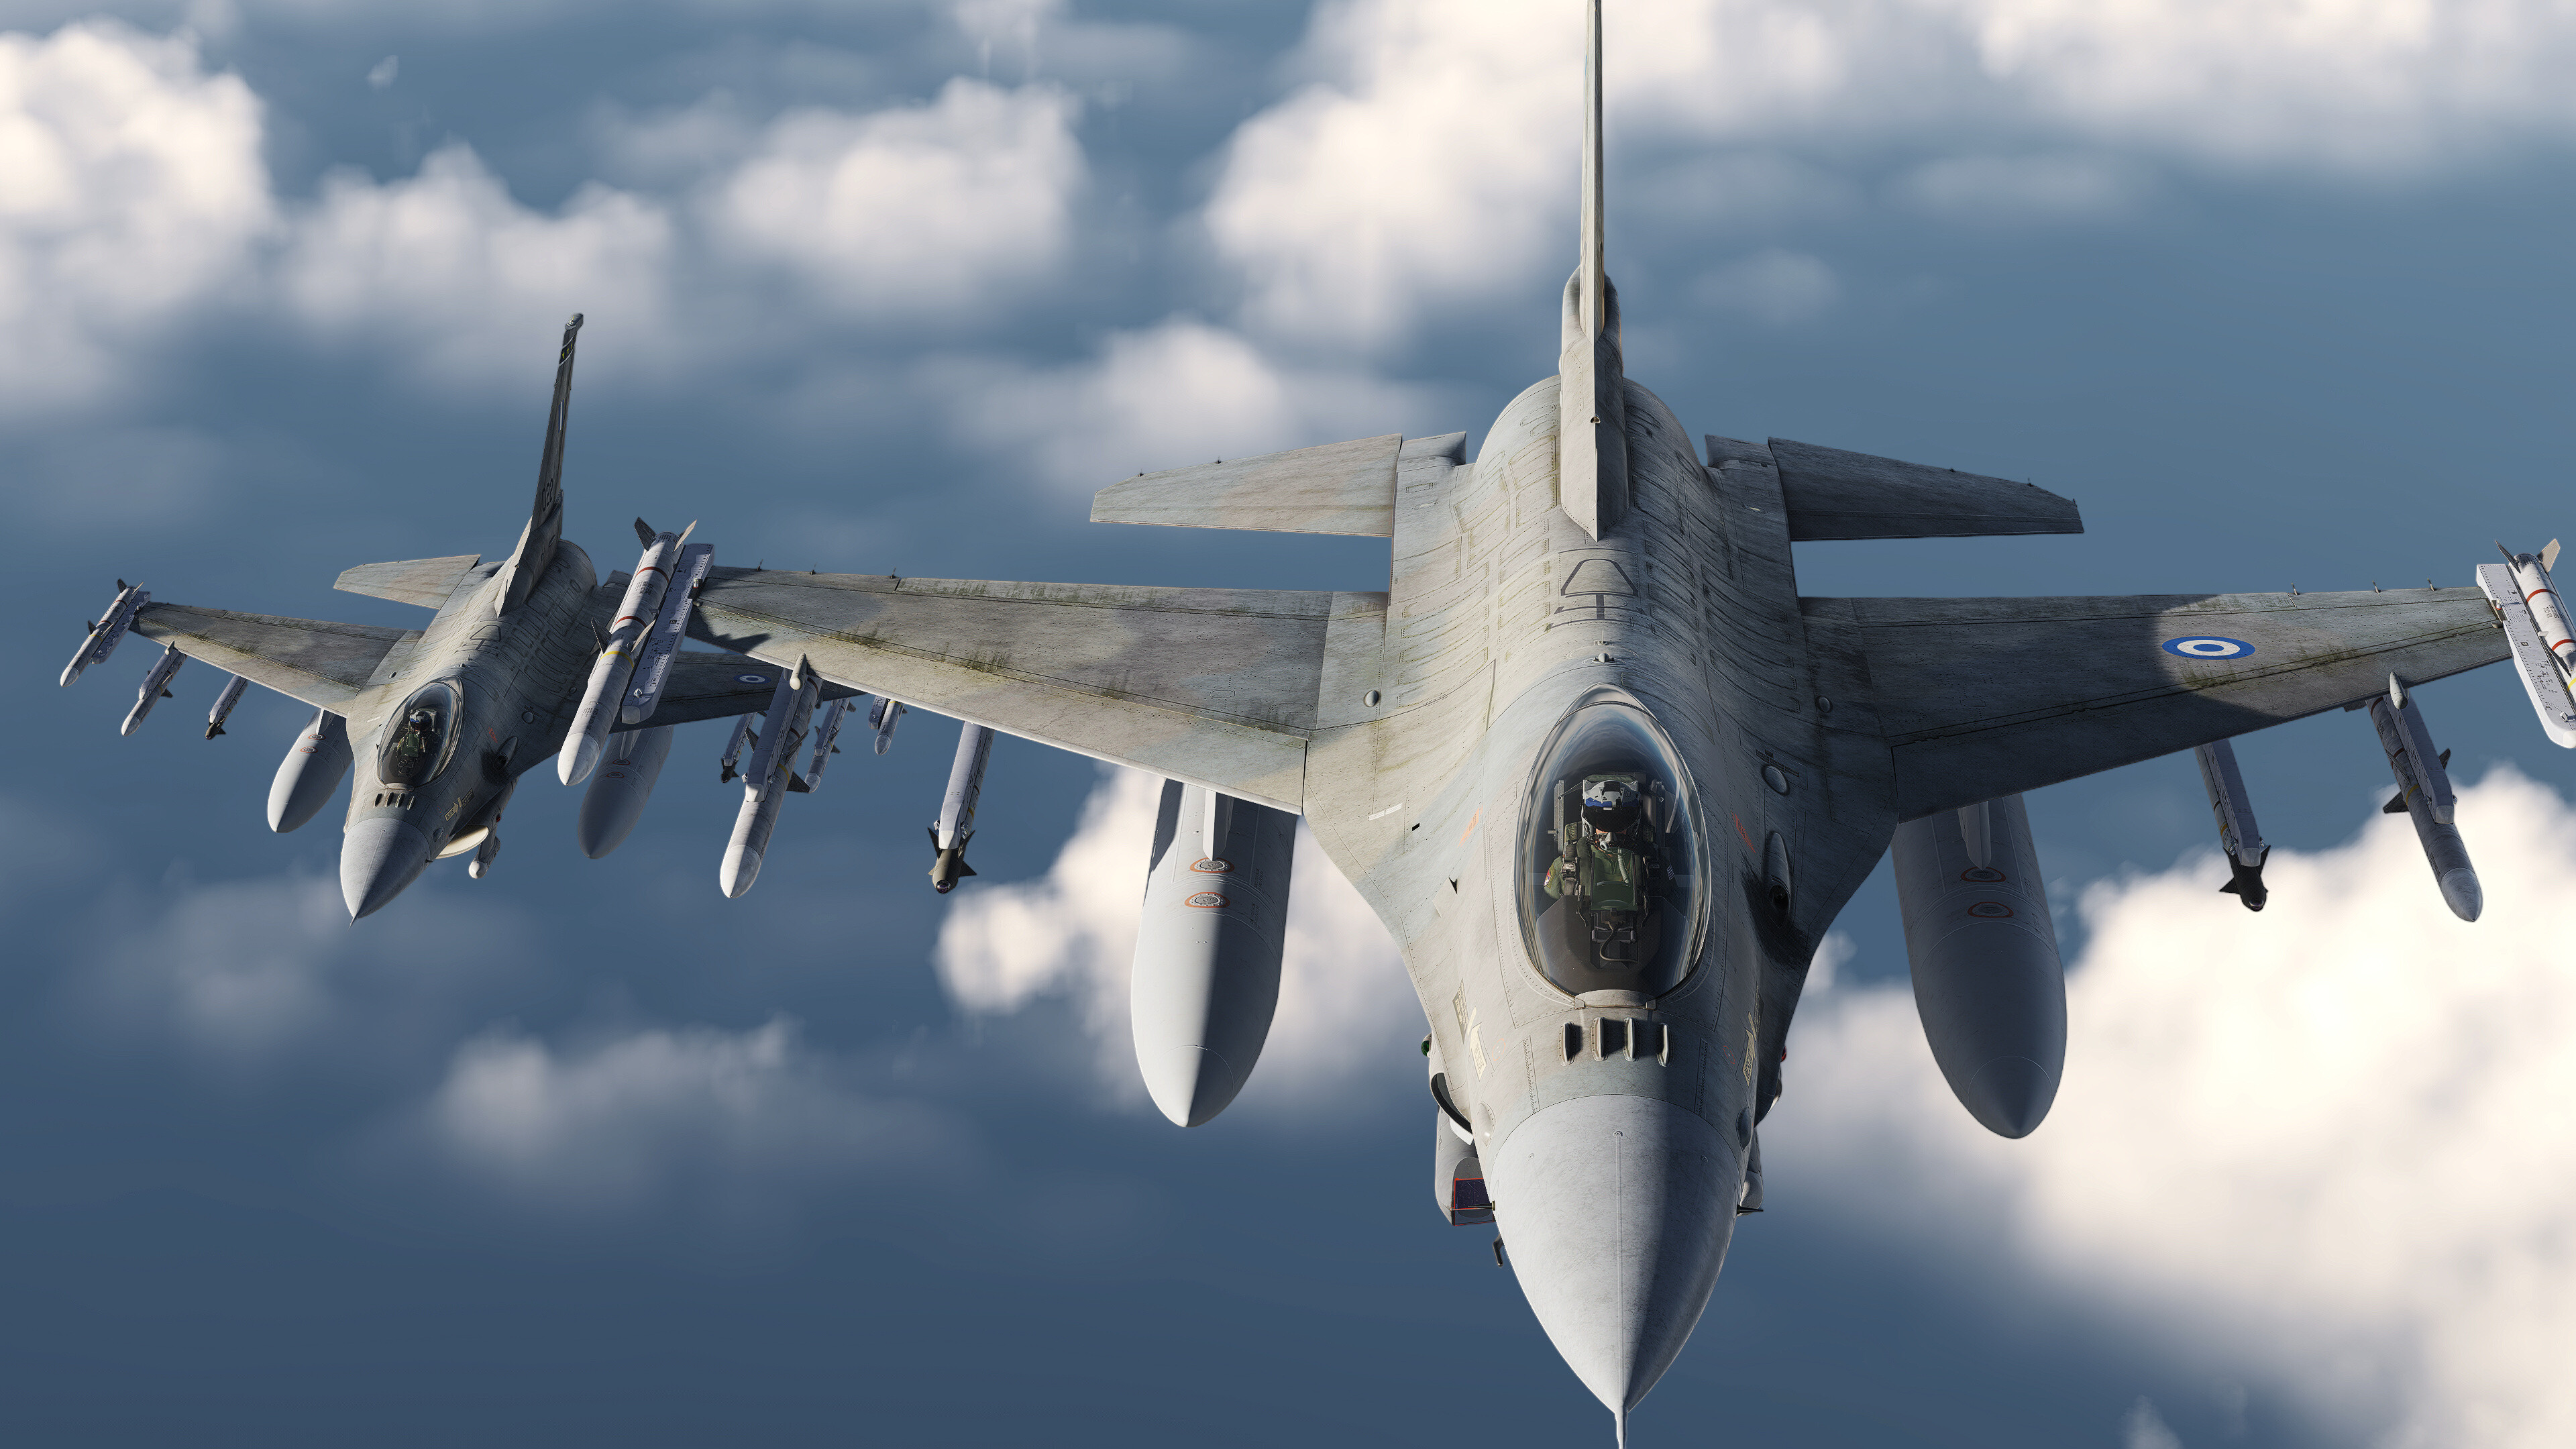
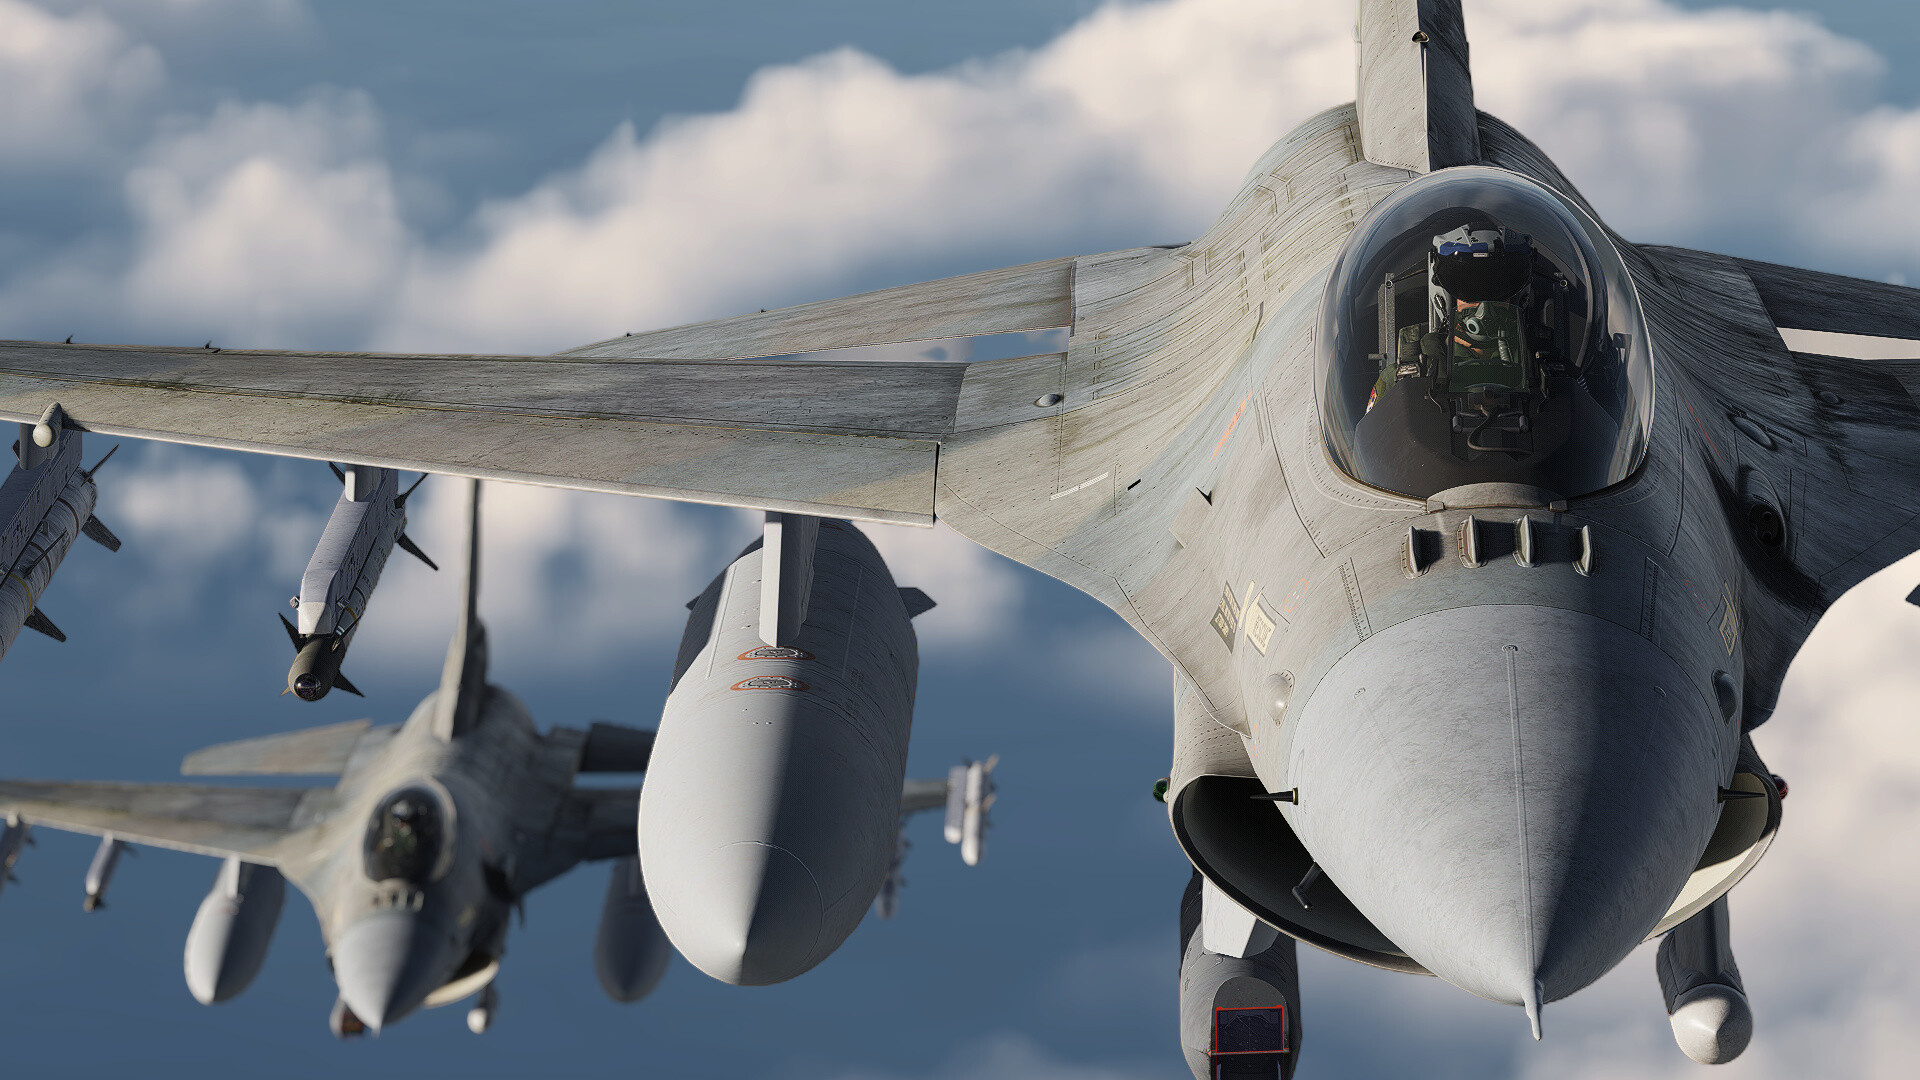
An issue i have been encountering for a while. As the title states, the takeoff rotation in the F-16 in DCS seems to be very slow. In the video below you can see that the F-16C IRL with this configuration needs around 1 second to go from nose at horizon to takeoff pitch (10°) - When i replicate the same configuration(2x bag, 2x GBU-12, 2xAIM-120, LITENING) - Calculate takeoff speed (Rotate 161kts, takeoff 176) - Im barely able to acheive 10° in 4 seconds, and im at 200kts before im able to go weight-off-wheels. - Realisticly, 200kt with weight-on-wheels is dangerous and can lead to over stressing the wheels. Thanks for the job that you do mods! F-16 TAKEOFF BUG TRACK.trk4 points
-
That is not the point. It cannot be that after such a long time the module does not have a proper manual, especially since supposedly only proofreading is required (since January 2024)...4 points
-
I’m afraid I can’t disclose the exact action taken, but it was directed towards the entire logistics team, rather than any single individual.3 points
-
That's a very broad group of assumptions you've made. In my 43 years of aircraft maintenance, I've worked on many WWII and post war era aircraft and the lack of quality you speak of is very incorrect. Some of the best engineering and workmanship came out of the war effort and that's a fact. Instruments, in particular, are very precision. My Father-in-law is a watch maker and has repaired dozens of warbird instruments over the years and I can tell you from first hand experience that the quality is way better than you surmise. The way the F4U RPM and MP gauges are operating now is not right. The constant vibrating needle is incorrect and setting a manifold pressure of 44.5" is impossible when the needle is bouncing between 41 and 48 like an oscillating saw. IRL these 2 instruments are critical for proper power management and engine life and operate rather smoothly as posted in the videos here. Magnitude 3 LLC needs to correct this behavior in a future update to bring it closer to the expected realism. Maybe it's the same programmer who decided to make the folded wings shake while parked on the carrier and the antenna post to whip around like a sword in flight. Both equally unrealistic and immersion breaking. Cheers, John3 points
-
The Iraq map (presumably the southern part) will also include the Iranian airport - Shiraz. It wasn't included in earlier announcements .3 points
-
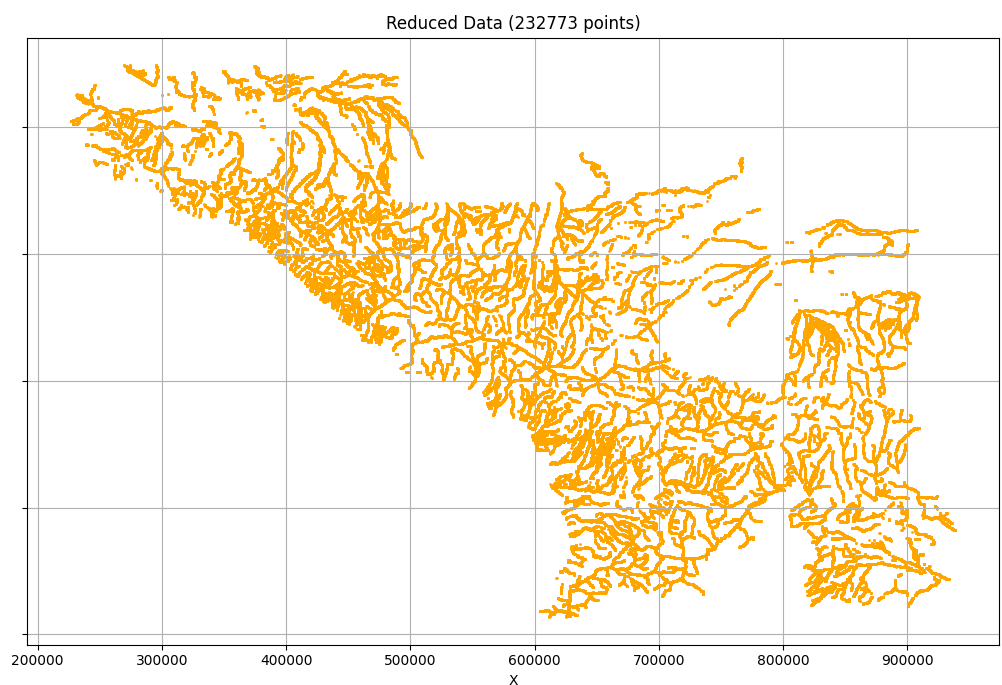
First off, I want to acknowledge that what follows is not groundbreaking — I know others have achieved similar results before. But despite plenty of digging, I couldn’t find anywhere this specific approach is properly documented or explained. So I took on the challenge of figuring it out myself. The Disposition function has recently been discovered and mentioned in the Reddit forums. From what I can tell this does something similar and is far simpler. That said, I still think this method might still be useful to some in the community. It’s also about time I gave something back, since everything I’ve managed to create for my own fun has been built on the shoulders of what others have shared before me. What This Does This setup provides a way to determine the distance from any given point to the nearest map feature: forested areas, roads, towns, rivers, beaches, and so on. Once the KD-Tree is built during mission load, the actual search for nearest point is pretty much instant. Building the KD-Tree can take a few minutes depending on the number of data points. I'm sure there are lots of practical uses but I've used it primarily to spawn/move ground units without them ending up in the indestructable forest. At its core, this is just a way to calculate the distance from a position to the closest matching map feature — based on colour-coded map data. How It Works Python (setup): Take a screenshot of the map and grab the RGB values for each pixel. Match each pixel’s RGB to map coordinates. Filter the pixels based on RGB — for example, greenish colours for trees. Save the resulting coordinate data to a file. Optionally reduce the data resolution to save performance. Lua (in mission scripting): Load the pre-generated data file. Build a KD-Tree (a spatial data structure that allows fast searches). Use the KD-Tree to find the nearest matching point and measure the distance. Use this to determine proximity — e.g. “how far am I from the nearest tree?” Final Notes As must be obivous by now, I’m not a programmer. So feel free to take this and rewrite it to be cleaner, faster, or just less ugly and pass it on. Lua Code to Setup the KD-Tree --- ================= KD Tree Functions ================= --- -- Function to load data from CSV file local function LoadDataPointsTrees(filename) local points = {} local Path = "C:\\Users\\xbox\\Saved Games\\DCS\\Missions" local ok ,fileData = UTILS.LoadFromFile(Path,filename) for lineNumber = 1, #fileData do lineString=fileData[lineNumber] local easting, northing = lineString:match("([^,]+),([^,]+)") easting = tonumber(easting) northing = tonumber(northing) table.insert(points, {northing, easting}) end return points end -- ===================== Data Point Distance Function ====================== -- -- Rebuild the KDTree recursively function rebuild_kdtree(data) if data == nil then return nil end local point = data["point"] local left = rebuild_kdtree(data["left"]) local right = rebuild_kdtree(data["right"]) return KDTreeNode:new(point, left, right) end -- Define a k-d tree node local KDTreeNode = {} KDTreeNode.__index = KDTreeNode function KDTreeNode:create(point, left, right) local node = {} setmetatable(node, KDTreeNode) node.point = point node.left = left node.right = right return node end -- Helper function to slice a table local function sliceTable(tbl, startIdx, endIdx) local sliced = {} for i = startIdx, endIdx do table.insert(sliced, tbl[i]) end return sliced end -- Function to build the k-d tree local function buildKDTree(points, depth) if #points == 0 then return nil end -- Select axis based on depth local axis = depth % 2 -- Sort point list and choose median as pivot element table.sort(points, function(a, b) if axis == 0 then return a[1] < b[1] -- Compare x-coordinates else return a[2] < b[2] -- Compare y-coordinates end end) -- Choose median local median = math.floor(#points / 2) + 1 -- Create node and construct subtrees return KDTreeNode:create( points[median], buildKDTree(sliceTable(points, 1, median - 1), depth + 1), buildKDTree(sliceTable(points, median + 1, #points), depth + 1) ) end -- Function to calculate squared distance between two points local function squaredDistance(p1, p2) return ((p1[1] - p2[1])^2 + (p1[2] - p2[2])^2) end -- Nearest neighbor search in the k-d tree local function nearestNeighborSearch(node, target, depth, best, bestDist) if node == nil then return best, bestDist end local axis = depth % 2 local nextBest = best local nextBestDist = bestDist local currentDist = squaredDistance(node.point, target) if currentDist < bestDist then nextBest = node.point nextBestDist = currentDist end local direction if axis == 0 then direction = target[1] < node.point[1] else direction = target[2] < node.point[2] end local primary = direction and node.left or node.right local secondary = direction and node.right or node.left nextBest, nextBestDist = nearestNeighborSearch(primary, target, depth + 1, nextBest, nextBestDist) if (axis == 0 and (target[1] - node.point[1]) ^ 2 < nextBestDist) or (axis == 1 and (target[2] - node.point[2]) ^ 2 < nextBestDist) then nextBest, nextBestDist = nearestNeighborSearch(secondary, target, depth + 1, nextBest, nextBestDist) end return nextBest, nextBestDist end -- Function to print the k-d tree (for testing purposes) local function printKDTree(node, depth) if node == nil then return end printKDTree(node.left, depth + 1) printKDTree(node.right, depth + 1) end -- Example function to serialize a Lua table (KD-tree) to a string local function serializeTableFROMGPT(t, indent) indent = indent or 0 local result = "" local padding = string.rep(" ", indent) result = result .. "{\n" for k, v in pairs(t) do local key = (type(k) == "string" and string.format("%q", k)) or k if type(v) == "table" then result = result .. padding .. "[" .. key .. "] = " .. serializeTable(v, indent + 4) .. ",\n" else local value = (type(v) == "string" and string.format("%q", v)) or tostring(v) result = result .. padding .. "[" .. key .. "] = " .. value .. ",\n" end end result = result .. string.rep(" ", indent) .. "}" return result end -- Example function to serialize a Lua table (KD-tree) to a string local function serializeTable_close(t, indent) indent = indent or 0 local result = "" local padding = string.rep(" ", indent) result = result .. "{\n" for k, v in pairs(t) do local key = (type(k) == "string" and string.format("%q", k)) or k if type(v) == "table" then result = result .. padding .. " " .. key .. " : " .. serializeTable(v, indent + 4) .. ",\n" else local value = (type(v) == "string" and string.format("%q", v)) or tostring(v) result = result .. padding .. " " .. key .. " : " .. value .. ",\n" end end result = result .. string.rep(" ", indent) .. "}" return result end -- Example function to serialize a Lua table (KD-tree) to a string local function serializeTable(t, indent) indent = indent or 0 local result = "" local padding = string.rep(" ", indent) result = result .. "{" for k, v in pairs(t) do local key = (type(k) == "string" and string.format("%q", k)) or k if type(v) == "table" then result = result .. padding .. " " .. key .. " = " .. serializeTable(v, indent + 0) .. "," else local value = (type(v) == "string" and string.format("%q", v)) or tostring(v) result = result .. padding .. " " .. key .. " = " .. value .. "," end end result = result .. string.rep(" ", indent) .. "}" return result end -- ============================================================================================================= local function GetDistanceToTrees(targetCoord) -- Nearest neighbor search example local distSquared = nil local nearest = nil local north = math.floor(targetCoord.x) local east = math.floor(targetCoord.z) --env.info(" - target coordinate " .. north .. " ".. east) local target = {north, east} --env.info(" Test north "..target[1] .. " east ".. target[2]) if kdtree then nearest, distSquared = nearestNeighborSearch(kdtree, target, 0, kdtree.point, squaredDistance(kdtree.point, target)) --print(string.format("Nearest neighbor to (%d, %d) is (%d, %d) with squared distance %d", target[1], target[2], nearest[1], nearest[2], dist)) else env.info(" ---- KD-Tree is empty ---") end -- Returning the squared distance (as finding root takes time) return distSquared end – Set up the KD-Tree env.info(" -- KD-Tree:") env.info(" - Loading the RAW Tree Datapoints") local points = LoadDataPointsTrees(treeDataPoints) env.info(" - Building the KD Tree") kdtree = buildKDTree(points, 0) To get a distance use the following: – Using the functions : distanceToTrees = GetDistanceToTrees(randomCoordinate) Before building the KD-Tree, you need to generate the RGB data for each coordinate on the map that is of interest. The python scripts follow: The 1stPython script captures the map data coordinates and RGB for each location. The 2nd Python script filters the RGB into suitabl buckets, that you can use in the KD-Tree The 3rd Python script can be used to reduce the number of data points and thus the time taken to build the KD-tree when first running a mission. # -- ========================================== -- # -- ============ DCS Tree Mapping ============ -- # -- ============ Script One ============ -- # -- ========================================== -- # # -- Mikey, "LittleNose" # -- October 2024 # # Script to take screenshots from DCS Map and determine the terrain / features # For me it is primarily used by my mission script to determine location of the indestructable DCS trees # This can be used as a database for searching against when spawning / moving ground units # # I use the data points file to check coordinates for distances from trees # The datafile takes a long time to read into DCS script, however, it only needs to do it once per server restart. # Within the DCS mission script, KD-Trees is the function I use for searching the data points file # https://www.baeldung.com/cs/k-d-trees # # # Thanks go out to the Martin from the SDCS server. # Here on the ED Forums, it is mentioned SDCS use "Anti Tree Technology": # https://forum.dcs.world/topic/346202-strategic-dcs-a-modern-persistent-pvp-combined-arms-driven-campaign/ # Although I don't know how they do it, knowing it's possible was the inspiration to try. # In the same vein, I hope that this spurs others into refining and helping the community. # # # -- =============== Instructions =============== -- # # Check your Python has the required libraries, and pip those you don't (eg: pip install pyautogui). # Open DCS in windowed mode, position the window top left of your screen # Open Python client in non-overlapping window # Open Mission Editor in DCS, and run a blank mission. # Move the compass rose out of the way # Set the script vaiables below # - coordinates top left and bottom right for the area wanted on the map # - the size per pixel (30m to 70m works well) # Run this python script - don't touch the mouse/keyboard until complete # Your mouse pointer will move around and teh screen will likely zoom and pan too, be patient. # # The csv file created is a list of coordinates and RGB values at those coordinates # # # # # ---------------------------------------------------------------- GLOBAL USER VARIABLES ----------- # Pixel size in m. 30-70 seems to work best. targetPixelSize = 30 # Specify the top left and bottom right coordinates of the area you want to capture # Keeping this to a smaller area reduces time in capturign data, but also when starting up the KD-Tree in mission # SYRIA : COMPLETE X vert, Z horiz #targetMapCoordTopLeft = [ 300000, -500000] #targetMapCoordBtmRight = [-375000, 435000] # SYRIA : CYPRUS X vert, Z horiz targetMapCoordTopLeft = [ 81500, -332000] targetMapCoordBtmRight = [-40000, -114000] # SYRIA : CENTRAL X vert, Z horiz #targetMapCoordTopLeft = [ 23155, -67000] #targetMapCoordBtmRight = [-187000, 253000] # Change this to match your visible map area (avoid the borders etc) xWindowLocations = [60, 2400] # left, right 60, 2400 yWindowLocations = [80, 1300] # top, bottom 100, 1300 # ---------------------------------------------------------------- END OF USER VARIABLES ----------- # ---------------------------------------------------------------- SYSTEM VARIABLES ---------------- workingFolder = "C:\\Users\\xbox\\Saved Games\\DCSTrees\\" rgbPartOutputFilePrefix = "rgb_part_" rgbAllOutputFilename = "rgb_all.csv" # Distance between pixels on the screen distPerPixelTopX = 0 distPerPixelBtmX = 0 distPerPixelLeftY = 0 distPerPixelRightY = 0 xCornerCoords = [[0,0],[0,0],[0,0],[0,0]] zCornerCoords = [[0,0],[0,0],[0,0],[0,0]] # ---------------------------------------------------------------- SYSTEM IMPORTS ---------------- import os import csv import math # pip install pandas import pandas as pd import numpy as np np.set_printoptions(suppress=True) #pip install matplotlib import matplotlib.pyplot as plt #pip install pyautogui import pyautogui #pip install keyboard import keyboard #pip install pyperclip import pyperclip #pip install pynput from pynput.mouse import Controller mouse = Controller() # ---------------------------------------------------------------- FUNCTIONS ---------------- def GetAreaGameCoordinates(): #print(" - Get Coordinates of the DCS Screen Grab") global xCornerCoords, zCornerCoords # loop 4 corners cornerIndices = [[0,0],[1,0],[0,1],[1,1]] for i in range(len(cornerIndices)): ix = cornerIndices[i][0] iy = cornerIndices[i][1] # Move Mouse to corner location of screen grab pyautogui.moveTo(xWindowLocations[ix],yWindowLocations[iy]) # Get Popup with coords keyboard.press('alt') pyautogui.click() keyboard.release('alt') # copy the coordinates pyautogui.moveTo(430, 375) pyautogui.click() # close the window pyautogui.moveTo(350, 375) pyautogui.click() # pu thte text into the clipboard copiedText = pyperclip.paste().split("\n")[0] #print(" - Text copied: {}".format(copiedText)) # Manipulate teh text to get teh coordinate values copiedTextSplit = copiedText.split(" ") if "+" in copiedTextSplit[1]: xCornerCoords[i]=(int(copiedTextSplit[1].split("+")[1])) elif "-" in copiedTextSplit[1]: xCornerCoords[i]=(int("-"+copiedTextSplit[1].split("-")[1])) if "+" in copiedTextSplit[2]: zCornerCoords[i]=(int(copiedTextSplit[2].split("+")[1])) elif "-" in copiedTextSplit[2]: zCornerCoords[i]=(int("-"+copiedTextSplit[2].split("-")[1])) def GetPixelSize(): print("\n - Get the pixel size") global distPerPixelTopX, distPerPixelBtmX, distPerPixelLeftY, distPerPixelRightY print(" Northing Easting") print(" - top left coord : {}, {}".format(xCornerCoords[0], zCornerCoords[0])) print(" - top right coord : {}, {}".format(xCornerCoords[1], zCornerCoords[1])) print(" - btm left coord : {}, {}".format(xCornerCoords[2], zCornerCoords[2])) print(" - btm right coord : {}, {}".format(xCornerCoords[3], zCornerCoords[3])) # coordinates NorthingDistanceLeft = xCornerCoords[2] - xCornerCoords[0] NorthingDistanceRight = xCornerCoords[3] - xCornerCoords[1] EastingDistanceTop = zCornerCoords[1] - zCornerCoords[0] EastingDistanceBtm = zCornerCoords[3] - zCornerCoords[2] distPerPixelTopX = EastingDistanceTop / pixelsWidth distPerPixelBtmX = EastingDistanceBtm / pixelsWidth distPerPixelLeftY = NorthingDistanceLeft / pixelsHeight distPerPixelRightY = NorthingDistanceRight / pixelsHeight print(" - Size of a Pixel Top X: {:.2f} m".format(distPerPixelTopX)) print(" - Size of a Pixel Btm X: {:.2f} m".format(distPerPixelBtmX)) print(" - Size of a Pixel Left Y: {:.2f} m".format(distPerPixelLeftY)) print(" - Size of a Pixel Right Y: {:.2f} m\n".format(distPerPixelRightY)) def GrabScreen(): print(" - Grabbing Screen ") left = xWindowLocations[0] top = yWindowLocations[0] width = xWindowLocations[1] - xWindowLocations[0] +1 height = yWindowLocations[1] - yWindowLocations[0] +1 #Grab image: imageScreen = pyautogui.screenshot(region=(left,top, width,height)) print(" - Captured Screen, pixels x{},y{} to x{}, y{}".format(xWindowLocations[0], yWindowLocations[0], xWindowLocations[1], yWindowLocations[1])) # Generate a List of the RGB values in format (r,g,b,transparency): pixel_values = list(imageScreen.getdata()) rgbPartOutputFilename = rgbPartOutputFilePrefix+str(screenX)+"_"+str(screenY)+".csv" try: os.remove(rgbPartOutputFilename) print(" - Deleting Existing file {}".format(rgbPartOutputFilename)) except: pass print(" - Existing file {} not found to delete".format(rgbPartOutputFilename)) fileOpenCSV = open(rgbPartOutputFilename, "a") #Save RGB to a file: print(" - Generating RGB {}, X{} Y{}".format(loopNumber, screenX, screenY)) eastingPixelCoord = 0 northingPixelCoord = 0 for i in range(len(pixel_values)): pixelColourUnit = [0,0,0] pixelColourUnit[0] = round(pixel_values[i][0], 3) pixelColourUnit[1] = round(pixel_values[i][1], 3) pixelColourUnit[2] = round(pixel_values[i][2], 3) pix_x = i % width pix_y = int((i-pix_x)/width) eastingPixelCoord = zCornerCoords[0] + (pix_x * distPerPixelTopX) northingPixelCoord = xCornerCoords[0] + (pix_y * distPerPixelLeftY) dataString = str(pix_x) + ", " + str(pix_y) + ", " + str(eastingPixelCoord) + ", " + str(northingPixelCoord) +", "+ str(pixelColourUnit[0])+ ", " + str(pixelColourUnit[1])+ ", " + str(pixelColourUnit[2]) + "\n" fileOpenCSV.write(dataString) print(" - Screen Coordinate Top Left N{:.1f}, E{:.1f}".format((xCornerCoords[0]), (zCornerCoords[0]))) print(" - Screen Coordinate Btm Right N{:.1f}, E{:.1f}".format(northingPixelCoord, eastingPixelCoord)) fileOpenCSV.close() print(" - Saved CSV File {}, {}\n".format(loopNumber, rgbPartOutputFilename)) def MoveTheMap(): print(" - Moving the Map for the Next Screen Grab {} {}".format(screenX, screenY)) global xCornerCoords, zCornerCoords pixelX1 = (xWindowLocations[0]+xWindowLocations[1])/2 pixelY1 = (yWindowLocations[0]+yWindowLocations[1])/2 pixelX2 = (xWindowLocations[0]+xWindowLocations[1])/2 pixelY2 = (yWindowLocations[0]+yWindowLocations[1])/2 if screenX == (xSections - 1): pixelsMoveY = -(pixelsHeight + 1) pixelY1 = yWindowLocations[1] pixelY2 = yWindowLocations[0] print(" - Moving the Map Screen South, {} pixels, from {} to {}".format(pixelsMoveY, pixelY1, pixelY2)) else: if screenY%2 == 0: # then it is even numbered row (row 0 = even) pixelsMoveX = pixelsWidth + 1 pixelX1 = xWindowLocations[1] pixelX2 = xWindowLocations[0] print(" - Moving the Map Screen East, {} pixels, from {} to {}".format(pixelsMoveX, pixelX1, pixelX2)) else: # even numbered row pixelsMoveX = -(pixelsWidth + 1) pixelX1 = xWindowLocations[0] pixelX2 = xWindowLocations[1] print(" - Moving the Map Screen West, {} pixels, from {} to {}".format(pixelsMoveX, pixelX1, pixelX2)) pyautogui.moveTo(pixelX1, pixelY1) pyautogui.mouseDown(button='left') pyautogui.moveTo(pixelX2, pixelY2, 1.5) pyautogui.mouseUp(button='left') print(" - Finished moving the map") def CombineTheFiles(): print("\n---------=== Combining the separate files into one ===---------") try: print(" - Deleting Existing Combined data file {}".format(rgbAllOutputFilename)) os.remove(rgbAllOutputFilename) except: print(" - No Existing file found to delete") print(" - Combinging Files:") for i in range(xSections*ySections): fileX = i % xSections fileY = int((i-fileX) / xSections) rgbPartOutputFilename = rgbPartOutputFilePrefix+str(fileX)+"_"+str(fileY)+".csv" print(" {}: {}".format(i+1, rgbPartOutputFilename)) fileCombined = open(rgbAllOutputFilename, 'a+') # append fileToAdd = open(rgbPartOutputFilename, 'r') # read fileCombined.write(fileToAdd.read()) # combine fileToAdd.close() fileCombined.close() print(" - Completed Aggregating the Files into {}".format(rgbAllOutputFilename)) # ---------------------------------------------------------------- MAIN ---------------- print("\n\n\n\n\n\n\n\n\n\n\n\n\n\n\n\n\n\n") print("\n\n\n\n\n\n\n\n\n---------=== Screen Grabber and RGB Pixelator ===--------- \n") # BASIC Setup os.chdir(workingFolder) # pixels pixelsWidth = xWindowLocations[1] - xWindowLocations[0] pixelsHeight = yWindowLocations[1] - yWindowLocations[0] # ------------------------------- NEW CODE def GetCurrentZoom(): GetAreaGameCoordinates() print(" - Image Grab Size, Pixels, X: {}, Y: {}".format(pixelsWidth+1, pixelsHeight+1)) GetPixelSize() print(" - Image Grab Size, Coords, Top Left : {}, {}".format(xCornerCoords[0], zCornerCoords[0])) print(" - Image Grab Size, Coords, Btm Right: {}, {}".format(xCornerCoords[3], zCornerCoords[3])) #pyautogui.scroll(-25) for i in range(10): GetCurrentZoom() averagePixelSize = (distPerPixelTopX + distPerPixelBtmX - distPerPixelLeftY - distPerPixelRightY)/4 ratioToTargtetPixels = targetPixelSize / averagePixelSize print(" Target Size: {}, Average: {:.2f}, Pixel Ratio: {:.3f}".format(targetPixelSize, averagePixelSize, ratioToTargtetPixels)) if averagePixelSize < 0.95 * targetPixelSize: print(" --- Zoom Out, Factor: {:.3f}".format(ratioToTargtetPixels)) mouse.scroll(0, -(2*ratioToTargtetPixels)) elif averagePixelSize > 1.05 * targetPixelSize: print(" --- Zoom In, Factor: {:.3f}".format(ratioToTargtetPixels)) mouse.scroll(0, 2/ratioToTargtetPixels) else: print(" -- Target Pixel size found") break def MoveTheMapToStartPoint(): print("\n -- Moving the Map to the Start Location {} {}".format(targetMapCoordTopLeft[0], targetMapCoordTopLeft[1])) targetX = targetMapCoordTopLeft[0] targetZ = targetMapCoordTopLeft[1] print(" - Target Locations: targetX {}, targetZ {}".format(targetX, targetZ)) GetAreaGameCoordinates() currentX = xCornerCoords[0] currentZ = zCornerCoords[0] print(" - Current Locations: currentX {}, currentZ {}".format(currentX, currentZ)) pixelSize = averagePixelSize targetDeltaX = (targetX - currentX) targetDeltaZ = (targetZ - currentZ) print(" - Target Delta DeltaX {:.1f}, DeltaZ {:.1f}".format(targetDeltaX, targetDeltaZ)) targetDeltaPixelsY = (targetX - currentX)/pixelSize targetDeltaPixelsX = (targetZ - currentZ)/pixelSize print(" - Target Delta Pixels DeltaX {:.1f}, DeltaY {:.1f}".format(targetDeltaPixelsX, targetDeltaPixelsY)) deltaXMultiple = abs(targetDeltaPixelsX / (xWindowLocations[1]-xWindowLocations[0])) deltaYMultiple = abs(targetDeltaPixelsY / (yWindowLocations[1]-yWindowLocations[0])) if targetDeltaPixelsX > 0: startPixelX = xWindowLocations[1] fullPixelX = xWindowLocations[0] else: startPixelX = xWindowLocations[0] fullPixelX = xWindowLocations[1] if targetDeltaPixelsY > 0: startPixelY = yWindowLocations[0] fullPixelY = yWindowLocations[1] else: startPixelY = yWindowLocations[1] fullPixelY = yWindowLocations[0] print(" - Pixels Start - X {:.1f}, Y {:.1f}".format(startPixelX, startPixelY)) print(" - Pixels Full - X {:.1f}, Y {:.1f}".format(fullPixelX, fullPixelY)) for i in range(math.floor(deltaXMultiple)): pyautogui.moveTo(startPixelX, startPixelY) pyautogui.mouseDown(button='left') pyautogui.moveTo(fullPixelX, startPixelY, 1.5) pyautogui.mouseUp(button='left') for j in range(math.floor(deltaYMultiple)): pyautogui.moveTo(startPixelX, startPixelY) pyautogui.mouseDown(button='left') pyautogui.moveTo(startPixelX, fullPixelY, 1.5) pyautogui.mouseUp(button='left') GetAreaGameCoordinates() currentX = xCornerCoords[0] currentZ = zCornerCoords[0] print(" - Current Locations: currentX {}, currentZ {}".format(currentX, currentZ)) pixelSize = averagePixelSize targetDeltaX = (targetX - currentX) targetDeltaZ = (targetZ - currentZ) print(" - Target Delta DeltaX {:.1f}, DeltaZ {:.1f}".format(targetDeltaX, targetDeltaZ)) targetDeltaPixelsY = (targetX - currentX)/pixelSize targetDeltaPixelsX = (targetZ - currentZ)/pixelSize print(" - Target Delta Pixels DeltaX {:.1f}, DeltaY {:.1f}".format(targetDeltaPixelsX, targetDeltaPixelsY)) if targetDeltaPixelsX > 0: deltaPixelsX = min(targetDeltaPixelsX, (xWindowLocations[1]-xWindowLocations[0])) startPixelX = xWindowLocations[1] endPixelX = startPixelX - deltaPixelsX else: deltaPixelsX = max(targetDeltaPixelsX, -(xWindowLocations[1]-xWindowLocations[0])) startPixelX = xWindowLocations[0] endPixelX = startPixelX - deltaPixelsX if targetDeltaPixelsY > 0: deltaPixelsY = min(targetDeltaPixelsY, (yWindowLocations[1]-yWindowLocations[0])) startPixelY = yWindowLocations[0] endPixelY = startPixelY + deltaPixelsY else: deltaPixelsY = max(targetDeltaPixelsY, -(yWindowLocations[1]-yWindowLocations[0])) startPixelY = yWindowLocations[1] endPixelY = startPixelY + deltaPixelsY print(" - deltaPixelsX : {:.1f}".format(deltaPixelsX)) print(" - deltaPixelsY : {:.1f}".format(deltaPixelsY)) print(" - Moving the Map by DeltaX {:.1f}, DeltaY {:.1f}".format(deltaPixelsX, deltaPixelsY)) pyautogui.moveTo(startPixelX, startPixelY) pyautogui.mouseDown(button='left') pyautogui.moveTo(endPixelX, endPixelY, 1.5) pyautogui.mouseUp(button='left') GetAreaGameCoordinates() print(" - Moved the map towards start point") reqdMapWidth = targetMapCoordTopLeft[1] - targetMapCoordBtmRight[1] reqdMapHeight = targetMapCoordTopLeft[0] - targetMapCoordBtmRight[0] imageWidth = zCornerCoords[3] - zCornerCoords[0] imageHeight = xCornerCoords[0] - xCornerCoords[3] print("\n -- Required Width {:.1f},\t Height {:.1f}".format(reqdMapWidth, reqdMapHeight)) print(" -- Image Width {:.1f},\t Height {:.1f}".format(imageWidth, imageHeight)) reqdSectionsHorizontal = abs(reqdMapWidth / imageWidth) reqdSectionsVertical = abs(reqdMapHeight / imageHeight) xSections = math.ceil(reqdSectionsHorizontal) ySections = math.ceil(reqdSectionsVertical) # Set these to unity for testing a single screen cap #xSections = 1 #ySections = 1 numberOfSections = xSections * ySections print(" -- Required Snapshots from screen Horiz: {:.1f}, Vert: {:.1f}".format(reqdSectionsHorizontal, reqdSectionsVertical)) print(" Actual Snapshots from screen Horiz: {:.1f}, Vert: {:.1f}".format(xSections, ySections)) MoveTheMapToStartPoint() # ------------------------------------- END OF NEW SECTION ----------- # -- MAIN LOOP -- for loopNumber in range(numberOfSections): # variables to know the screen indexed location screenX = loopNumber % xSections screenY = int((loopNumber-screenX) / xSections) print("\n---------=== New Screen Grab, Index {} {} ===---------".format(screenX, screenY)) # run the functions GetAreaGameCoordinates() GetPixelSize() GrabScreen() if loopNumber != numberOfSections-1: MoveTheMap() else: print(" - Last Screen Complete, no need to move the map") # Gather all rgb files and gather into one file CombineTheFiles() # Filter the file, and generate a "Trees" file #FilterForTrees() print(" - Image Grab Size, Pixels, X: {}, Y: {}".format(pixelsWidth+1, pixelsHeight+1)) print(" - {} Images, Pixels, X: {}, Y: {}".format(numberOfSections, numberOfSections*(pixelsWidth+1), numberOfSections*(pixelsHeight+1))) print(" - Total Number of Pixels: {}".format(numberOfSections*(pixelsWidth+1) *(pixelsHeight+1))) print("\n ------ === Script Complete === ------\n\n") Second Python Script to Filter the data # -- ========================================== -- # -- ============ DCS Tree Mapping ============ -- # -- ============ Script Two ============ -- # -- ========================================== -- # # -- Mikey, "LittleNose" # -- July 2025 plotBuckets = False import os import csv import math workingFolder = "C:\\Users\\xbox\\Saved Games\\DCSTrees\\" os.chdir(workingFolder) rgbAllOutputFilename = "rgb_all.csv" outputFilenameWater = "filtered_water.csv" outputFilenameRiver = "filtered_river.csv" outputFilenameTrees = "filtered_trees.csv" outputFilenameTowns = "filtered_towns.csv" outputFilenameRoads = "filtered_roads.csv" outputFilenameLand = "filtered_land.csv" import os import csv import math import numpy as np import matplotlib.pyplot as plt def FilterForRGB(valR, valG, valB, fileNameOut, tolRange, tolDiff, bins=8, top_n=20, show_plot=True, save_plot=None, rgbAllOutputFilename="rgb_all.csv"): print(f"\n---------=== Filtering for RGB ===--------- {fileNameOut}") matchCount = 0 matched_colors = [] # collect (r, g, b) for matched rows try: print(f" - Deleting existing file {fileNameOut}") os.remove(fileNameOut) except FileNotFoundError: print(" - No existing file found to delete") print(" - Filtering...") with open(rgbAllOutputFilename, 'r', newline='') as infile, \ open(fileNameOut, 'w', newline='') as outfile: reader = csv.reader(infile) writer = csv.writer(outfile) for row in reader: try: east, north = round(float(row[2])), round(float(row[3])) r, g, b = float(row[4]), float(row[5]), float(row[6]) except (IndexError, ValueError): # skip malformed rows continue # Euclidean distance in RGB space distance = math.sqrt((r - valR)**2 + (g - valG)**2 + (b - valB)**2) if distance <= tolRange: absoluteRG = abs(r - g) # equivalent to sqrt((r-g)^2) if absoluteRG < tolDiff: writer.writerow([east, north]) matched_colors.append((r, g, b)) matchCount += 1 print(f" - {matchCount} points found in Filtered data in file: {fileNameOut}\n") if plotBuckets == True: if matchCount == 0: print(" - No matches; skipping histogram/plot.") return # Prepare bins: allow scalar or per-channel if isinstance(bins, int): bins_tuple = (bins, bins, bins) else: try: bins_tuple = tuple(bins) if len(bins_tuple) != 3: raise ValueError except Exception: raise ValueError("bins must be int or iterable of three ints") colors_arr = np.array(matched_colors) # shape (N, 3) # Define edges assuming RGB in [0, 255]; adjust if your scale differs edges = [np.linspace(0, 255, num=b+1) for b in bins_tuple] # 3D histogram hist, edges_out = np.histogramdd(colors_arr, bins=edges) # Flatten and get top N buckets flat_hist = hist.flatten() nonzero_idxs = np.nonzero(flat_hist)[0] if nonzero_idxs.size == 0: print(" - No nonzero buckets despite matches; unexpected. Aborting plot.") return top_n = min(top_n, nonzero_idxs.size) top_indices = np.argsort(flat_hist[nonzero_idxs])[::-1][:top_n] selected_flat_idxs = nonzero_idxs[top_indices] counts = flat_hist[selected_flat_idxs] # Compute the representative (center) color for each selected bucket bucket_shape = hist.shape # (bins_r, bins_g, bins_b) centers = [] for flat_idx in selected_flat_idxs: r_idx, g_idx, b_idx = np.unravel_index(flat_idx, bucket_shape) # compute center of each bin r_center = (edges[0][r_idx] + edges[0][r_idx + 1]) / 2 g_center = (edges[1][g_idx] + edges[1][g_idx + 1]) / 2 b_center = (edges[2][b_idx] + edges[2][b_idx + 1]) / 2 centers.append((r_center, g_center, b_center)) # Build bar chart fig, ax = plt.subplots(figsize=(max(6, top_n * 0.3), 4)) bar_positions = np.arange(len(counts)) bar_labels = [f"#{i+1}" for i in range(len(counts))] # simple labels # Normalize colors to [0,1] for matplotlib bar_colors = [(r/255, g/255, b/255) for r, g, b in centers] bars = ax.bar(bar_positions, counts, color=bar_colors, edgecolor='black') ax.set_xticks(bar_positions) ax.set_xticklabels(bar_labels, rotation=45, ha='right') ax.set_ylabel("Count in Bucket") ax.set_title(f"Top {len(counts)} RGB Buckets Passing Filter") # Annotate with hex color and count for idx, bar in enumerate(bars): r, g, b = centers[idx] rgb_label = f"({int(r)},{int(g)},{int(b)})" ax.text(bar.get_x() + bar.get_width() / 2, bar.get_height(), f"{int(counts[idx])}\n{rgb_label}", ha='center', va='bottom', fontsize=7) plt.tight_layout() if save_plot: try: fig.savefig(save_plot, dpi=150) print(f" - Saved histogram plot to {save_plot}") except Exception as e: print(f" - Failed to save plot: {e}") if show_plot: plt.show() plt.close(fig) # Caucasus Filters #RGBWater = [126, 185, 198] #RGBRiver = [ 55, 92, 140] #RGBTrees = [ 90, 138, 93] #RGBTowns = [198, 131, 0] #RGBRoads = [170, 80, 0] # Syria Filters RGBWater = [47, 143, 143] RGBRiver = [50, 160, 220] RGBTrees = [120, 135, 60] RGBTowns = [250, 154, 61] RGBRoads = [143, 60, 30] RGBLand = [220, 111, 45] tolRGBWater = [ 20, 100] tolRGBRiver = [100, 999] tolRGBTrees = [ 75, 10] tolRGBTowns = [ 40, 75] tolRGBRoads = [ 30, 200] tolRGBLand = [175, 75] FilterForRGB(RGBWater[0], RGBWater[1], RGBWater[2], outputFilenameWater, tolRGBWater[0], tolRGBWater[1]) FilterForRGB(RGBRiver[0], RGBRiver[1], RGBRiver[2], outputFilenameRiver, tolRGBRiver[0], tolRGBRiver[1]) FilterForRGB(RGBTrees[0], RGBTrees[1], RGBTrees[2], outputFilenameTrees, tolRGBTrees[0], tolRGBTrees[1]) FilterForRGB(RGBTowns[0], RGBTowns[1], RGBTowns[2], outputFilenameTowns, tolRGBTowns[0], tolRGBTowns[1]) FilterForRGB(RGBRoads[0], RGBRoads[1], RGBRoads[2], outputFilenameRoads, tolRGBRoads[0], tolRGBRoads[1]) FilterForRGB( RGBLand[0], RGBLand[1], RGBLand[2], outputFilenameLand, tolRGBLand[0], tolRGBLand[1]) Finally, once you capture your data points, you can reduce the filesize by changing the resolution. I find 75m data points works reasonably well. # -- ========================================== -- # -- ============ DCS Tree Mapping ============ -- # -- ============ Script Three ============ -- # -- ========================================== -- import os import pandas as pd import matplotlib.pyplot as plt workingFolder = "C:\\Users\\xbox\\Saved Games\\DCSTrees\\" os.chdir(workingFolder) # Load data from input file #input_file = "filtered_water.csv" #output_file = "filtered_water_reduced.csv" #input_file = "filtered_river.csv" #output_file = "filtered_river_reduced.csv" #input_file = "filtered_trees.csv" #output_file = "filtered_trees_reduced.csv" #input_file = "filtered_towns.csv" #output_file = "filtered_towns_reduced.csv" input_file = "filtered_roads.csv" output_file = "filtered_roads_reduced.csv" grid_size = 75 # Adjust for more/less accuracy vs reduction # Read the original CSV data = pd.read_csv(input_file, header=None, names=["x", "y"]) # Dictionary to store one point per grid cell grid_dict = {} # Grid-based filtering for x, y in data.itertuples(index=False): gx = x // grid_size gy = y // grid_size key = (gx, gy) if key not in grid_dict: grid_dict[key] = (x, y) # Create reduced DataFrame reduced_df = pd.DataFrame(list(grid_dict.values()), columns=["x", "y"]) # Save to output file reduced_df.to_csv(output_file, index=False, header=False) # Step 4: Plot both original and reduced datasets side-by-side fig, axes = plt.subplots(1, 2, figsize=(14, 6), sharex=True, sharey=True) # Original data plot axes[0].scatter(data["x"], data["y"], s=1) axes[0].set_title(f"Original Data ({len(data)} points)") axes[0].set_xlabel("X") axes[0].set_ylabel("Y") axes[0].grid(True) # Reduced data plot axes[1].scatter(reduced_df["x"], reduced_df["y"], s=1, color='orange') axes[1].set_title(f"Reduced Data ({len(reduced_df)} points)") axes[1].set_xlabel("X") axes[1].grid(True) plt.suptitle("Original vs Reduced Data Points", fontsize=14) plt.tight_layout(rect=[0, 0, 1, 0.96]) plt.show() Hope you have fun. Here's an example of the Rivers in Caucasus at 100m intervals. null Edited: Updated Python script. Now the zooming, start location, and number of screen captures are automatic (1st Python script), and the filtering in the 2nd Python script has more controls added, plus it can present the colour "buckets" that can be an aid to working out the filters to use.
 2 points
 -
Three issues I've notice with today's update: The antenna mast flutter animation based on everything I've read, is way overdone. It was not designed to whip around like that and def not at cruise speeds. Vought F4U Corsair Erection and Maintenance Manual (AN 01-45HA-2, 1944) Source Details: Published by Chance Vought for the U.S. Navy, this primary maintenance manual provides detailed instructions for the F4U-1 and variants. Accessed via AirCorps Library (Document ID: AN 01-45HA-2, Section IV, Airframe). Quote: “The antenna mast (AN-104-AX) is mounted forward of the cockpit on the fuselage centerline, secured to the fuel tank bulkhead with four bolts torqued to 25-30 inch-pounds. Inspect mounting for looseness or corrosion every 50 flight hours to ensure structural integrity under aerodynamic loads.” (Section IV, Paragraph 12-3, p. 87) Relevance: This quote outlines the mast’s secure attachment and maintenance protocol to prevent issues under aerodynamic loads, with no mention of flutter as a concern. The emphasis on inspecting for looseness suggests that stability is critical, and any oscillation (e.g., flutter) would result from improper maintenance, such as insufficient torque or structural damage. Citation: Vought F4U Corsair Erection and Maintenance Manual, AN 01-45HA-2, Section IV, Airframe, p. 87, 1944 (AirCorps Library). Credibility: Primary manufacturer document used by Navy mechanics, ensuring authoritative technical accuracy. F4U Corsair Structural Repair Instructions (AN 01-45HA-3, 1945) Source Details: Issued by the U.S. Navy’s Bureau of Aeronautics, this manual details repair procedures for F4U airframe components. Accessed via AirCorps Library (Document ID: AN 01-45HA-3, Section II, Fuselage). Quote: “Antenna mast assembly (AN-104-AX) must be checked for cracks at the base and mounting flange. Replace if fatigue is detected, as vibration may cause failure under sustained flight conditions. Ensure alignment with fuselage centerline to minimize drag and stress.” (Section II, Paragraph 8-4, p. 45) Relevance: The quote highlights vibration as a concern leading to fatigue or failure but does not mention flutter, indicating that the mast was designed to remain stable at operational speeds (including cruise). Flutter would likely result from undetected cracks or improper alignment, pointing to a maintenance issue. Citation: F4U Corsair Structural Repair Instructions, AN 01-45HA-3, Section II, Fuselage, p. 45, 1945 (AirCorps Library). Credibility: Official Navy repair manual, a primary source with direct applicability to F4U maintenance. Chance Vought F4U-1 Corsair Engineering Drawing No. 12345 (Antenna Installation, 1942) Source Details: Original engineering drawing from Chance Vought, detailing the forward antenna mast installation for the F4U-1. Accessed via AirCorps Library (Drawing No. 12345, Sheet 2). Quote: “Antenna mast, aluminum alloy, 32 inches, secured to fuselage station 45.5 with 4 AN4-6A bolts. Designed for aerodynamic stability at speeds up to 425 mph. Tolerance: ±0.02 inches for alignment.” (Drawing No. 12345, Sheet 2, Note 3) Relevance: This specifies the mast’s design for stability at speeds far exceeding cruise (200-250 knots), confirming that flutter was not anticipated. Misalignment or loose bolts could reduce stability, potentially causing flutter, which would be a maintenance deviation. Citation: Chance Vought F4U-1 Corsair Engineering Drawing No. 12345, Sheet 2, Note 3, 1942 (AirCorps Library). Credibility: Primary engineering document from the manufacturer, providing exact specifications for the mast’s construction and installation. F4U Corsair in Action (Squadron/Signal Publications, Aircraft No. 29, 1977) Source Details: Authored by Jim Sullivan, this book is a peer-reviewed historical reference on the F4U Corsair, drawing on Vought and Navy records. Published by Squadron/Signal, a trusted aviation publisher. Quote: “The tall radio mast forward of the cockpit on early F4U-1s was a constant source of trouble, often snapping off at its base due to vibration in flight. Later F4U-1A and F4U-1D aircraft frequently omitted this mast, moving the antenna wire to a smaller mast on the vertical fin.” (p. 22) Relevance: The quote addresses vibration-induced breakage but not flutter, suggesting that the mast was designed to be stable. Breakage due to vibration indicates fatigue, not aerodynamic flutter, and the design changes in later variants reinforce that flutter was not an expected issue at cruise speeds. Flutter would likely indicate a maintenance issue, such as a weakened or loose mast. Citation: Sullivan, J. (1977). F4U Corsair in Action. Squadron/Signal Publications, Aircraft No. 29, p. 22. Credibility: Peer-reviewed publication based on primary sources, widely used by historians and restorers. Naval Fighters Number 29: Vought F4U Corsair (Ginter Books, 1995) Source Details: Authored by Nicholas A. Veronico and John M. Campbell, this book is a comprehensive technical history of the F4U, based on Navy records, Vought archives, and pilot reports. Published by Ginter Books, a respected aviation publisher. Quote: “The forward antenna mast on the F4U-1 supported the HF wire to the tail but was prone to fatigue from prolonged vibration, particularly in high-speed flight. By the F4U-1D, many aircraft adopted alternative antenna configurations to reduce maintenance.” (p. 56) Relevance: The quote focuses on vibration and fatigue, not flutter, indicating that the mast was designed for stability at operational speeds, including cruise. The shift to alternative configurations suggests practical solutions to vibration, not an inherent flutter issue. Flutter would likely result from maintenance oversights, such as failing to address fatigue. Citation: Veronico, N. A., & Campbell, J. M. (1995). Naval Fighters Number 29: Vought F4U Corsair. Ginter Books, p. 56. Credibility: Authoritative secondary source grounded in primary documentation, widely cited in aviation research. 2) The Whistling sound effect is still an issue as well. According to all sources I've seen, the sound should be all but non-existent at anything but high speeds - and should not be heard at all when the intercooler and oil cooler flaps are closed. Here's some additional sources to go along with those I posted in a previous post on this topic: Lt. Col. Ken Walsh (VMF-124), Medal of Honor recipient: Walsh confirmed that the Corsair made a noticeable whistle during dives, but emphasized that the pilot could not really hear it over the engine, particularly during combat or when wearing a flight helmet. He noted that ground crews and enemy troops were more aware of it than the pilots themselves. Robert "Bob" Brunson (VMF-312): Brunson said: "I never really noticed the whistle from inside the cockpit. But our ground crews would mention how it shrieked coming in low over the strip." He added that the sound was more psychological warfare than something pilots relied on. 3) The wing fluttering while sitting on the deck, doesn't line up with reality - see video below and compare with the newly introduced effect in the sim: Thx for your attention. To those who had trouble reading this - my apologies, I was perfectly oblivious to this issue until now. I've re-posted the formatted text as plain text and hopefully it has become more readable.2 points
-
Old news. DCS natively supports this now. Add the below line to your C:\Users\username\Saved Games\DCS\Config\autoexec.cfg file to set the DLSS preset, this is still C by default. You will need to create this file if it does not already exist. DLSS_Preset = 'K' You can add this line as well if you don’t want DLSS applied to MFDs and HUD to keep them sharp with no ghosting for greater control. HUD_MFD_after_DLSS = true2 points
-
It's coming, just been occupied with higher priority tasks. I'll probably have it out this weekend.2 points
-
No, just been occupied with other tasks. A video is coming.2 points
-
Ибо работа по земле и немного по морским целям в этом симуляторе составляет очень большой кусок геймплея. Отвергнуть это вместе с онлайном означает оставить себе процентов 20 от игры.2 points
-
Hi, I have removed the image from the above post, please remember our 1.16 forum rule when posting A pm is often better if you are sharing real world documents. I will run this past the team, but as mentioned previously we have checked and all seems correct. thank you2 points
-
You should rather set both brake axes as sliders rather than "just" axes. That applies to all aircraft and all types of axes which are meant to work as 0 / 100% and not -50% / 0 / +50%. So throttles, RPMs, brakes etc. With sliders you won't even need such extreme curves to brake gradually.2 points
-
Honestly I would simply encourage people to just STOP pre-ordering from Pimax. Period. Sadly when I bought my OG it was way after the whole commotion about the pre-orders (their site said it was in stock and ready for shipping - and even then they still took 3 weeks to ship?)... so I didn't know that they were like that. After the Super, whatever comes next, DO NOT BUY until they clearly have no backlog anymore. You'll be doing everyone a favor, and not encouraging companies to treat customers like this.2 points
-
User error. I can tell immediately from the IHADSS that your acquisition source is set to a Cursor Acquisition/Terrain Point (TRN). Whenever you CAQ on the map, where you drop that point becomes the Acquisition Source (ACQ). The reason the dotted cross is pointing to an open field is because the dotted cross points out your Acquisition Source, and your Acquisition Source is a TRN point in an open field. You need to set your Acquisition Source back to TADS to see where George is pointing the TADS in your helmet (I recommend through the weapons page).2 points
-
Moin zusammen, das virtuelle Hubschraubergeschwader 23 sucht Piloten und Copiloten für den Aufbau eines Hubschraubergeschwaders mit Fokus in Richtung MilSim. MilSim bedeutet nicht die 100%tige Darstellung eines realen Verbandes, sondern der Wille dem arcadigen Gameplay den Rücken zu kehren und DCS wieder mehr in die Richtung Simulation zu treiben. Wir wollen das volle Spektrum der militärischen Fliegerei abbilden, hierzu gehören auch Tätigkeiten wie Briefing, Planung, längere Flüge ohne Waffeneinsatz, taktisches Vorgehen im Team, Ausbildung insbesondere im taktischen Sinne, Verhalten auf und um die Airbase, Formationsflüge, Turns, Rejoins, Teamwork im Cockpit sowie im Flight und und und. Die Liste könnte man ewig so weiter führen... Ideen für all diese Themen gibt es mehr als genug, es fehlt aktuell schlichtweg nur an Piloten und Copiloten. Ja genau auch Copiloten, denn wir wollen langfristig gern alle Flugmuster im Multicrew fliegen, so wie es in der Realität auch der Fall ist. Wenn du also ein echter RotaryWing Fan bist, Bock auf taktisches Fliegen im Geschwader hast und im besten Fall noch eine Menge Ideen im Kopf hast welche dem Aufbau des Geschwaders zugute kommen, dann tritt doch gern unserem Discord - https://discord.gg/cNXwSZP38d bei und setze mit uns das Fundament für ein professionelles Hubschraubergeschwader. Taktische Verfahren, professionelle Kommunikation und ne Menge Spaß an der Sache - hier sehen wir den Schlüssel zum Erfolg um etwas besonderes auf die Beine zu stellen, wir brauchen nur noch DICH! Discord - https://discord.gg/cNXwSZP38d vHSG-23 | Schmirco2 points
-
My first successful trap in DCS. (For posterity}. Phew! ..
2 points
-
You're just a guy who's read a lot of books, and knowledge is pouring out of his ears, and he has to brag about it. That's not the point. Just like it's not the point that Chuck created a very good manual.2 points
-
OK, full update of the list is done! Thanks for your patience and help, everyone Notable changes: I've broken out the Flaming Cliffs modules (and the Su-25T, which shares their lack of cockpit-clickability) into a separate table in the document. It was too confusing to have the high fidelity module and the low fidelity module right next to each other in the same table, and made the "Jet Fighters and Trainers" table a bit too big. I also feel that people who are in the market for a Flaming Cliffs module aren't the same audience as those who are in the market for a full fidelity module, so hopefully this makes sense to everyone. The F4U-1D Corsair is added to the list, I guess they disabled the torso movement with the latest patch until they can fix it, as I didn't observe it (the torso moves a bit with control manipulation now, but not when you look to the left or right). As per the color coding guide this puts the module in the "[GREEN]" category. The F-5E Flaming Cliffs module uses the old F-5E/FA-18 pilot model, which is a bit disappointing. I was expecting it to use the new F-5E Remastered pilot model with the updated torso movement and larger kneeboard. I'm not sure when this happened, but the pilot model in the Christen Eagle now has a bit of torso movement when looking around. The movement is reasonable - I'd guess you're strapped in pretty tight in an aerobatics aircraft - but unfortunately the hands aren't rigged perfectly to the controls so the throttle comes through the left hand when looking about. This puts the module in the "[GOLD]" category, and I've updated the list to reflect this. I will update the first post later this week, I'm toying with the idea of trying to include the tables in the post in some form but I'll need to see how well / if the forum software supports that. Thanks again to everyone who has contributed and pushed me to keep this going!2 points
-
With spoilers out, speed brakes out, NWS on, and full aft stick using the horizontal stabs as massive air brakes, I typically have zero issues maintaining centerline and stopping quickly with minimal wheel brake use.2 points
-
** MOST RECENT UPDATE **: v3.6 - July 29th, 2025 *Changelog:* THE SNIPER POD IS HERE - All missions where the Targeting Pod is relevant (About half the mission pack) Have had additional client aircraft added with the ATP equipped on the jet. All aircraft are labeled with either 'LITENING' or 'SNIPER' tags, but if I missed one, just remember, if it doesn't say 'Sniper', it has the old pod. Other Changes: - '.Basic - Air to Air Guns' has been moved to Advanced. This was one of the earliest missions I made and it is absolutely not a true beginner test of skill. - A new mission: 'Weapons - Aerial Gunnery Basics' has been added with unresponsive, unmoving F4 Phantom drones for a truly basic AA guns practice mission. - A LITENING & SNIPER pod client has been added to the 'Fight the Phoenix' mission, for those of you who want to practice your BVR target ID skills. - Targeting pod client aircraft have been added to the 'Weapons - AG Guns & Unguided Rockets' mission.2 points
-
Flying a 2000hp 12000lbs warbird doesn’t necessarily mean it needs to be unrealistically twitchy, unstable, and capable of doing Extra330-like aerobatics. I much prefer the current FM, definitely not perfect, but better than before.2 points
-
DCS warbirds are great IMHO, it has been the only sim that has given me some feel or realism, FFB with extension also helped, but one problem with DCS is that we always fly in calm air, there is no bumpy air or turbulence, low alt wind you can feel it but its like laminar wind, not bumpy at all. When I fly my warbird IRL and I have calm winds, it reminds me of how warbirds feel in DCS.2 points
-
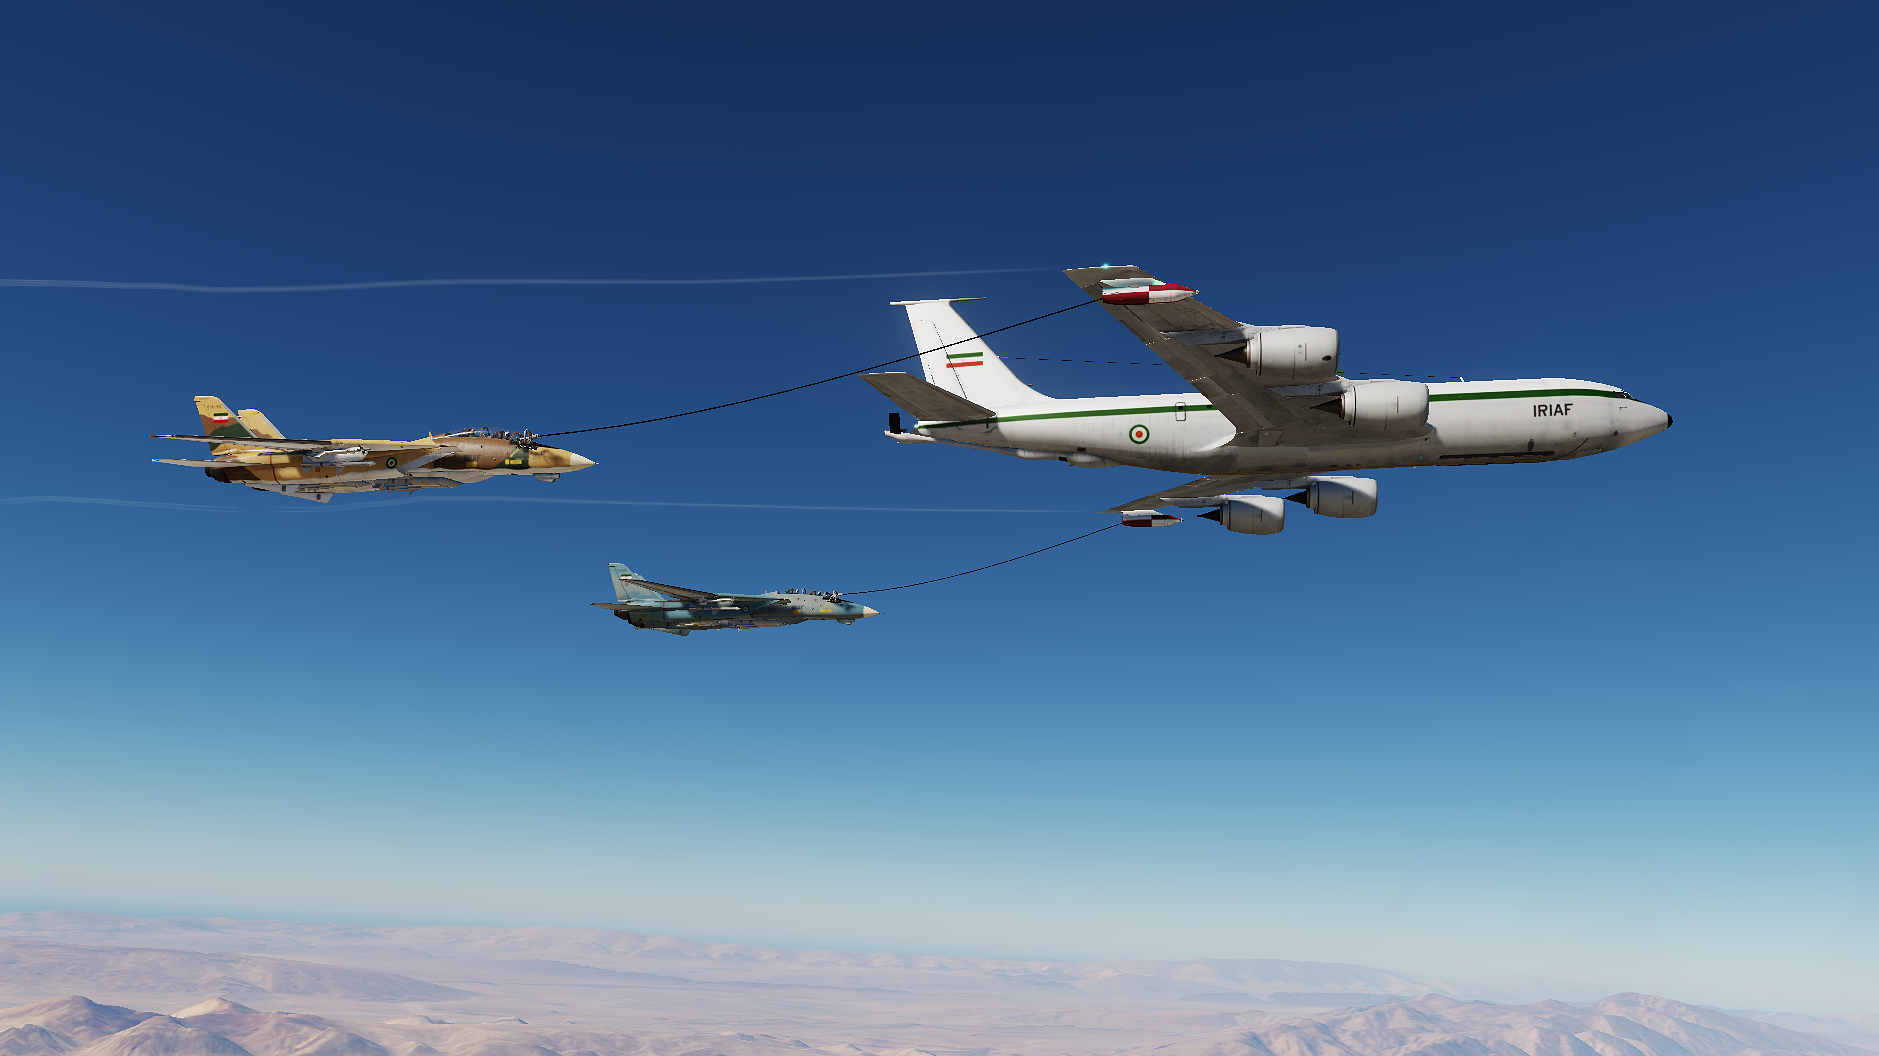
With Great Contribution of @flanker78. good advance on W IP ASM, big work Comrade ...
2 points
-
I have created a list of DCS aircraft modules that have a visible first-person pilot body in the cockpit. This is an important feature beacuse of the additional immersion in VR of having your body there - and VR is all about immersion! The good news is that a majority of paid modules include a visible first-person pilot body. I hope this document will assist VR users who value the virtual pilot in determining which modules are worth their hard earned cash. Link to document As of 30 July 2025 the list is complete and details all available paid modules.1 point
-
Now with F-14B Tomcat and Supercarrier support! What is this, an interactive CASE 1 trainer? Yes! I made this mission with the intent to make it easier and more fun to practice your skills around the boat. CASE 1 recoveries are one of those things that most sim pilots (that are into somewhat realistic naval flying) want to get proficient in, but it can sometimes be tedious to practice it. The scoring system has been developed with guidance from Lex (former F/A-18 pilot and US Navy flight instructor). How does it work? The mission spawns you 10nm behind the boat (there are also slots for cold start and cat if you’d prefer). As you fly over the trailing ship, the “pass” starts. Approach the carrier from behind and do all the pattern stuff (break, downwind, final turn and a trap/bolter). The mission will track your flying at certain points and give you a score on each point, as well as some real-time feedback. For instance, it tracks if you’re on the right altitude, if you’re on-speed, and how far from the boat you are when abeam. After a trap (or bolter, or even a wave-off), you’ll get a summary on how well you performed in each section of the pattern, as well as a final score, where 75/75 is maximum. It will also tell you what wire you got. Practice and track the progress To restart the pattern, you simply fly back south to the trailing ship. The mission will tell you that you’re welcome back for another pass. In other words, don’t fly straight into the pattern. Instead always perform full CASE 1 recovery breaks and patterns (that’s the whole point of this practice mission). The mission will also keep a little list containing the score of all your passes of the sortie, so you can see if you’re making progress. Multiplayer! Finally, there’s multiplayer support. You can launch the mission with your friends or squadron mates, and the mission will track everyone’s progress separately. Maybe you can even use it to host a CASE 1 recovery competition in your squadron? Things to check out! * Discord: https://discord.gg/bYB4jXQWQW * Patreon: https://www.patreon.com/banklerdcs Final words I’m eager to hear your feedback so I can make adjustments and provide updates based on it. There might of course be smaller bugs and such, just let me know! If this tool helped anyone out, or at least you had a good time with it, I’d LOVE to hear from you! If you’re not already aware how to perform the CASE 1 recovery, I recommend watching this: Jabbers’ excellent video covering the basics: Many thanks to FlightControl (for Moose), Grimes (for Mist) and Lex and Gregory Brett (for patiently answering all my geek questions), as well as the Master Arms community and everyone who helped out with play testing! Also big thanks to Matt Geders and Funkyfranky! DOWNLOAD 7.4.0 Pick the version with your favorite boat: Legacy carrier or Supercarrier. There is also a version that supports the T-45C mod. Supercarrier version: Bankler's Case 1 Recovery Trainer_v07-40_Supercarrier.miz ----- Supercarrier / T-45C version: Bankler's Case 1 Recovery Trainer_v07-40_Supercarrier_T-45C.miz ----- Legacy Carrier version: Bankler's Case 1 Recovery Trainer_v07-40_LegacyCarrier.miz -----
1 point
-
On 2.9.18.12722 , behavior was changed to return values as per the change logs and forums post... This was then reversed on hotfix 2.9.18.12899. Returning nil seems like a consistent behavior to me, but that particular tidbit was not spelled out in the change log or in the forum post about this (granted, I did not read all the thread)1 point
-
Well, no and yes. While there is no gauge or light to tell you the status of microswitch, you can look at AP yaw channel. If it does not counter-deflect when you yaw, microswitch is pressed in. It will move a little bit, to stabilise you, but if does not go all the way over, heading hold is not active.1 point
-
@silverdevil, Thanks for the reply! I just tried it and it seems it worked, thanks!1 point
-
Посмотрите на лицензионное соглашение, какая там ответственность. Как правило, все ПО для масс-маркета продается с припиской "как есть", что разработчик ни какой ответственности перед покупателем не несет, и если ему захочется, то разработчик может отозвать право на использование его ПО, что уже и произошло с некоторыми играми на Steam1 point
-
It's improved. Before the Corsair was especially suffering from excessive yaw instability. And I'm not talking about the rudder inputs, it's like the tail was just sliding out from under it in any sort of maneuver, which the historical aircraft didn't experience and was actually noted to be very stable.1 point
-
Yup: my personal wish list for DCS forum users: - learn to read; - learn to use the Search function1 point
-
Vietnam War Vessels 2.0.0 This release is a major update of the Vietnam War Vessels mod. With VWV 2.0.0 comes a new directory structure, where all assets have a [VWV] prefix in the folder name. This makes it necessary that you first uninstall the old Vietnam War Vessels 1.x.y completely. We welcome the USS Enterprise, CVAN-65, in its 1966 configuration, to the fleet. The first nuclear driven carrier has been derived from the modern USS Enterprise, and takes a place of its own now. The complete launch and parking system has been overhauled, leading to a hopefully more immersive experience. The second new addition to the mod is the A-37 Dragonfly. This iconic aircraft of the Vietnam War is now available for AI use within the virtual DCS sky. Please take a look at the Known Limitations below! Updates, Ships Knox class - FF icons are used instead of DD BB-62 New Jersey - CC map icon in use, better helicopter landing on the deck, new custom shell for main armament CVA Essex and Bon Homme Richard - model improvements, nick name as short display name for Bonnie Dick Many ships - sound updates to gun fire Updates, Planes A-1 Skyraider - split into A-1H (with bridle cat support) and AD-4 (without), add Napalm bombs from A-4E-C mod, add toilet bombs to all pylons, rework flight model to take off from Essex ‘44 with 70% loadout H-2 Seasprite - use of a new model, split into SH-2F, UH-2A, UH-2B, UH-2C classes MiG-21MF overhauled nose gear, support for RATO take-offs O-1 Bird Dog, add engine nozzle definition, Flight Model change for more realistic take-off RA-5C Vigilante - Flight Mode change, more lift at low speed Known Limitations CVA-31 Bon Homme Richard - Player controlled helicopters slightly move forward on the flight deck F-8 Crusader - Aircraft is intended as static and for limited AI operations - Player control is experimental at best, but largely untested and unsupported - Carrier launch and landing operations are not supported for player aircraft, only AI - Unknown how to drop bombs as player aircraft - Variable incidence wing is not enabled - Collision shell not reliable under player control - Nose wheel rotation disabled MiG-17F "Fresco-C" - Player control is almost untested and unsupported - Collision shell not reliable under player control - Damage susceptible when placed as static H-2 Seasprite - Wheels don't touch the ship deck - Landing gear is deployed multiple kilometers away from landing spot Fletcher Class Destroyers with FRAM II upgrade - Bridge and mast are WWII style RA-5C Vigilante - The plane is too large for regular parking spots, best to use as single plane on the runway MiG-21MF "Fishbed-C" - Textures are work in progress - Gear up location is pretty bad A-1 Skyraider - The new bridle disappears during launch - The precision of dropping Napalm is abysmal - Takes off like a spaceship from land - Tiny Tim rockets seem never to be launched A-37 Dragonfly - Flight model is raw and has not been tested much - Only one pilot ejects, ejection somewhat broken O-1 Bird Dog - The propeller blur is static CVAN-65 Enterprise - Catapult hookup spotty, sometimes planes start to drift - Parking spotty, some planes start to drift - Probable inability to sync INS when taking off cold - RA-5C and F-14 Tomcat slightly too large for safe aircraft operations when taxiing - The shoot power of the catapults seems insufficient at times - No support for night operations, e.g. no lights Download (Github): https://github.com/tspindler-cms/tetet-vwv/releases Alternative download (Google Drive): https://drive.google.com/drive/folders/16pUuupD08L36KnD6vDel5VRlmwwftX5o?usp=drive_link Enjoy, The Vietnam War Vessels team1 point
-
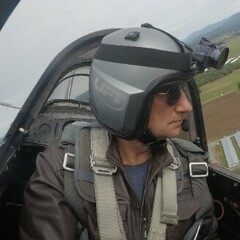
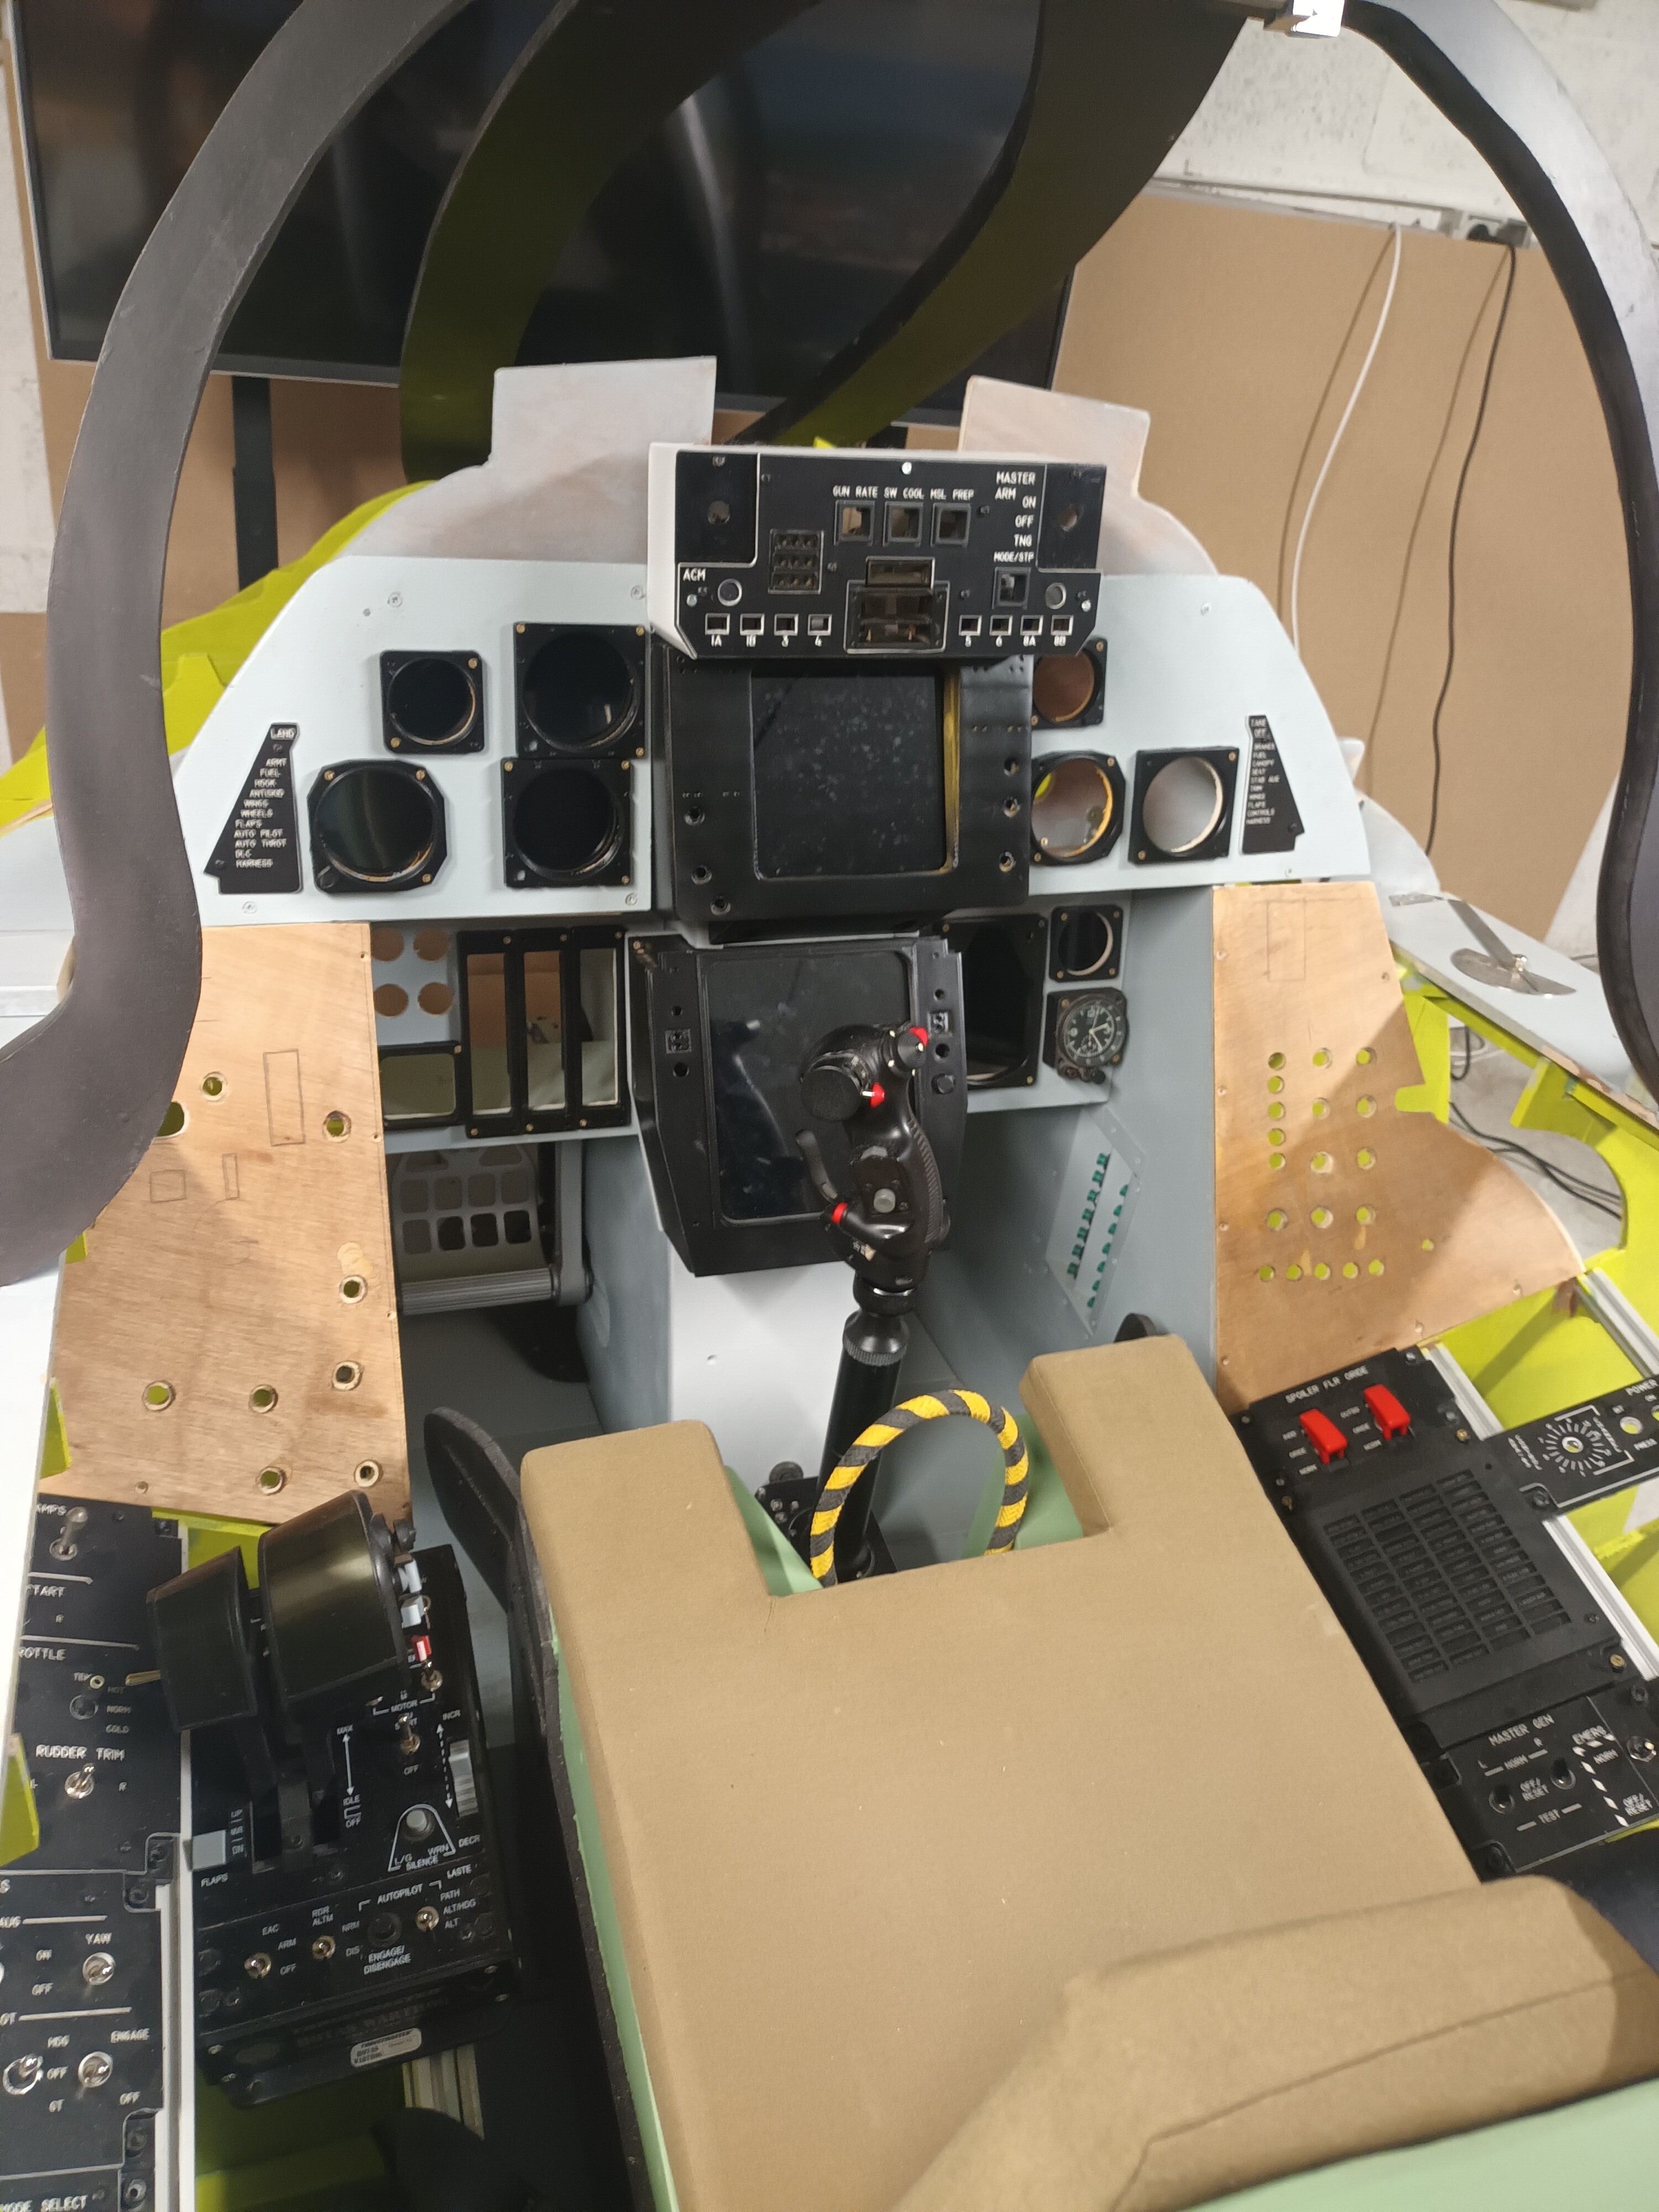
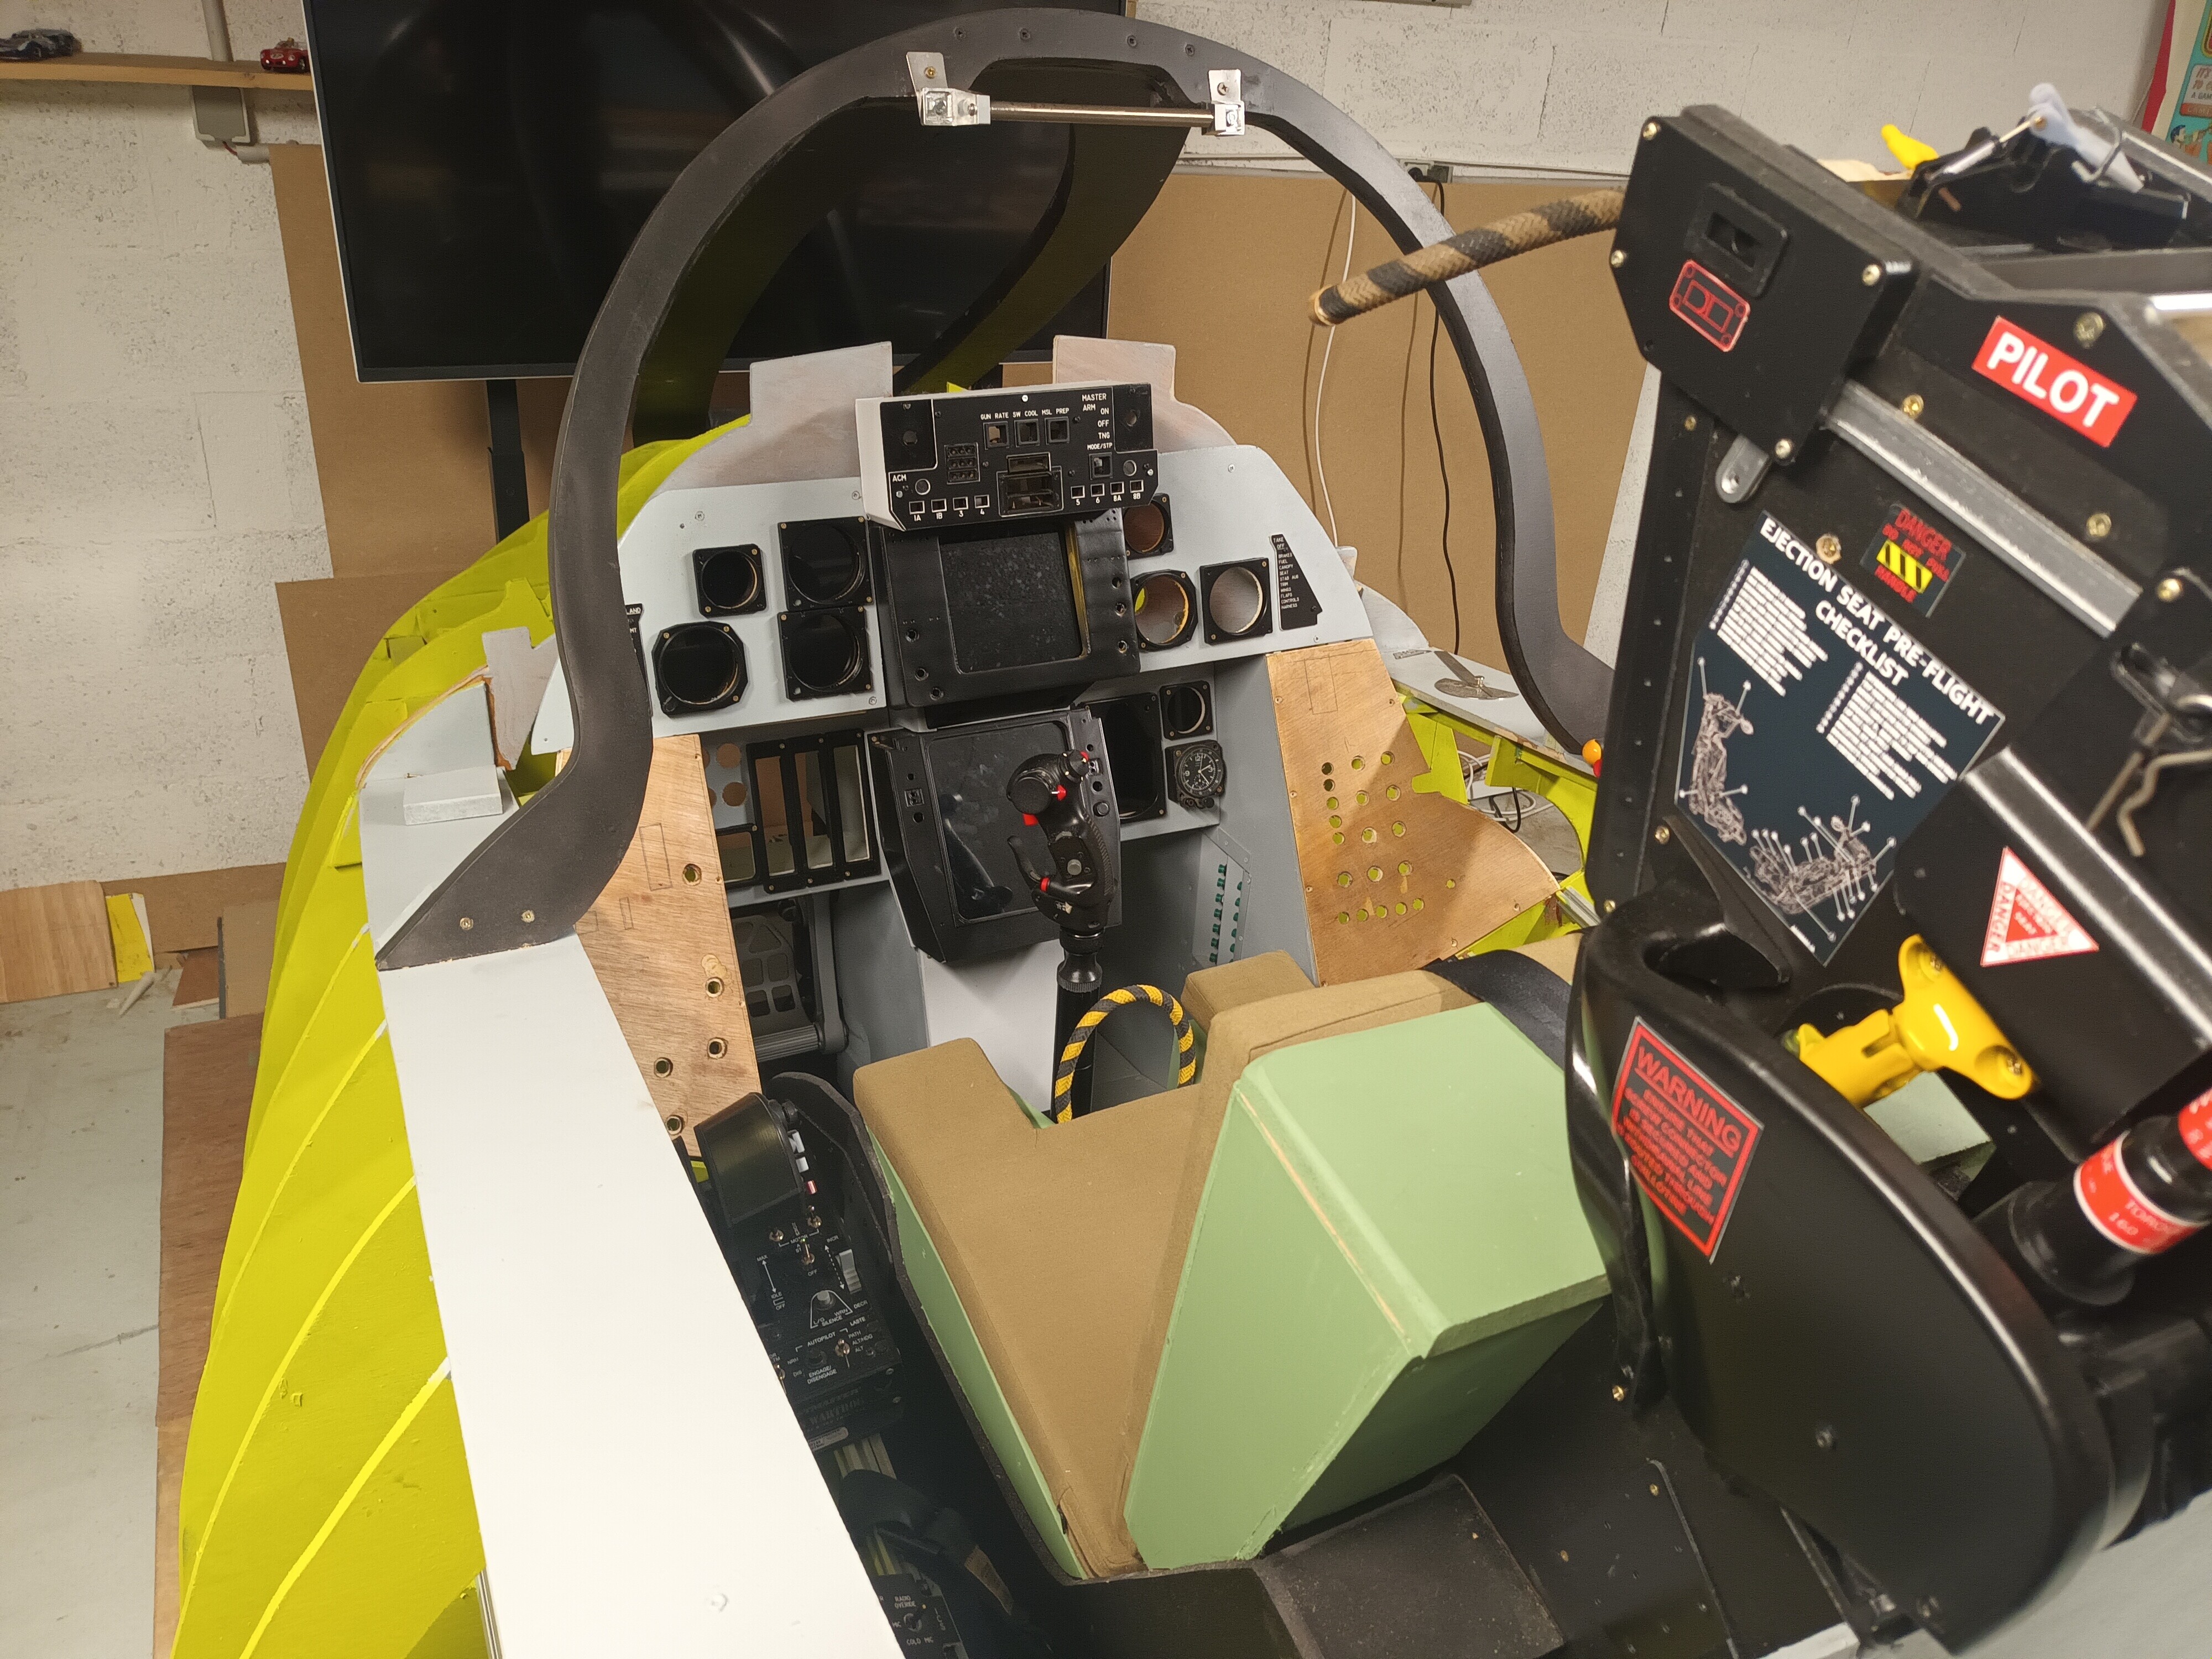
hi guys , With the precious help of HAGEN and holydays starting , the pit is on good tracks ! here are some pics !
1 point
-
1 point
-
Had some time to try it. No tests, just testing how it feels and I think it's a step in the right direction. The dynamic stability in yaw is much better now and it's not as sensitive in pitch. Roll rate is still too slow in my opinion. Other that that I'd say I'm happy with how it behaves in the air. On the other hand I think it's the only warbird in DCS in which you can hold the aircraft on the brakes at full power. I also think that the rudder is too effective at low speed during takeoff. Can't say whether its realistic or not just that it's worth investigating. There are other issues which prevent me from making it my daily flyer but it's a step in the right direction.1 point
-
Ты может и прав конечно... но если за то что ты делаешь берешь за это деньги то наверно это както должно обязывать? не? если бы я так относился к своей работе...катастрофа была бы! да короче...похер1 point
-
Another month of silence...1 point
-
Finally got my first chance to try her out, and I answered my own question. ADI is now working and generating full MAP. Handling is MUCH improved, and she no longer bounces all over (I may even turn down my curves/saturation a bit) so gunnery is cleaner. Oh, and THANKYOUTHANKYOUTHANKYOU for having Quick Action start with guns hot and sight on. I WOULD like an option to set convergence from the Quick Action loadout, unless I'm missing it somewhere.1 point
-
The fuel tank selector rotary, and magnetos switch are still + or - . The gunsight brightness is finally an axis. The correction to drag with loadouts are nice, it doesn't wallow as bad anymore.1 point
-
F-16? I don't think so. At high speed - if you can call it that - lets say 250kt, the nose sways all over the place1 point
-
Nothing, that's the normal exhaust effect in DCS.1 point
-
Pretty sure this will only work for single player, US aircraft.... I've collected all the useable current callsigns in the game as of July 2025, you can add this section into any of the aircraft lua files to get all of them. I saw this section usually goes just under "mechanimations" sections and seems to work well there. Gives your missions better flavour on the radio instead of everything being "Springfield 1-1 blah blah...." Add this block to your aircraft's lua file (not the entry.lua file...) eg: "F14B.lua" , etc. Also note the F-16 and F-18 and a couple others have this section so you can add, modify, or overwrite current as needed. Add them all or just the ones you like..... I didnt add in the Tanker or AWACS ones, but that could be done too I think.... InheriteCommonCallnames = true, SpecificCallnames = { ["USA"] = { {_('Hornet'), 'Hornet'}, {_('Squid'), 'Squid'}, {_('Ragin'), 'Ragin'}, {_('Roman'), 'Roman'}, {_('Sting'), 'Sting'}, {_('Jury'), 'Jury'}, {_('Joker'), 'Joker'}, {_('Ram'), 'Ram'}, {_('Hawk'), 'Hawk'}, {_('Devil'), 'Devil'}, {_('Check'), 'Check'}, {_('Snake'), 'Snake'}, {_('Viper'), 'Viper'}, {_('Venom'), 'Venom'}, {_('Lobo'), 'Lobo'}, {_('Cowboy'), 'Cowboy'}, {_('Python'), 'Python'}, {_('Rattler'), 'Rattler'}, {_('Panther'), 'Panther'}, {_('Wolf'), 'Wolf'}, {_('Weasel'), 'Weasel'}, {_('Wild'), 'Wild'}, {_('Ninja'), 'Ninja'}, {_('Hawg'), 'Hawg'}, {_('Boar'), 'Boar'}, {_('Pig'), 'Pig'}, {_('Tusk'), 'Tusk'}, {_('Jedi'), 'Jedi'}, {_('Crow'), 'Crow'}, {_('Chaos'), 'Chaos'}, {_('Sioux'), 'Sioux'}, {_('Gatling'), 'Gatling'}, {_('Gunslinger'), 'Gunslinger'}, {_('Hammerhead'), 'Hammerhead'}, {_('Bootleg'), 'Bootleg'}, {_('Palehorse'), 'Palehorse'}, {_('Carnivore'), 'Carnivore'}, {_('Saber'), 'Saber'} } }, Also a template for a lineup card to keep all those straight in mission...! NOTE: However you want to add all or any of these in you aircraft files, make sure the last callsign has no trailing comma or that module will not even load! Lineup_Blank.docx1 point
-
It would be great if ED worked on optimizing this map for VR. The modern Mariana was also pretty sluggish when first released, then about a year later it was nicely optimized and it performs excellent nowadays. The WW2 map is .. ahem.. a stutter fest on my 9800x3d + 4090.1 point
-
Welcome to flying a piston-engine Warbird. You're going to be using your rudder a lot, especially with the Corsair. It's a big engine with a lot of torque. And it's got a big rudder to compensate. So watch the slip indicator (it's right on the gunsight so you can watch both it and your sights at the same time) make sure you're using coordinated turns during maneuvers.1 point
-
Nice,,, learn sumthin new every 5 minutes :}1 point


-
Recently Browsing 0 members
- No registered users viewing this page.